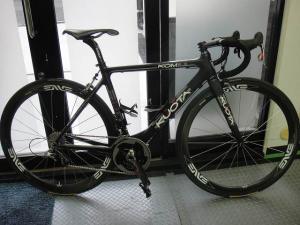
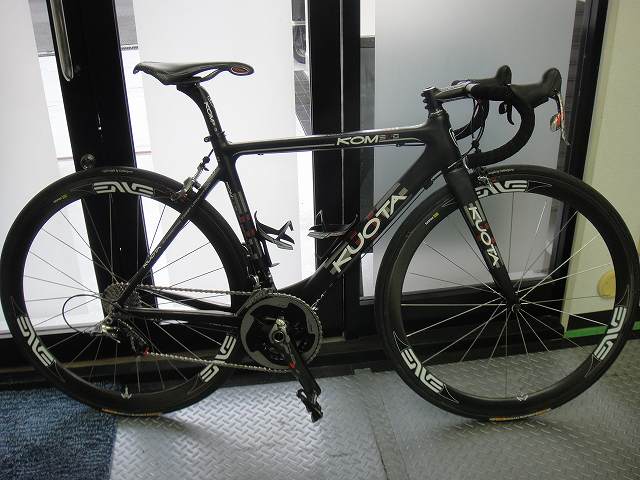
I built up a Quarta KOM Evo!
I usually just write about wheels,
but if I start writing about bicycle assembly I'd have to mention the meal ticket code constantly, so I can't really do it.
This is supposed to be my main job, so if you need any assembly or re-assembly work done,
feel free to reach out.
The Quarta KOM Evo is a nice light frame.
Once assembled with pedals, it came in at 6.26 kg on the scale.
Not related to Quarta, but this bike is equipped with the latest SRAM Red components.
Since it's Red, there's something I want to write about.

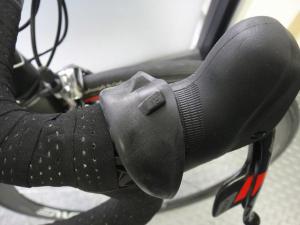
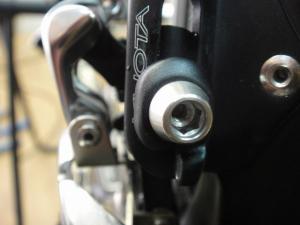
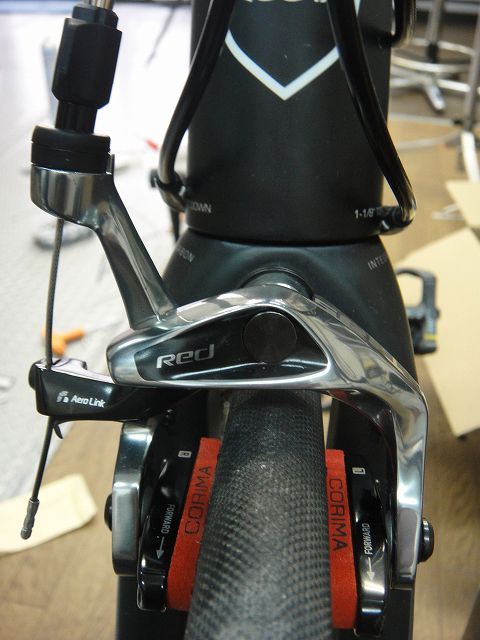
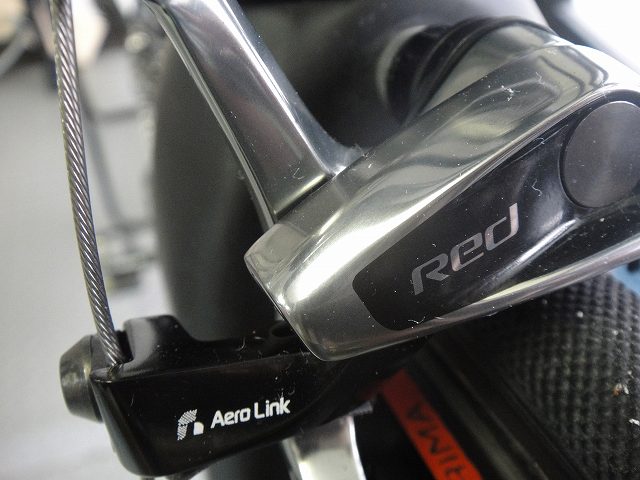
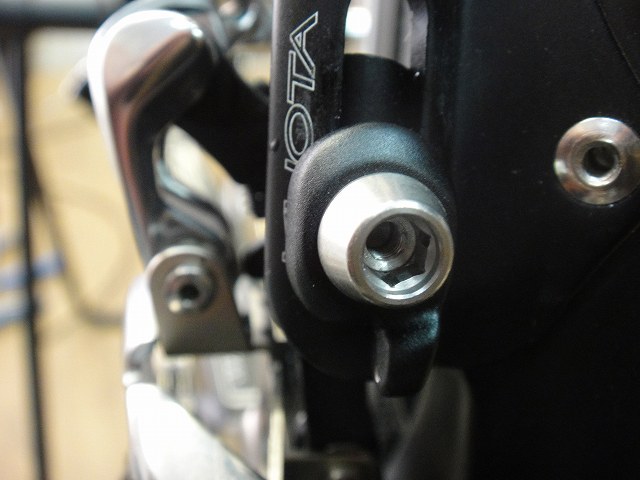
The part that caught my attention the most is the brake.
While it's technically a single-pivot type,
it has surprisingly good braking power for that.
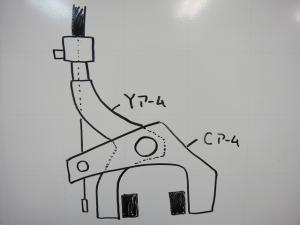
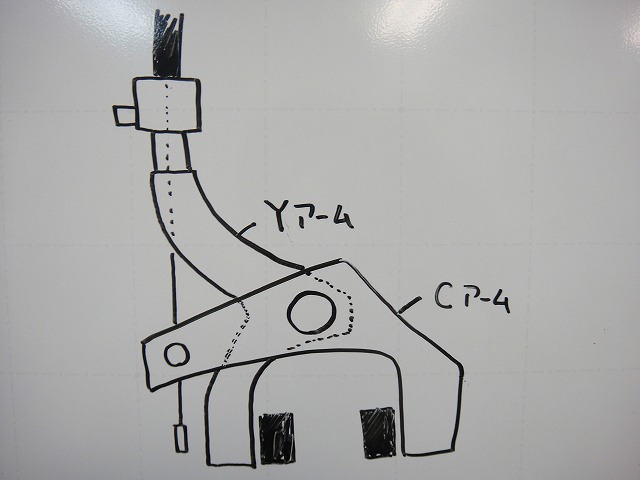
A single-pivot brake consists of two arms,
with the Y-arm catching the outer cable and the C-arm securing the inner cable.
The brake pads are mounted one on each side, on the Y-arm and C-arm respectively.
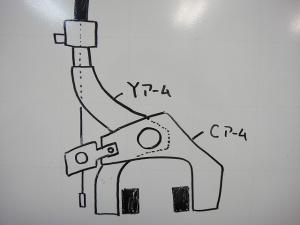
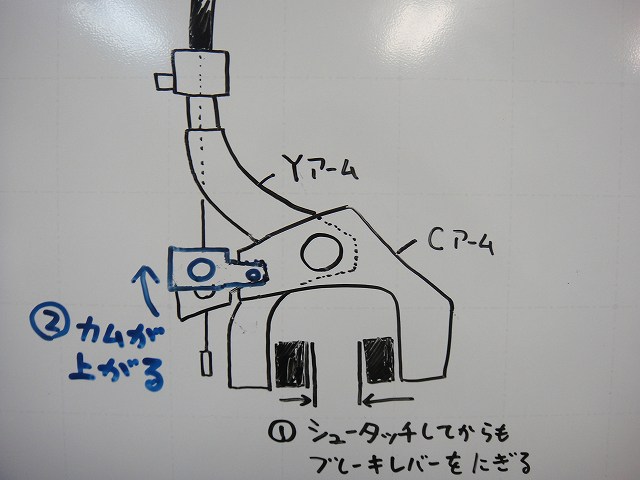
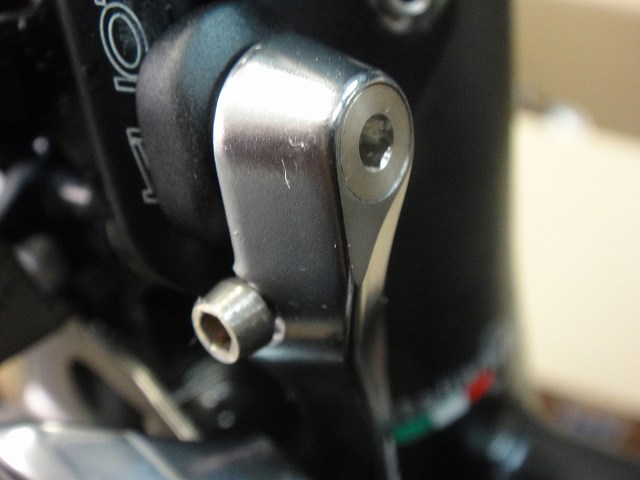
On this Red brake, the tip of the C-arm is shaped like a cam.
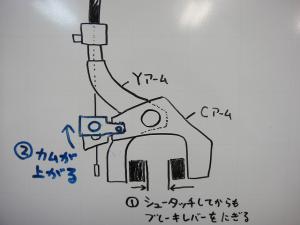
This might be increasing the braking force from the initial pad contact onwards as you squeeze harder.
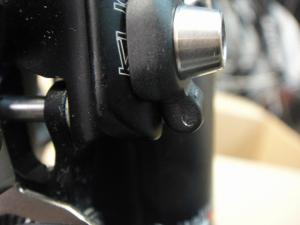
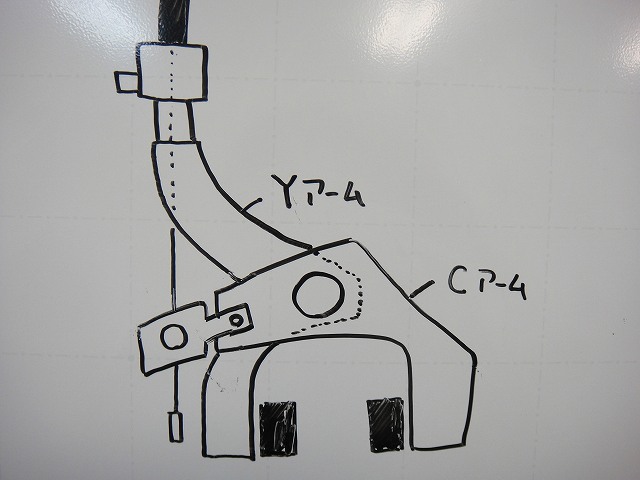
ZeroGravity has a similar structure,

but on Red, this cam (the black part labeled as Aero Link)
is connected to the Y-arm in back.
On ZeroGravity, the cam can move when the brake cable isn't routed through it,
but on Red it's connected to the Y-arm so the cam doesn't wobble at all.
This design definitely helps reduce flex in the brake arch after initial pad contact.

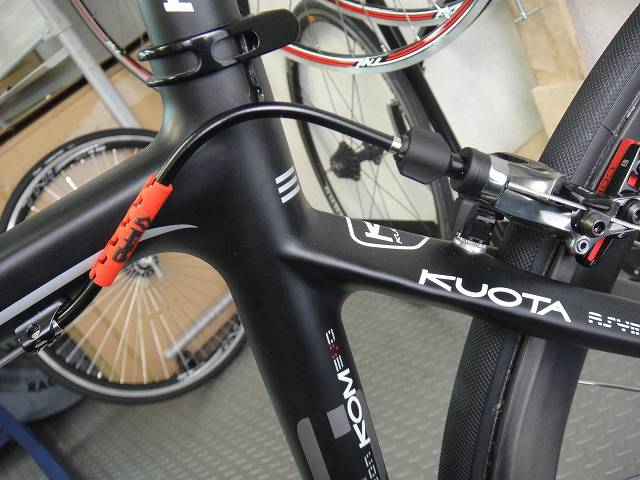
The outer cable anchor and adjuster section has a quick lever attached.
Because of that, the outer cable anchor part is tall and extends upward, so
I thought that on frames with steep sloping the rear brake outer cable routing might get tight,
but it doesn't seem to be that bad.
Though it probably varies depending on the frame.

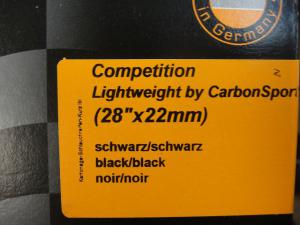
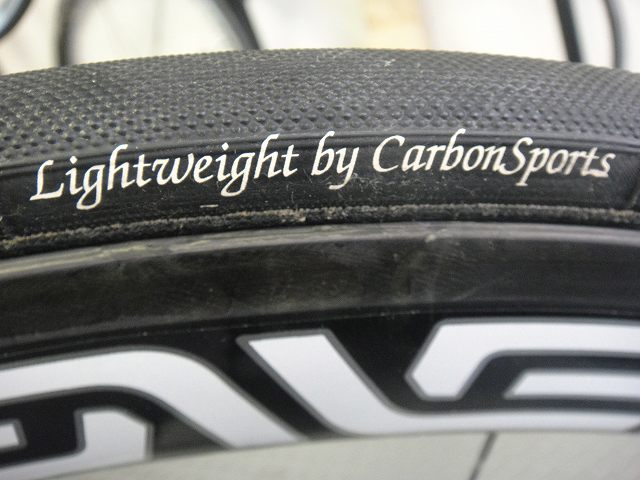
↑Not related to Red, but
Continental makes a Competition Lightweight version with a logo on it.
I guess since both are German manufacturers they get along well.

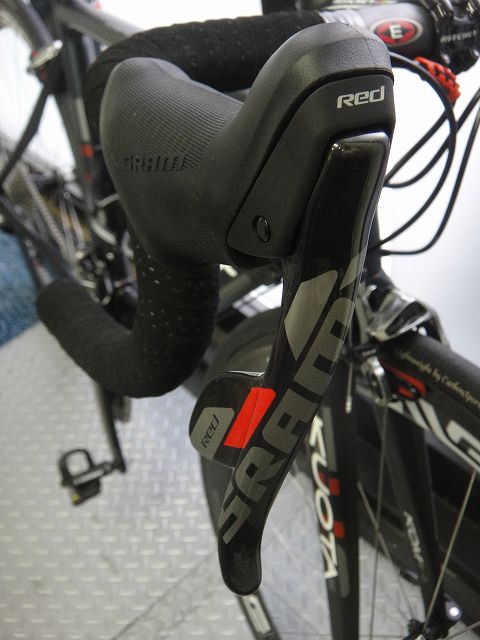
The double-tap lever looks a bit more refined.
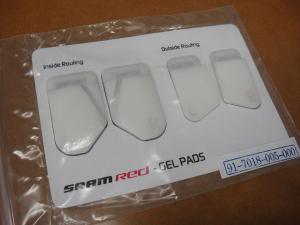
Depending on whether the inner and outer cables are routed inward or outward pull,
different pads are included to place behind the lever pad.
Some people work around this by wrapping extra bar tape or getting creative,
but this shows that the manufacturer has noticed this need.
↑In this case with this handlebar, it didn't seem necessary so I didn't use it.
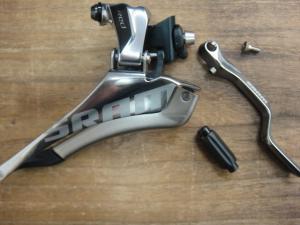
I was impressed with the front derailleur.
It comes with a chain drop guard and an adjuster screw.
As for the adjuster screw, since the frame had one already, I didn't install it.
On a side note, it's really annoying how complete bikes from manufacturers
come with these adjusters for both front and rear derailleurs on both sides that rattle against each other.
I think just having one for the front derailleur would be enough...
There's a small screw hole in the back of the front derailleur mounting bolt.
The spacer on the mounting bolt has a part where the tip of the adjustment screw can press against it.

The chain drop guard attaches by slipping over the mounting bolt.
This is really clever! You can install and remove the guard
without loosening the inner cable attachment bolt.
Then by turning the bolt on the side
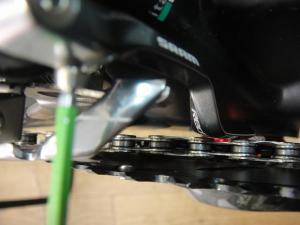
you can adjust the gap between the guard and chain infinitely and precisely. That's clever too!
I usually just write about wheels,
but if I start writing about bicycle assembly I'd have to mention the meal ticket code constantly, so I can't really do it.
This is supposed to be my main job, so if you need any assembly or re-assembly work done,
feel free to reach out.
The Quarta KOM Evo is a nice light frame.
Once assembled with pedals, it came in at 6.26 kg on the scale.
Not related to Quarta, but this bike is equipped with the latest SRAM Red components.
Since it's Red, there's something I want to write about.
The part that caught my attention the most is the brake.
While it's technically a single-pivot type,
it has surprisingly good braking power for that.
A single-pivot brake consists of two arms,
with the Y-arm catching the outer cable and the C-arm securing the inner cable.
The brake pads are mounted one on each side, on the Y-arm and C-arm respectively.
On this Red brake, the tip of the C-arm is shaped like a cam.
This might be increasing the braking force from the initial pad contact onwards as you squeeze harder.
ZeroGravity has a similar structure,
but on Red, this cam (the black part labeled as Aero Link)
is connected to the Y-arm in back.
On ZeroGravity, the cam can move when the brake cable isn't routed through it,
but on Red it's connected to the Y-arm so the cam doesn't wobble at all.
This design definitely helps reduce flex in the brake arch after initial pad contact.
The outer cable anchor and adjuster section has a quick lever attached.
Because of that, the outer cable anchor part is tall and extends upward, so
I thought that on frames with steep sloping the rear brake outer cable routing might get tight,
but it doesn't seem to be that bad.
Though it probably varies depending on the frame.

↑Not related to Red, but
Continental makes a Competition Lightweight version with a logo on it.
I guess since both are German manufacturers they get along well.
The double-tap lever looks a bit more refined.

Depending on whether the inner and outer cables are routed inward or outward pull,
different pads are included to place behind the lever pad.
Some people work around this by wrapping extra bar tape or getting creative,
but this shows that the manufacturer has noticed this need.

↑In this case with this handlebar, it didn't seem necessary so I didn't use it.

I was impressed with the front derailleur.
It comes with a chain drop guard and an adjuster screw.
As for the adjuster screw, since the frame had one already, I didn't install it.
On a side note, it's really annoying how complete bikes from manufacturers
come with these adjusters for both front and rear derailleurs on both sides that rattle against each other.
I think just having one for the front derailleur would be enough...
There's a small screw hole in the back of the front derailleur mounting bolt.

The spacer on the mounting bolt has a part where the tip of the adjustment screw can press against it.
The chain drop guard attaches by slipping over the mounting bolt.
This is really clever! You can install and remove the guard
without loosening the inner cable attachment bolt.
Then by turning the bolt on the side

you can adjust the gap between the guard and chain infinitely and precisely. That's clever too!