Another day, another wheel (etc.).

A customer brought in the rear wheel from a Vittoria QURANO 46 wheel.
It's a carbon rim reinforced by mixing in graphene,


Unfortunately it got crushed within just a month of purchase.
When I contacted the Japanese distributor, they said they don't have replacement rims in stock
(at least not currently).
So the customer wants a rebuild with whatever compatible rim I can find,
but this rim has a 2:1 spoke pattern with 7 pairs, making it 21H.

They're using a super high-low flange hub with that DT-like machined appearance (though not DT-made)

in a 2:1 lacing pattern.
As a relative newcomer to wheel manufacturing,
they've probably just borrowed the best bits from various makers and combined them.
Anyway, there is actually a way to rebuild with a 21H hub.
If I draw it out in a wheel diagram...

In a hub-rim-hub format diagram,
the original wheel looks like this.
It's 21H from 2:1 spokes totaling 3 spokes repeated 7 times,
but I only drew 4 repetitions to avoid making the diagram too wide.
The circles at the rim edges are valve holes.
The red dots next to the hub lines are flange holes,

↑In this case, because the spoke head positions on the freewheel side are like this,
the final crossing angle is shallower compared to evenly spaced holes.
If I incorporate that into the diagram as well,

it looks like this.
The actual freewheel side of the wheel uses 4-cross lacing, not the 2-cross shown in the diagram,
but drawing that accurately would make the diagram too cluttered, so I've simplified it.
From this state...

I switched the rim to 28H.
Because I matched the valve hole phase to the 21H rim,
the hub and rim hole phases don't align.

So I shifted the rim phase to align with the non-freewheel side.
The valve hole is offset too, but I'll address that later.
Half of the non-freewheel side rim holes fall into an "off phase."

For the freewheel side rim holes, from the final crossing perspective,
the rim hole spacing is wider than with 21H,
but since it widened evenly on both sides, I can build the wheel
by adjusting spoke length.
When I look at this in the actual hardware,

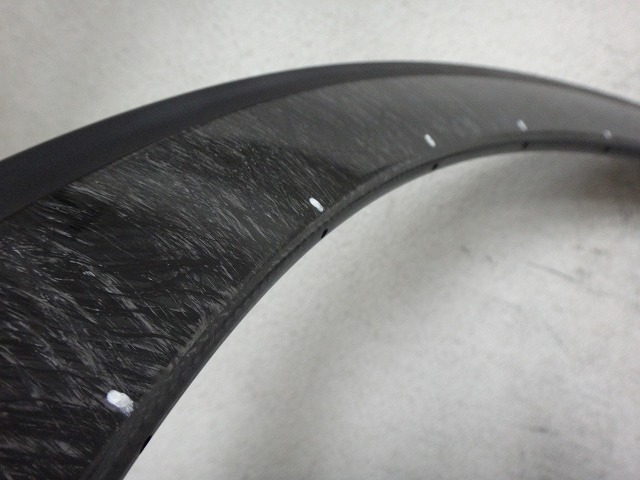
I marked the rim hole positions with white marks.

Like this.

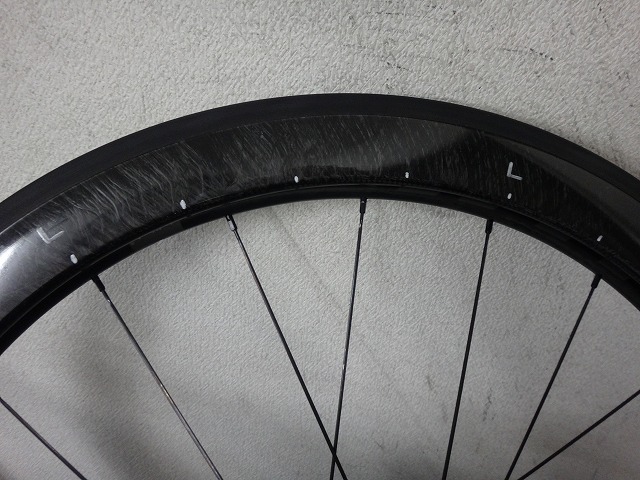
I overlay the Vittoria wheel on it.
I aligned the hole directly below the non-freewheel radial lacing
with a 28H rim hole and marked that position as L.
In the range of this image, old and new rim phases only align
at point L,

↑but four positions over, they align again. This is also L.

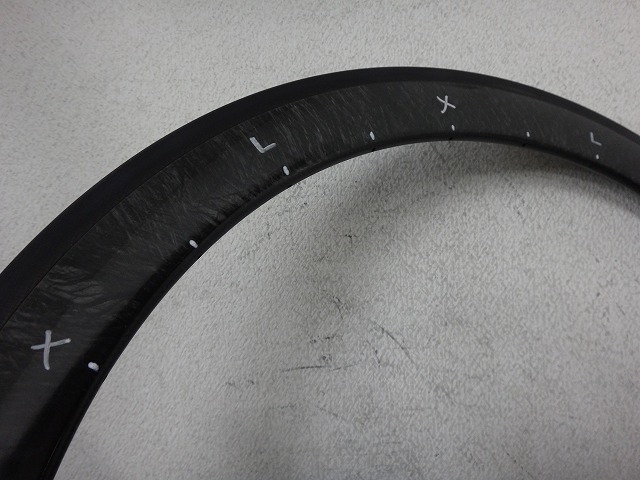
I marked an × between the L positions.
This is the off phase.

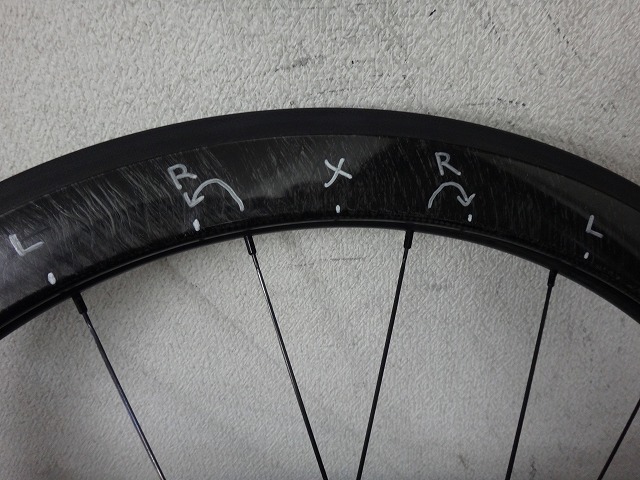
↑The remaining phase becomes R,
and the phase shifts symmetrically on both sides with the final crossing angle opening up.
This means spoke length changes, and
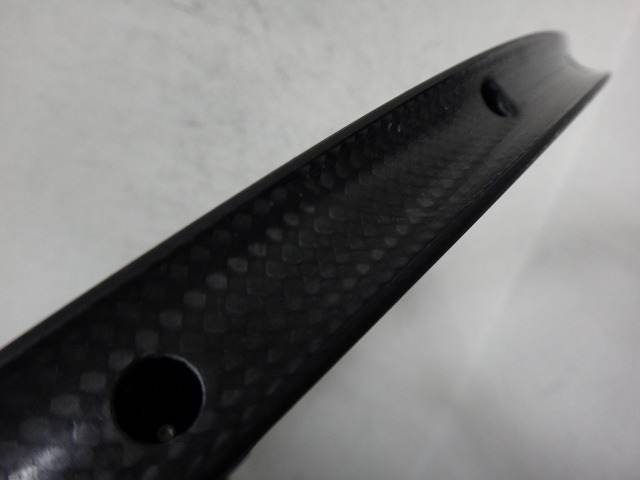
since the new rim has an internal nipple,
I also need to account for that correction value.

Built.
For those who've noticed, the L-R-rest-R×7 repetitions is
the same rim hole phase as the current Racing Zero.
For Racing Speed, the 2:1 spacing is even, so
50mm high rim with off-phase 2:1 lacing is a rare configuration.
With the super high-low flange, phase offset, and rim height all lining up,
the two freewheel side spokes on either side of the non-freewheel radial lacing
are roughly parallel, so the spoke pattern is closer to G3 than 2:1.
I should mention: the rim is from a Nomelab Wheel 2.5 (Japanese brand, custom wheel specialist).

I used black CX-RAY straight spokes for both sides.
With 2:1 lacing, left-right different diameters could overcorrect,
so I intentionally used the same diameter on both sides.
It's a super high-low flange anyway.
Also, I quietly braided the final crossing on the freewheel side.
I don't think it'll make noise, but
if it does, I'll tie it in properly. (heh heh)

The valve hole ends up here.
In the diagram when I shifted the rim, the valve hole shifted too—
and that's exactly how it turned out in reality.
It looks a bit awkward to have the valve hole within the G3-like group of three spokes,

↑but if I position the valve hole at point A in the image above,
it lands right in the final crossing.
With the spoke angles, valve stem length, pump head shape, and other conditions converging,
the pump head might snag on a spoke when inflating.
That leaves B or C, but C would mean building it as a reverse rim,
so I went with B.
The original was also built as a standard rim.

You can't build any 21H hub to 28H rim combination under any conditions.
Since this rim has internal nipples, the tool access from outside means
the outer side has hole offset, but fortunately the inner side has none.
With internal nipples, the off-phase rim holes don't show.
If I need to cover them, it's easy—just tape or sticker.

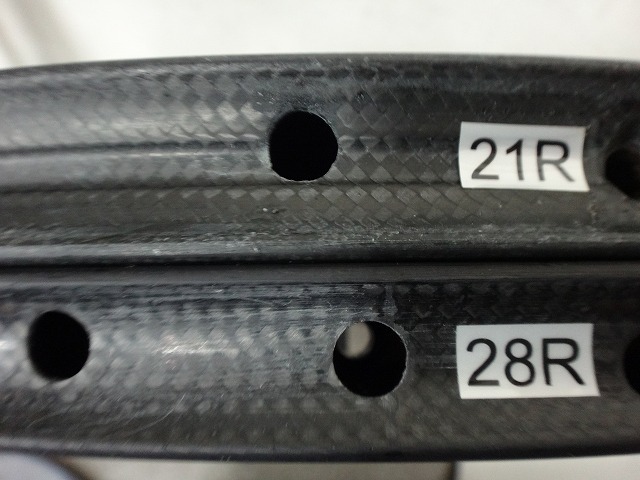
By the way, the "21R" sticker on the original rim
means 21H rear rim.
I feel like I've seen this font somewhere before, but I can't place it.

The 28H rim for the rebuild is an Equinox!

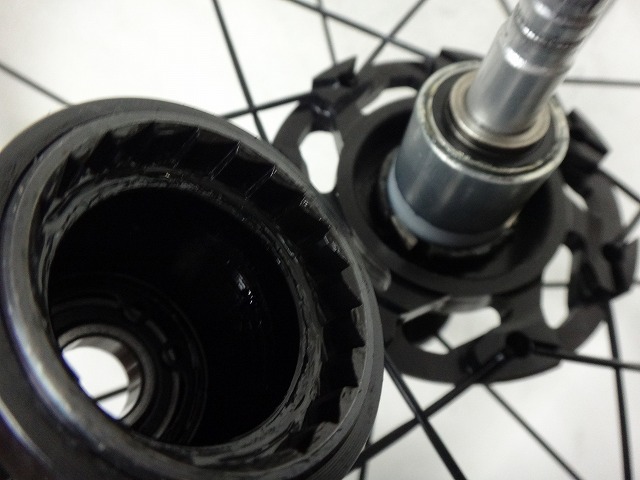
The freewheel body uses a press-on right end,


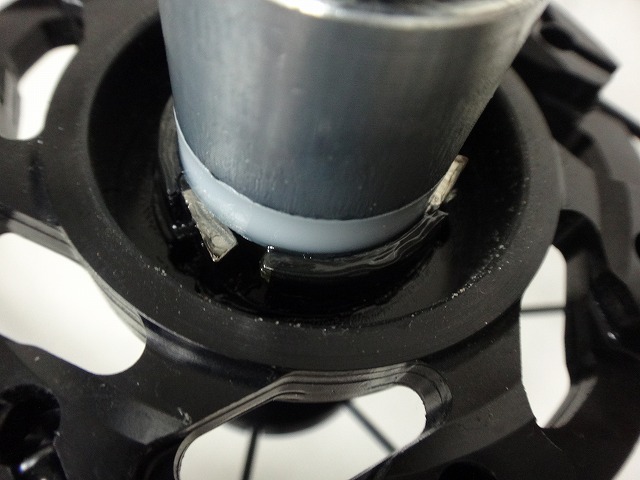
and they've nicely borrowed the structure from both new Easton and Mavic freewheel bodies.
The new Easton has the ratchet pawls on the hub body side from this point,
with ratchet teeth on the freewheel body side—a reversed structure compared to standard.
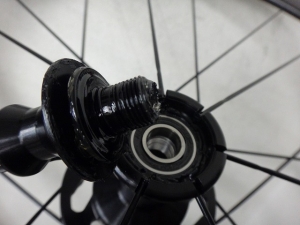
The left side of the hub uses a hollow end bolt,
and the hub axle doesn't pass through the hub body.
It's arguably not a great structure, but
the Zentis XH-001 hub from the other day has a similar left end.

I worry whether having the hub axle end face inside the left bearing is really OK—
but if it works on Zentis, I figured it must be alright.
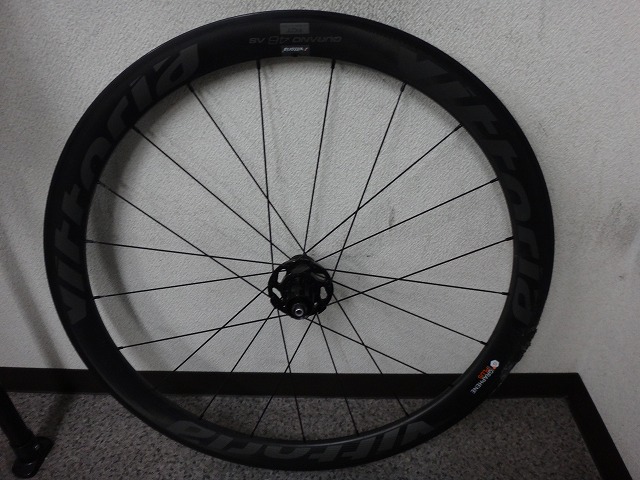
A customer brought in the rear wheel from a Vittoria QURANO 46 wheel.
It's a carbon rim reinforced by mixing in graphene,
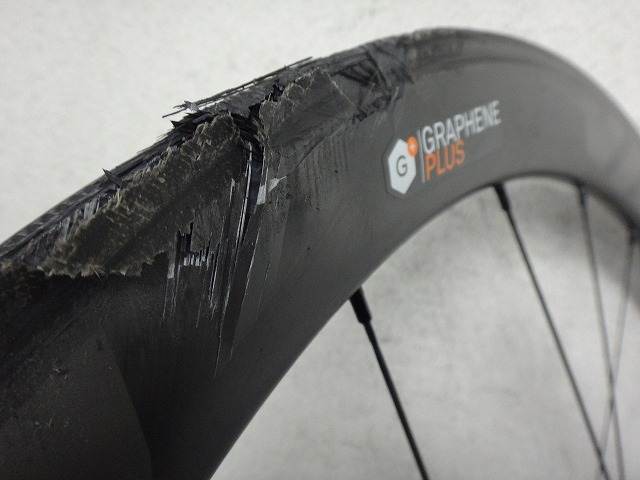

Unfortunately it got crushed within just a month of purchase.
When I contacted the Japanese distributor, they said they don't have replacement rims in stock
(at least not currently).
So the customer wants a rebuild with whatever compatible rim I can find,
but this rim has a 2:1 spoke pattern with 7 pairs, making it 21H.
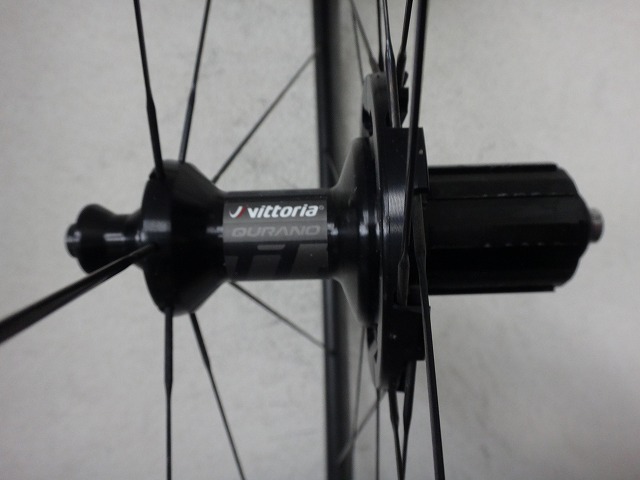
They're using a super high-low flange hub with that DT-like machined appearance (though not DT-made)

in a 2:1 lacing pattern.
As a relative newcomer to wheel manufacturing,
they've probably just borrowed the best bits from various makers and combined them.
Anyway, there is actually a way to rebuild with a 21H hub.
If I draw it out in a wheel diagram...

In a hub-rim-hub format diagram,
the original wheel looks like this.
It's 21H from 2:1 spokes totaling 3 spokes repeated 7 times,
but I only drew 4 repetitions to avoid making the diagram too wide.
The circles at the rim edges are valve holes.
The red dots next to the hub lines are flange holes,
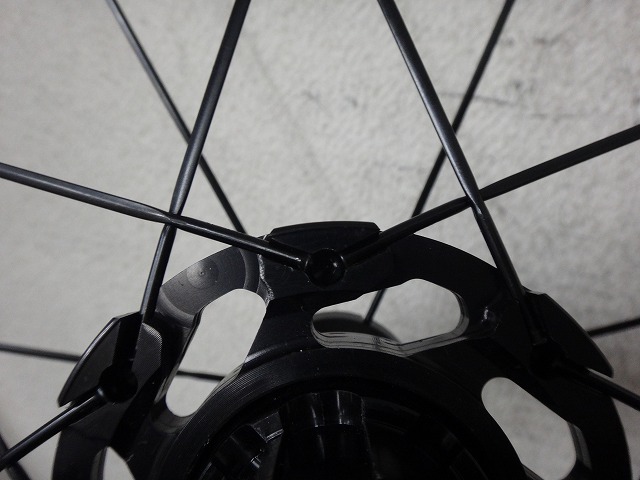
↑In this case, because the spoke head positions on the freewheel side are like this,
the final crossing angle is shallower compared to evenly spaced holes.
If I incorporate that into the diagram as well,
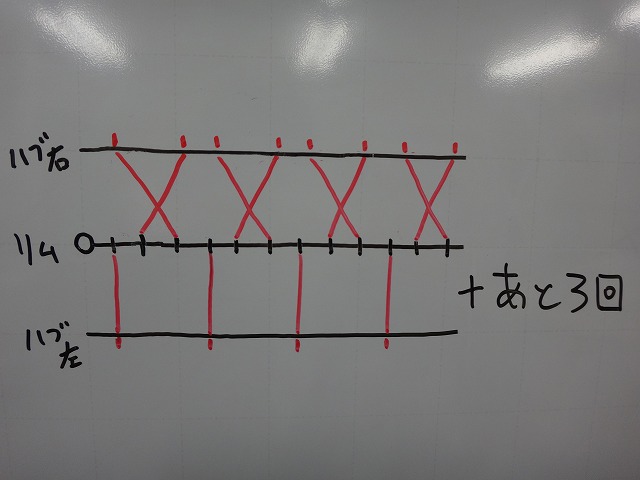
it looks like this.
The actual freewheel side of the wheel uses 4-cross lacing, not the 2-cross shown in the diagram,
but drawing that accurately would make the diagram too cluttered, so I've simplified it.
From this state...

I switched the rim to 28H.
Because I matched the valve hole phase to the 21H rim,
the hub and rim hole phases don't align.
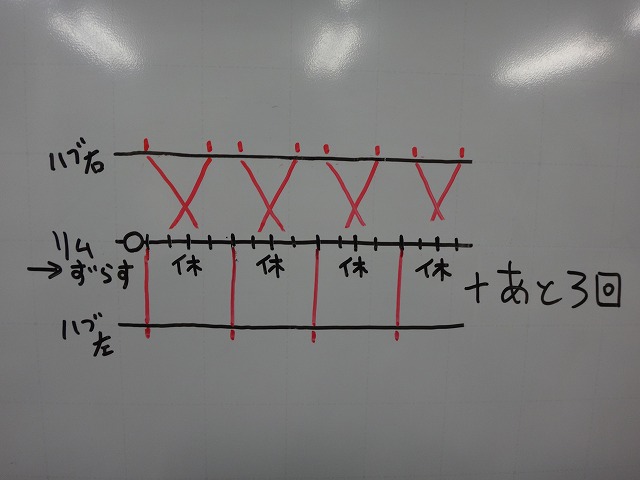
So I shifted the rim phase to align with the non-freewheel side.
The valve hole is offset too, but I'll address that later.
Half of the non-freewheel side rim holes fall into an "off phase."
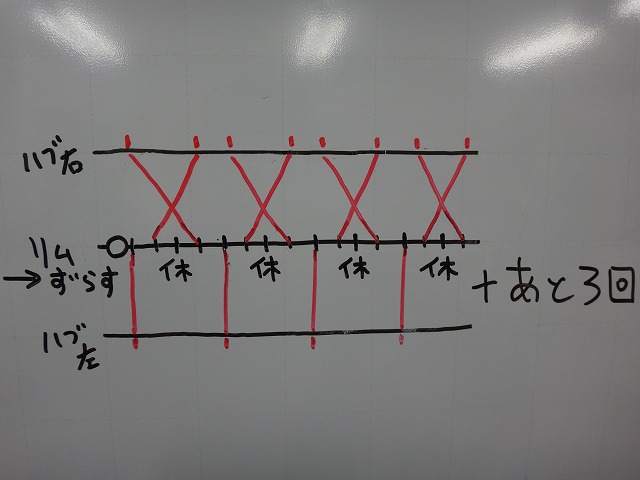
For the freewheel side rim holes, from the final crossing perspective,
the rim hole spacing is wider than with 21H,
but since it widened evenly on both sides, I can build the wheel
by adjusting spoke length.
When I look at this in the actual hardware,

I marked the rim hole positions with white marks.
Like this.

I overlay the Vittoria wheel on it.
I aligned the hole directly below the non-freewheel radial lacing
with a 28H rim hole and marked that position as L.
In the range of this image, old and new rim phases only align
at point L,
↑but four positions over, they align again. This is also L.
I marked an × between the L positions.
This is the off phase.
↑The remaining phase becomes R,
and the phase shifts symmetrically on both sides with the final crossing angle opening up.
This means spoke length changes, and
since the new rim has an internal nipple,
I also need to account for that correction value.
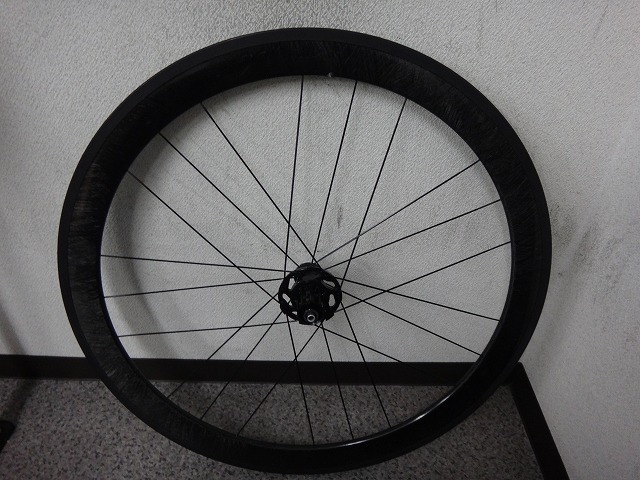
Built.
For those who've noticed, the L-R-rest-R×7 repetitions is
the same rim hole phase as the current Racing Zero.
For Racing Speed, the 2:1 spacing is even, so
50mm high rim with off-phase 2:1 lacing is a rare configuration.
With the super high-low flange, phase offset, and rim height all lining up,
the two freewheel side spokes on either side of the non-freewheel radial lacing
are roughly parallel, so the spoke pattern is closer to G3 than 2:1.
I should mention: the rim is from a Nomelab Wheel 2.5 (Japanese brand, custom wheel specialist).
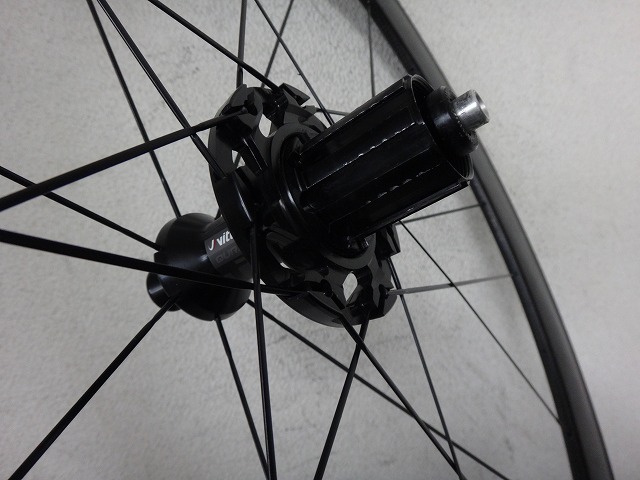
I used black CX-RAY straight spokes for both sides.
With 2:1 lacing, left-right different diameters could overcorrect,
so I intentionally used the same diameter on both sides.
It's a super high-low flange anyway.
Also, I quietly braided the final crossing on the freewheel side.
if it does, I'll tie it in properly. (heh heh)
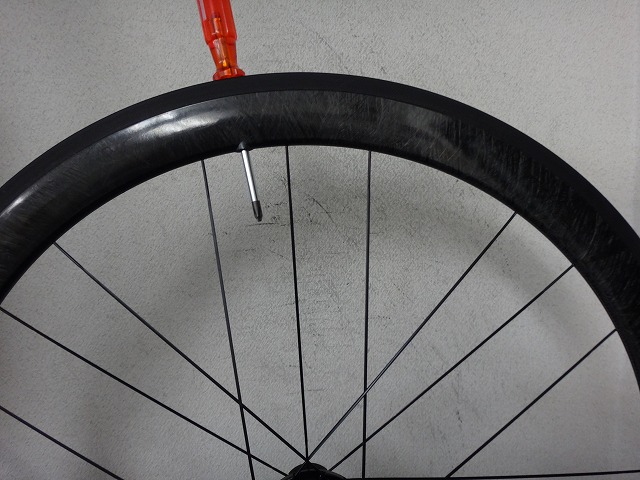
The valve hole ends up here.
In the diagram when I shifted the rim, the valve hole shifted too—
and that's exactly how it turned out in reality.
It looks a bit awkward to have the valve hole within the G3-like group of three spokes,
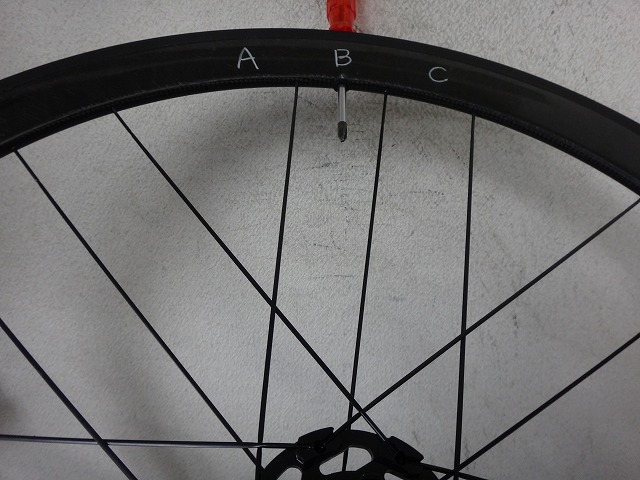
↑but if I position the valve hole at point A in the image above,
it lands right in the final crossing.
With the spoke angles, valve stem length, pump head shape, and other conditions converging,
the pump head might snag on a spoke when inflating.
That leaves B or C, but C would mean building it as a reverse rim,
so I went with B.
The original was also built as a standard rim.
You can't build any 21H hub to 28H rim combination under any conditions.
Since this rim has internal nipples, the tool access from outside means
the outer side has hole offset, but fortunately the inner side has none.
With internal nipples, the off-phase rim holes don't show.
If I need to cover them, it's easy—just tape or sticker.

By the way, the "21R" sticker on the original rim
means 21H rear rim.
I feel like I've seen this font somewhere before, but I can't place it.
The 28H rim for the rebuild is an Equinox!

The freewheel body uses a press-on right end,
and they've nicely borrowed the structure from both new Easton and Mavic freewheel bodies.
The new Easton has the ratchet pawls on the hub body side from this point,
with ratchet teeth on the freewheel body side—a reversed structure compared to standard.
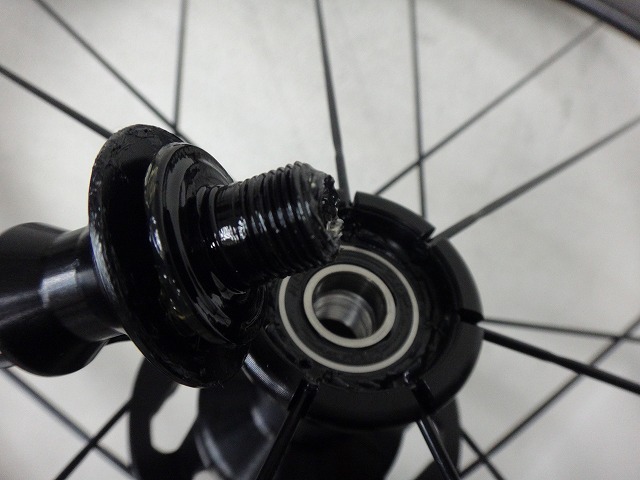
The left side of the hub uses a hollow end bolt,
and the hub axle doesn't pass through the hub body.
It's arguably not a great structure, but
the Zentis XH-001 hub from the other day has a similar left end.
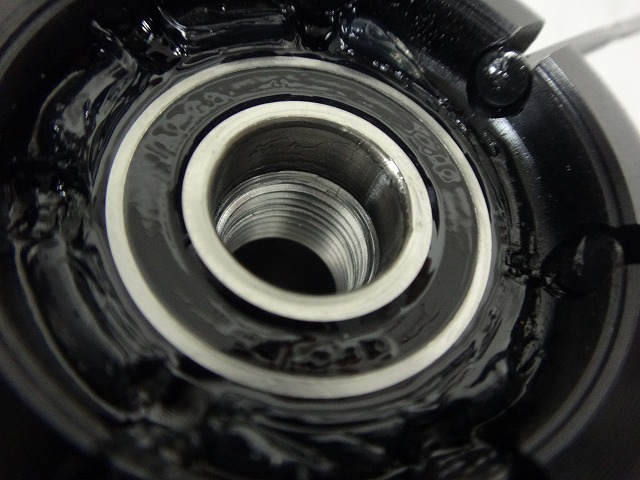
I worry whether having the hub axle end face inside the left bearing is really OK—
but if it works on Zentis, I figured it must be alright.