It's wheel day again (and so on).
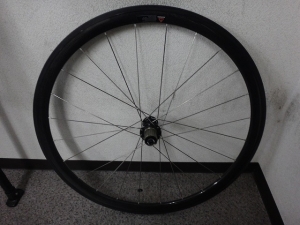
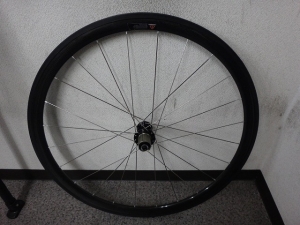
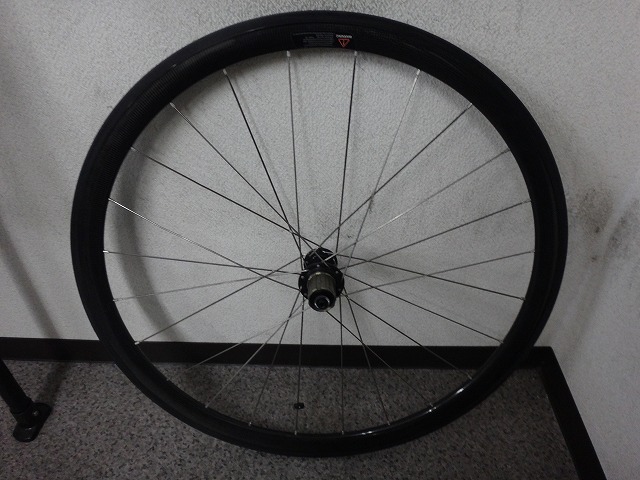
A customer dropped off a 38mm carbon rim rear wheel that I had built previously.
It crashed and developed some wobble, so they wanted me to fix it.
Rather than just replacing a few spokes or truing it up,
they wanted me to check whether the rim could still be used,
and if necessary, replace all the spokes.
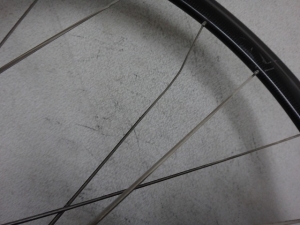
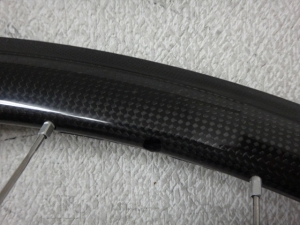
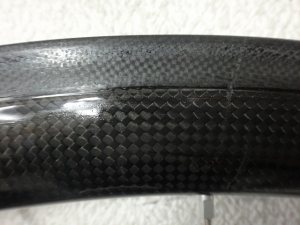
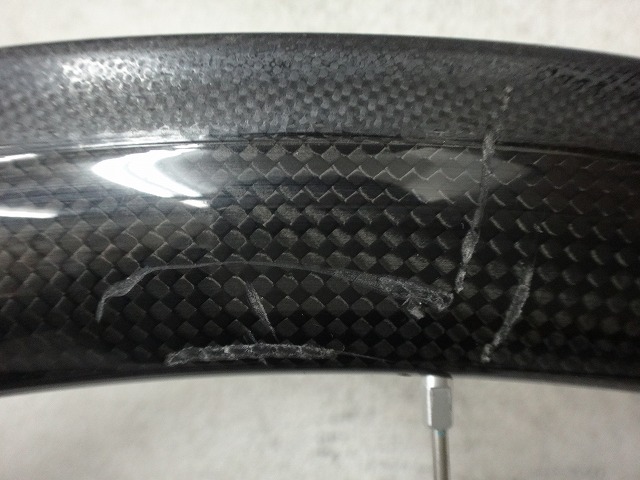
The rim definitely has some scuff marks,
and there are spots where the spoke tension has gone slack,
so replacing everything with new parts might be the better option.
Since the customer is from out of town,
I want to avoid the possibility that after partial repairs,
something else goes wrong elsewhere down the road.
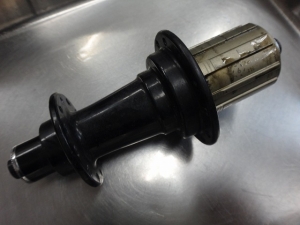
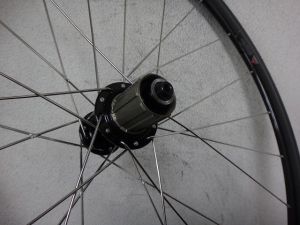
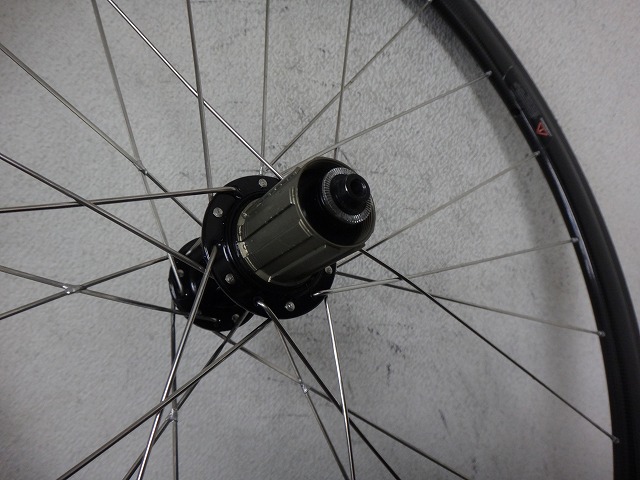
The hub is a Leaf Hub–like 24-hole hub, semi-comp with four-cross lacing and radial spokes on the drive side.
I'll use the same specs when rebuilding it.

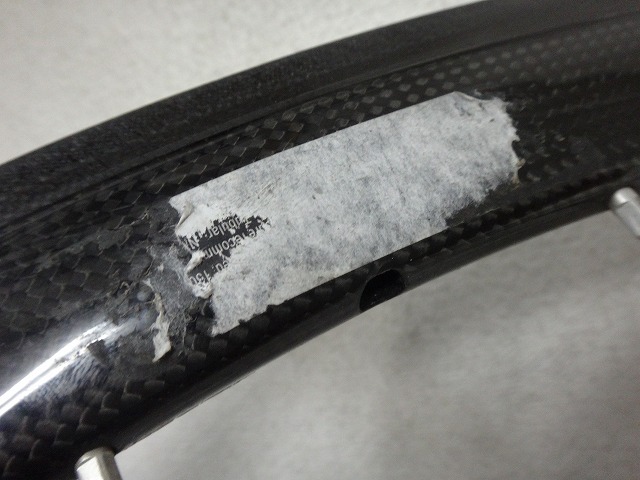
The sticker near the valve hole on the non-drive side is peeling up a bit.
The adhesive is strong, which is why this happens,
but I'll clean it up nicely later.
I'll leave the drive side as it is.
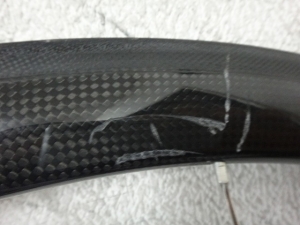
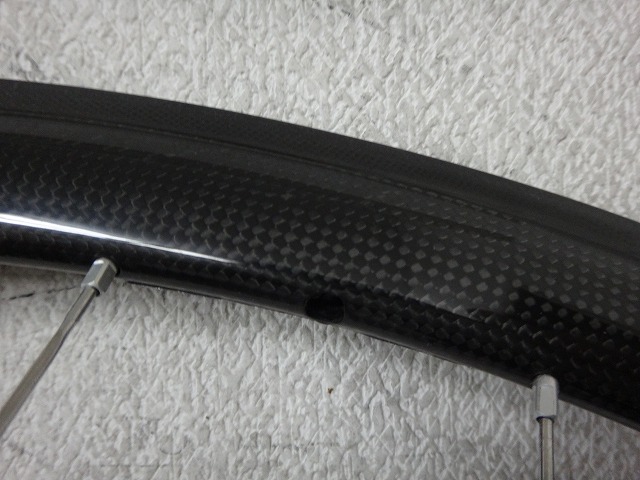
The only noticeable rim damage is in this spot on the non-drive side.
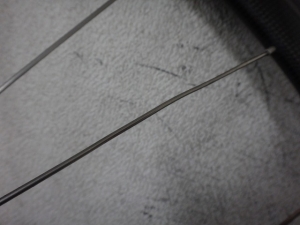
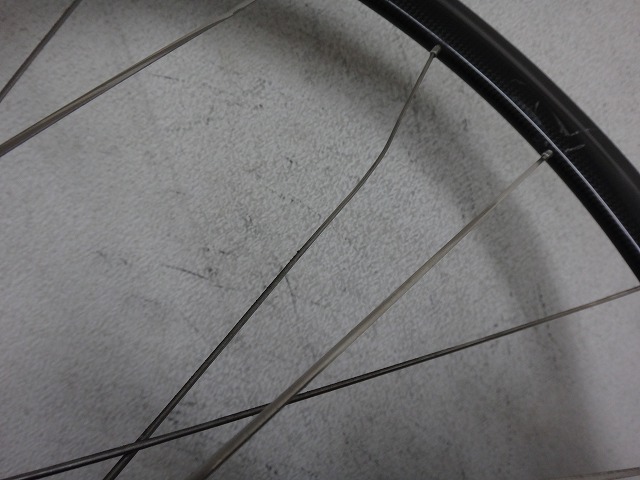
Looking closely at the spot where the spoke tension is slack,
I can see there's a slight bend,
Once I loosened it, the deformation became clear.
It occurred to me at this point that this spot was near the rim damage.
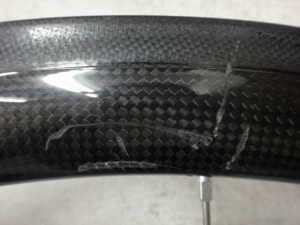
I disassembled it.
With carbon rims, the resin that holds the sheet together can sometimes crush on impact
and become something like plastic deformation in metal.
(Unlike aluminum rims, they rarely develop clear warping or become wavy,
or develop a potato-chip shape.
They tend to crush and crumple like folding bamboo.)
Checked against a glass surface plate and found no warping,
and since the rim damage isn't deep, it can be reused.
When reassembling the wheel and applying spoke tension,
sometimes internal crush damage that wasn't visible in the bare rim
will show up (like the rim sides caving in abnormally),
but in the end, that didn't happen either.
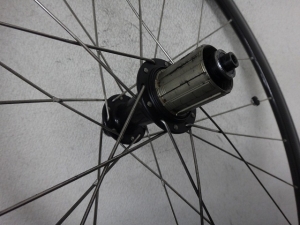
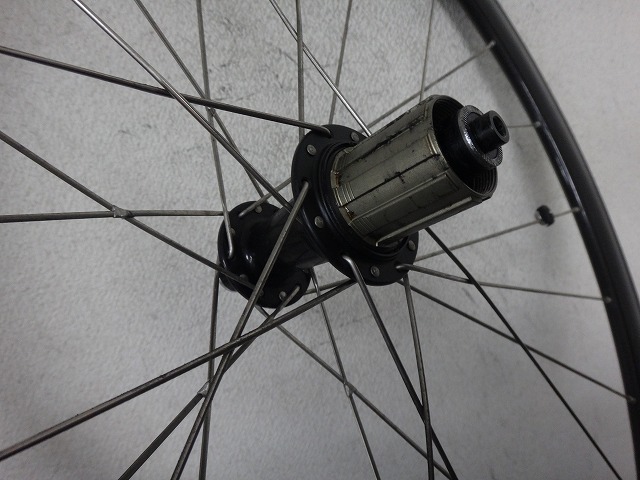
More importantly, the hub rotation was gritty, so I'll replace the bearings.
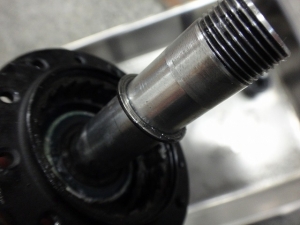
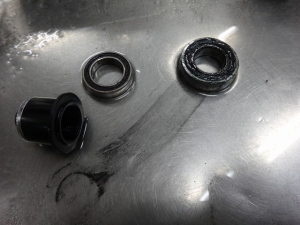
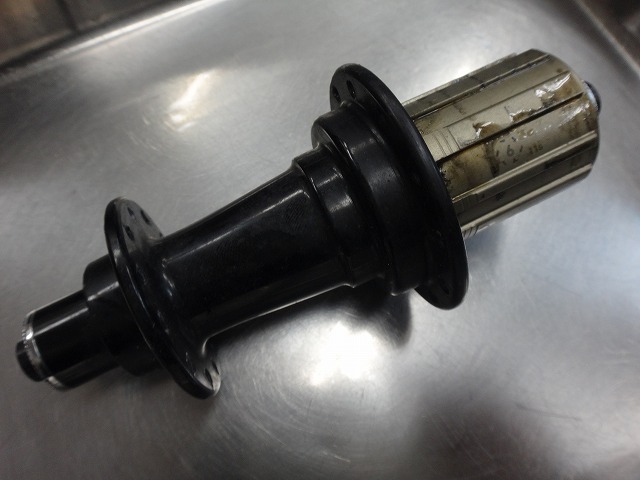
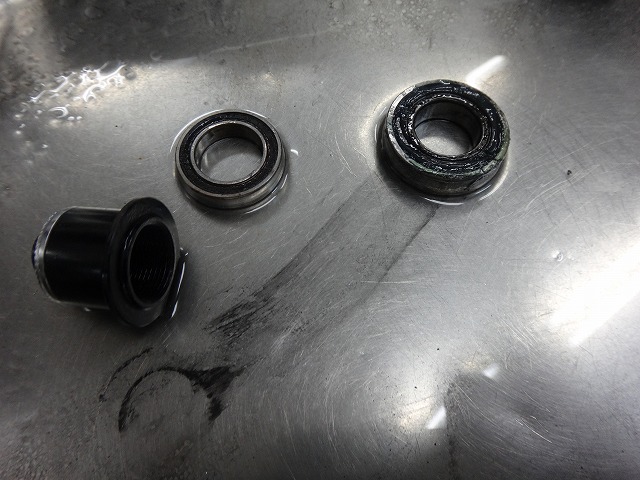
I removed the freebody.
In the image I've pulled it out for clarity,
but between the freebody and the hub bearing
there's a thin spacer to prevent end-play—just one piece.
When removing the freebody, this spacer sometimes sticks to the freebody
due to grease and comes out with it.
If a customer disassembles it at some point and loses this spacer,
then reassembles it without it,
the freebody becomes a fixed gear—this has happened a few times.
This hub is sold under the names POWER WAY or BITEX
(and also Leaf Hub), but these are brand names,
not the actual hub manufacturer's name.
Moreover, it's an OEM-only manufacturer that doesn't sell hubs under their own name,
so searching for it won't turn anything up... wait, I just searched and it did come up.
The actual brand is LOHAS, though I won't give you that name.
If you're interested, search "hubsmaster.com" instead of LOHAS.
By the way, I have no idea if they sell to individual customers.
Their About Us page says
"the worldwide hubs OEM/ODM professional manufacturer"
so it seems they remain OEM-only.
This particular hub corresponds to the LOHAS R07R (probably).
I'd love to get the R01F but they'd probably tell me to buy 100 units, so no dice
When I've needed that spacer in the past,
I've cannibalized it from old Leaf Hubs,
but last time I ordered 100 hubs, I also ordered spacers separately.
To put it cynically, thanks to my own mistakes,
I've never had to buy a new spacer again.
Please, just don't lose them.
The bearing next to it is from a Leaf front hub (LOHAS R11F).
It's an extremely unusual size, so I keep it in stock at all times.
Since there's a standard size that has the same inner and outer diameter but half the thickness,
I could stack two of them together, but...
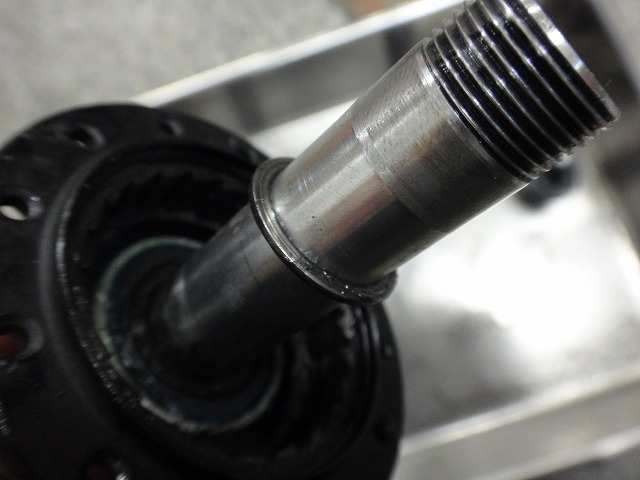
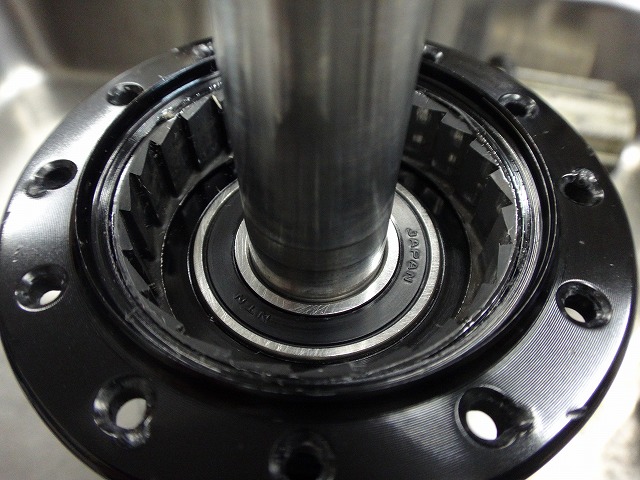
I removed the rear hub bearings.
Since there was grittiness even with the freebody removed,
the culprit is one or both of these.
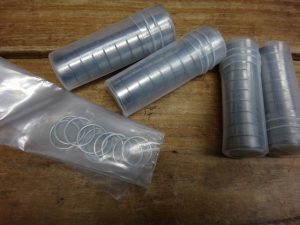
The right is 6902 and the left is 6802, both standard sizes that are easy to source.
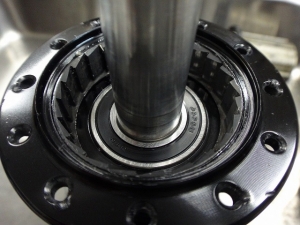
After replacing the bearings, the rotation became smooth.
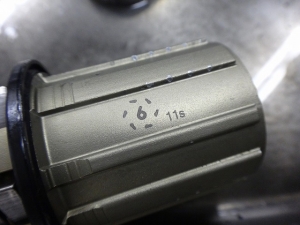
The "6" on the freebody means

it has six pawls.
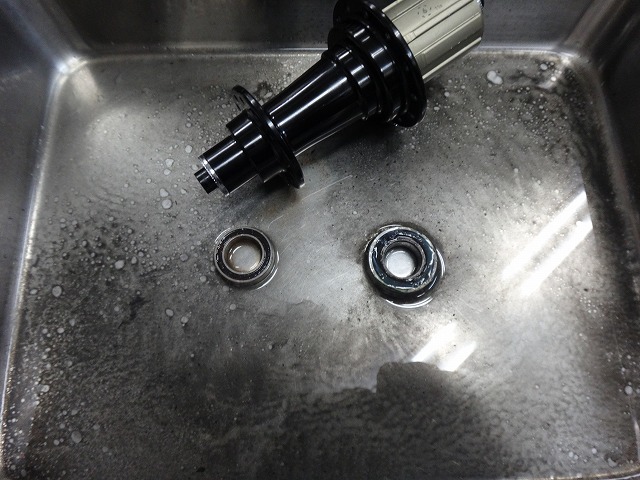
The freebody has two 6802 bearings (the ones in the image are Enduro brand),
and while most freeboxes are designed with both bearings removed from the outside,
the inner bearing on this freebody pulls out from the inside instead.
Since I didn't need to replace them this time, it doesn't matter.

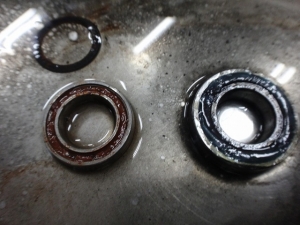
It looks like the non-drive side bearing was the main culprit.
The drive-side bearing could technically continue being used,
but since they're not that expensive, I replaced it anyway for peace of mind.

There it is—rust bloom!
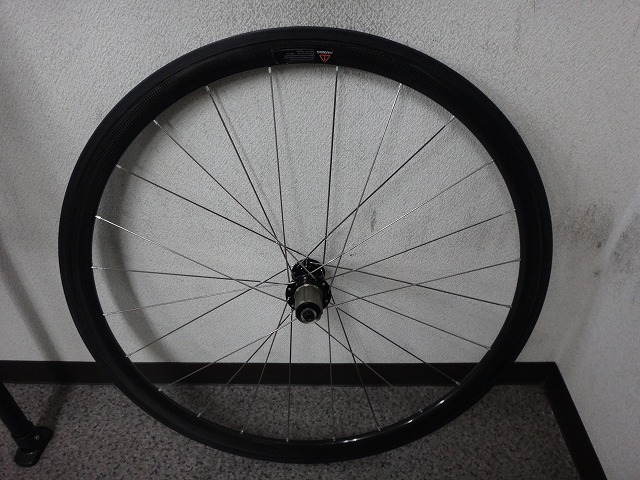
Built it up.
My spoke length calculation formula uses one Excel row per unknown spoke length.
In this rear wheel's case, I used two rows for left and right.
For wheels like Nomu Lab wheels where I've memorized the length,
I don't use the formula, so rows don't accumulate.
As of today I'm at 3634 rows, and this spoke length calculation was around rows 3328–3329.
That's more recent than I expected.
Once I installed the freebody, there was no grittiness from those bearings,
so I didn't need to replace the freebody bearings.
I cleaned up the sticker on the non-drive side valve hole
as promised.
I filled the rim damage with a strong coating.
This is only possible with glossy carbon rims.
I didn't apply it to the brake zone.
Since the drying time is fairly long,
I couldn't do this until after building the wheel.
A customer dropped off a 38mm carbon rim rear wheel that I had built previously.
It crashed and developed some wobble, so they wanted me to fix it.
Rather than just replacing a few spokes or truing it up,
they wanted me to check whether the rim could still be used,
and if necessary, replace all the spokes.
The rim definitely has some scuff marks,
and there are spots where the spoke tension has gone slack,
so replacing everything with new parts might be the better option.
Since the customer is from out of town,
I want to avoid the possibility that after partial repairs,
something else goes wrong elsewhere down the road.
The hub is a Leaf Hub–like 24-hole hub, semi-comp with four-cross lacing and radial spokes on the drive side.
I'll use the same specs when rebuilding it.
The sticker near the valve hole on the non-drive side is peeling up a bit.
The adhesive is strong, which is why this happens,
but I'll clean it up nicely later.
I'll leave the drive side as it is.
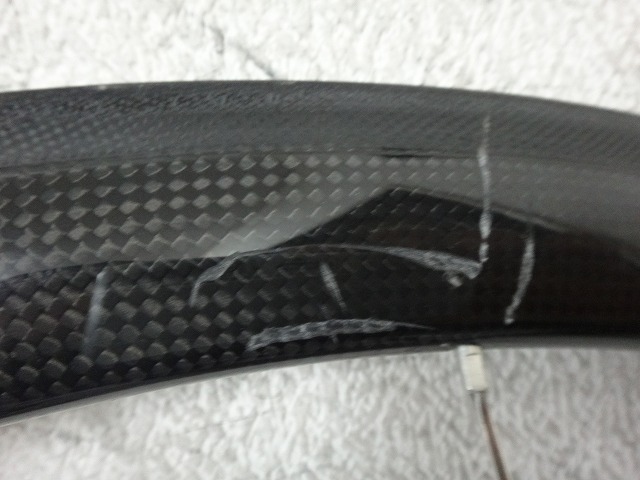
The only noticeable rim damage is in this spot on the non-drive side.

Looking closely at the spot where the spoke tension is slack,
I can see there's a slight bend,
Once I loosened it, the deformation became clear.
It occurred to me at this point that this spot was near the rim damage.
I disassembled it.
With carbon rims, the resin that holds the sheet together can sometimes crush on impact
and become something like plastic deformation in metal.
(Unlike aluminum rims, they rarely develop clear warping or become wavy,
or develop a potato-chip shape.
They tend to crush and crumple like folding bamboo.)
Checked against a glass surface plate and found no warping,
and since the rim damage isn't deep, it can be reused.
When reassembling the wheel and applying spoke tension,
sometimes internal crush damage that wasn't visible in the bare rim
will show up (like the rim sides caving in abnormally),
but in the end, that didn't happen either.
More importantly, the hub rotation was gritty, so I'll replace the bearings.
I removed the freebody.
In the image I've pulled it out for clarity,
but between the freebody and the hub bearing
there's a thin spacer to prevent end-play—just one piece.
When removing the freebody, this spacer sometimes sticks to the freebody
due to grease and comes out with it.
If a customer disassembles it at some point and loses this spacer,
then reassembles it without it,
the freebody becomes a fixed gear—this has happened a few times.
This hub is sold under the names POWER WAY or BITEX
not the actual hub manufacturer's name.
Moreover, it's an OEM-only manufacturer that doesn't sell hubs under their own name,
so searching for it won't turn anything up... wait, I just searched and it did come up.
The actual brand is LOHAS, though I won't give you that name.
If you're interested, search "hubsmaster.com" instead of LOHAS.
By the way, I have no idea if they sell to individual customers.
Their About Us page says
"the worldwide hubs OEM/ODM professional manufacturer"
so it seems they remain OEM-only.
This particular hub corresponds to the LOHAS R07R (probably).

When I've needed that spacer in the past,
I've cannibalized it from old Leaf Hubs,
but last time I ordered 100 hubs, I also ordered spacers separately.
To put it cynically, thanks to my own mistakes,
I've never had to buy a new spacer again.
Please, just don't lose them.
The bearing next to it is from a Leaf front hub (LOHAS R11F).
It's an extremely unusual size, so I keep it in stock at all times.
Since there's a standard size that has the same inner and outer diameter but half the thickness,
I could stack two of them together, but...
I removed the rear hub bearings.
Since there was grittiness even with the freebody removed,
the culprit is one or both of these.
The right is 6902 and the left is 6802, both standard sizes that are easy to source.
After replacing the bearings, the rotation became smooth.

The "6" on the freebody means

it has six pawls.
The freebody has two 6802 bearings (the ones in the image are Enduro brand),
and while most freeboxes are designed with both bearings removed from the outside,
the inner bearing on this freebody pulls out from the inside instead.
Since I didn't need to replace them this time, it doesn't matter.

It looks like the non-drive side bearing was the main culprit.
The drive-side bearing could technically continue being used,
but since they're not that expensive, I replaced it anyway for peace of mind.

There it is—rust bloom!
Built it up.
My spoke length calculation formula uses one Excel row per unknown spoke length.
In this rear wheel's case, I used two rows for left and right.
For wheels like Nomu Lab wheels where I've memorized the length,
I don't use the formula, so rows don't accumulate.
As of today I'm at 3634 rows, and this spoke length calculation was around rows 3328–3329.
That's more recent than I expected.
Once I installed the freebody, there was no grittiness from those bearings,
so I didn't need to replace the freebody bearings.
I cleaned up the sticker on the non-drive side valve hole
as promised.
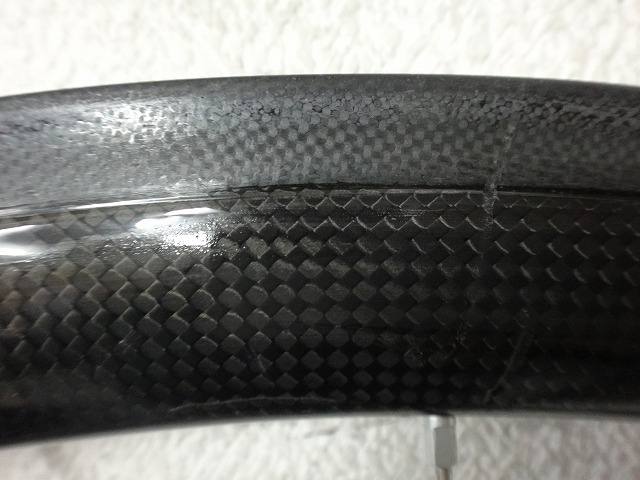
I filled the rim damage with a strong coating.
This is only possible with glossy carbon rims.
I didn't apply it to the brake zone.
Since the drying time is fairly long,
I couldn't do this until after building the wheel.