Another day, another wheel build (and so on).

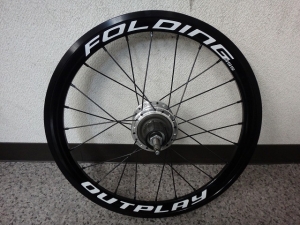
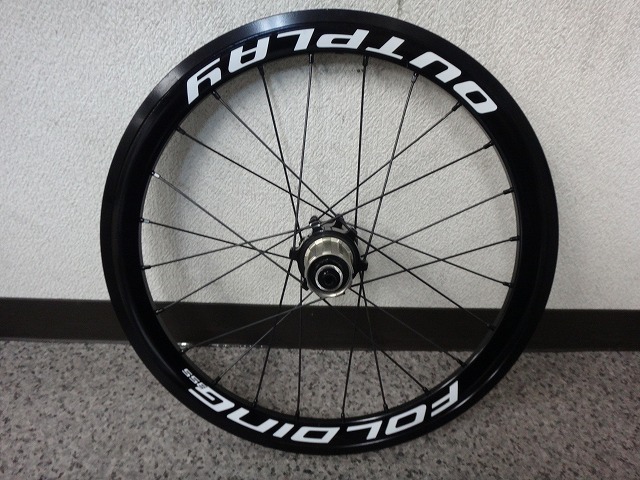
A customer brought in an 18-inch wheel from a brand called Outplay.
They make road wheels too, but they're mainly known for small-diameter wheel models.
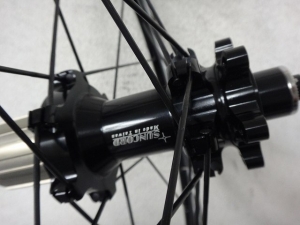
It's a 12H straight-spoke disc hub built in reverse-Italian lacing.
I call it 12H based on my spoke-length calculation formula,
but there are actually 24 spokes.
Normally you'd just call this a 24H wheel.
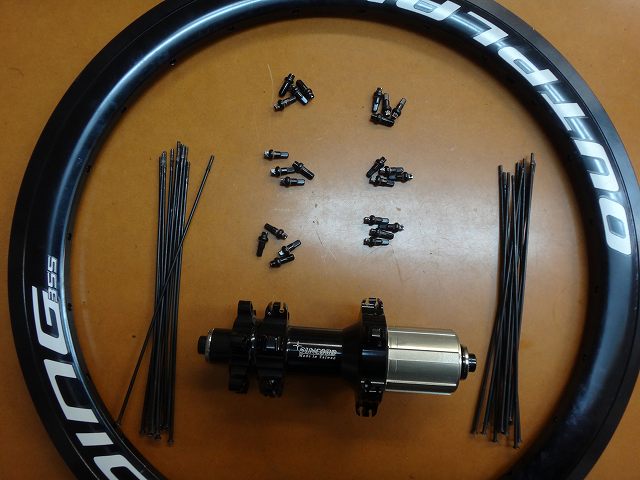
All I need is the rim.
The black aluminum nipples have a decent shape—you can grip them from the outer edge too—
but they're already somewhat stripped on both sides, or they came rounded that way to begin with,
so I'm not reusing them this time.

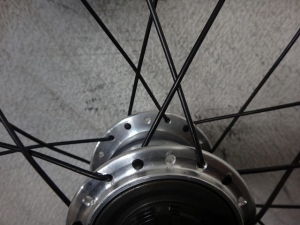
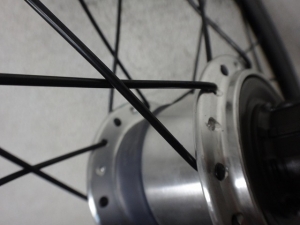
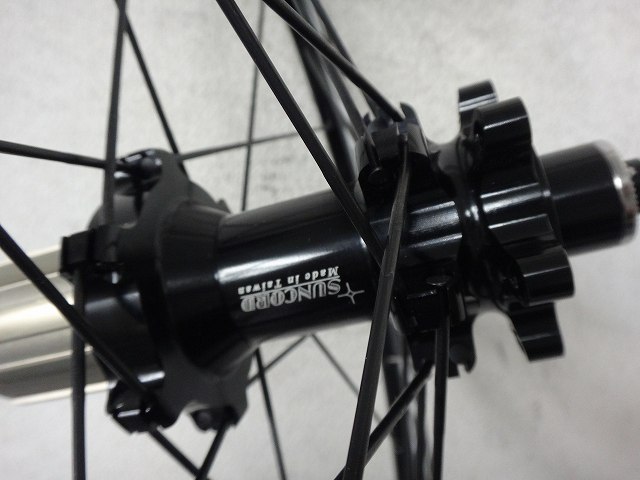
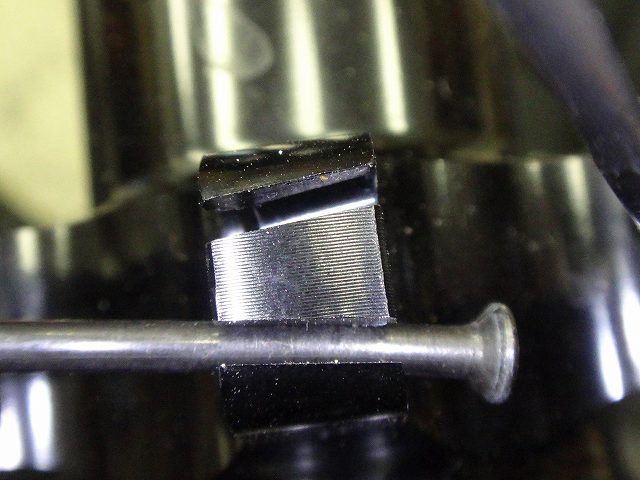
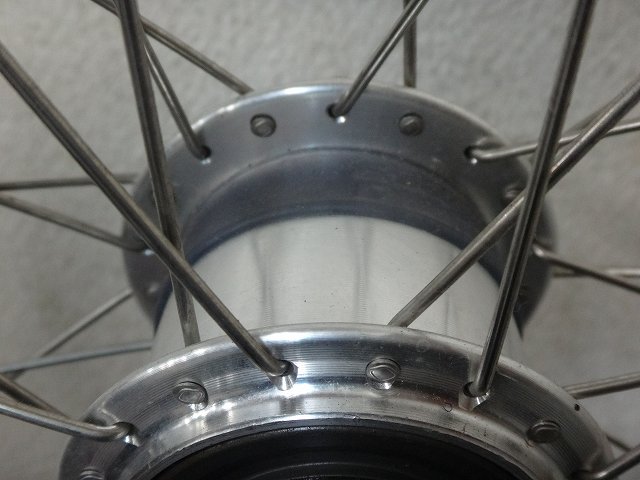
This hub flange has a slit cut all the way through.
If these were aero spokes, you could loosen the nipple past the cylindrical section below the head
until the flattened part caught on the slit, letting you slide the spoke out through it—
making it effectively a "slip-through" design. But with these spokes,
there's nowhere along the length narrow enough to pass through the slit,
so it's a true through-lacing setup, and that makes disassembly a bit tedious.

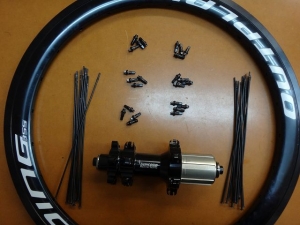
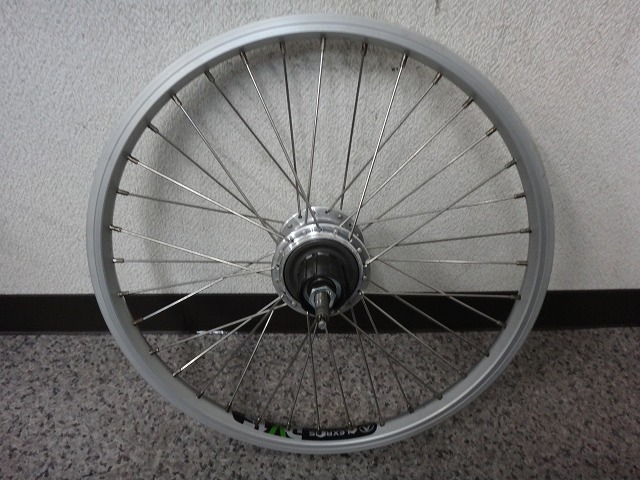
Now for the second wheel.
An 18-inch wheel built with a SRAM Dual Drive hub—that's 36H.

Dual Drive means you've got an internal hub with both external and internal shifting.
In addition to the sprocket teeth on the free body,
there's internal shifting happening inside the hub itself.
This one had an 8-speed cassette and a 3-speed internal hub,
making it 24 speeds total in one rear hub.
(If the crankset were triple, you'd be looking at 72 speeds front and rear.
Though most of the time these run single chainrings.)
Compare that to modern road bikes with wide-ratio 11–28T, 11-speed cassettes
and a compact 50–34T crankset up front:
the 50×28T (big ring, smallest cog) is roughly equivalent to 34×19T.
That means the unique light gearing you can only get with the small ring
is just four ratios: 21T, 23T, 25T, and 28T (anything larger than 19T).
Bluntly put, using the big ring gets you almost the same gear ratios
as pairing down to 34×19T and anything smaller,
so if a 22-pencil color set were actually used,
and you grouped duplicate shades as the same color,
you'd really only have 15 distinct colors:
all 11 from the big ring, plus the 4 light ratios unique to the small ring.
Dual-drive hubs from various makers are out there,
and they all suffer from massive gear overlap.
The effective number of speeds is hard to pin down, but it's definitely more than 8.
In particular, if you want that sweet spot of "lowest internal + lowest external,"
the added hub weight is more than offset by what you gain as a rider.

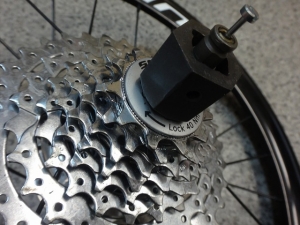
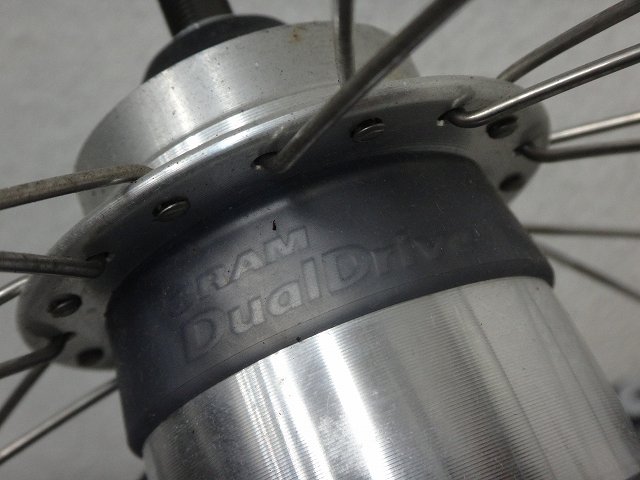
The SRAM Dual Drive branding? That's just a silicone band with embossed lettering
wrapped around a generic hub shell—
so if the wheel's phase relative to the valve hole bugs you after assembly,
you can actually change it later. That's a handy feature.
Of course, if you mess around carelessly and the silicone band snaps, it's game over,
so it's best to leave it alone.

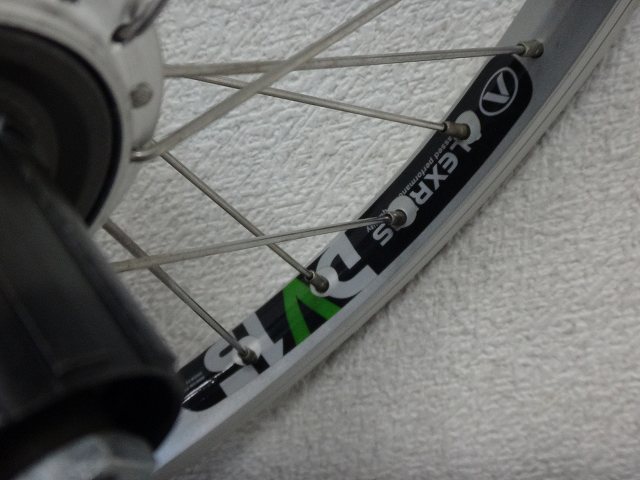
The old rim was an ALEXRIMS DV15, but I noticed the label was upside down.
Not that it matters—I'm tearing it down anyway.
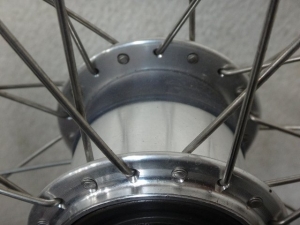
The lacing pattern uses inpoke and outpoke in a 2-cross Italian lacing with no final pattern weaving.
If you're going to do this, I think all-outpoke through-laced 1-cross would be better.
(The non-freewheel side could also be all-inpoke through-laced 1-cross.)
Pattern-weaving—or "ayedori" as I call it (though "ayatori" is more correct)—
means doing a final cross-over pattern.
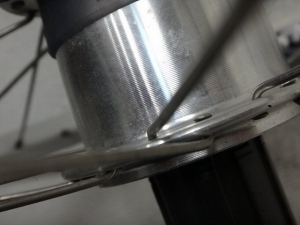
Since the flange holes have decent depth and the spokes aren't flattened,
attempting that final pattern here would put serious bends in the spokes.
Laced.
36H hub, 24H rim, JIS lacing.
The "3-cross" name comes from the flange hole count, but it's actually 2-cross equivalent (1-cross).
Since 36:24 = 3:2, you can manage this by matching 2 out of every 3 flange holes to the rim.
Calculating the spoke-length correction is such a pain.
When I posted just the summary of this entry,
I'd written the old wheel as 32H. Thanks for the correction in the comments.
As a note: with a 32H hub and 24H rim, 32:24 = 4:3,
so you could build it as a 2:1 "F-non-F-rest" lacing with an idle phase on the non-freewheel side.
For details, see here.
Since the final cross sits clear of the flange, I went ahead and did the pattern weave.
The reason? Because I felt like it.
If I hadn't woven it, there'd be a small risk of the inpoke spokes on the freewheel side
catching the rear derailleur... but that's pretty unlikely with a small-diameter wheel.
(And besides, the right flange sits slightly inboard, so contact won't happen anyway.)
Whether it's the hub design or the lacing pattern, both original wheels had no pattern weave.
The spokes are Sapim Leader #14 plain gauge. The customer just wanted
black spokes and black nipples—I had #15 plain in stock too—
but I ended up going with #14.
Pattern weaving would be easier with #15,
but I went with #14 considering it's only 24 spokes.
(With 32H, I'd have used #15.)
↑Valve hole orientation.
I didn't move the silicone band at all.
Now for some of the tricky details about this wheel:
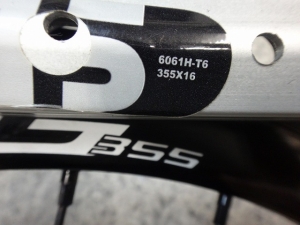
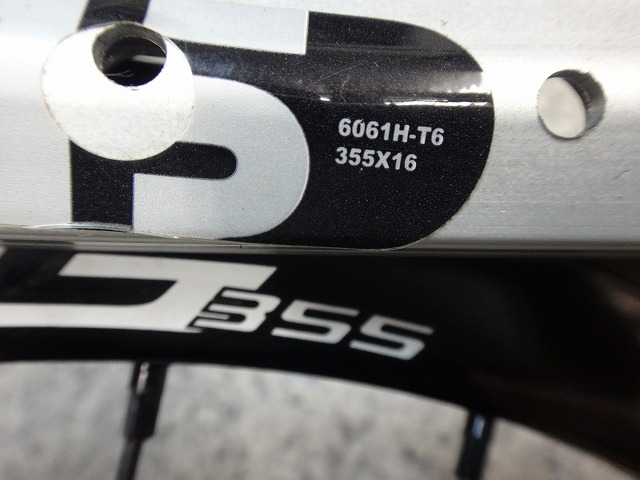
Both the old and new rims are "18-inch."
In ETRTO terms, they're 355mm inside diameter,
but the old rim is HE and the new one is WO (probably).
The inch designation refers to the approximate outer diameter with a tire mounted.
So a 622mm rim with a road tire makes 700C, but the same rim with an MTB tire makes 29".
Technically 700C = 700mm ≈ 27.5", but 700C is conventionally called 28".
A 700C rim with a 28C tire will actually measure about 700mm in overall diameter.
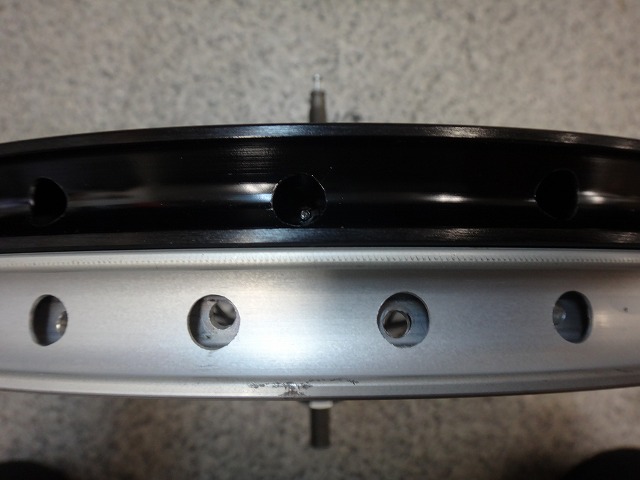
Conversely, when the inch name is the same, WO and HE rims have different inside diameters.
A 26" WO is 571mm while 26" HE is 559mm;
20" WO is 451mm while 20" HE is 406mm.
But with 18", both WO and HE measure 355mm inside diameter.

So a tire marked 355 isn't guaranteed to fit a rim marked 355.
The bead hook diameters match, but the widths are completely different—
so in practice there's no real compatibility.
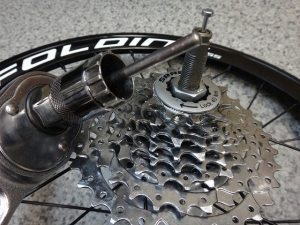
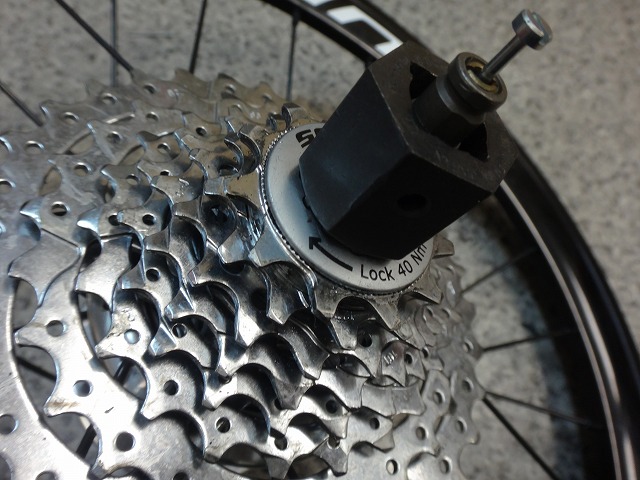
Shimano's lockring tightening tool now comes with a guide shaft as standard.
Originally, pro team mechanics were modifying existing tools to add shafts,
and Shimano saw that and later released one in that style.
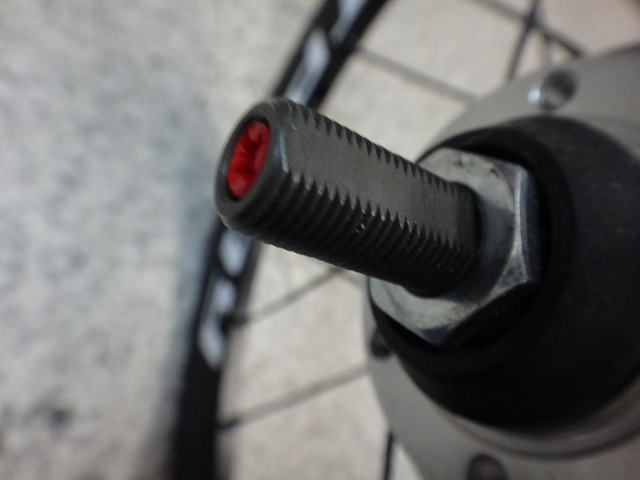
But for hubs without a hollow axle,
you obviously need a tool without a guide shaft.
Just tightening it like this isn't enough though,
because it'll spin freely in the forward direction too.

With an internal hub, spinning the free body forward
makes the axle shaft spin backward.
Locking the flat section of the axle to the frame prevents
the free body from spinning forward.
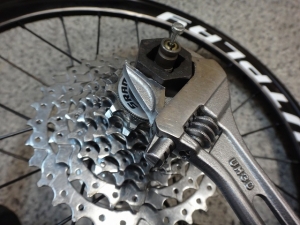
So you could just hold the flat part of the axle shaft and tighten the lockring,
but I was worried about damaging the axle with the tool,
so I used the cassette removal tool in reverse—the one that usually prevents rotation—
to hold it while I tightened the lockring.
Whether that's related or not, I can't say, but the old wheel's lockring
was barely tightened at all (I could loosen it by hand).
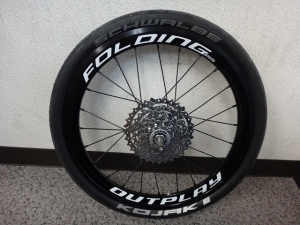
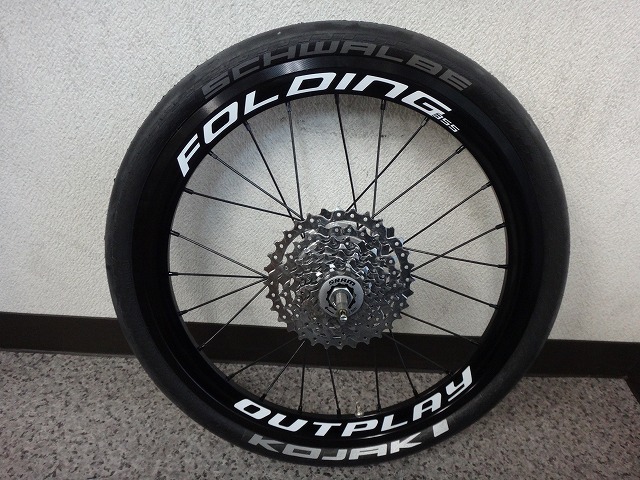
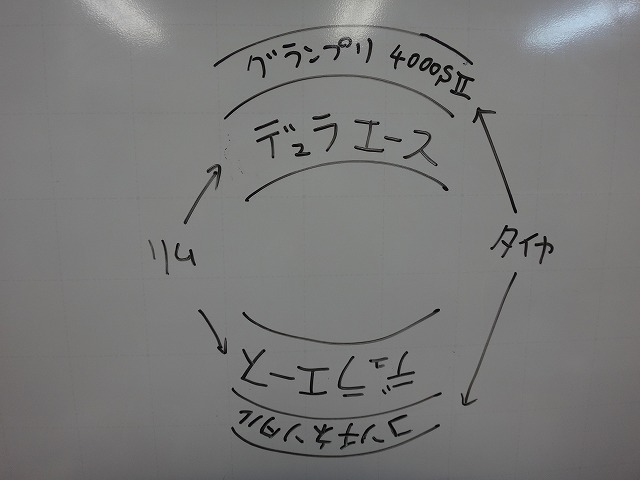
Tire installed.
The Schwalbe tire and this wheel both have logos oriented downward (one direction),
so I needed to align those.
↑Like this.
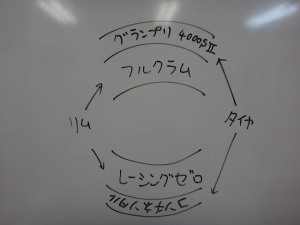
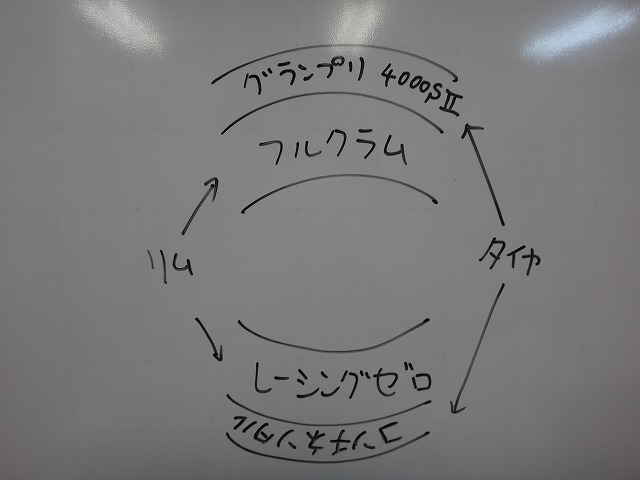
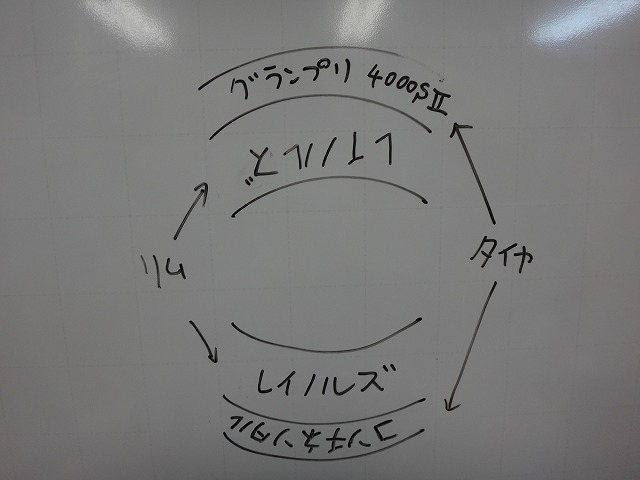
Fulcrum wheels also have gravity pulling the lettering downward, so the label reads correctly as shown.
But Continental tires have lettering where gravity pulls it inward to the wheel,
so at the bottom of the diagram, the rim and tire text orientations reverse.
Just to be clear, if Continental lettering is upside down, it doesn't become "Latnemnitnoj."
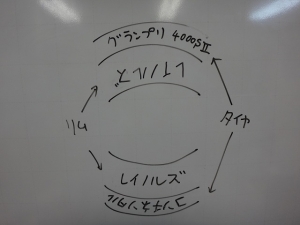
On Reynolds wheels, the lettering falls outward,

and on Shimano wheels, it falls inward.
For this Outplay rim and Schwalbe tire,
both had lettering oriented downward, so I matched them that way.


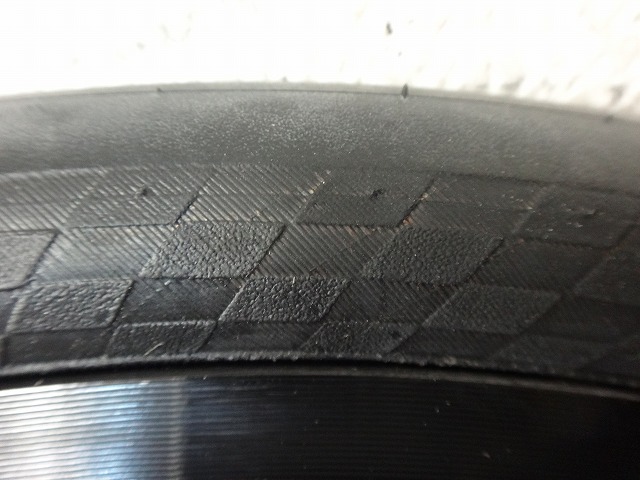
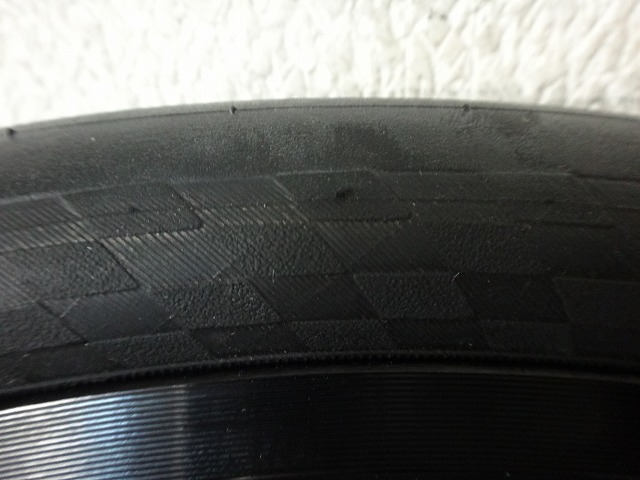
This tire has a slick center tread, but the checkered flag pattern on the sidewalls
has a water-shedding direction, so there's technically a correct mounting orientation.
That said, you're never going to lean the wheel this far
(that sidewall pattern will never contact the ground),
so it's pretty meaningless.
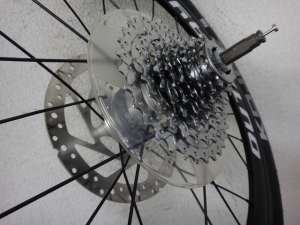
Disc rotor installed.
JIS lacing was the choice precisely for this.
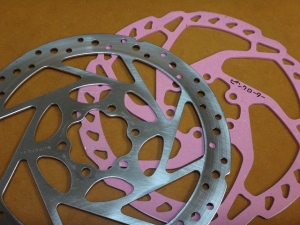
↑The rotor that came with the original wheel. The other one is unrelated, just my own spare.
A customer brought in an 18-inch wheel from a brand called Outplay.
They make road wheels too, but they're mainly known for small-diameter wheel models.
It's a 12H straight-spoke disc hub built in reverse-Italian lacing.
I call it 12H based on my spoke-length calculation formula,
but there are actually 24 spokes.
Normally you'd just call this a 24H wheel.
All I need is the rim.
The black aluminum nipples have a decent shape—you can grip them from the outer edge too—
but they're already somewhat stripped on both sides, or they came rounded that way to begin with,
so I'm not reusing them this time.
This hub flange has a slit cut all the way through.
If these were aero spokes, you could loosen the nipple past the cylindrical section below the head
until the flattened part caught on the slit, letting you slide the spoke out through it—
making it effectively a "slip-through" design. But with these spokes,
there's nowhere along the length narrow enough to pass through the slit,
so it's a true through-lacing setup, and that makes disassembly a bit tedious.
Now for the second wheel.
An 18-inch wheel built with a SRAM Dual Drive hub—that's 36H.

Dual Drive means you've got an internal hub with both external and internal shifting.
In addition to the sprocket teeth on the free body,
there's internal shifting happening inside the hub itself.
This one had an 8-speed cassette and a 3-speed internal hub,
making it 24 speeds total in one rear hub.
(If the crankset were triple, you'd be looking at 72 speeds front and rear.
Though most of the time these run single chainrings.)
Compare that to modern road bikes with wide-ratio 11–28T, 11-speed cassettes
and a compact 50–34T crankset up front:
the 50×28T (big ring, smallest cog) is roughly equivalent to 34×19T.
That means the unique light gearing you can only get with the small ring
is just four ratios: 21T, 23T, 25T, and 28T (anything larger than 19T).
Bluntly put, using the big ring gets you almost the same gear ratios
as pairing down to 34×19T and anything smaller,
so if a 22-pencil color set were actually used,
and you grouped duplicate shades as the same color,
you'd really only have 15 distinct colors:
all 11 from the big ring, plus the 4 light ratios unique to the small ring.
Dual-drive hubs from various makers are out there,
and they all suffer from massive gear overlap.
The effective number of speeds is hard to pin down, but it's definitely more than 8.
In particular, if you want that sweet spot of "lowest internal + lowest external,"
the added hub weight is more than offset by what you gain as a rider.
The SRAM Dual Drive branding? That's just a silicone band with embossed lettering
wrapped around a generic hub shell—
so if the wheel's phase relative to the valve hole bugs you after assembly,
you can actually change it later. That's a handy feature.
Of course, if you mess around carelessly and the silicone band snaps, it's game over,
so it's best to leave it alone.
The old rim was an ALEXRIMS DV15, but I noticed the label was upside down.
Not that it matters—I'm tearing it down anyway.
The lacing pattern uses inpoke and outpoke in a 2-cross Italian lacing with no final pattern weaving.
If you're going to do this, I think all-outpoke through-laced 1-cross would be better.
(The non-freewheel side could also be all-inpoke through-laced 1-cross.)

Pattern-weaving—or "ayedori" as I call it (though "ayatori" is more correct)—
means doing a final cross-over pattern.
Since the flange holes have decent depth and the spokes aren't flattened,
attempting that final pattern here would put serious bends in the spokes.

Laced.

36H hub, 24H rim, JIS lacing.
The "3-cross" name comes from the flange hole count, but it's actually 2-cross equivalent (1-cross).
Since 36:24 = 3:2, you can manage this by matching 2 out of every 3 flange holes to the rim.
When I posted just the summary of this entry,
I'd written the old wheel as 32H. Thanks for the correction in the comments.
As a note: with a 32H hub and 24H rim, 32:24 = 4:3,
so you could build it as a 2:1 "F-non-F-rest" lacing with an idle phase on the non-freewheel side.
For details, see here.

Since the final cross sits clear of the flange, I went ahead and did the pattern weave.
The reason? Because I felt like it.
If I hadn't woven it, there'd be a small risk of the inpoke spokes on the freewheel side
catching the rear derailleur... but that's pretty unlikely with a small-diameter wheel.
(And besides, the right flange sits slightly inboard, so contact won't happen anyway.)
Whether it's the hub design or the lacing pattern, both original wheels had no pattern weave.
The spokes are Sapim Leader #14 plain gauge. The customer just wanted
black spokes and black nipples—I had #15 plain in stock too—
but I ended up going with #14.
Pattern weaving would be easier with #15,
but I went with #14 considering it's only 24 spokes.
(With 32H, I'd have used #15.)

↑Valve hole orientation.
I didn't move the silicone band at all.
Now for some of the tricky details about this wheel:
Both the old and new rims are "18-inch."
In ETRTO terms, they're 355mm inside diameter,
but the old rim is HE and the new one is WO (probably).
The inch designation refers to the approximate outer diameter with a tire mounted.
So a 622mm rim with a road tire makes 700C, but the same rim with an MTB tire makes 29".
Technically 700C = 700mm ≈ 27.5", but 700C is conventionally called 28".
A 700C rim with a 28C tire will actually measure about 700mm in overall diameter.
Conversely, when the inch name is the same, WO and HE rims have different inside diameters.
A 26" WO is 571mm while 26" HE is 559mm;
20" WO is 451mm while 20" HE is 406mm.
But with 18", both WO and HE measure 355mm inside diameter.
So a tire marked 355 isn't guaranteed to fit a rim marked 355.
The bead hook diameters match, but the widths are completely different—
so in practice there's no real compatibility.

Shimano's lockring tightening tool now comes with a guide shaft as standard.
Originally, pro team mechanics were modifying existing tools to add shafts,
and Shimano saw that and later released one in that style.
But for hubs without a hollow axle,
you obviously need a tool without a guide shaft.

Just tightening it like this isn't enough though,
because it'll spin freely in the forward direction too.
With an internal hub, spinning the free body forward
makes the axle shaft spin backward.
Locking the flat section of the axle to the frame prevents
the free body from spinning forward.
So you could just hold the flat part of the axle shaft and tighten the lockring,
but I was worried about damaging the axle with the tool,
so I used the cassette removal tool in reverse—the one that usually prevents rotation—
to hold it while I tightened the lockring.
Whether that's related or not, I can't say, but the old wheel's lockring
was barely tightened at all (I could loosen it by hand).
Tire installed.
The Schwalbe tire and this wheel both have logos oriented downward (one direction),
so I needed to align those.
↑Like this.
Fulcrum wheels also have gravity pulling the lettering downward, so the label reads correctly as shown.
But Continental tires have lettering where gravity pulls it inward to the wheel,
so at the bottom of the diagram, the rim and tire text orientations reverse.
On Reynolds wheels, the lettering falls outward,
and on Shimano wheels, it falls inward.
For this Outplay rim and Schwalbe tire,
both had lettering oriented downward, so I matched them that way.
This tire has a slick center tread, but the checkered flag pattern on the sidewalls
has a water-shedding direction, so there's technically a correct mounting orientation.
That said, you're never going to lean the wheel this far
(that sidewall pattern will never contact the ground),
so it's pretty meaningless.

Disc rotor installed.
JIS lacing was the choice precisely for this.

↑The rotor that came with the original wheel. The other one is unrelated, just my own spare.