Another day of wheel-building (abbreviated hereafter).
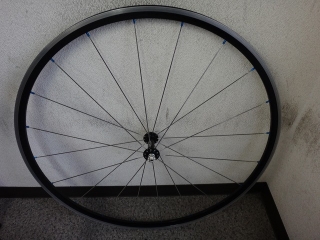
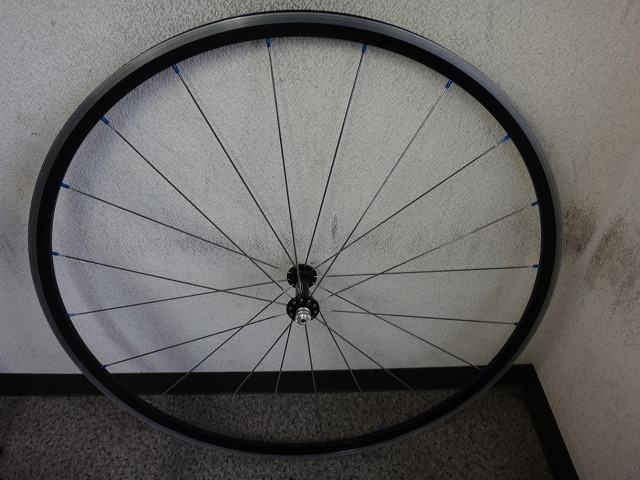
Built the front wheel for Nomu Lab Wheel No. 5.
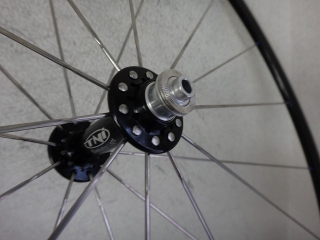
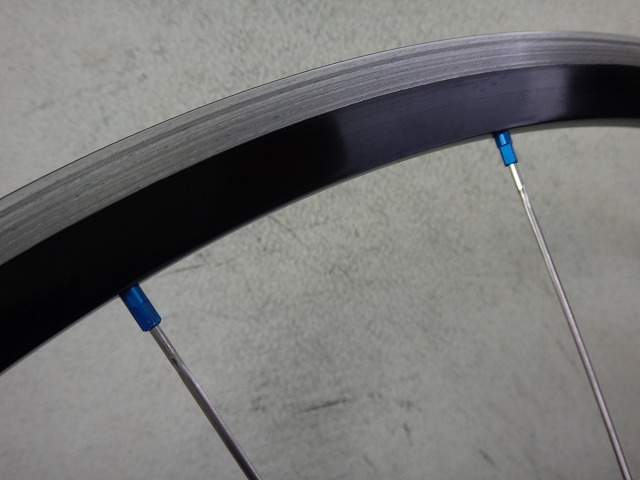
Evolite hub 20H CX-RAY outpoke radial laced with

blue aluminum nipples.
The rim shows some wear, but this is a rebuild of Nomu Lab Wheel No. 5's front wheel
applying an undocumented warranty while working in front of the customer.
I renewed every component except the rim,
and I was prepared to replace the rim too if it showed runout when placed on a glass surface plate,
but the rim turned out to be reusable.
While I'm building it completely from a naked rim state,
by my own arbitrary rules, today's wheel-building doesn't count (doesn't matter anyway).

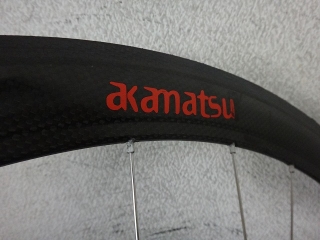
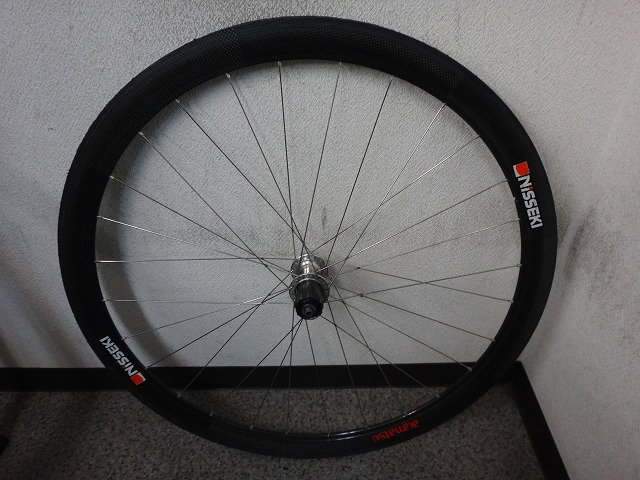
Now I'm continuing with that Nisseki carbon wheel from the other day.

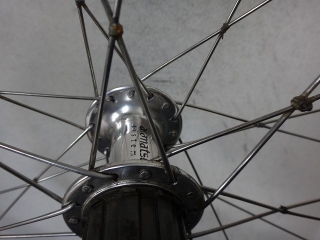
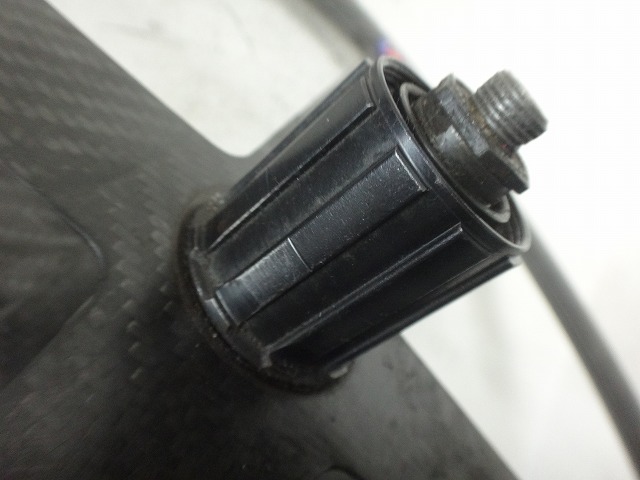
It's an Akamatsu Systema rear hub,
using a Shimano freebody with custom-fabricated hub shell and other parts.
As an example of a rear hub using a Shimano freebody straight up,

there's this Systema hub,
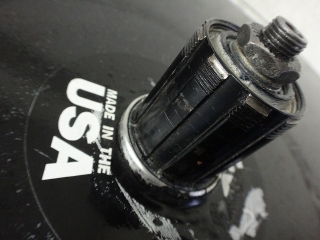
HED's disc wheel,

TNT hub,

and Spinergy's REV-X, among others.
The reason they source freebodies from Shimano and install them is that,
from a cost perspective compared to manufacturing a freebody themselves, it makes more sense to do it this way—
or so I heard long ago from my spiritual mentor.
But nowadays Systema only manufactures front hubs.
When I asked them why,
they said "you're better off just buying a regular Shimano hub for the rear."
This is speculation on my part, but when the 7800-series rear hub
switched to a pawl spring system(Campagnolo knockoff),
it moved away from the traditional Shimano hub architecture,
and I suspect that's related to their decision.
The 7900 and 9000 series did return to Shimano-style freehubs,
but due to spline differences (→here), compatibility is gone.
Furthermore, the R9100 series doesn't even have a rear hub option,
so buying a regular Shimano hub is becoming impossible.
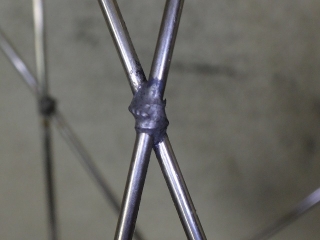
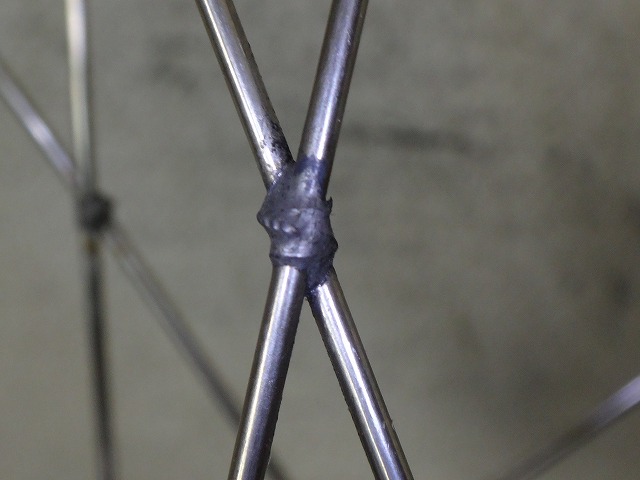
28H, all radial, JIS-laced on both sides with spoke ties on both.
I don't know why it's JIS-laced.
If this lacing happened to be the "tying lace" version,
there would be an advantage(?) in that the wire wrapping direction at the final cross is the same on both sides.
With my current "tying lace Version 4" approach,
my hands remember the overlapping pattern at the final cross on the non-freewheel side of Italian lacing,
so spoke tying goes smoothly
(same applies to the non-rotor side of disc front hubs in reverse Italian lacing).
But this "right side of Italian/JIS lacing & left side of JIS lacing" tying
has all the hand movements mirrored in reverse, which I'm terrible at.
That's what the non-freewheel side of disc rear hub JIS lacing is,
so I've been getting quite a bit of practice lately.
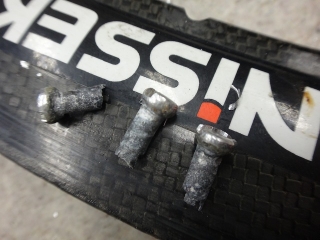
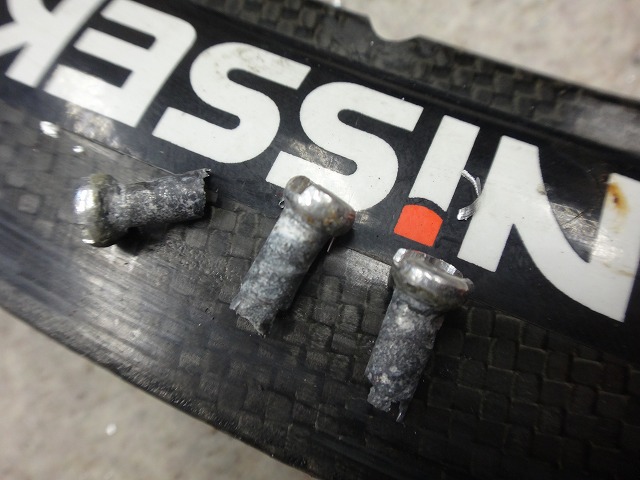
The nipples were so corroded that just applying the wrench
made them snap right off in my hand. Truing alone would've been impossible.
Since the circular cross-section of the nipple has a large contact area with the rim hole,
removing rusted and swollen nipples from the rim holes was incredibly tedious.
It took over an hour just to get the rim down to a bare state.
Separately, removing the filmy residue of the TUFO rim tape that was left on the rim's surface
took another 30+ minutes to peel back to where it doesn't interfere with wheel building.
So the prep work before actual wheel building took nearly two hours.

↑This is the front wheel I built the other day, but...
↑This is the rear rim, and while the rim height is the same, the specifications differ.
It's not specifically a rear-only specification—I think it's just from a different production run—
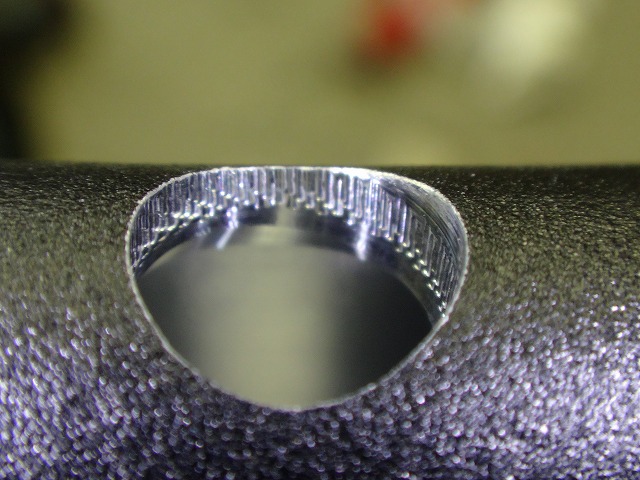
but the flattening-type machining on the rim holes to give them thickness
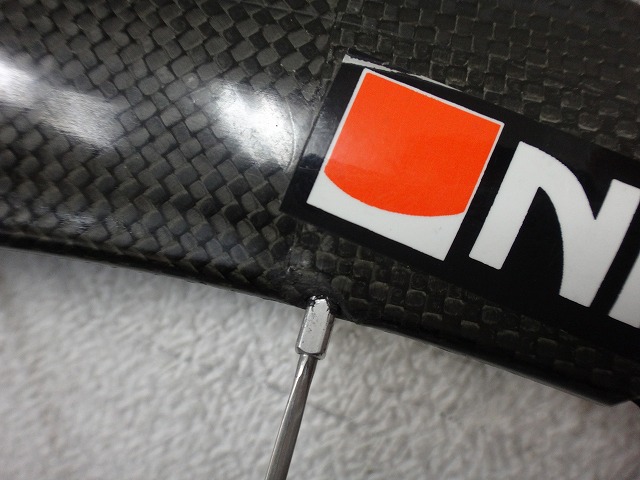
is much more pronounced on the rear rim. That alone would be fine, but
the front rim could be built with 14mm nipples,
whereas the rear rim requires 16mm nipples or else there's almost no grip for the wrench.
Since I barely have enough 16mm nipples,
I've prepared this much but can't actually build it today.
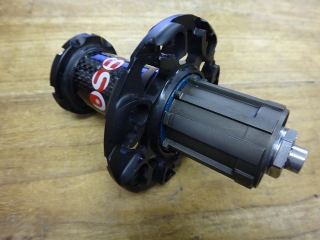
A customer dropped off a Racing Zero rear hub.
The reason it's just the hub is because they destroyed the rim.
Wait, hold up. Why aren't there any spokes on this thing?
According to the story, when they went to a nearby shop for a rim replacement,
they were told they'd need a complete spoke overhaul too.
In the end they didn't go through with it, but the shop removed (probably cut) all the spokes at that time,
so there's not a single spoke left.
In my experience, even with catastrophically mangled rim replacements,
I've almost never had to replace more than five spokes.
Even if it's buckled to hell or gotten hammered by a derailleur,
I've had cases where no spoke replacement was needed at all.
In fact, replacing three or more spokes usually happens with chain drops or rear derailleur wraps,
and rim replacements almost always let you reuse the spokes as-is.
Ugh, I hate those careless hack shops.
Show me a rear wheel that's been damaged so badly it needs all 21 spokes replaced.
I'd like to see it.
I explained to the customer that since spoke cost exceeds rim cost,
rebuilding from the hub gets pretty pricey,
but they said go ahead anyway, so I ordered the parts.
Rear right spoke + nipple at ¥2,044 tax-included per pair, so 14 pairs = ¥28,616,
rear left spoke + nipple at ¥2,044 tax-included per pair, so 7 pairs = ¥14,308,
for a total of ¥42,924. Yikes.
But here's the thing: there's a complete kit of 14 rear right spokes + 7 left spokes,
and that's ¥24,699 tax-included.
The spoke complete kit doesn't include nipples,
but we have enough extras lying around that I can throw them in as a service,
so we managed to keep the cost down somewhat.

So here's the complete kit:
the rear right marking is "one horizontal line," and the rear left is "three vertical lines."
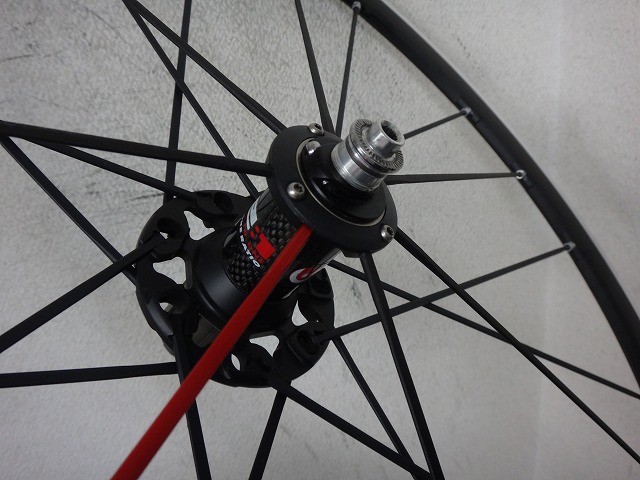
The customer wants to do the stylish thief thing
and requested one red spoke,
and with Fulcrum's official stylish thief setup,
the red spoke goes in the "non-freewheel side rim hole closest to the valve hole," so
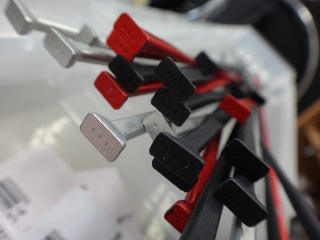
I swapped one of the "three vertical lines" spokes for red.

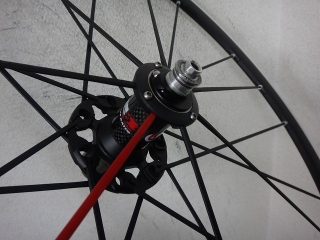
Not important, but
from the machining marks on the rim hole edges I can infer
what tools and processes were used.
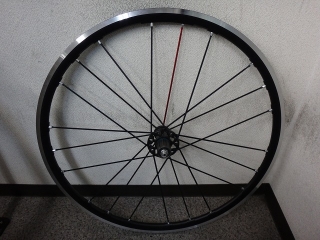
Built.
Since there's no disassembly of the original wheel, that part's easier.
Even including individually fishing nipples out with a magnet from the bare rim state,
it didn't take an hour.
By the way, the Nomu Lab Wheel No. 5 from the top of this post
came together in about 20 minutes from a bare rim state.
Built the front wheel for Nomu Lab Wheel No. 5.

Evolite hub 20H CX-RAY outpoke radial laced with
blue aluminum nipples.
The rim shows some wear, but this is a rebuild of Nomu Lab Wheel No. 5's front wheel
applying an undocumented warranty while working in front of the customer.
I renewed every component except the rim,
and I was prepared to replace the rim too if it showed runout when placed on a glass surface plate,
but the rim turned out to be reusable.
While I'm building it completely from a naked rim state,
by my own arbitrary rules, today's wheel-building doesn't count (doesn't matter anyway).

Now I'm continuing with that Nisseki carbon wheel from the other day.

It's an Akamatsu Systema rear hub,
using a Shimano freebody with custom-fabricated hub shell and other parts.
As an example of a rear hub using a Shimano freebody straight up,

there's this Systema hub,

HED's disc wheel,

TNT hub,
and Spinergy's REV-X, among others.
The reason they source freebodies from Shimano and install them is that,
from a cost perspective compared to manufacturing a freebody themselves, it makes more sense to do it this way—
or so I heard long ago from my spiritual mentor.
But nowadays Systema only manufactures front hubs.
When I asked them why,
they said "you're better off just buying a regular Shimano hub for the rear."
This is speculation on my part, but when the 7800-series rear hub
switched to a pawl spring system
it moved away from the traditional Shimano hub architecture,
and I suspect that's related to their decision.
The 7900 and 9000 series did return to Shimano-style freehubs,
but due to spline differences (→here), compatibility is gone.
Furthermore, the R9100 series doesn't even have a rear hub option,
so buying a regular Shimano hub is becoming impossible.

28H, all radial, JIS-laced on both sides with spoke ties on both.
I don't know why it's JIS-laced.
If this lacing happened to be the "tying lace" version,
there would be an advantage(?) in that the wire wrapping direction at the final cross is the same on both sides.
With my current "tying lace Version 4" approach,
my hands remember the overlapping pattern at the final cross on the non-freewheel side of Italian lacing,
so spoke tying goes smoothly
(same applies to the non-rotor side of disc front hubs in reverse Italian lacing).
But this "right side of Italian/JIS lacing & left side of JIS lacing" tying
has all the hand movements mirrored in reverse, which I'm terrible at.
That's what the non-freewheel side of disc rear hub JIS lacing is,
so I've been getting quite a bit of practice lately.
The nipples were so corroded that just applying the wrench
made them snap right off in my hand. Truing alone would've been impossible.
Since the circular cross-section of the nipple has a large contact area with the rim hole,
removing rusted and swollen nipples from the rim holes was incredibly tedious.
It took over an hour just to get the rim down to a bare state.
Separately, removing the filmy residue of the TUFO rim tape that was left on the rim's surface
took another 30+ minutes to peel back to where it doesn't interfere with wheel building.
So the prep work before actual wheel building took nearly two hours.
↑This is the front wheel I built the other day, but...

↑This is the rear rim, and while the rim height is the same, the specifications differ.
It's not specifically a rear-only specification—I think it's just from a different production run—
but the flattening-type machining on the rim holes to give them thickness
is much more pronounced on the rear rim. That alone would be fine, but
the front rim could be built with 14mm nipples,
whereas the rear rim requires 16mm nipples or else there's almost no grip for the wrench.
Since I barely have enough 16mm nipples,
I've prepared this much but can't actually build it today.

A customer dropped off a Racing Zero rear hub.
The reason it's just the hub is because they destroyed the rim.
Wait, hold up. Why aren't there any spokes on this thing?
According to the story, when they went to a nearby shop for a rim replacement,
they were told they'd need a complete spoke overhaul too.
In the end they didn't go through with it, but the shop removed (probably cut) all the spokes at that time,
so there's not a single spoke left.
In my experience, even with catastrophically mangled rim replacements,
I've almost never had to replace more than five spokes.
Even if it's buckled to hell or gotten hammered by a derailleur,
I've had cases where no spoke replacement was needed at all.
In fact, replacing three or more spokes usually happens with chain drops or rear derailleur wraps,
and rim replacements almost always let you reuse the spokes as-is.
Ugh, I hate those careless hack shops.
Show me a rear wheel that's been damaged so badly it needs all 21 spokes replaced.
I'd like to see it.
I explained to the customer that since spoke cost exceeds rim cost,
rebuilding from the hub gets pretty pricey,
but they said go ahead anyway, so I ordered the parts.
Rear right spoke + nipple at ¥2,044 tax-included per pair, so 14 pairs = ¥28,616,
rear left spoke + nipple at ¥2,044 tax-included per pair, so 7 pairs = ¥14,308,
for a total of ¥42,924. Yikes.
But here's the thing: there's a complete kit of 14 rear right spokes + 7 left spokes,
and that's ¥24,699 tax-included.
The spoke complete kit doesn't include nipples,
but we have enough extras lying around that I can throw them in as a service,
so we managed to keep the cost down somewhat.

So here's the complete kit:
the rear right marking is "one horizontal line," and the rear left is "three vertical lines."
The customer wants to do the stylish thief thing
and requested one red spoke,
and with Fulcrum's official stylish thief setup,
the red spoke goes in the "non-freewheel side rim hole closest to the valve hole," so

I swapped one of the "three vertical lines" spokes for red.
Not important, but
from the machining marks on the rim hole edges I can infer
what tools and processes were used.

Built.
Since there's no disassembly of the original wheel, that part's easier.
Even including individually fishing nipples out with a magnet from the bare rim state,
it didn't take an hour.
By the way, the Nomu Lab Wheel No. 5 from the top of this post
came together in about 20 minutes from a bare rim state.