The drill whines!

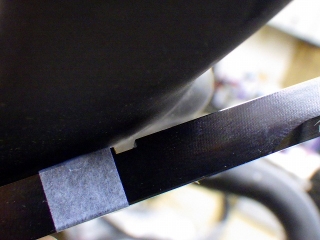
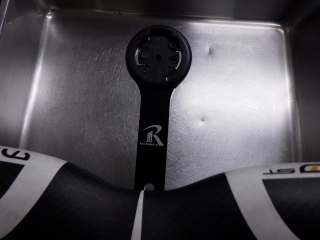
A customer brought in a carbon integrated stem handlebar from MOST (モスト), the parts brand owned by Pinarello.
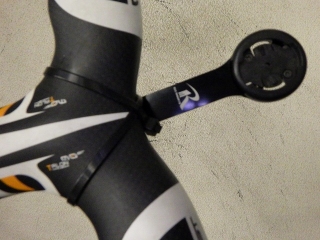
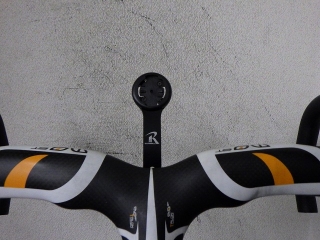
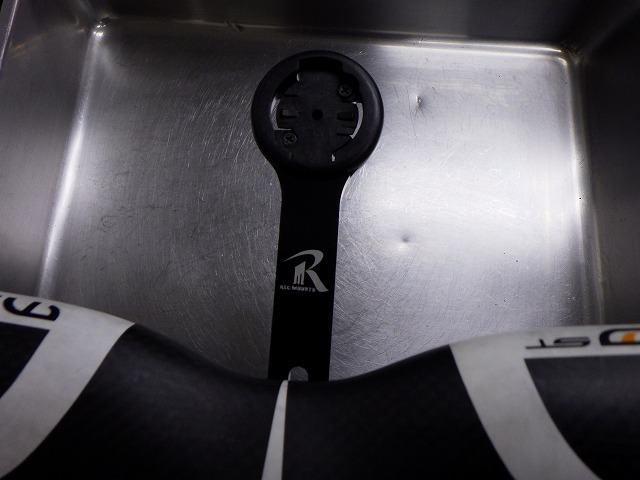
A Lezyne cycle computer mounting bracket is currently attached with zip ties and double-sided tape. Apparently it's been used this way for a while. The bracket sticks out quite far forward, so I asked about the specific computer model to see if it's one of those larger screens with map viewing—I won't say which one here. The customer wants me to install an M5 rivet nut on the underside of the stem section.
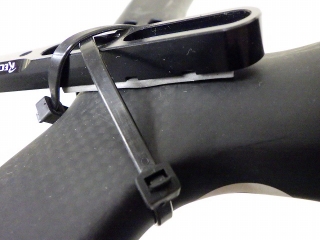
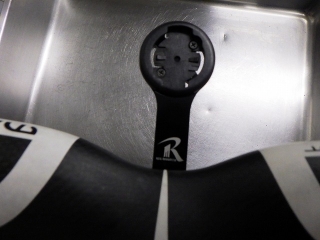
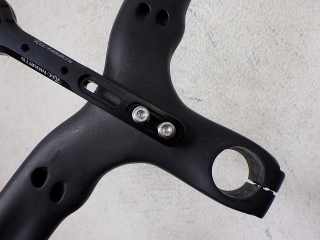
This is what it looks like from the back side.
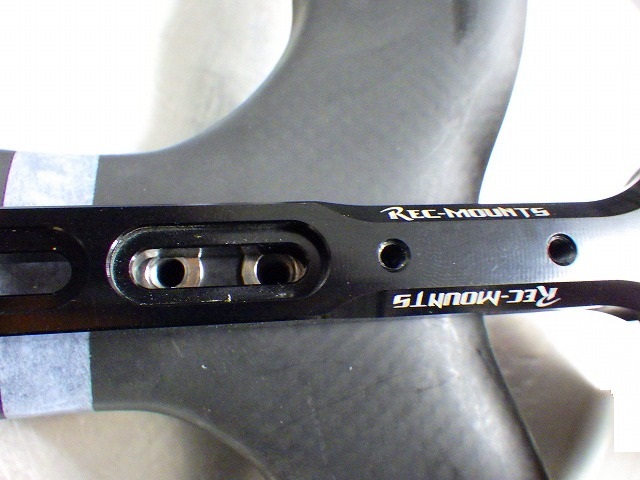
If we move the bracket any further back, it will interfere with the frame.
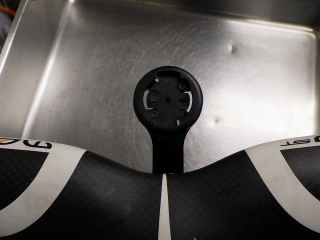
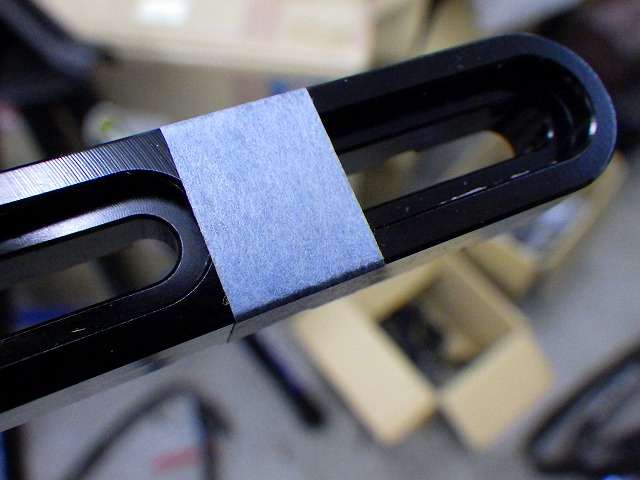
So I marked the rear end position of the original bracket with tape.

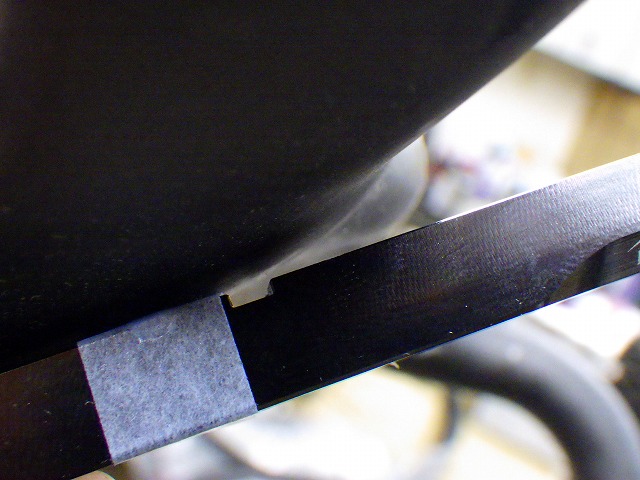
This is a separate reference mark—I put tape on the rear end of the front slot hole out of the two elongated holes.
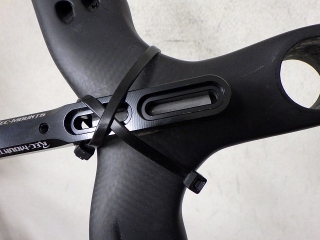
The bottom of the stem section curves upward at the front, so it doesn't look like I can install the rivet nut at a position where I could use the front elongated hole.

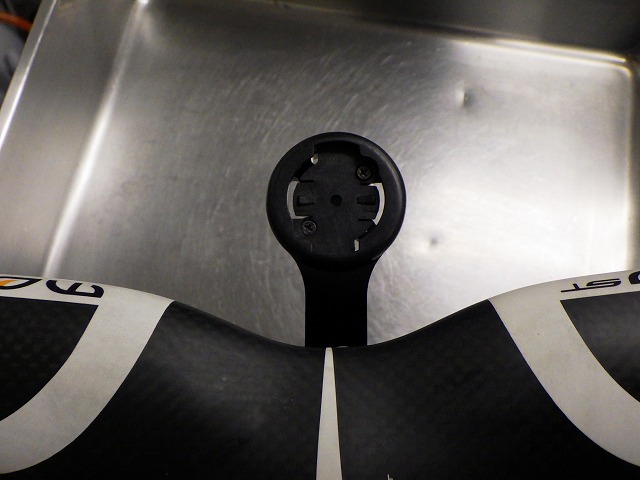
After thinking it over, I settled on this position.
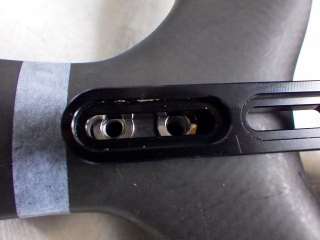
This uses the rear elongated hole like the original position while still allowing very slight front-to-back adjustment. I'll call this Position A from here on.
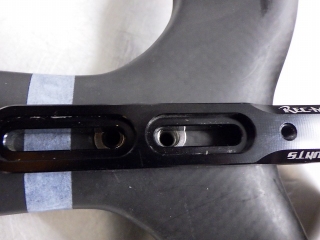
There's almost no adjustment range, but it's positioned to span both the front and rear elongated holes. I'll call this Position B from here on.
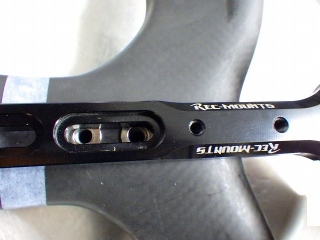
This uses the front elongated hole. I'll call this Position C from here on. If you want Position B or C, you'll need to cut the bracket as needed.
↑Position A
↑Position B
↑Position C
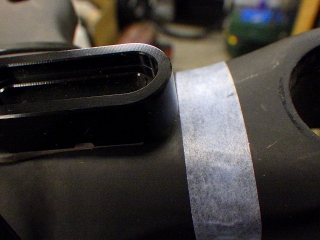
This is the back side during Position B setup, but the bracket was interfering with the stem body, so I didn't fully tighten the mounting bolt.
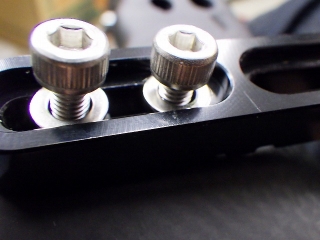
I'm including washers and bolts as a service. The bolt head is a cap screw, but if I used a truss head—a low-profile semi-spherical bolt—it would look cleaner. However, that would require a 3mm Allen key instead of 4mm, and I wanted to be able to tighten it securely, so I deliberately chose this bolt instead.
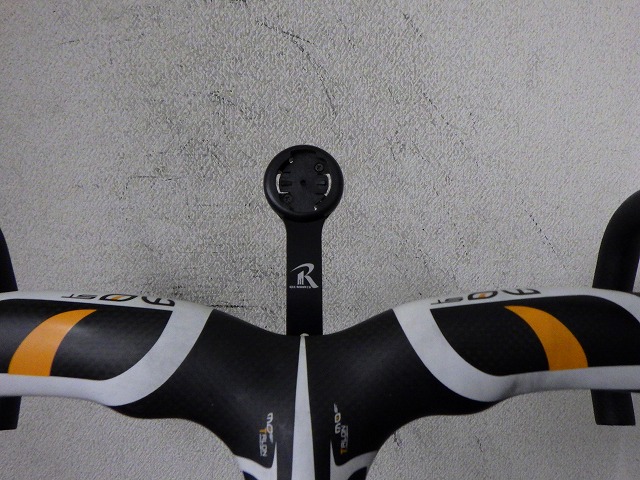
Done. This is Position A, same as the original.
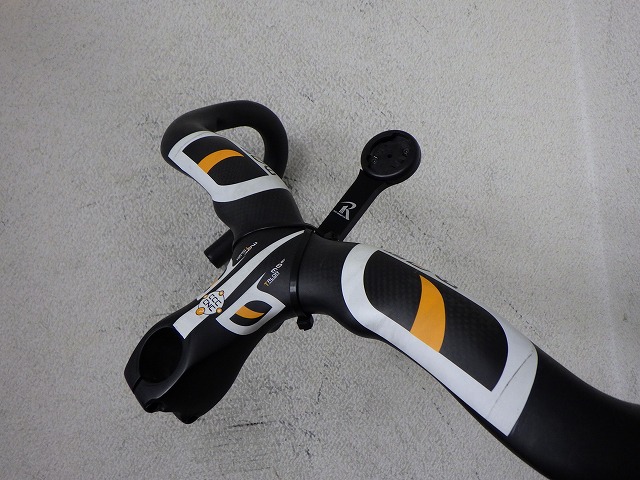
A customer brought in a carbon integrated stem handlebar from MOST (モスト), the parts brand owned by Pinarello.

A Lezyne cycle computer mounting bracket is currently attached with zip ties and double-sided tape. Apparently it's been used this way for a while. The bracket sticks out quite far forward, so I asked about the specific computer model to see if it's one of those larger screens with map viewing—I won't say which one here. The customer wants me to install an M5 rivet nut on the underside of the stem section.

This is what it looks like from the back side.

If we move the bracket any further back, it will interfere with the frame.

So I marked the rear end position of the original bracket with tape.
This is a separate reference mark—I put tape on the rear end of the front slot hole out of the two elongated holes.
The bottom of the stem section curves upward at the front, so it doesn't look like I can install the rivet nut at a position where I could use the front elongated hole.
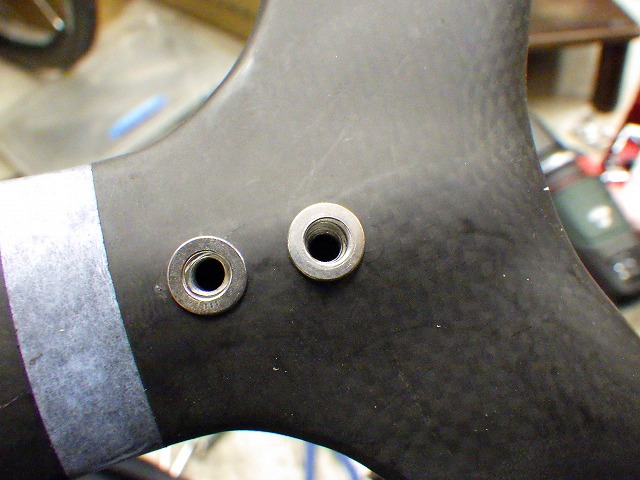
After thinking it over, I settled on this position.
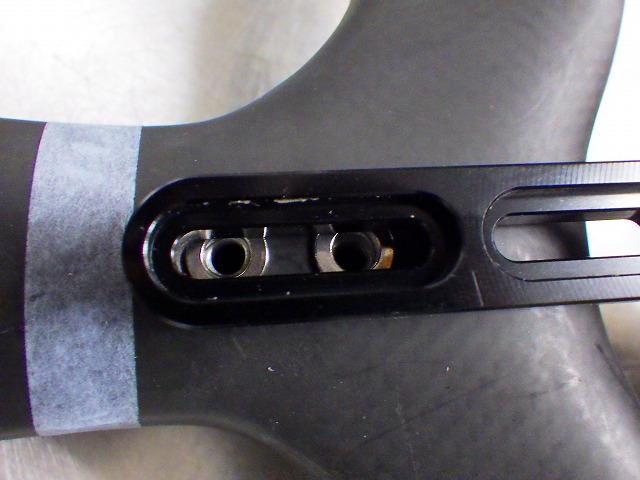
This uses the rear elongated hole like the original position while still allowing very slight front-to-back adjustment. I'll call this Position A from here on.

There's almost no adjustment range, but it's positioned to span both the front and rear elongated holes. I'll call this Position B from here on.
This uses the front elongated hole. I'll call this Position C from here on. If you want Position B or C, you'll need to cut the bracket as needed.
↑Position A

↑Position B
↑Position C

This is the back side during Position B setup, but the bracket was interfering with the stem body, so I didn't fully tighten the mounting bolt.

I'm including washers and bolts as a service. The bolt head is a cap screw, but if I used a truss head—a low-profile semi-spherical bolt—it would look cleaner. However, that would require a 3mm Allen key instead of 4mm, and I wanted to be able to tighten it securely, so I deliberately chose this bolt instead.

Done. This is Position A, same as the original.