Today it's wheels again (and so on).
A customer brought in the front wheel of a Nomulab Wheel No. 5 (custom wheel brand).
They wanted me to check the lateral runout,
and there was one spot with some pretty severe runout.
The situation was that the spoke tension was abnormally low in that area, and the only way to correct the runout was to loosen it further.
I got definitive evidence that the rim was in potato chip condition, so I'm replacing the rim.
If I write this, the customer might get identified by an acquaintance, but
apparently they hit a street tree.
The fact that other damage was limited to things like the STI lever bending inward is probably thanks to the front wheel taking the hit for everything else.
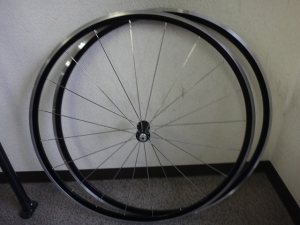
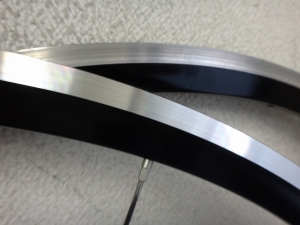
↑Before rim relocation
The brake zone isn't too dirty.
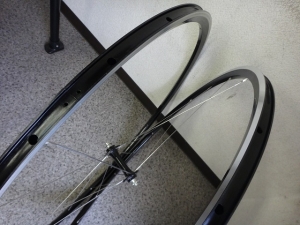
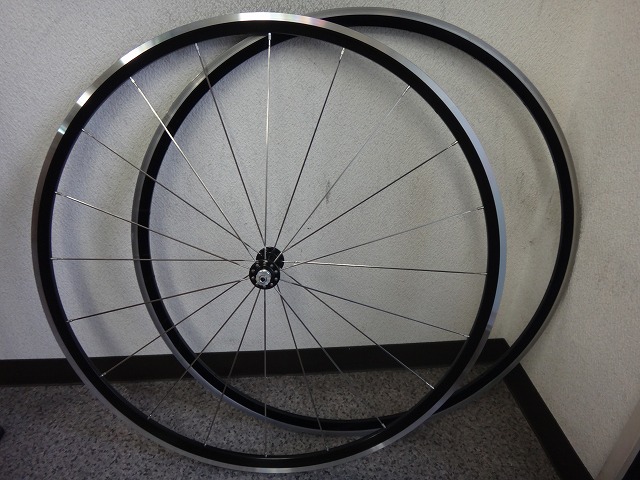
Relocating spokes to the new rim...
Built it.
I reused the nipples this time, so I didn't replace anything else besides the rim.
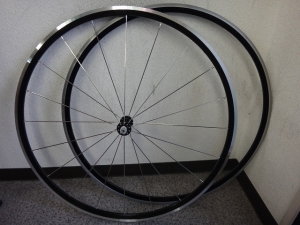
↑After rim relocation
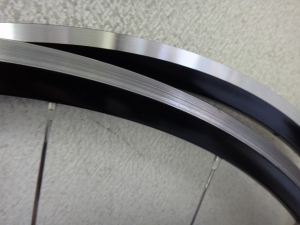
When I placed the old rim against a glass surface plate, it was quite warped.
I had the customer confirm this.

Moving on to a separate job,
I built the rear wheel for a Nomulab Wheel No. 5.
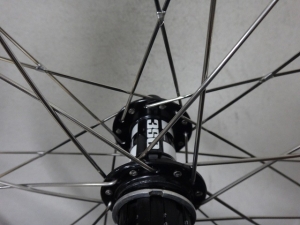
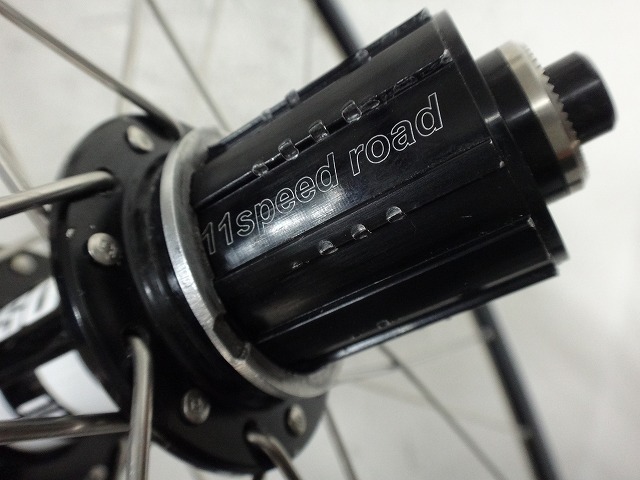
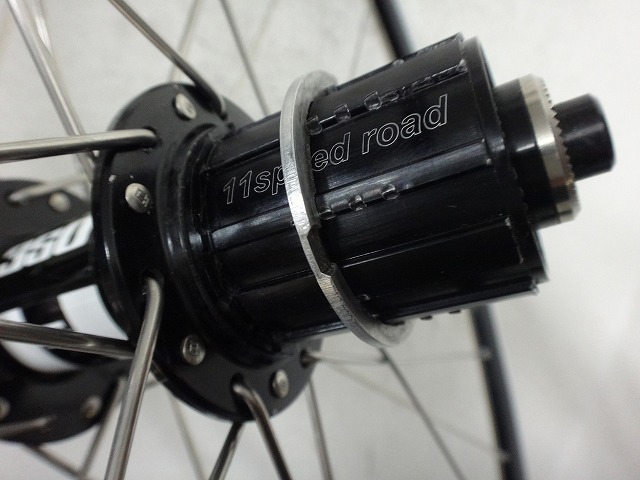
The hub is a customer-supplied DT350 28H.
I did a half-comp 4-cross lacing with spoke ties.

The 11-speed to 10-speed spacer is still on it
as the customer left it, but it looks like it's about to fall off.
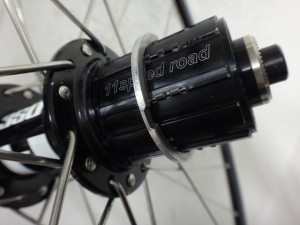
But just as I thought that, the galling marks from the sprocket on the spline prevented it from coming off any further.
If they really want to remove it, a light file would do the trick.

A customer brought in the front wheel of a Nomulab Wheel No. 5 (custom wheel brand).
They wanted me to check the lateral runout,
and there was one spot with some pretty severe runout.
The situation was that the spoke tension was abnormally low in that area, and the only way to correct the runout was to loosen it further.
I got definitive evidence that the rim was in potato chip condition, so I'm replacing the rim.
If I write this, the customer might get identified by an acquaintance, but
apparently they hit a street tree.
The fact that other damage was limited to things like the STI lever bending inward is probably thanks to the front wheel taking the hit for everything else.

↑Before rim relocation
The brake zone isn't too dirty.

Relocating spokes to the new rim...
Built it.
I reused the nipples this time, so I didn't replace anything else besides the rim.

↑After rim relocation
When I placed the old rim against a glass surface plate, it was quite warped.
I had the customer confirm this.

Moving on to a separate job,
I built the rear wheel for a Nomulab Wheel No. 5.

The hub is a customer-supplied DT350 28H.
I did a half-comp 4-cross lacing with spoke ties.
The 11-speed to 10-speed spacer is still on it
as the customer left it, but it looks like it's about to fall off.
But just as I thought that, the galling marks from the sprocket on the spline prevented it from coming off any further.
If they really want to remove it, a light file would do the trick.