I received a Racing Zero from a customer.

They want a stylish overhaul.
First, I'll start with the rear wheel for a specific reason.
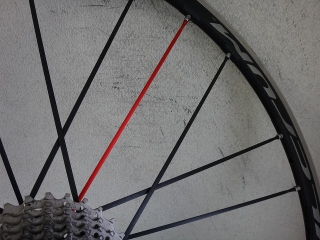

I colored one spoke red on the anti-freewheel side, one position clockwise from the valve hole.
The reason I did the rear wheel first was that three spokes on the front wheel are bent, so
if the rear left and front spokes were interchangeable (same length),
I could potentially use the removed rear left spoke to repair the front wheel
(for example, the Racing Zero Carbon I overhauled the other day
had the same length front and rear left spokes).
But in this Racing Zero's case they were different, so it didn't work out in the end.

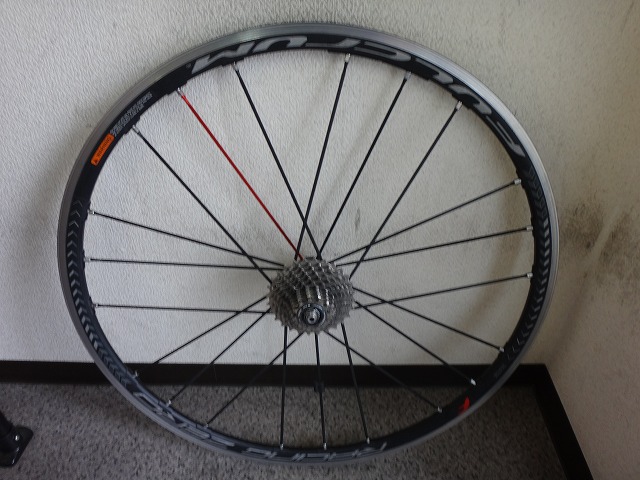
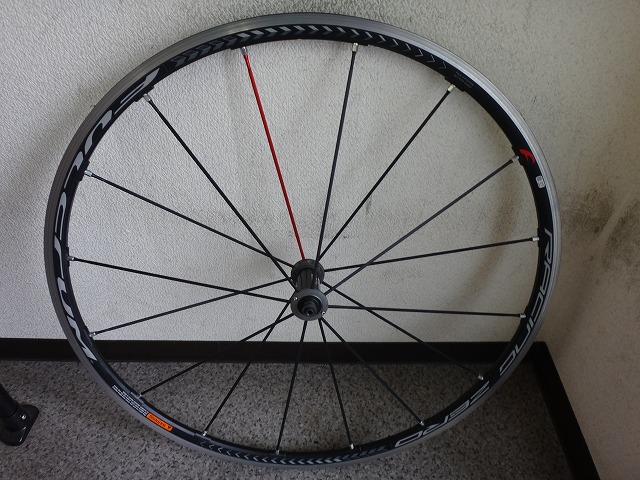
Now for the front wheel.
Beyond the spoke the customer had marked,
after careful inspection, those three were the only ones with damage.

Done.

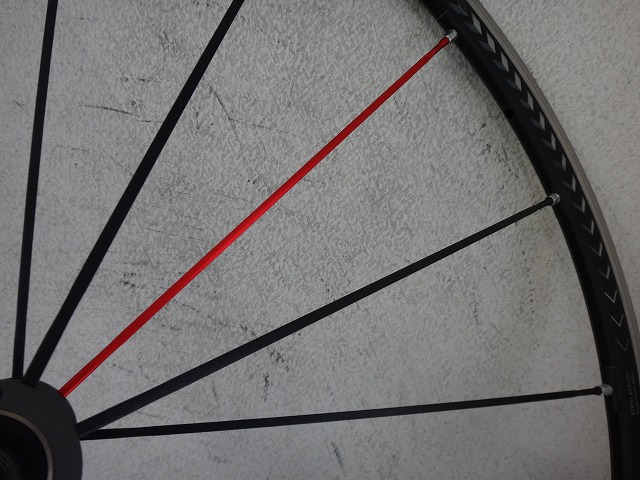
Since none of the damaged spokes were next to the valve,
I temporarily removed a good black spoke and replaced it with the red one.
So combined with the three replaced spokes, I removed a total of four spokes,
which means I'm building from a state where one-quarter of this wheel's spokes are out.
This created some radial runout and lateral wobble like during initial wheel assembly.
It took a bit longer than usual.

They want a stylish overhaul.
First, I'll start with the rear wheel for a specific reason.

I colored one spoke red on the anti-freewheel side, one position clockwise from the valve hole.
The reason I did the rear wheel first was that three spokes on the front wheel are bent, so
if the rear left and front spokes were interchangeable (same length),
I could potentially use the removed rear left spoke to repair the front wheel
(for example, the Racing Zero Carbon I overhauled the other day
had the same length front and rear left spokes).
But in this Racing Zero's case they were different, so it didn't work out in the end.

Now for the front wheel.
Beyond the spoke the customer had marked,
after careful inspection, those three were the only ones with damage.
Done.
Since none of the damaged spokes were next to the valve,
I temporarily removed a good black spoke and replaced it with the red one.
So combined with the three replaced spokes, I removed a total of four spokes,
which means I'm building from a state where one-quarter of this wheel's spokes are out.
This created some radial runout and lateral wobble like during initial wheel assembly.
It took a bit longer than usual.