The drill is screaming!
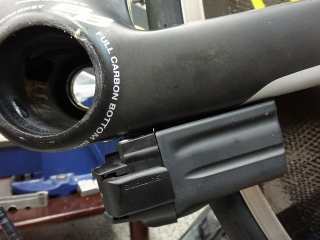
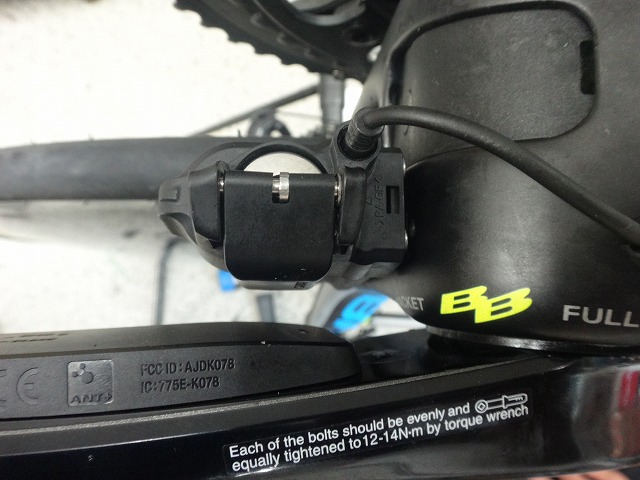
This customer's (sort of) BH TT frame has an external battery mount, but
Pioneer's left pedaling monitor was interfering with it.
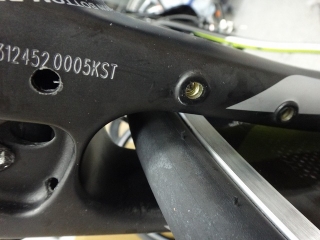
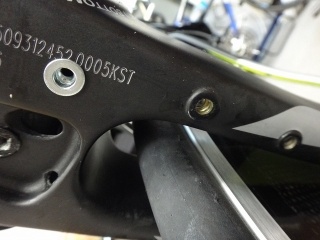
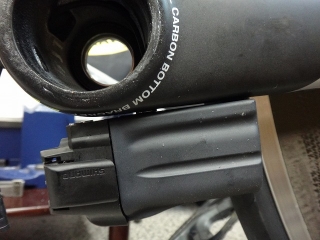
This is what it looks like from the back of the BB
(The timeline in this post is all over the place,
so in the image above, the rivet nut is already installed from the completed work)
If we flip the battery mount around, it won't interfere with the pedaling monitor. But it turns out that removing the battery (due to the direction the lever opens) requires removing the rear wheel, and the wiring doesn't look clean. Then we discovered that the closed lever interferes with the disc wheel.
It's a common situation, but they bought a pedaling monitor as a left-right set,
then moved the left crank to a different bike
to use them split between two bikes—that's not why they bought the monitor in the first place.
They're just using it for practice runs up to Noto and for the actual event,
so if it absolutely won't fit, they could return it to the other bike with the right crank attached.
But they absolutely insist on making it work somehow.
I suggested creating a new hole for the mount on the lower down tube,
around the front of the BB,
but they said they'd prefer not to do that.
So I removed the crankset, the left BB bearing,
and the BB cover (which would be a cable stop for mechanical components)
and drilled a hole at the exact spot
and installed a rivet nut.
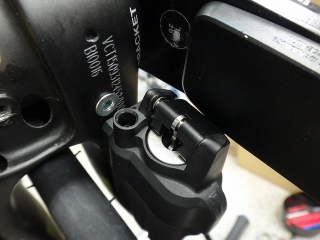
The reason the newly created third hole is positioned toward the inside is intentional.

The drill didn't go through the BB hole.
What you see in the center of the hole is the threaded hole for fastening the cover (cable stop).
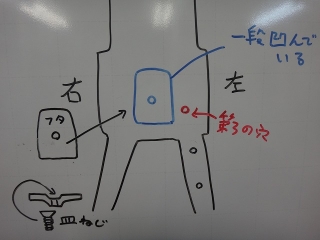
The back of the BB is recessed on the inside due to the cable stop installation for mechanical components.
When installing a cover for electronic components,
the back side of the cover protrudes so it's roughly flush with the frame.
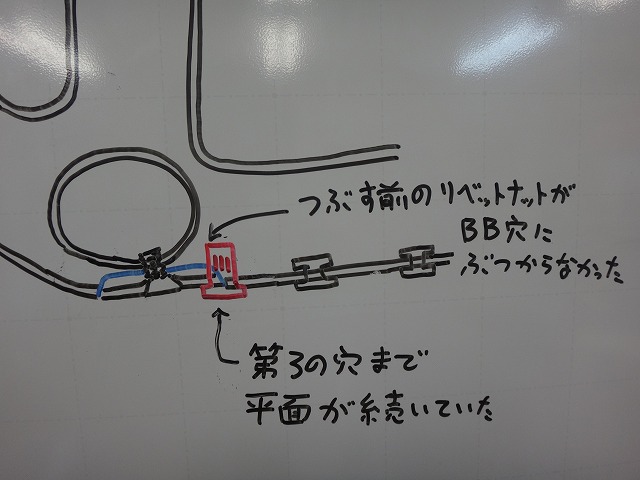
We're drilling the third hole next to the recess,
and figuring out how hollow that area is took time.
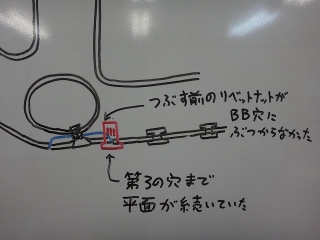
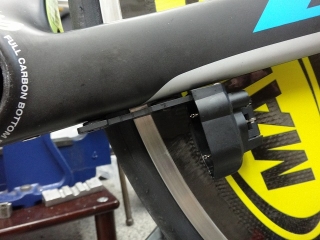
The conditions happened to work out—the rivet nut before crimping didn't hit the outside of the BB hole,
and the frame's flat surface continued all the way to the third hole—
so the drill is screaming.
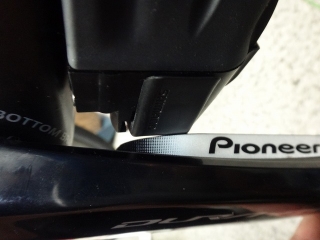
Using the third hole, I moved the battery mount forward.


No more interference.
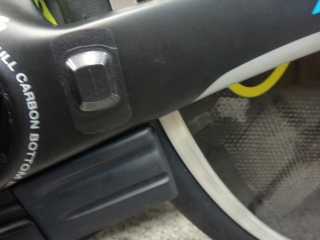
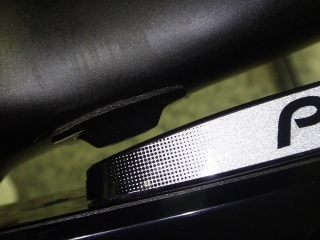
The magnet for the pedaling monitor is tight but doesn't actually interfere—
I confirmed that beforehand.
If it didn't fit here, we could attach it to the down tube or seat tube,
but it wouldn't look as clean.
By the way, this magnet is sold as a set of two,
but we sell them individually at the shop.
I think a lot of people have done this, but with this magnet,
if you press it firmly with double-sided tape and then peel it off,
it separates like a two-ply tissue—
just the surface layer peels up first, so you can't reuse it.
Be careful when positioning and temporarily attaching the magnet.

This customer's (sort of) BH TT frame has an external battery mount, but

Pioneer's left pedaling monitor was interfering with it.

This is what it looks like from the back of the BB
(The timeline in this post is all over the place,
so in the image above, the rivet nut is already installed from the completed work)

If we flip the battery mount around, it won't interfere with the pedaling monitor. But it turns out that removing the battery (due to the direction the lever opens) requires removing the rear wheel, and the wiring doesn't look clean. Then we discovered that the closed lever interferes with the disc wheel.
It's a common situation, but they bought a pedaling monitor as a left-right set,
then moved the left crank to a different bike
to use them split between two bikes—that's not why they bought the monitor in the first place.
They're just using it for practice runs up to Noto and for the actual event,
so if it absolutely won't fit, they could return it to the other bike with the right crank attached.
But they absolutely insist on making it work somehow.
I suggested creating a new hole for the mount on the lower down tube,
around the front of the BB,
but they said they'd prefer not to do that.
So I removed the crankset, the left BB bearing,
and the BB cover (which would be a cable stop for mechanical components)

and drilled a hole at the exact spot

and installed a rivet nut.
The reason the newly created third hole is positioned toward the inside is intentional.

The drill didn't go through the BB hole.
What you see in the center of the hole is the threaded hole for fastening the cover (cable stop).

The back of the BB is recessed on the inside due to the cable stop installation for mechanical components.
When installing a cover for electronic components,
the back side of the cover protrudes so it's roughly flush with the frame.
We're drilling the third hole next to the recess,
and figuring out how hollow that area is took time.
The conditions happened to work out—the rivet nut before crimping didn't hit the outside of the BB hole,
and the frame's flat surface continued all the way to the third hole—
so the drill is screaming.

Using the third hole, I moved the battery mount forward.
No more interference.


The magnet for the pedaling monitor is tight but doesn't actually interfere—
I confirmed that beforehand.
If it didn't fit here, we could attach it to the down tube or seat tube,
but it wouldn't look as clean.
By the way, this magnet is sold as a set of two,
but we sell them individually at the shop.
I think a lot of people have done this, but with this magnet,
if you press it firmly with double-sided tape and then peel it off,
it separates like a two-ply tissue—
just the surface layer peels up first, so you can't reuse it.
Be careful when positioning and temporarily attaching the magnet.