Another day, another wheel (and so on...).

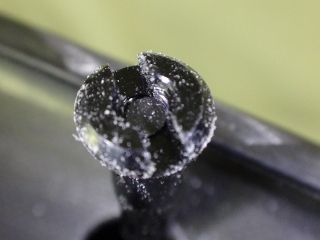
A customer brought in a rear wheel built with a carbon WO rim that has an outermost cosmetic carbon finish looking pretty Colnago-ish.
Apparently it's a Meccanico rim.
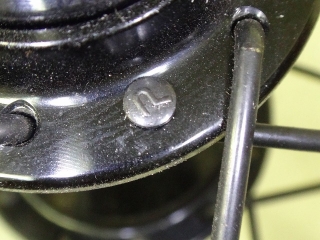
24H hub, 4-cross lacing, built with Pillar square aero spokes.

The non-drive side is loose, apparently.
Honestly, compared to genuinely sloppy hand-built wheels and other knock-offs, this isn't abnormally loose.
According to the customer, it's looser than a rear wheel I built previously—which was actually a rebuild of someone else's hand assembly.
I see... *Foffofofofo (V)0¥0(V)* ← Baltanians
I've been taking notes during this rebuild with a black Campy Record nipple, and these Pillar square aero spokes can serve as the complement to CX-RAY's asymmetric left-right diameter lacing.
So I figured: why not rebuild just the non-drive side, swapping from Pillar's 4-cross to CX-RAY's 6-cross?
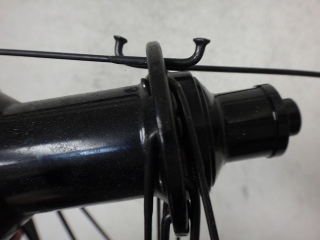
Separately today, I've been truing a rear wheel built 24H, 4-0 lacing with a red Meccanico hub, black CX-RAY, and red nipples.
Looseness in the nipples on the non-drive side radial lacing was the main culprit behind the lateral runout. Radial lacing loosens more easily than tangential.
Anyway, there was some centering drift from years of use—the side that shouldn't shift. When I checked the nipple tightening margin to correct it, I found the spoke length was flush with the nipple slot.
By my standards that's short, but it's not a deal-breaker. I see this same length on some complete wheels too.
Viewing from the drive side, starting at the valve hole and going counterclockwise, I carefully took the wheel apart spoke by spoke, leaving the final four spokes with nipples completely untouched.
I can see the nipple threads inside the rim with my eyes, but photographing them is tricky.

I'll pull a spoke from the rim on the left of this bundle to photograph the thread condition.

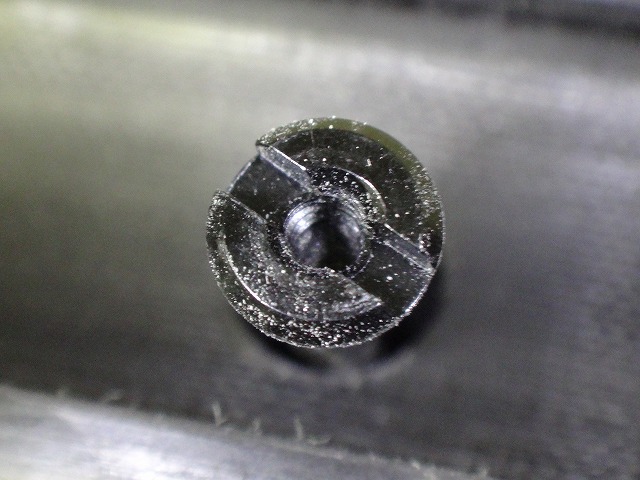
↑Non-drive side

↑Drive side

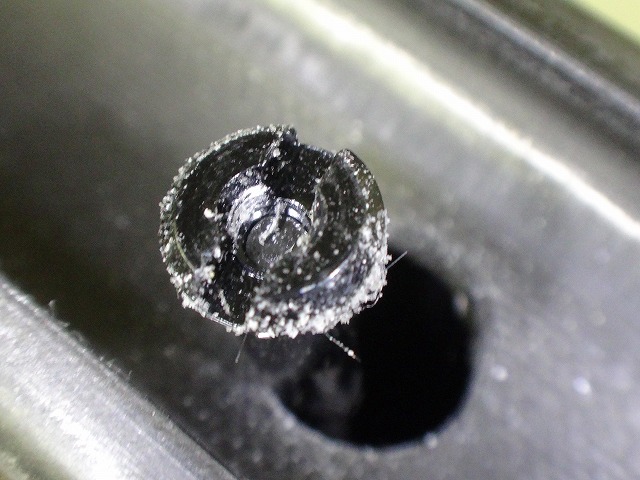
↑Non-drive side
↑Drive side
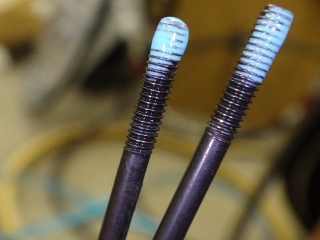
The drive side is roughly flush with the slot, but the non-drive side is clearly short.
With a hub having equal-diameter flanges and equal-spoke-count lacing on both sides, there's typically about a 2mm difference in spoke length left-to-right.
So when only the non-drive side is short, you can often say with near certainty: "They just used the same spoke length on both sides and cut corners."
But this rear hub has pretty pronounced high-low flanges, so the non-drive spokes should actually be longer. So no corner-cutting here.
They simply miscalculated.
What occurred to me was:
"I could cut the non-drive spokes and use them on the drive side, rebuilding to nipple-end flush length."
But that would mean using up these Pillar spokes—which I can't source again.
The drive side, even in its original state, already reaches the slot, and the tension was slightly below my comfort zone, so if I rebuild, the threads won't reach the nipple end, but will advance further than before.
Considering both cleanliness and practicality as part of performance, weighing major and minor factors together, I decided the best approach was:
"Keep the drive side spokes as-is, and return the non-drive spokes to the customer as spare parts for future repairs."
So I removed only the non-drive side spokes.
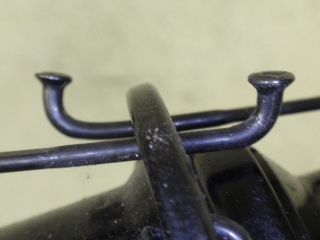
↑Left is inpoke neck, right is outpoke neck.

I cleaned the hub without removing any of the drive-side spokes.
You can apply threadlocker even when spokes aren't removed individually.

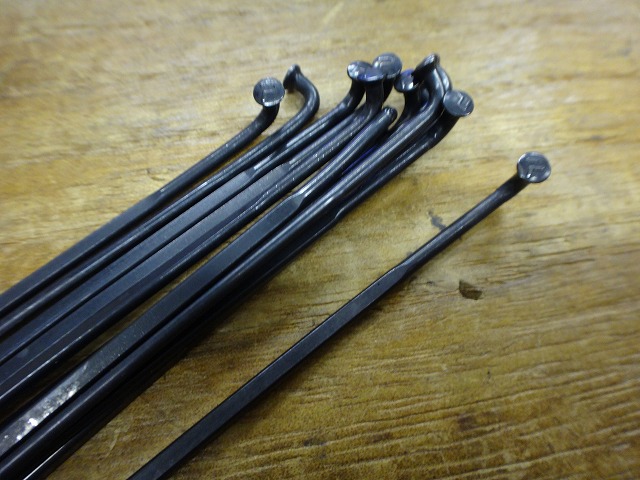
I also cleaned the 12 spokes from the original non-drive side.
Without even trying to separate them into groups of six...
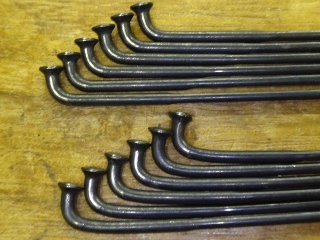
...distinguishing the original inpokes from outpokes is easy.
The bundle on top in the image is the outpokes.
Even for spares, you'd want to match this detail if possible.

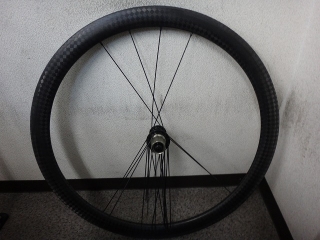
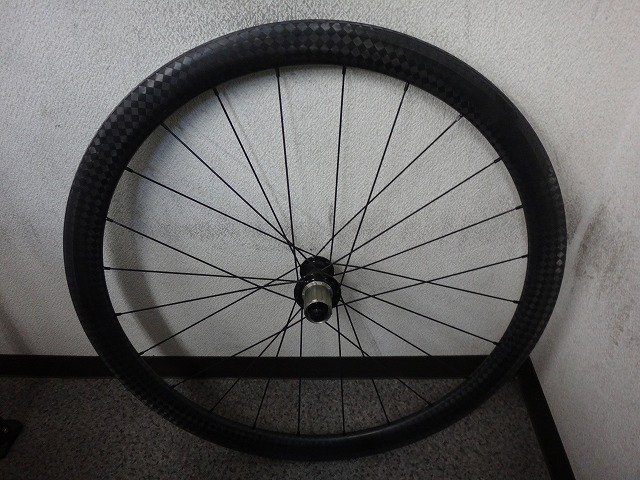
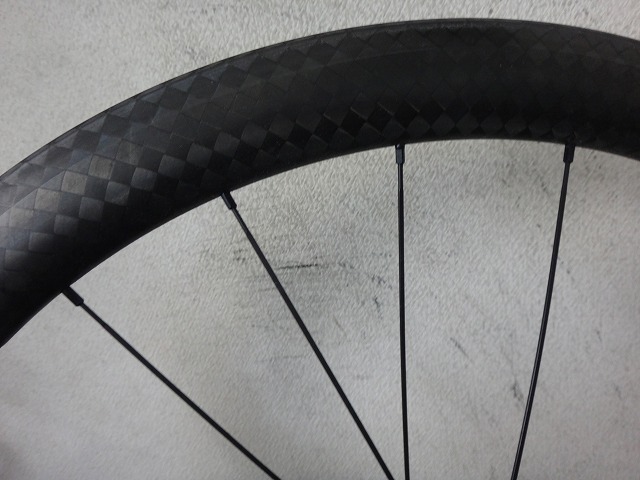
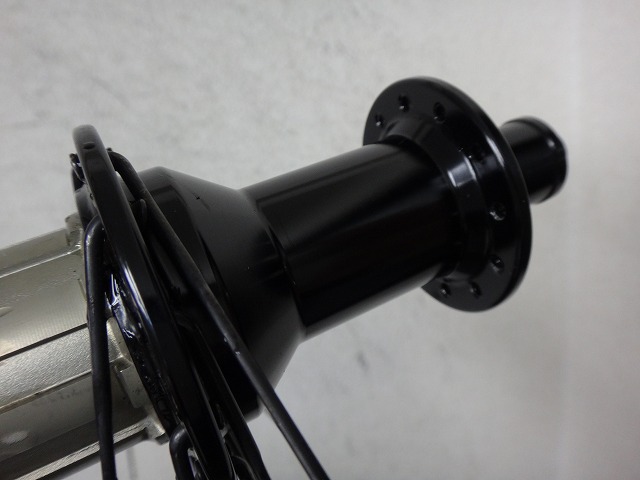
Built.

24H hub, black Pillar square aero / black CX-RAY 4-6 laced with bracing.
I didn't calculate the non-drive spoke length from the rim ID and hub dimensions. Instead, I drew on experience—like knowing that the length difference between radial and 4-cross on a 24H front is roughly 10mm, assuming the hub isn't extreme.
In this case, I took the length difference between 4-cross and 6-cross, plus the correction value for extending the clearly-short spoke from the slot to the end face, and added that to the original length. Result: drive side is now between slot and end face; non-drive side is between end face and flush.
I could've skipped the photo-documentation steps, loosened the drive side evenly until about three threads showed, applied threadlocker, and carefully removed only the non-drive spokes—that'd be faster.
But then this would become a rim-swap job, and I couldn't frame it as "Another day, another wheel..."
So I did a complete teardown.
(I didn't remove the drive-side spokes from the hub itself, but detaching the hub-rim connection is fine.)
One more thing: I didn't like the 14mm black aluminum nipples that were originally used, so I switched to DT's 12mm black aluminum nipples. But swapping those one at a time clockwise would also make this a rim-swap job, so I went with the full teardown approach.
A customer brought in a rear wheel built with a carbon WO rim that has an outermost cosmetic carbon finish looking pretty Colnago-ish.
Apparently it's a Meccanico rim.

24H hub, 4-cross lacing, built with Pillar square aero spokes.

The non-drive side is loose, apparently.
Honestly, compared to genuinely sloppy hand-built wheels and other knock-offs, this isn't abnormally loose.
According to the customer, it's looser than a rear wheel I built previously—which was actually a rebuild of someone else's hand assembly.
I see... *Foffofofofo (V)0¥0(V)* ← Baltanians
I've been taking notes during this rebuild with a black Campy Record nipple, and these Pillar square aero spokes can serve as the complement to CX-RAY's asymmetric left-right diameter lacing.
So I figured: why not rebuild just the non-drive side, swapping from Pillar's 4-cross to CX-RAY's 6-cross?
Separately today, I've been truing a rear wheel built 24H, 4-0 lacing with a red Meccanico hub, black CX-RAY, and red nipples.
Looseness in the nipples on the non-drive side radial lacing was the main culprit behind the lateral runout. Radial lacing loosens more easily than tangential.
Anyway, there was some centering drift from years of use—the side that shouldn't shift. When I checked the nipple tightening margin to correct it, I found the spoke length was flush with the nipple slot.
By my standards that's short, but it's not a deal-breaker. I see this same length on some complete wheels too.

Viewing from the drive side, starting at the valve hole and going counterclockwise, I carefully took the wheel apart spoke by spoke, leaving the final four spokes with nipples completely untouched.
I can see the nipple threads inside the rim with my eyes, but photographing them is tricky.
I'll pull a spoke from the rim on the left of this bundle to photograph the thread condition.
↑Non-drive side

↑Drive side
↑Non-drive side

↑Drive side
The drive side is roughly flush with the slot, but the non-drive side is clearly short.
With a hub having equal-diameter flanges and equal-spoke-count lacing on both sides, there's typically about a 2mm difference in spoke length left-to-right.
So when only the non-drive side is short, you can often say with near certainty: "They just used the same spoke length on both sides and cut corners."
But this rear hub has pretty pronounced high-low flanges, so the non-drive spokes should actually be longer. So no corner-cutting here.
They simply miscalculated.
What occurred to me was:
"I could cut the non-drive spokes and use them on the drive side, rebuilding to nipple-end flush length."
But that would mean using up these Pillar spokes—which I can't source again.
The drive side, even in its original state, already reaches the slot, and the tension was slightly below my comfort zone, so if I rebuild, the threads won't reach the nipple end, but will advance further than before.
Considering both cleanliness and practicality as part of performance, weighing major and minor factors together, I decided the best approach was:
"Keep the drive side spokes as-is, and return the non-drive spokes to the customer as spare parts for future repairs."

So I removed only the non-drive side spokes.

↑Left is inpoke neck, right is outpoke neck.
I cleaned the hub without removing any of the drive-side spokes.

You can apply threadlocker even when spokes aren't removed individually.
I also cleaned the 12 spokes from the original non-drive side.
Without even trying to separate them into groups of six...
...distinguishing the original inpokes from outpokes is easy.
The bundle on top in the image is the outpokes.
Even for spares, you'd want to match this detail if possible.
Built.

24H hub, black Pillar square aero / black CX-RAY 4-6 laced with bracing.
I didn't calculate the non-drive spoke length from the rim ID and hub dimensions. Instead, I drew on experience—like knowing that the length difference between radial and 4-cross on a 24H front is roughly 10mm, assuming the hub isn't extreme.
In this case, I took the length difference between 4-cross and 6-cross, plus the correction value for extending the clearly-short spoke from the slot to the end face, and added that to the original length. Result: drive side is now between slot and end face; non-drive side is between end face and flush.
I could've skipped the photo-documentation steps, loosened the drive side evenly until about three threads showed, applied threadlocker, and carefully removed only the non-drive spokes—that'd be faster.
But then this would become a rim-swap job, and I couldn't frame it as "Another day, another wheel..."
So I did a complete teardown.
(I didn't remove the drive-side spokes from the hub itself, but detaching the hub-rim connection is fine.)
One more thing: I didn't like the 14mm black aluminum nipples that were originally used, so I switched to DT's 12mm black aluminum nipples. But swapping those one at a time clockwise would also make this a rim-swap job, so I went with the full teardown approach.