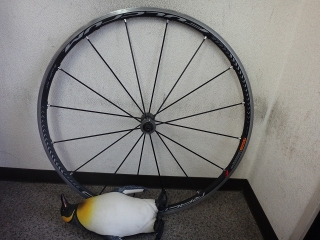
A customer brought in the front wheel of a Racing Zero for service.
The reason for my concern is that
there's a team name sticker stuck on the rim.
The rim's bead hook has several dents in it,
and while the wheel truing (done elsewhere) did a pretty good job of covering it up,
the customer wanted to replace the rim, so I took it in for service.
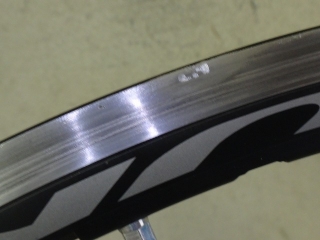
The rim is dented, and there are several spots where the brake shoes aren't making contact.
Looking from above, it's like this.
It's pretty dented all the way around,
but honestly, I'm impressed they managed to true it well enough to keep it usable at all.

I replaced the rim.
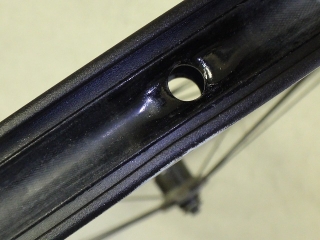
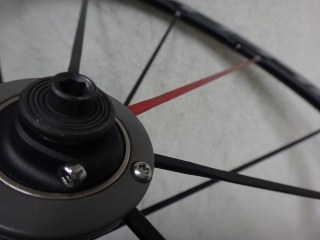
Since this is a 2WAY-FIT rim,
as I mentioned yesterday, the valve hole position isn't centered between rim holes—
instead it lines up with the unskimmed section of the rim and one nearby rim hole.
So, in case the bike gets stolen for parts,
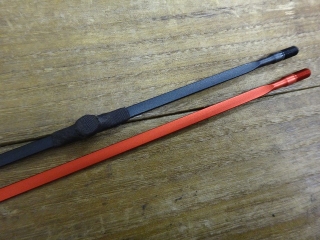
I positioned the red spoke nearest to the valve hole on the left side.
It's a "theft-deterrent configuration."
...Now that I'm writing this, I realized
the customer actually did want that theft-deterrent setup. Oops, my bad.
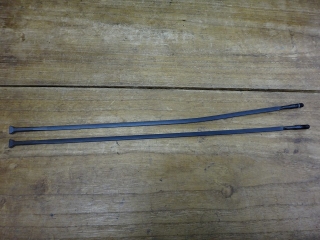
I replaced two spokes.
One is clearly bent, but

the other one was twisted.
Since there's the theft-deterrent conversion and rear wheel inspection to do,
I'll write more about that later.
Continued:
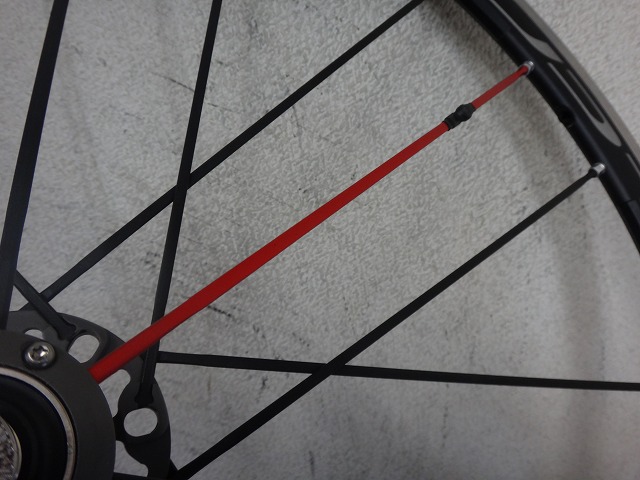
The front wheel theft-deterrent conversion is complete.

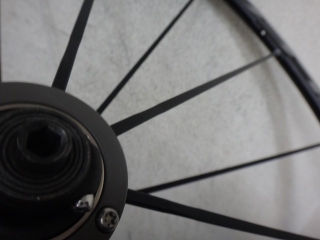
Next up is the rear wheel. The image above is from after the work.
I forgot to take a before photo, so I couldn't use one.
I need to inspect and do the theft-deterrent conversion, but
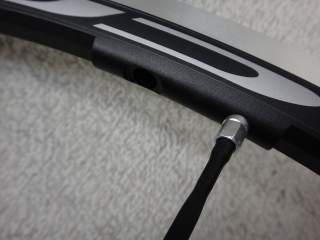
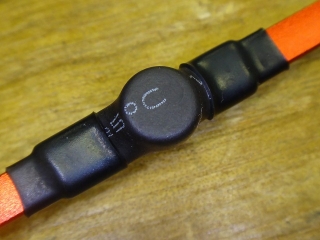
I've taped a wheel magnet to the black spoke nearest the valve hole.
The Racing Zero rim has reinforcement that doubles as a weight at the rim seam,
and it's so heavy that even with the valve positioned opposite to it, balance is poor.
So positioning a magnet weight near the valve hole is probably the right approach.
I'll figure out how to deal with this later.
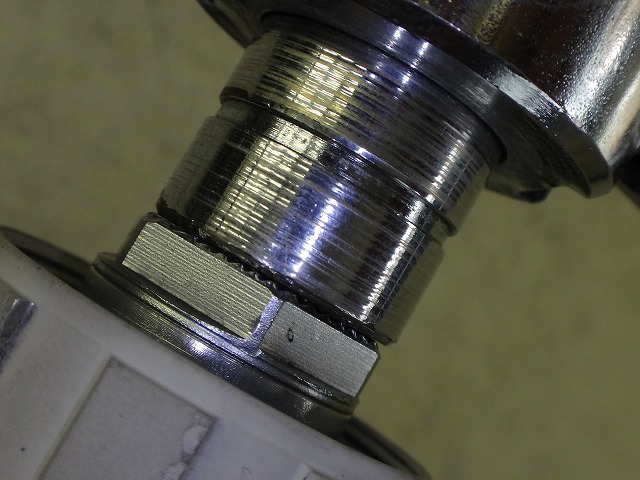
First, I'll work on the hub.
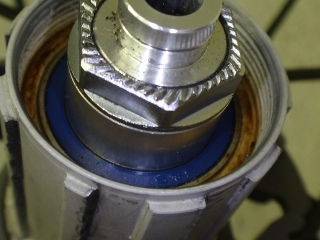
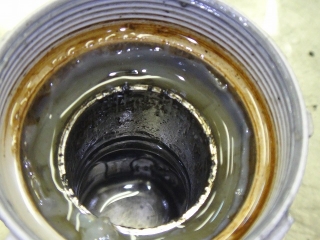
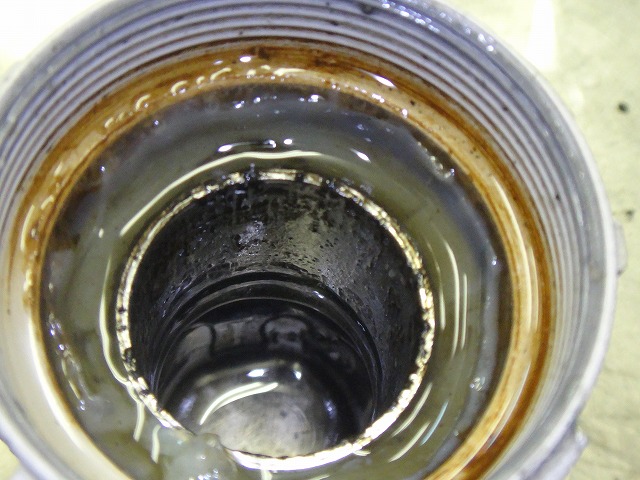
There's surface rust seeping out, which is a bad sign...
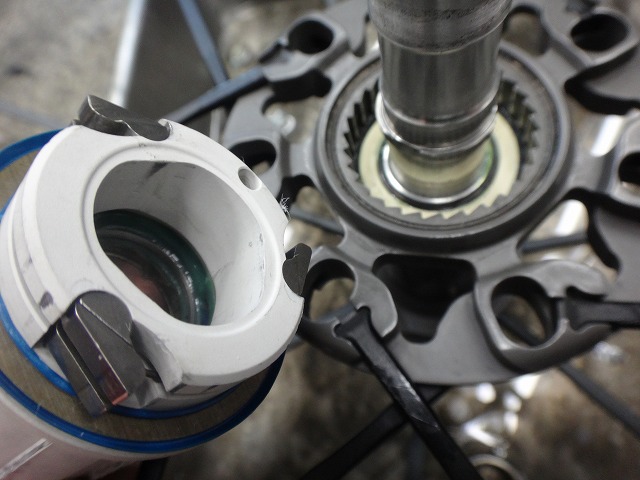
I pulled the hub axle and tapped out the freewheel body.

I wiped down the hub axle.
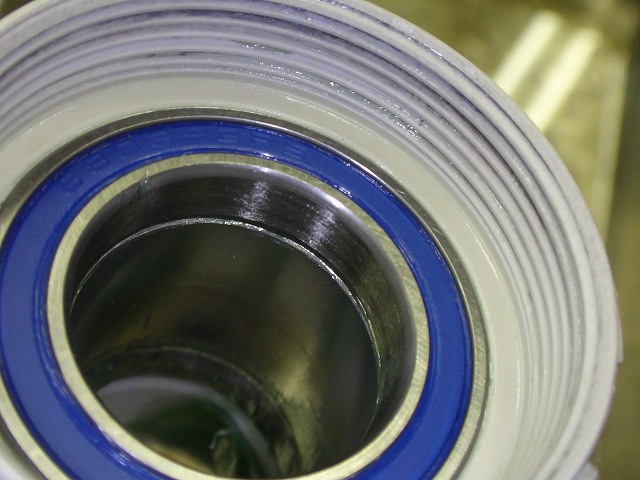
There are scuff marks from the bearing rust on the outer bearing of the freewheel body,
and the corrosion seizing was so bad I couldn't pull the freewheel body out by hand.
I removed as much rust as I could.
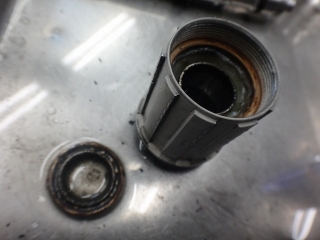
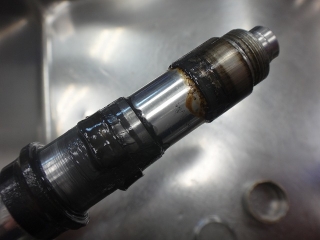
When I removed the freewheel body, the bearing came out with it.

↑ Original bearing
The outer race isn't too bad, but the inner race is rusted.

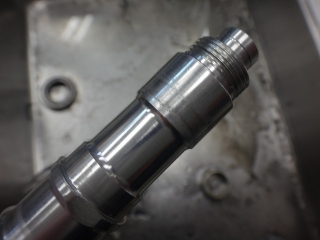
↑ New bearing

I cleaned the inside of the freewheel body, added grease, and replaced the outer bearing.
The inner bearing showed no signs of damage, so I didn't replace it.

In the end, it became a full hub overhaul.
The rim is slightly off-center toward the freewheel side, but since I didn't check the preliminary center,
I can't tell if some of that offset came from the hub overhaul.

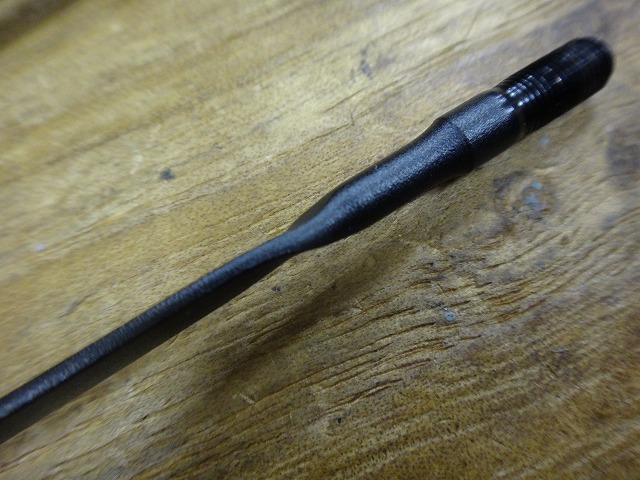
I removed the black spoke near the valve hole.
It shows no deformation, so it can be kept as a spare spoke.
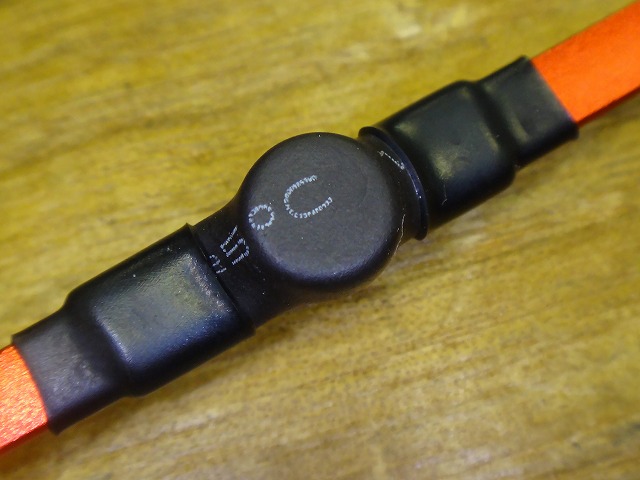
I measured the distance from the end of the spoke to the magnet...

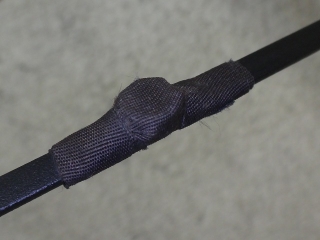
...and moved the magnet.
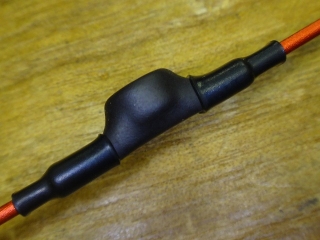
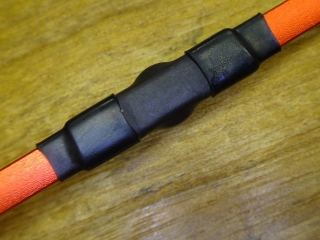
I finished it with heat-shrink tubing.

The theft-deterrent conversion is complete, and


the centering is spot-on.
There's practically no runout.
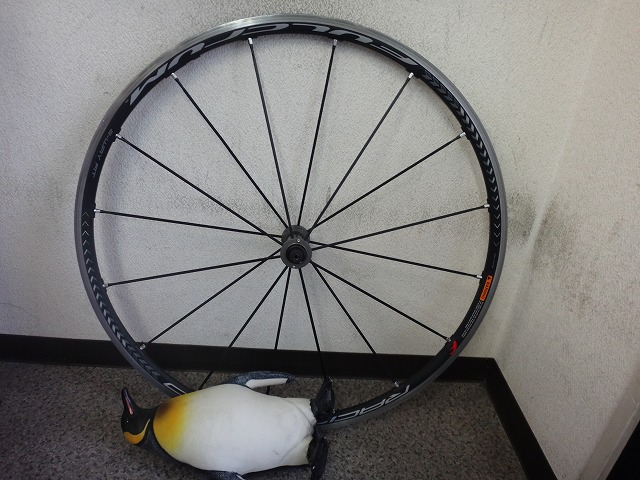
The reason for my concern is that
there's a team name sticker stuck on the rim.
The rim's bead hook has several dents in it,
and while the wheel truing (done elsewhere) did a pretty good job of covering it up,
the customer wanted to replace the rim, so I took it in for service.
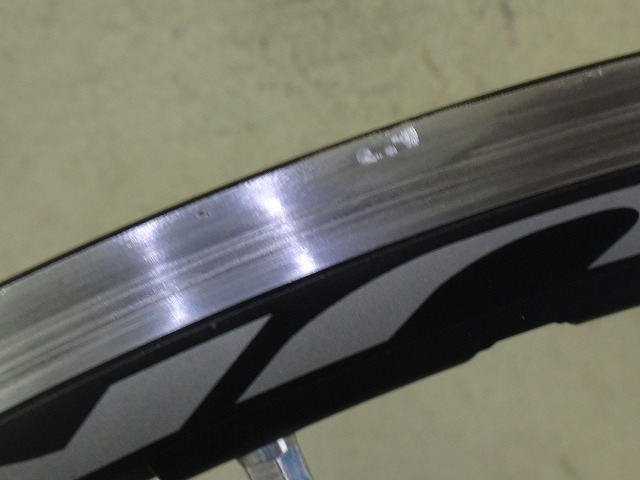
The rim is dented, and there are several spots where the brake shoes aren't making contact.
Looking from above, it's like this.
It's pretty dented all the way around,
but honestly, I'm impressed they managed to true it well enough to keep it usable at all.
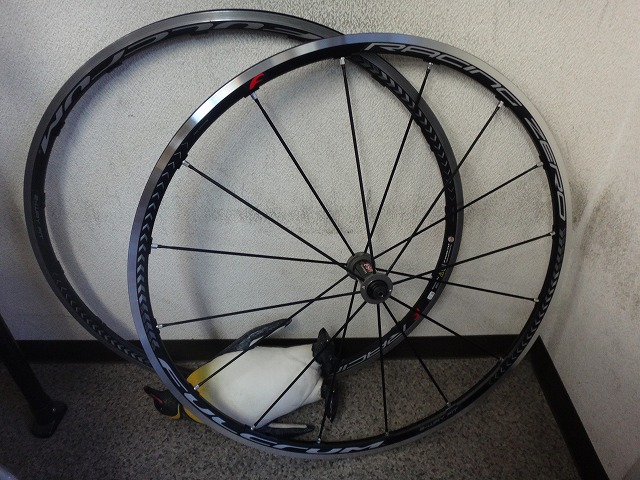
I replaced the rim.

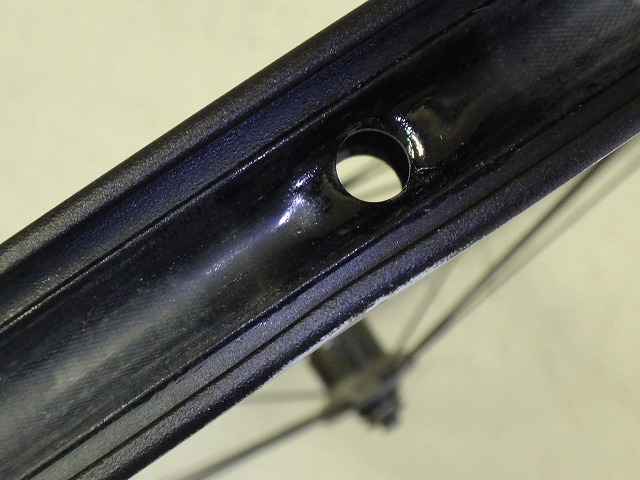
Since this is a 2WAY-FIT rim,
as I mentioned yesterday, the valve hole position isn't centered between rim holes—
instead it lines up with the unskimmed section of the rim and one nearby rim hole.

So, in case the bike gets stolen for parts,
I positioned the red spoke nearest to the valve hole on the left side.
It's a "theft-deterrent configuration."
...Now that I'm writing this, I realized
the customer actually did want that theft-deterrent setup. Oops, my bad.

I replaced two spokes.
One is clearly bent, but
the other one was twisted.
Since there's the theft-deterrent conversion and rear wheel inspection to do,
I'll write more about that later.
Continued:

The front wheel theft-deterrent conversion is complete.

Next up is the rear wheel. The image above is from after the work.
I forgot to take a before photo, so I couldn't use one.
I need to inspect and do the theft-deterrent conversion, but


I've taped a wheel magnet to the black spoke nearest the valve hole.
The Racing Zero rim has reinforcement that doubles as a weight at the rim seam,
and it's so heavy that even with the valve positioned opposite to it, balance is poor.
So positioning a magnet weight near the valve hole is probably the right approach.
I'll figure out how to deal with this later.

First, I'll work on the hub.
There's surface rust seeping out, which is a bad sign...

I pulled the hub axle and tapped out the freewheel body.
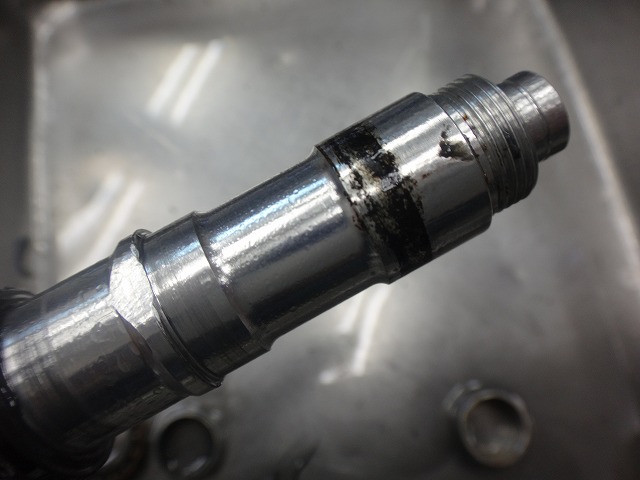
I wiped down the hub axle.
There are scuff marks from the bearing rust on the outer bearing of the freewheel body,
and the corrosion seizing was so bad I couldn't pull the freewheel body out by hand.

I removed as much rust as I could.

When I removed the freewheel body, the bearing came out with it.
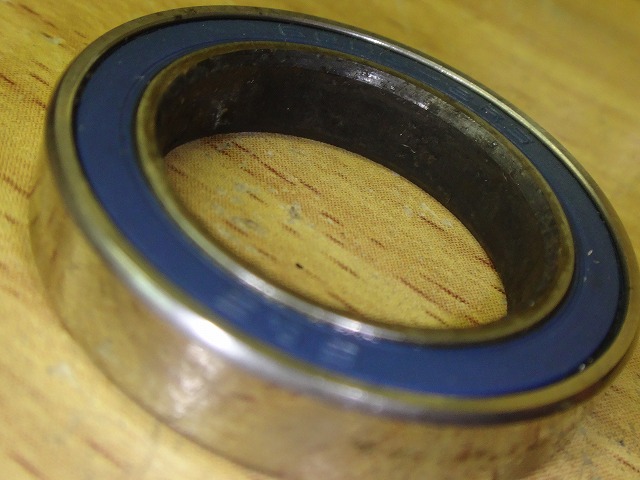
↑ Original bearing
The outer race isn't too bad, but the inner race is rusted.
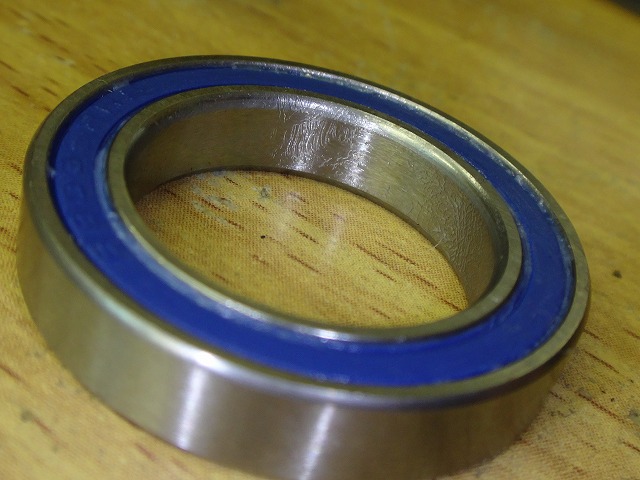
↑ New bearing
I cleaned the inside of the freewheel body, added grease, and replaced the outer bearing.
The inner bearing showed no signs of damage, so I didn't replace it.
In the end, it became a full hub overhaul.


The rim is slightly off-center toward the freewheel side, but since I didn't check the preliminary center,
I can't tell if some of that offset came from the hub overhaul.
I removed the black spoke near the valve hole.
It shows no deformation, so it can be kept as a spare spoke.

I measured the distance from the end of the spoke to the magnet...
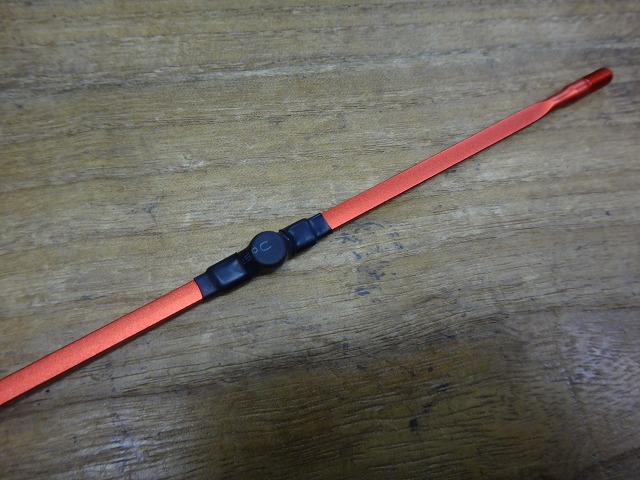
...and moved the magnet.
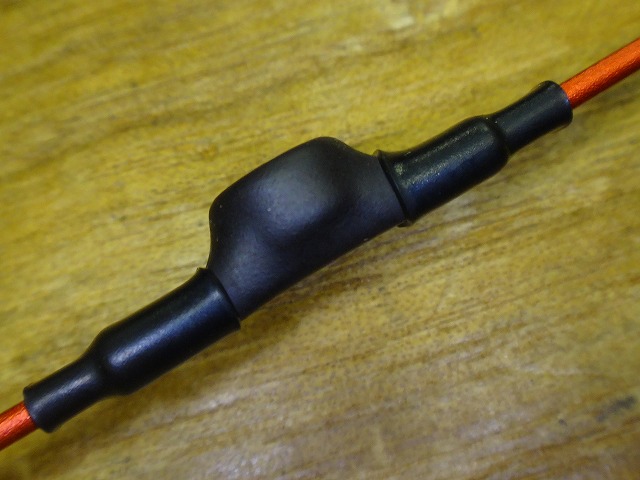

I finished it with heat-shrink tubing.
The theft-deterrent conversion is complete, and

the centering is spot-on.
There's practically no runout.