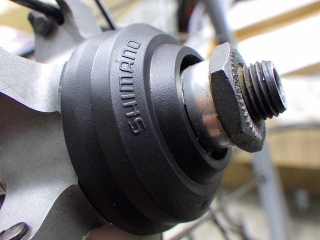
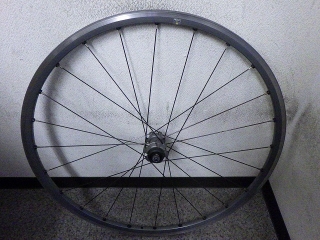
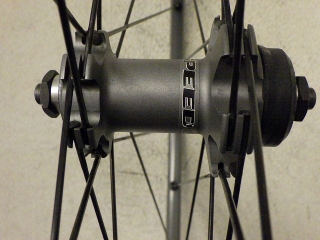
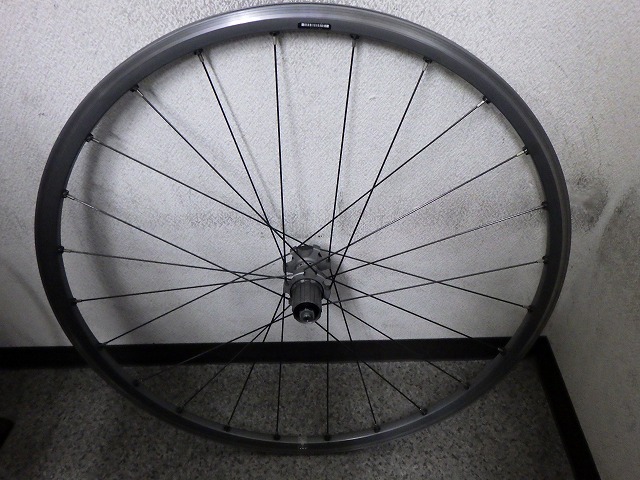
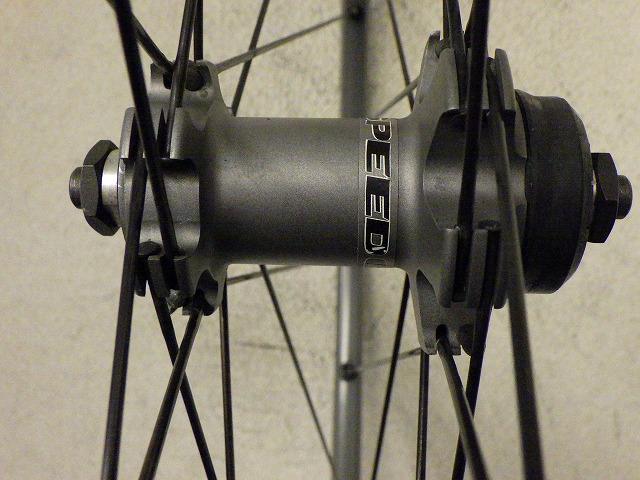
I received the front and rear wheels of a Mavic Speedcity CL from a customer.
CL refers to the centerlock rotor mount specification.

Both the hub and rim have gray anodizing throughout,
but the rim sidewalls are compatible with rim brakes.
The hub is a quick-release type with 100mm front width and 135mm rear width, and...
for more details, please see (→here).
This was an era after disc brakes became widespread
but before thru-axles became standard on MTBs.
The idea was that you could enjoy "one bike, two wheelsets" by
swapping wheels between 700C road tire wheels for
commuting and asphalt riding, and
26-inch HE rim MTB tire wheels for weekend trail rides.
This was a proposal from the manufacturer side (※), and this wheel was released as part of that initiative.
There are examples of flat-bar gravel bikes that had their disc mounts sealed
and continued to be used with rim brake wheels,
but with this wheel, the original owner used it that way,
and the current owner wanted to use it with disc brakes,
so they brought it in for inspection beforehand.
※Since this was a proposal from the manufacturer (Mavic) side,
wheels with the same purpose (100/135mm quick-release,
700C rim/disc brake compatible) from other makers
didn't come out in such abundance,
and it never really became a boom phenomenon.
By the way, the aggressive push of gravel bikes
is nowhere near comparable to this Speedcity,
but it doesn't seem to catch on easily.
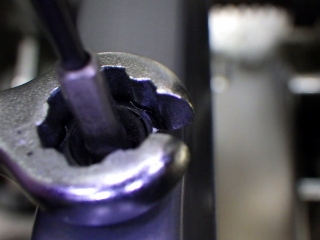
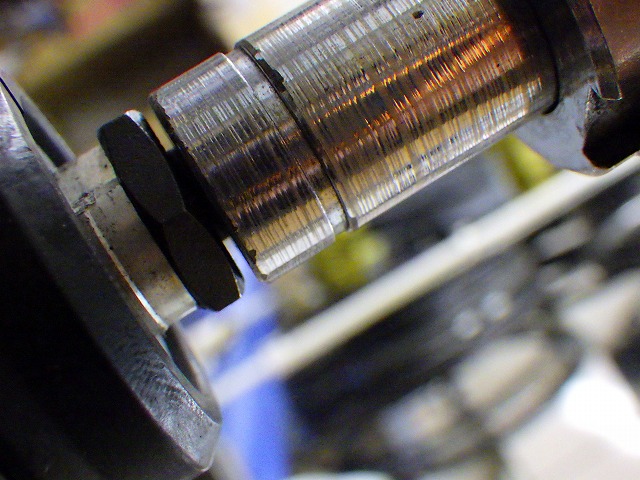
First, the rear wheel.
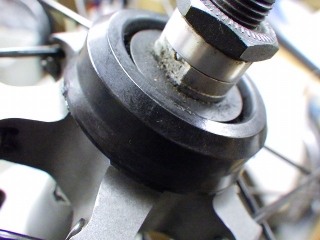
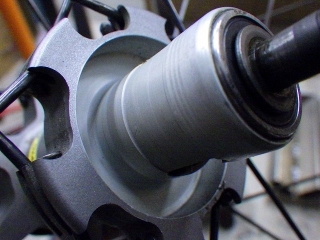
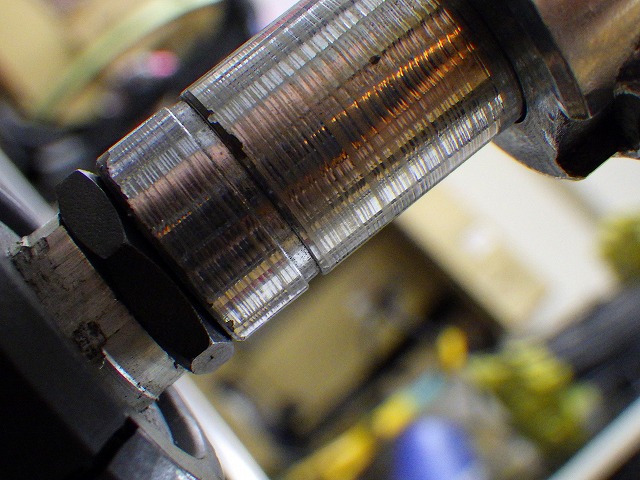
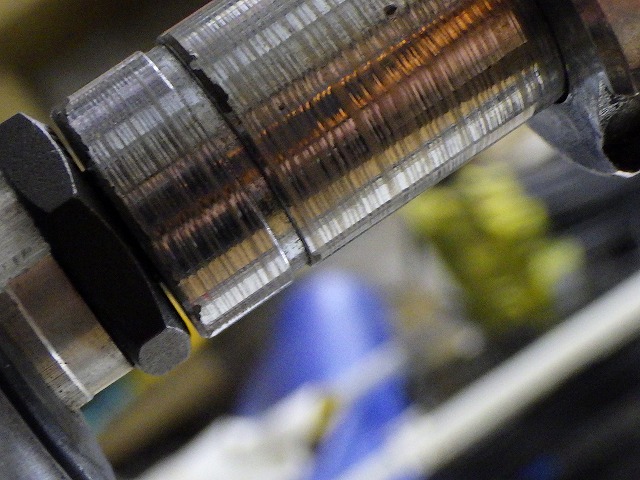
I removed the rubber cover that was on the centerlock rotor mount.
Removed it.
There's some sand in the splines,
but there are no signs of use with a disc rotor installed.
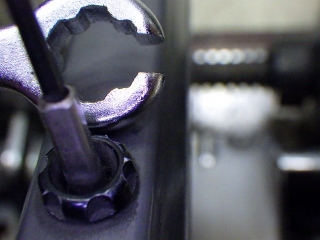
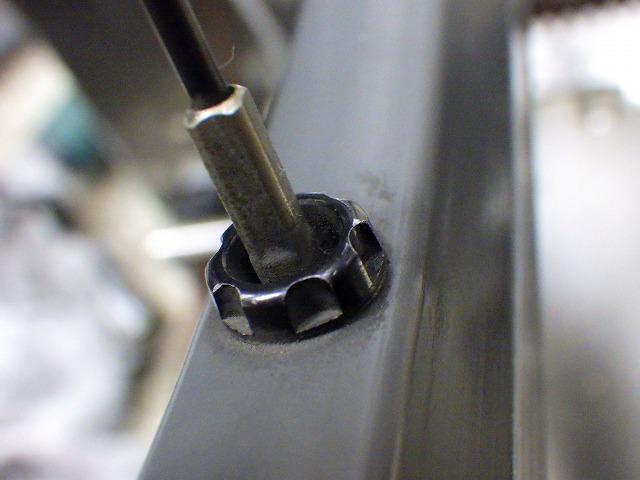
Not directly related to this inspection, but
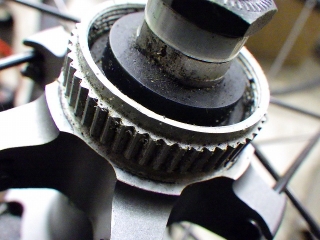
I checked whether a Shimano centerlock cover would fit over this.
There's no interference with the hub axle or the dropout,
and it installs without problems.
This cover used to come as standard with centerlock hubs
back when disc brakes were still being distributed
but V-brakes were still reasonably common,
but these days, even if you buy a quick-release MTB hub
with a centerlock mount, it doesn't come with one.
So I tried to source a replacement part,
but even when I searched using the spare parts numbers
from when it used to come standard,
nothing came up.
Currently, it can be ordered under the name of a spare part for the WH-M505 wheel
with part number Y25Y06000.
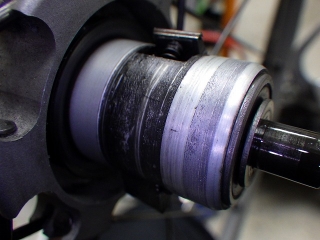
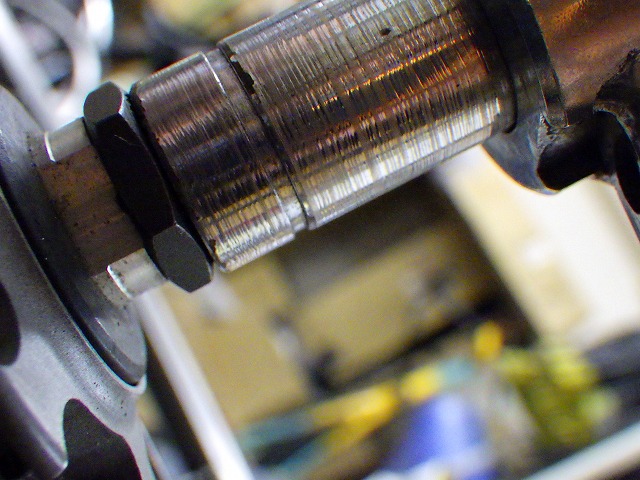
When I removed the freebody,
the oil inside had drained completely and it was bone dry.
In my post from two days ago about the Ksyrium,
I wrote about how the corrugated rubber seal that's always rubbing deep inside
the FTS-L freebody had been removed.
That hub had no seal, so either because of that
or because the freebody had some slight eccentricity wobble
with the hub's right endcap as the apex of a cone,
the wear marks from rotation were inside the two pawls.
But with this hub, because the sand-grain-like contamination inside the freebody
seems to be the main culprit,
the wear marks from rotation are outside the two pawls.

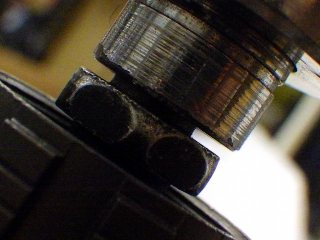
↑What you see deep inside is the rubber seal
that's being kept under light pressure
to keep the oil inside the freebody sealed.
I removed the parts and cleaned them.

I filled the freebody with specialized oil,
reassembled the hub, and checked the preliminary center.
It's hard to tell whether it's just from age
or if there's a history of spoke-tensioning attempts,
but spoke tension had sagged quite a bit on both sides.
(Mavic rear wheels tend to drift left with high probability,
but this one drifted hard to the right.)
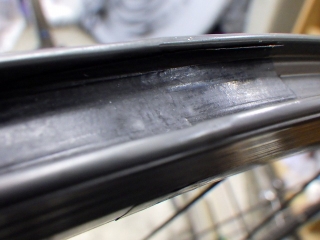
The rim sidewalls on both wheels had worn just enough
to round off slightly in the brake zone,
but not to the point of needing rim replacement,
and the current owner plans to use it with disc brakes anyway,
so there's no problem.


I didn't just true out the center.
I tightened all the nipples on both sides considerably.
Next, the front wheel.
This centerlock cover was quite cracked
and on the verge of falling apart, so
I tested whether the Shimano cover would fit on the rear wheel instead.
Due to work logistics, I ended up removing it temporarily anyway.
As I write in the linked article,
this wheel has high-low flanges large enough to offset
the offset from the disc mount,
and even just grabbing the spokes on both sides after work
without looking at the wheel, you can't tell
left from right because the deformation amounts of the spokes
on the equal-diameter sides are so similar.
This doesn't seem coincidental—it looks like they're aiming for this deliberately, which impressed me.
←←← push this way
push this way →→→
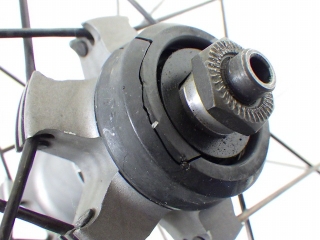
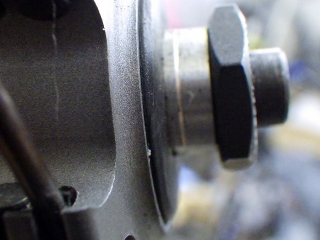
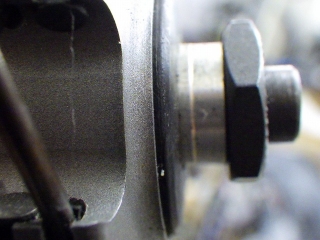
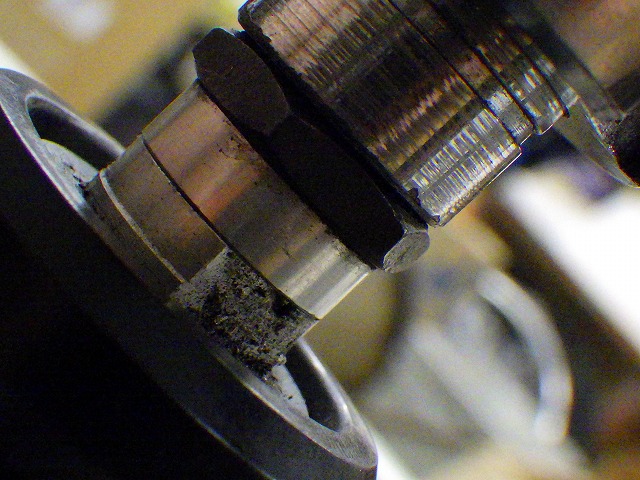
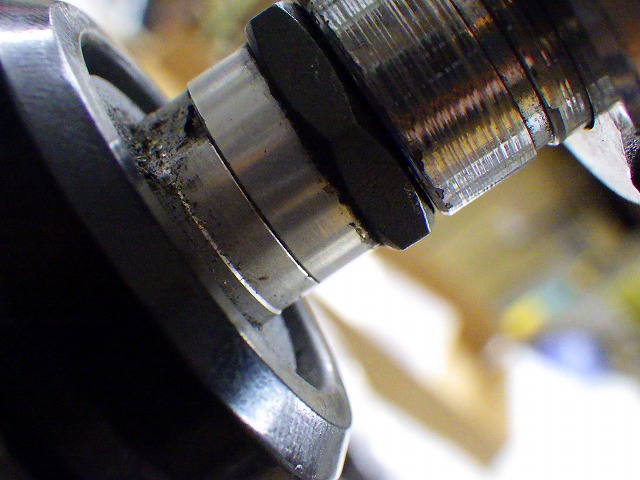
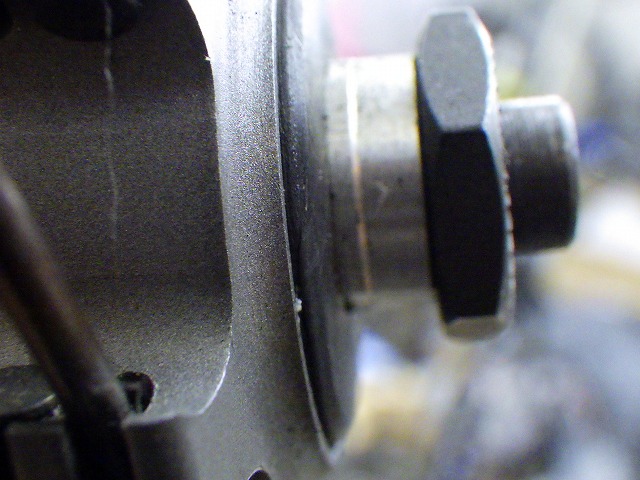
The front hub had play in both directions.
You can tell from the length of the dust cap coming out of the hub body.
When a hub has play like this and gets used over time,
there's a higher chance the bearings will fail,
so I removed the double-nut style hub axles on both sides
and checked the condition of the bearings,
but found no problems.

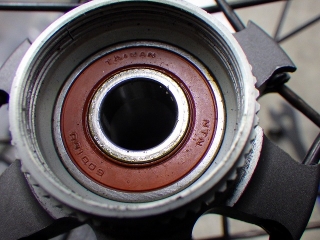
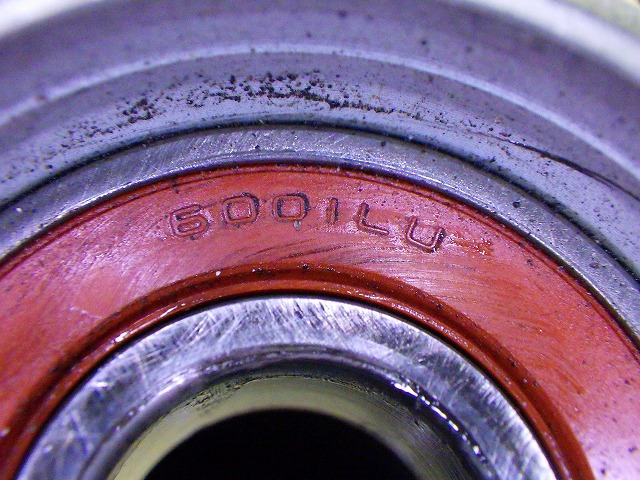
The reason 6001 bearings—somewhat uncommon in size—are used
is because the bearing seat on the hub axle has an outer diameter of 12mm.
The 6001 is a standard-sized bearing:
inner diameter 12mm / outer diameter 28mm / width 8mm.


I installed the axle, adjusted the bearing preload,
reattached the cover, and checked the preliminary center.
Going by the logic of the offset, the rim has shifted toward the rotor mount side,
which matches the direction it would shift with age.
So I can't definitively say "this is center drift from aging!"
If the rear hub had an offset of this magnitude,
I could observe rim lateral movement from aging,
but with a front wheel built on a disc brake hub,
the center doesn't drift nearly that noticeably.
The front wheel's spoke tension had also sagged
to a degree Mavic never would have shipped like this,
so I think aging was a major factor, but...

The Speedcity rim uses the same method
that was adopted on mid-range MTB wheels of that era
(not aluminum spoke, but not generic rim holes either):
"larger Zicral threaded holes with adapters that accommodate
standard-sized nipples installed in them."
There's even a tool to remove and install these adapters.
By using this method, you can build a wheel with generic nipples
while maintaining a rim with no holes except the valve hole on the outer perimeter.
However, even though Mavic was the originator of the UST tubeless standard,
which became the de facto standard in the MTB world,
with road tubeless they played it safe and were among the last to adopt it.
So not just with Speedcity, but even with R-SYS and Ksyrium—
even the Ksyrium 125 generation—they're not tubeless-compatible.
So even having no holes except the valve hole
only offers the advantage that rim tape isn't necessary.


I didn't deliberately bias the tightening to one side,
but as I chased out the various wobbles,
by the time I'd eliminated the lateral runout,
the center drift had reversed direction.
The amount of drift was less than the preliminary center.


From that state, I tightened the rotor mount side
and got the center dialed in.
Just like the rear wheel, there wasn't a single nipple
that I didn't tighten more than it was originally.
The tape that covers the rim seam joint
was offset enough to ride up the inside rim sidewall, so
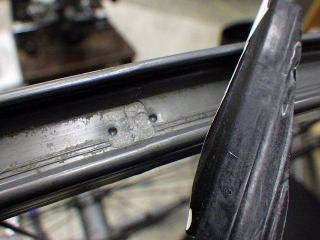
I removed it.
This same black tape is currently applied
to the end of the brown tape on road UST tubeless (→here),
but it seems to get crushed in toward the center
from wrinkles from the movement during Mavic tubeless tire setup
in almost every case I see.
That tubeless tape also has weak adhesion at the end,
and I frequently see sealant seeping a few centimeters under the tape,
completely losing the tape's adhesive.

I wiped and degreased the rim seam area with acetone
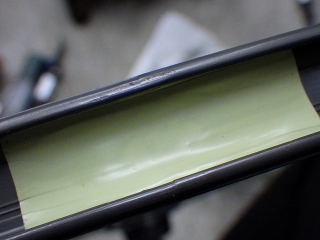
and applied Stan's tape.
I did this on both wheels.
In fact, the rear wheel was missing the black tape entirely.
CL refers to the centerlock rotor mount specification.
Both the hub and rim have gray anodizing throughout,
but the rim sidewalls are compatible with rim brakes.
The hub is a quick-release type with 100mm front width and 135mm rear width, and...
for more details, please see (→here).
This was an era after disc brakes became widespread
but before thru-axles became standard on MTBs.
The idea was that you could enjoy "one bike, two wheelsets" by
swapping wheels between 700C road tire wheels for
commuting and asphalt riding, and
26-inch HE rim MTB tire wheels for weekend trail rides.
This was a proposal from the manufacturer side (※), and this wheel was released as part of that initiative.
There are examples of flat-bar gravel bikes that had their disc mounts sealed
and continued to be used with rim brake wheels,
but with this wheel, the original owner used it that way,
and the current owner wanted to use it with disc brakes,
so they brought it in for inspection beforehand.
※Since this was a proposal from the manufacturer (Mavic) side,
wheels with the same purpose (100/135mm quick-release,
700C rim/disc brake compatible) from other makers
didn't come out in such abundance,
and it never really became a boom phenomenon.
is nowhere near comparable to this Speedcity,
but it doesn't seem to catch on easily.
First, the rear wheel.

I removed the rubber cover that was on the centerlock rotor mount.

Removed it.
There's some sand in the splines,
but there are no signs of use with a disc rotor installed.

Not directly related to this inspection, but
I checked whether a Shimano centerlock cover would fit over this.
There's no interference with the hub axle or the dropout,
and it installs without problems.
This cover used to come as standard with centerlock hubs
back when disc brakes were still being distributed
but V-brakes were still reasonably common,
but these days, even if you buy a quick-release MTB hub
with a centerlock mount, it doesn't come with one.
So I tried to source a replacement part,
but even when I searched using the spare parts numbers
from when it used to come standard,
nothing came up.
Currently, it can be ordered under the name of a spare part for the WH-M505 wheel
with part number Y25Y06000.

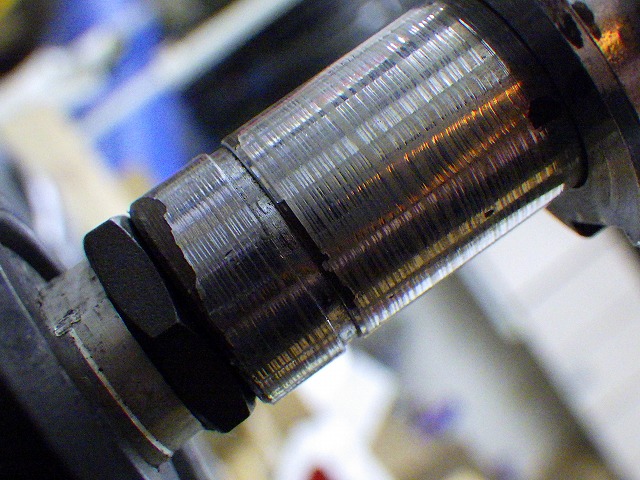
When I removed the freebody,
the oil inside had drained completely and it was bone dry.
In my post from two days ago about the Ksyrium,
I wrote about how the corrugated rubber seal that's always rubbing deep inside
the FTS-L freebody had been removed.
That hub had no seal, so either because of that
or because the freebody had some slight eccentricity wobble
with the hub's right endcap as the apex of a cone,
the wear marks from rotation were inside the two pawls.
But with this hub, because the sand-grain-like contamination inside the freebody
seems to be the main culprit,
the wear marks from rotation are outside the two pawls.

↑What you see deep inside is the rubber seal
that's being kept under light pressure
to keep the oil inside the freebody sealed.

I removed the parts and cleaned them.

I filled the freebody with specialized oil,
reassembled the hub, and checked the preliminary center.
It's hard to tell whether it's just from age
or if there's a history of spoke-tensioning attempts,
but spoke tension had sagged quite a bit on both sides.
(Mavic rear wheels tend to drift left with high probability,
but this one drifted hard to the right.)
The rim sidewalls on both wheels had worn just enough
to round off slightly in the brake zone,
but not to the point of needing rim replacement,
and the current owner plans to use it with disc brakes anyway,
so there's no problem.

I didn't just true out the center.
I tightened all the nipples on both sides considerably.

Next, the front wheel.

This centerlock cover was quite cracked
and on the verge of falling apart, so
I tested whether the Shimano cover would fit on the rear wheel instead.
Due to work logistics, I ended up removing it temporarily anyway.
As I write in the linked article,
this wheel has high-low flanges large enough to offset
the offset from the disc mount,
and even just grabbing the spokes on both sides after work
without looking at the wheel, you can't tell
left from right because the deformation amounts of the spokes
on the equal-diameter sides are so similar.
This doesn't seem coincidental—it looks like they're aiming for this deliberately, which impressed me.
←←← push this way

push this way →→→
The front hub had play in both directions.
You can tell from the length of the dust cap coming out of the hub body.

When a hub has play like this and gets used over time,
there's a higher chance the bearings will fail,
so I removed the double-nut style hub axles on both sides
and checked the condition of the bearings,
but found no problems.
The reason 6001 bearings—somewhat uncommon in size—are used
is because the bearing seat on the hub axle has an outer diameter of 12mm.
The 6001 is a standard-sized bearing:
inner diameter 12mm / outer diameter 28mm / width 8mm.
I installed the axle, adjusted the bearing preload,
reattached the cover, and checked the preliminary center.
Going by the logic of the offset, the rim has shifted toward the rotor mount side,
which matches the direction it would shift with age.
So I can't definitively say "this is center drift from aging!"
If the rear hub had an offset of this magnitude,
I could observe rim lateral movement from aging,
but with a front wheel built on a disc brake hub,
the center doesn't drift nearly that noticeably.
The front wheel's spoke tension had also sagged
to a degree Mavic never would have shipped like this,
so I think aging was a major factor, but...
The Speedcity rim uses the same method
that was adopted on mid-range MTB wheels of that era
(not aluminum spoke, but not generic rim holes either):
"larger Zicral threaded holes with adapters that accommodate
standard-sized nipples installed in them."


There's even a tool to remove and install these adapters.
By using this method, you can build a wheel with generic nipples
while maintaining a rim with no holes except the valve hole on the outer perimeter.
However, even though Mavic was the originator of the UST tubeless standard,
which became the de facto standard in the MTB world,
with road tubeless they played it safe and were among the last to adopt it.
So not just with Speedcity, but even with R-SYS and Ksyrium—
even the Ksyrium 125 generation—they're not tubeless-compatible.
So even having no holes except the valve hole
only offers the advantage that rim tape isn't necessary.
I didn't deliberately bias the tightening to one side,
but as I chased out the various wobbles,
by the time I'd eliminated the lateral runout,
the center drift had reversed direction.
The amount of drift was less than the preliminary center.

From that state, I tightened the rotor mount side
and got the center dialed in.
Just like the rear wheel, there wasn't a single nipple
that I didn't tighten more than it was originally.

The tape that covers the rim seam joint
was offset enough to ride up the inside rim sidewall, so
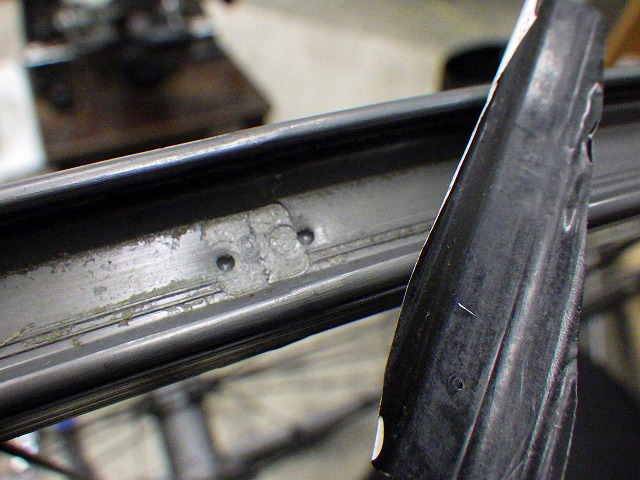
I removed it.
This same black tape is currently applied
to the end of the brown tape on road UST tubeless (→here),
but it seems to get crushed in toward the center
from wrinkles from the movement during Mavic tubeless tire setup
in almost every case I see.
That tubeless tape also has weak adhesion at the end,
and I frequently see sealant seeping a few centimeters under the tape,
completely losing the tape's adhesive.
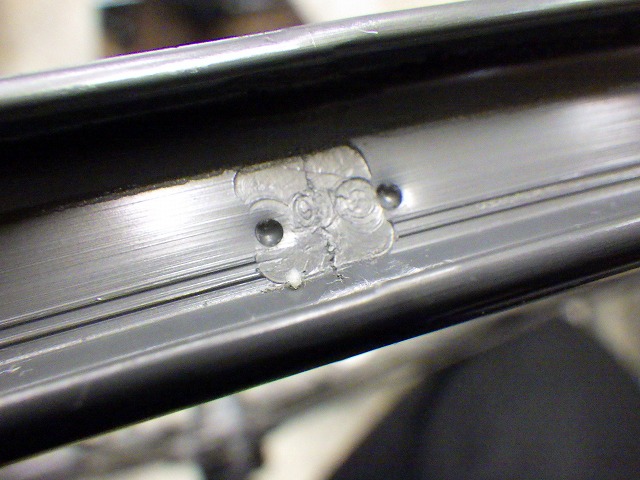
I wiped and degreased the rim seam area with acetone

and applied Stan's tape.
I did this on both wheels.
In fact, the rear wheel was missing the black tape entirely.