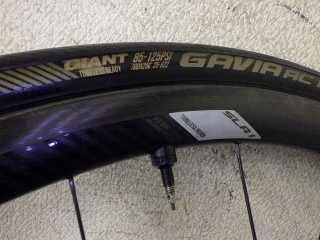
I received the rear wheel of a GIANT SLR1 from a customer.
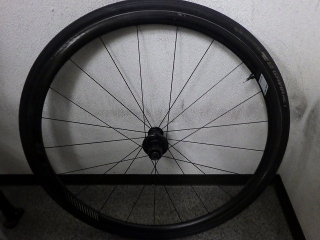
The issue is that the chain slips forward when pedaling hard in the outer big ring and top small cog.
The most common cause of this symptom is
installing a new chain on a sprocket with severely worn teeth,
but in that case it usually only occurs in the gears that were frequently used on flat terrain
rather than in the top gear.
The customer is aware of this, so they've already verified that
even after replacing both the chain and sprocket with new ones the problem persists,
and it still happens when this rear wheel is mounted on a different frame.
Also, they confirmed that a local shop in Shikoku couldn't solve it either.
When I first asked about the wheel brand on the phone, I mentioned that
if it has a DT hub with a three-pawl spring design rather than a star ratchet,
the wear on that mechanism could be the culprit
and it's possible to replace it.
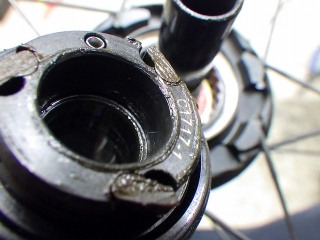
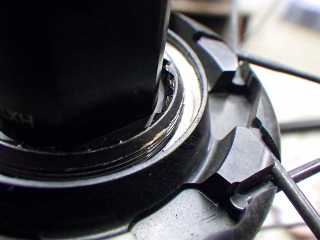
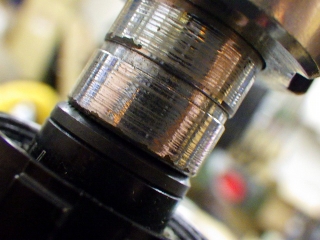
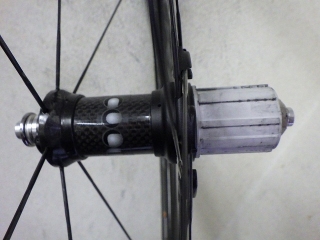
So when I pulled out the freebody,
sure enough it was the three-pawl spring design.
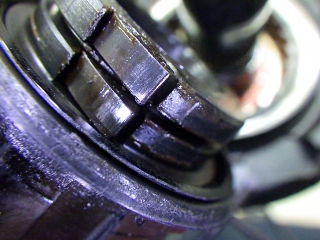
The pawls on the freebody side don't show any notable wear marks.
The white appearance at the tip of the pawls is just the lighting.
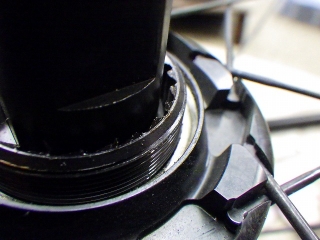
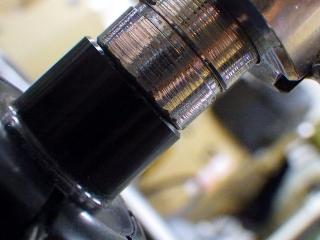
↑The ratchet teeth on the hub body side that are threaded in here—
DT uses its own unique terminology, calling the freebody + right side end locknut set a "rotor kit,"
and similarly calls the ratchet teeth component a "ring nut."
This ring nut has the same compatibility (34mm thread diameter) as the star ratchet version,
so by replacing it you can convert this hub to a star ratchet design.
Besides DT, Campagnolo (Fulcrum) is the only other brand that offers
replaceable ratchet tooth components,
but Campagnolo requires proprietary tools that only service centers have,
making it a mail-in job. DT sells the tools, so
shops(excluding the customer's local shop) or
individuals can do the replacement themselves.
For details, see here

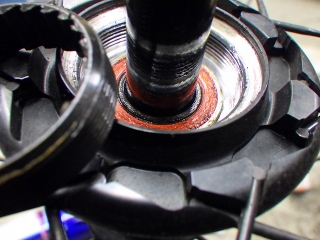
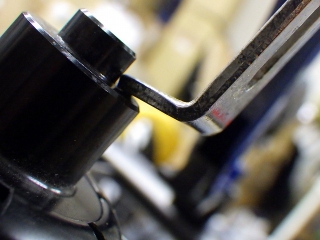
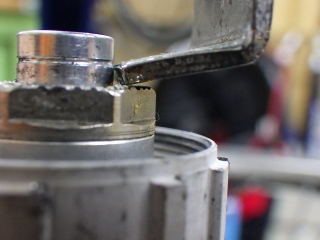
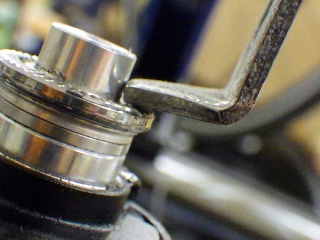
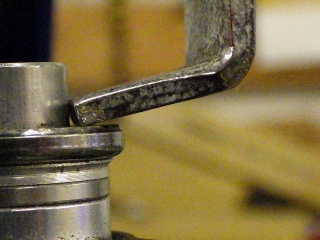
I applied the tool.
Especially on rear wheels that have been in use for years,
this ring nut is often tightened incredibly hard,
and the tool only has a square grip for monkey wrench or vise use—it doesn't accept socket wrench—
so you need to extend the monkey wrench handle like a breaker bar.
Once I got it to break free,
after that I could loosen it smoothly by hand with the tool.
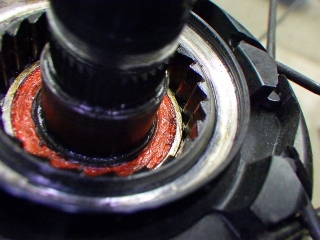
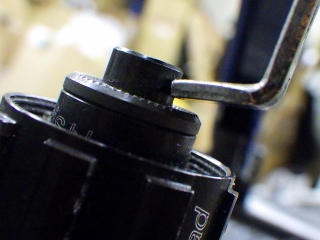
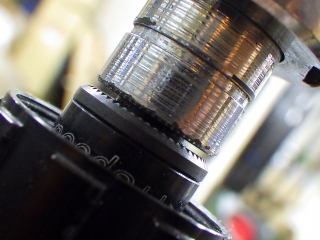
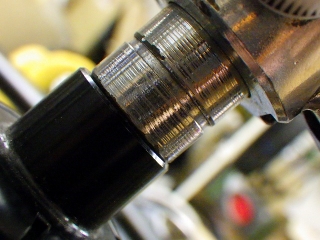
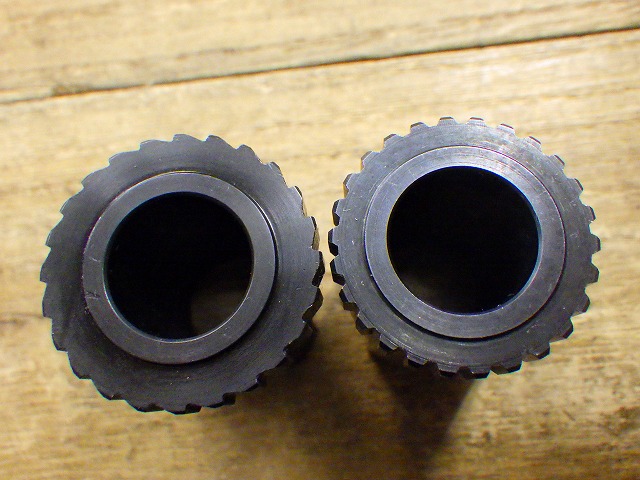
I removed the ring nut.
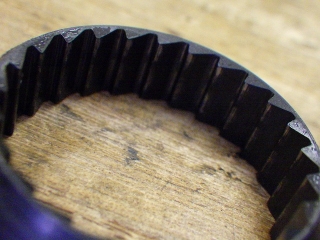
↑The removed ring nut
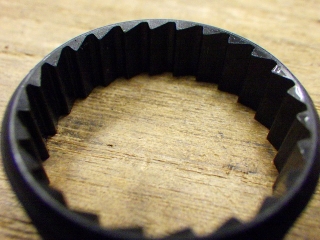
↑The new ring nut
The white-looking part on the right is just the lighting.
This ring nut—even including the star ratchet version—is very reasonably priced.
For the freebody pawls, rather than replacing the entire freebody,
DT sells a service kit containing
"3 pawls + pawl return spring + grease
(not a proprietary grease like the star ratchet)"
at a very reasonable price.
I considered replacing the freebody pawls as well this time,
but based on experience I judged that just replacing the ring nut should do the trick.
Since ring nut replacement requires owning the tool and takes some skill,
while the pawl and spring replacement can be easily done by the customer,
I decided to just replace the ring nut for now
and have them see how it goes.
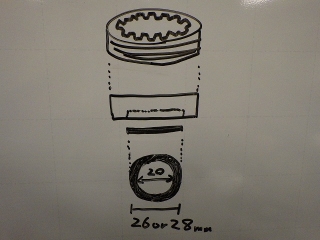
The ring nut for the star ratchet has a recess on the hub body side
where a washer sits.
The washer outer diameter comes in 26mm and 28mm depending on the model,
but the inner diameter is always 20mm.
Because of the washer outer diameter difference,
there are two types of star ratchet ring nuts.

This image is from the linked article I mentioned earlier.
The ring nut removal tools—left is for the spring design,
right is for the star ratchet.
Those round parts at the end are guides to center the washer.
Unnecessary for the spring design tool,
but it has one anyway. Let's just pretend we didn't see that.
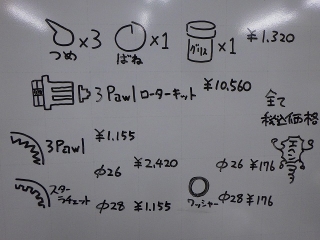
↑This is the DT spare parts price list (tax included)
that we've been discussing.
The prices are very reasonable, but what's truly admirable is that
DT offers these replacement parts at all.
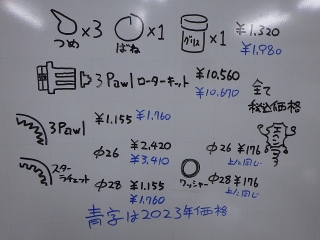
Oh wait, those were actually 2021/2022 prices.
Starting in 2023 there was a price increase.
The rotor kit (freebody) only saw a 100 yen pre-tax increase,
which is because it's actually a different product with different finishing,
spline markings, and part numbers.
By the way, the 2023 tax-included price for the star ratchet
"2 face ratchets + spring(s) (1 or 2) + proprietary grease" service kit
is: for the older dual-spring star ratchet with 24 teeth it's 15,400 yen,
36 teeth is 20,900 yen, 54 teeth is 23,100 yen,
and for the newer single-spring version it's 19,030 yen.
For the three-pawl spring design it's 1,980 yen,
so it looks even more reasonable by comparison.
Apart from the freebody slipping issue, the customer also asked about the wheel feeling loose,
but without re-lacing with different spoke tension that's impossible to fix,
so I just did an inspection this time.
Beyond the usual story about factory wheelsets where even if you tighten them from the original specs
they don't transform much—and if they did, the manufacturer would have tensioned them that way from the start—
this particular wheel's stock specification
simply doesn't allow excessive tensioning.
I'll cover that in a separate post.
It came in with (probably sealant-filled) tubeless tires mounted,
and there was enough runout that I couldn't say it was straight.
Since it has internal nipples, correcting runout requires
not just removing the tire but also peeling off the tubeless tape.
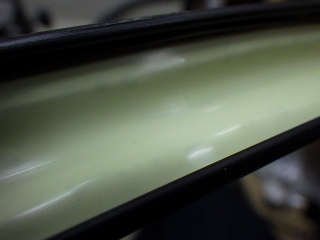
With the tubeless tire deflated,
the rim is shifted quite a bit to the right.
The upper image shows a Park Tool center gauge—
the WAG-4, the 4th version of their Wheel Alignment Gauge—
which can check wheel center even with the tire installed,
but it has higher tolerance than the Hozan version.
It can't detect the amount of deviation that Hozan would call
"one sheet of paper," so I don't use it much.
Just the runout alone I might be able to say "eh, not bad enough to peel off the tape,"
but this lateral shift is completely NG.
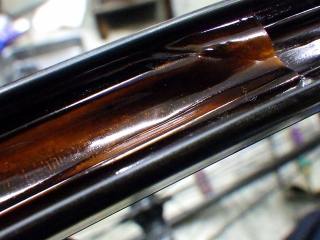
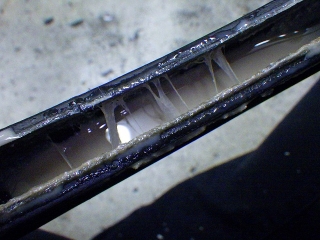
The rim tape on Mavic and GIANT wheels looks like it's made by Effetto Mariposa
(though I could be wrong)—that beetle-shell color
(see here)—
often comes with sealant seeping in from the end for some distance.
Actually, almost all of them are like that.
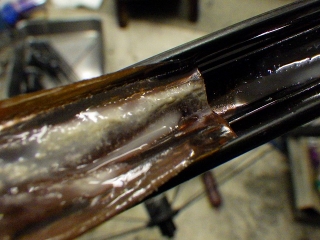
↑Like this
I hate this tape because the adhesive residue on the rim is brutal.
Though with factory wheels there's no way to avoid it.
I removed the tire and applied the Hozan center gauge.
The phase where I applied it is likely different from the WAG-4.
Based on how the rim tape looks in factory condition,
this wheel has apparently never been trued since purchase.
There was noticeable radial runout.
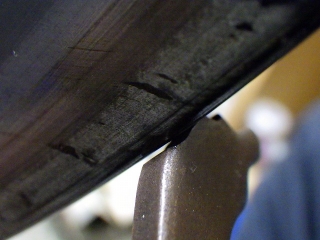
At most phases the rim and gauge have this much gap, but

at one spot the gauge scrapes with a hard contact.
I tightened the nipples in that area, but
the rim wouldn't come inward easily.
Hmm... this is... (I'll write about it in the next post)
I centered the wheel by itself.
Since I can't adjust after mounting the tire and pressurizing,
and considering future aging,
I could have shifted it about 1-2 sheets of paper to the left,
but I'll stick with this approach this time.
I applied Stan's tubeless tape,
carefully trying not to spill the
sealant-filled tire, and
when I aired it up, the bead seated fairly easily.
There was a small hissing sound near the valve at that point,
but it went away when I put that area down and shook the wheel side to side.
Since I did this yesterday and there's no sign of air loss even now,
I think it's fine. If you're concerned, just add more sealant.
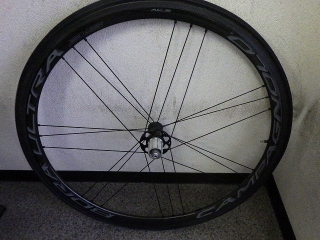
The Bora Ultra 35 tubular rear wheel
was selected to ship alongside the GIANT wheel in a two-wheel box
just to fill up the space.
Both sides had noticeable lateral runout—nothing severe, but visible.
The hub rotation is smooth, with no roughness,
and the freebody bearings didn't feel damaged either.
The right end nut wouldn't loosen by hand.
The hub is fine.
I didn't check the provisional center, but considering the age,
I did truing focusing on tightening the non-freewheel side,
though small runout appeared across both sides
and I had to tighten the freewheel side somewhat as well.
Also, during one of the brief rest phases in the G3 truing pattern
there was some lateral runout I couldn't eliminate, but there's nothing to be done about that.
I think I got it small enough that it won't be noticeable under braking, though.
Only after chasing down the lateral runout
did I apply the center gauge.
The tubular tire is still on, so WAG-4.
When I measure the freewheel side dimension and apply it to the non-freewheel side...
Ugh! Hard to photograph!
The camera can't fit in the position to shoot straight across
without hitting either the WAG-4 or the protruding spokes on the non-freewheel side,
so the angle is quite limited.
This gauge's contact point is a point contact, not a surface contact—
you just touch the corner lightly.
Even with this, the Hozan center gauge might call it
"one sheet of paper" offset in some cases,
but I don't think it's worth peeling off the tubular tire to refine it,
so I'll leave it here this time.

The issue is that the chain slips forward when pedaling hard in the outer big ring and top small cog.
The most common cause of this symptom is
installing a new chain on a sprocket with severely worn teeth,
but in that case it usually only occurs in the gears that were frequently used on flat terrain
rather than in the top gear.
The customer is aware of this, so they've already verified that
even after replacing both the chain and sprocket with new ones the problem persists,
and it still happens when this rear wheel is mounted on a different frame.
Also, they confirmed that a local shop in Shikoku couldn't solve it either.
When I first asked about the wheel brand on the phone, I mentioned that
if it has a DT hub with a three-pawl spring design rather than a star ratchet,
the wear on that mechanism could be the culprit
and it's possible to replace it.

So when I pulled out the freebody,
sure enough it was the three-pawl spring design.

The pawls on the freebody side don't show any notable wear marks.
The white appearance at the tip of the pawls is just the lighting.

↑The ratchet teeth on the hub body side that are threaded in here—
DT uses its own unique terminology, calling the freebody + right side end locknut set a "rotor kit,"
and similarly calls the ratchet teeth component a "ring nut."
This ring nut has the same compatibility (34mm thread diameter) as the star ratchet version,
so by replacing it you can convert this hub to a star ratchet design.
Besides DT, Campagnolo (Fulcrum) is the only other brand that offers
replaceable ratchet tooth components,
but Campagnolo requires proprietary tools that only service centers have,
making it a mail-in job. DT sells the tools, so
shops
individuals can do the replacement themselves.
For details, see here

I applied the tool.
Especially on rear wheels that have been in use for years,
this ring nut is often tightened incredibly hard,
and the tool only has a square grip for monkey wrench or vise use—it doesn't accept socket wrench—
so you need to extend the monkey wrench handle like a breaker bar.

Once I got it to break free,

after that I could loosen it smoothly by hand with the tool.

I removed the ring nut.

↑The removed ring nut

↑The new ring nut
The white-looking part on the right is just the lighting.
This ring nut—even including the star ratchet version—is very reasonably priced.
For the freebody pawls, rather than replacing the entire freebody,
DT sells a service kit containing
"3 pawls + pawl return spring + grease
(not a proprietary grease like the star ratchet)"
at a very reasonable price.
I considered replacing the freebody pawls as well this time,
but based on experience I judged that just replacing the ring nut should do the trick.
Since ring nut replacement requires owning the tool and takes some skill,
while the pawl and spring replacement can be easily done by the customer,
I decided to just replace the ring nut for now
and have them see how it goes.

The ring nut for the star ratchet has a recess on the hub body side
where a washer sits.
The washer outer diameter comes in 26mm and 28mm depending on the model,
but the inner diameter is always 20mm.
Because of the washer outer diameter difference,
there are two types of star ratchet ring nuts.
This image is from the linked article I mentioned earlier.
The ring nut removal tools—left is for the spring design,
right is for the star ratchet.
Those round parts at the end are guides to center the washer.
Unnecessary for the spring design tool,
but it has one anyway. Let's just pretend we didn't see that.

↑This is the DT spare parts price list (tax included)
that we've been discussing.
The prices are very reasonable, but what's truly admirable is that
DT offers these replacement parts at all.

Oh wait, those were actually 2021/2022 prices.
Starting in 2023 there was a price increase.
The rotor kit (freebody) only saw a 100 yen pre-tax increase,
which is because it's actually a different product with different finishing,
spline markings, and part numbers.
By the way, the 2023 tax-included price for the star ratchet
"2 face ratchets + spring(s) (1 or 2) + proprietary grease" service kit
is: for the older dual-spring star ratchet with 24 teeth it's 15,400 yen,
36 teeth is 20,900 yen, 54 teeth is 23,100 yen,
and for the newer single-spring version it's 19,030 yen.
For the three-pawl spring design it's 1,980 yen,
so it looks even more reasonable by comparison.

Apart from the freebody slipping issue, the customer also asked about the wheel feeling loose,
but without re-lacing with different spoke tension that's impossible to fix,
so I just did an inspection this time.
Beyond the usual story about factory wheelsets where even if you tighten them from the original specs
they don't transform much—and if they did, the manufacturer would have tensioned them that way from the start—
this particular wheel's stock specification
simply doesn't allow excessive tensioning.
I'll cover that in a separate post.
It came in with (probably sealant-filled) tubeless tires mounted,
and there was enough runout that I couldn't say it was straight.
Since it has internal nipples, correcting runout requires
not just removing the tire but also peeling off the tubeless tape.


With the tubeless tire deflated,
the rim is shifted quite a bit to the right.
The upper image shows a Park Tool center gauge—
the WAG-4, the 4th version of their Wheel Alignment Gauge—
which can check wheel center even with the tire installed,
but it has higher tolerance than the Hozan version.
It can't detect the amount of deviation that Hozan would call
"one sheet of paper," so I don't use it much.
Just the runout alone I might be able to say "eh, not bad enough to peel off the tape,"
but this lateral shift is completely NG.

The rim tape on Mavic and GIANT wheels looks like it's made by Effetto Mariposa
(though I could be wrong)—that beetle-shell color
(see here)—
often comes with sealant seeping in from the end for some distance.
Actually, almost all of them are like that.

↑Like this
I hate this tape because the adhesive residue on the rim is brutal.
Though with factory wheels there's no way to avoid it.


I removed the tire and applied the Hozan center gauge.
The phase where I applied it is likely different from the WAG-4.

Based on how the rim tape looks in factory condition,
this wheel has apparently never been trued since purchase.
There was noticeable radial runout.
At most phases the rim and gauge have this much gap, but

at one spot the gauge scrapes with a hard contact.
I tightened the nipples in that area, but
the rim wouldn't come inward easily.
Hmm... this is... (I'll write about it in the next post)


I centered the wheel by itself.
Since I can't adjust after mounting the tire and pressurizing,
and considering future aging,
I could have shifted it about 1-2 sheets of paper to the left,
but I'll stick with this approach this time.

I applied Stan's tubeless tape,

carefully trying not to spill the
sealant-filled tire, and

when I aired it up, the bead seated fairly easily.
There was a small hissing sound near the valve at that point,
but it went away when I put that area down and shook the wheel side to side.
Since I did this yesterday and there's no sign of air loss even now,
I think it's fine. If you're concerned, just add more sealant.

The Bora Ultra 35 tubular rear wheel
was selected to ship alongside the GIANT wheel in a two-wheel box
just to fill up the space.
Both sides had noticeable lateral runout—nothing severe, but visible.

The hub rotation is smooth, with no roughness,
and the freebody bearings didn't feel damaged either.
The right end nut wouldn't loosen by hand.
The hub is fine.
I didn't check the provisional center, but considering the age,
I did truing focusing on tightening the non-freewheel side,
though small runout appeared across both sides
and I had to tighten the freewheel side somewhat as well.
Also, during one of the brief rest phases in the G3 truing pattern
there was some lateral runout I couldn't eliminate, but there's nothing to be done about that.
I think I got it small enough that it won't be noticeable under braking, though.

Only after chasing down the lateral runout
did I apply the center gauge.
The tubular tire is still on, so WAG-4.
When I measure the freewheel side dimension and apply it to the non-freewheel side...

Ugh! Hard to photograph!
The camera can't fit in the position to shoot straight across
without hitting either the WAG-4 or the protruding spokes on the non-freewheel side,
so the angle is quite limited.

This gauge's contact point is a point contact, not a surface contact—
you just touch the corner lightly.
Even with this, the Hozan center gauge might call it
"one sheet of paper" offset in some cases,
but I don't think it's worth peeling off the tubular tire to refine it,
so I'll leave it here this time.