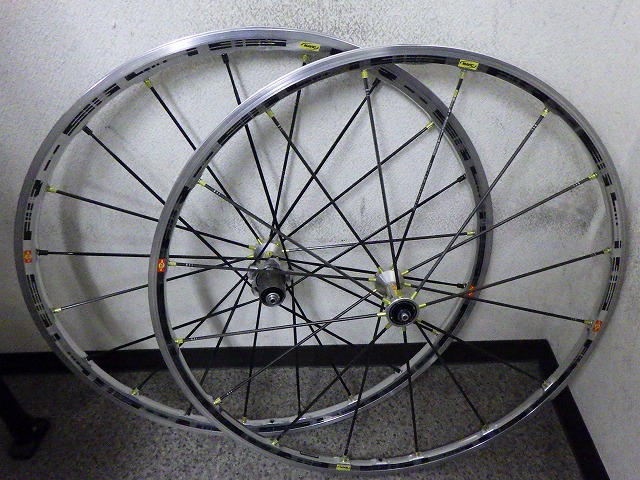
A customer entrusted me with the front and rear wheels from a first-generation R-SYS.

Not exactly unused,
but they definitely hadn't seen much riding.
The customer wanted an inspection. I'll say upfront:
neither front nor rear wheels had any bearings that required replacement.

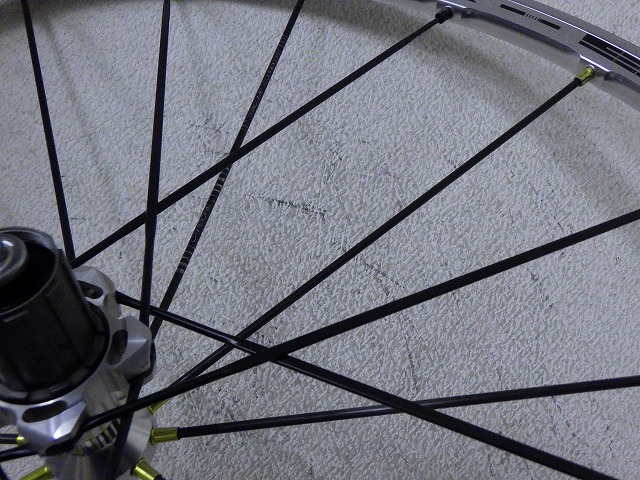
↑These are the front wheel spokes (carbon on both sides), and
those three silver lines running through them
indicate this is a replacement unit from the recalled early batch.

But on the rear wheel's non-drive side carbon spokes...

They're like bamboo—just vertical fibers.
The later batches of the first-generation R-SYS
had these spokes changed to the improved version too,
but the recall only covered the front wheel initially.
The reasoning was that while cracked carbon and splitting on the front wheel is dangerous,
it's not as critical on the rear. But then,
the later batches did change the rear spokes anyway.
Yet no one complained about that back then.
Maybe it was because they got Aksium wheels as an apology.
For more on the "splitting spoke" situation and related topics,
see (here).

This first-generation R-SYS came out
five years after Shimano released 10-speed components.
Originally, Mavic's early complete wheelsets like
Helium and Cosmic only came with Shimano freehub bodies,
and the spline length was 2mm longer than Shimano's standard.
When using Shimano's 9-speed cassettes,
you'd install a 2mm spacer to make up that difference
before mounting the cassette.
So what about using Campagnolo 9-speed components? You'd use
what Mavic called the CC9 cassette at the time.
CC stands for "Cassette Cog"—an acronym where
cog is French for gear.
The CC9 was a cassette-type sprocket with alternating individual cogs and spacers,
but with black plastic inter-gear spacers plus
a 2mm spacer in back, it matched Shimano 9-speed;
remove the rear 2mm spacer and
swap the black spacers for yellow ones,
and it matched Campagnolo 9-speed.
However, the top and second cogs had integrated spacer shapes,
so you'd only choose between black and yellow spacers for the remaining six cogs.
When using the CC9 in Campagnolo configuration,
shifting on the top three cogs was (following Shimano geometry) not great.
Plus, since you could freely choose tooth counts cog-by-cog,
you couldn't precisely set the shift ramp geometries to match the tooth configuration,
so even on Shimano 9-speed the shift performance
wasn't particularly good.
When Shimano moved from 9-speed to 10-speed,
they kept the freehub spline length the same
but increased the overall cassette width by 1mm;
the breakdown was +0.25mm on the top side and
+0.75mm on the low side.
When going from 10-speed to 11-speed, the freehub spec changed,
and between 10-speed and 11-speed cassettes
there's a 1.85mm difference in spline length,
so putting a 1.85mm spacer on an 11-speed freehub
makes it compatible with 8–10-speed. But
Mavic had made the CC9's Campagnolo version
with a 2mm spacer from the start,
so reasoning that removing it would get you from 2mm to 1.85mm—close enough—
they made that work as Shimano 11-speed compatible.
↑Things got long-winded so here's the same image again.
So with this first-generation R-SYS,
the right flange is pretty chunky on the outside,
and Shimano 11-speed cassettes will work on it.
But Campagnolo 11-speed won't.
With Campagnolo 10-speed you can swap in
the later Campagnolo freehub body, but
with Campagnolo 11-speed the low cog interferes with the right flange
and the cassette freehub won't turn.
I've solved this before (see here),
but that method is proprietary knowledge.
What got me wondering though: will this first-generation R-SYS work with Shimano 12-speed?
Adding gears without changing freehub dimensions
basically means overhang the low cog and
shift it inward.
That's why in current components low cogs don't come in sizes like 23T or 25T;
Campagnolo's minimum is 29T, and SRAM and Shimano sit at 30T—
this all ties back to that issue.

So I tried putting the low four cogs
from an Altus 11–30T Shimano 12-speed cassette
onto the R-SYS.

Looking straight down, the low cog
overlaps the right flange, but

there's no actual contact. It works.
Even accounting for lockring tightness,
there's plenty of clearance—nothing hair-trigger.

Starting with the front wheel.
The front wheel is the replacement unit, so
the front hub has the new-generation top hat
with integrated drag-preventer.

I applied silicone grease to the spoke heads.
This helps prevent creaking from that area.


Here's the centering offset.

You can see in the previous image too,
the gap is on the ball-race adjustment mechanism side.


Besides the rim seam opposite the valve hole,
there was lateral runout worth correcting,
and normal radial runout too, so
I fiddled with it bit by bit, and
once radial and lateral runout were gone
the center offset had flipped direction.
The gap size itself is about the same,
so I've turned the nipples roughly twice as much as needed
to correct the original offset.


From that point I got it centered.


Now the rear wheel. What the heck.

I cleaned around the rear hub pawls.
They weren't really that dirty to begin with.

The rear wheel is from the early batch, so it has the old-generation top hat.

The anodizing on the contact point with the spoke head is worn,
and when spoke tension—specifically non-drive-side tension—is loose,
this ring rotates and creates a lateral wear mark.
The newer generation prevents this with a notch that limits rotation,
but honestly I prefer this older type.

Rotating the contact point by 1/3 lets you use three new contact spots,
but the tuning is fussy, so I went with 1/2 rotation.

When doing overhauls on Mavic FTS-L freehub wheelsets,
which I do fairly often, I'll
assemble and true without installing the freehub pawls.
I do install the accordion-like rubber ring that runs
between the Delrin-like yellow part in the back of the freehub area
and the hub body.

When you hold the rim and spin the wheel that way, this happens:

Then I hold the end of the freehub body
so only the hub rotates.
The rubber ring connecting both parts acts like a slip clutch—
some of the hub rotation gets transmitted to the freehub, which spins along.
Even without pawls, the hand force needed to hold the freehub steady
was surprisingly strong.
On Mavic FTS-L freehub rear wheels,
once internal resistance increases from dirt,
pedaling with the tire off the ground causes the chain to ghost-pedal—
the hub's rotation drives the freehub through drag.
If it gets worse, coasting downhill with feet off the pedals
can cause ghost-feeding that builds up slack chain on the chainstay,
sometimes causing chain drops.
But this accordion rubber manages oil seal duty more than anything else—
it keeps the thick FTS-L freehub-specific oil contained,
so you can't remove it anyway.


The rim was initially offset to the right, but
once trued, when the center came out the non-drive carbon spoke tension was loose,
so I wanted to tighten both sides a bit more, and... that took forever.
The upper image is the final state at second centering,
but if the first centering had been good enough
it wouldn't have taken more than 10 minutes total,
yet getting to this state took about 25 minutes.
Not exactly unused,
but they definitely hadn't seen much riding.
The customer wanted an inspection. I'll say upfront:
neither front nor rear wheels had any bearings that required replacement.

↑These are the front wheel spokes (carbon on both sides), and
those three silver lines running through them
indicate this is a replacement unit from the recalled early batch.
But on the rear wheel's non-drive side carbon spokes...

They're like bamboo—just vertical fibers.
The later batches of the first-generation R-SYS
had these spokes changed to the improved version too,
but the recall only covered the front wheel initially.
The reasoning was that while cracked carbon and splitting on the front wheel is dangerous,
it's not as critical on the rear. But then,
the later batches did change the rear spokes anyway.
Yet no one complained about that back then.
Maybe it was because they got Aksium wheels as an apology.
For more on the "splitting spoke" situation and related topics,
see (here).

This first-generation R-SYS came out
five years after Shimano released 10-speed components.
Originally, Mavic's early complete wheelsets like
Helium and Cosmic only came with Shimano freehub bodies,
and the spline length was 2mm longer than Shimano's standard.
When using Shimano's 9-speed cassettes,
you'd install a 2mm spacer to make up that difference
before mounting the cassette.
So what about using Campagnolo 9-speed components? You'd use
what Mavic called the CC9 cassette at the time.
CC stands for "Cassette Cog"—an acronym where
cog is French for gear.
The CC9 was a cassette-type sprocket with alternating individual cogs and spacers,
but with black plastic inter-gear spacers plus
a 2mm spacer in back, it matched Shimano 9-speed;
remove the rear 2mm spacer and
swap the black spacers for yellow ones,
and it matched Campagnolo 9-speed.
However, the top and second cogs had integrated spacer shapes,
so you'd only choose between black and yellow spacers for the remaining six cogs.
When using the CC9 in Campagnolo configuration,
shifting on the top three cogs was (following Shimano geometry) not great.
Plus, since you could freely choose tooth counts cog-by-cog,
you couldn't precisely set the shift ramp geometries to match the tooth configuration,
so even on Shimano 9-speed the shift performance
wasn't particularly good.
When Shimano moved from 9-speed to 10-speed,
they kept the freehub spline length the same
but increased the overall cassette width by 1mm;
the breakdown was +0.25mm on the top side and
+0.75mm on the low side.
When going from 10-speed to 11-speed, the freehub spec changed,
and between 10-speed and 11-speed cassettes
there's a 1.85mm difference in spline length,
so putting a 1.85mm spacer on an 11-speed freehub
makes it compatible with 8–10-speed. But
Mavic had made the CC9's Campagnolo version
with a 2mm spacer from the start,
so reasoning that removing it would get you from 2mm to 1.85mm—close enough—
they made that work as Shimano 11-speed compatible.
↑Things got long-winded so here's the same image again.
So with this first-generation R-SYS,
the right flange is pretty chunky on the outside,
and Shimano 11-speed cassettes will work on it.
But Campagnolo 11-speed won't.
With Campagnolo 10-speed you can swap in
the later Campagnolo freehub body, but
with Campagnolo 11-speed the low cog interferes with the right flange
and the cassette freehub won't turn.
I've solved this before (see here),
but that method is proprietary knowledge.
What got me wondering though: will this first-generation R-SYS work with Shimano 12-speed?
Adding gears without changing freehub dimensions
basically means overhang the low cog and
shift it inward.
That's why in current components low cogs don't come in sizes like 23T or 25T;
Campagnolo's minimum is 29T, and SRAM and Shimano sit at 30T—
this all ties back to that issue.

So I tried putting the low four cogs
from an Altus 11–30T Shimano 12-speed cassette
onto the R-SYS.

Looking straight down, the low cog
overlaps the right flange, but

there's no actual contact. It works.
Even accounting for lockring tightness,
there's plenty of clearance—nothing hair-trigger.

Starting with the front wheel.
The front wheel is the replacement unit, so
the front hub has the new-generation top hat
with integrated drag-preventer.

I applied silicone grease to the spoke heads.
This helps prevent creaking from that area.


Here's the centering offset.

You can see in the previous image too,
the gap is on the ball-race adjustment mechanism side.


Besides the rim seam opposite the valve hole,
there was lateral runout worth correcting,
and normal radial runout too, so
I fiddled with it bit by bit, and
once radial and lateral runout were gone
the center offset had flipped direction.
The gap size itself is about the same,
so I've turned the nipples roughly twice as much as needed
to correct the original offset.


From that point I got it centered.


Now the rear wheel. What the heck.

I cleaned around the rear hub pawls.
They weren't really that dirty to begin with.

The rear wheel is from the early batch, so it has the old-generation top hat.

The anodizing on the contact point with the spoke head is worn,
and when spoke tension—specifically non-drive-side tension—is loose,
this ring rotates and creates a lateral wear mark.
The newer generation prevents this with a notch that limits rotation,
but honestly I prefer this older type.

Rotating the contact point by 1/3 lets you use three new contact spots,
but the tuning is fussy, so I went with 1/2 rotation.

When doing overhauls on Mavic FTS-L freehub wheelsets,
which I do fairly often, I'll
assemble and true without installing the freehub pawls.
I do install the accordion-like rubber ring that runs
between the Delrin-like yellow part in the back of the freehub area
and the hub body.

When you hold the rim and spin the wheel that way, this happens:

Then I hold the end of the freehub body
so only the hub rotates.
The rubber ring connecting both parts acts like a slip clutch—
some of the hub rotation gets transmitted to the freehub, which spins along.
Even without pawls, the hand force needed to hold the freehub steady
was surprisingly strong.
On Mavic FTS-L freehub rear wheels,
once internal resistance increases from dirt,
pedaling with the tire off the ground causes the chain to ghost-pedal—
the hub's rotation drives the freehub through drag.
If it gets worse, coasting downhill with feet off the pedals
can cause ghost-feeding that builds up slack chain on the chainstay,
sometimes causing chain drops.
But this accordion rubber manages oil seal duty more than anything else—
it keeps the thick FTS-L freehub-specific oil contained,
so you can't remove it anyway.


The rim was initially offset to the right, but
once trued, when the center came out the non-drive carbon spoke tension was loose,
so I wanted to tighten both sides a bit more, and... that took forever.
The upper image is the final state at second centering,
but if the first centering had been good enough
it wouldn't have taken more than 10 minutes total,
yet getting to this state took about 25 minutes.