Another day with wheels (and so on).
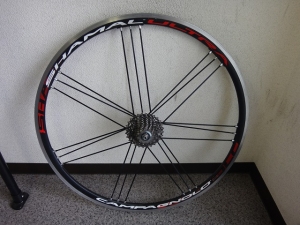
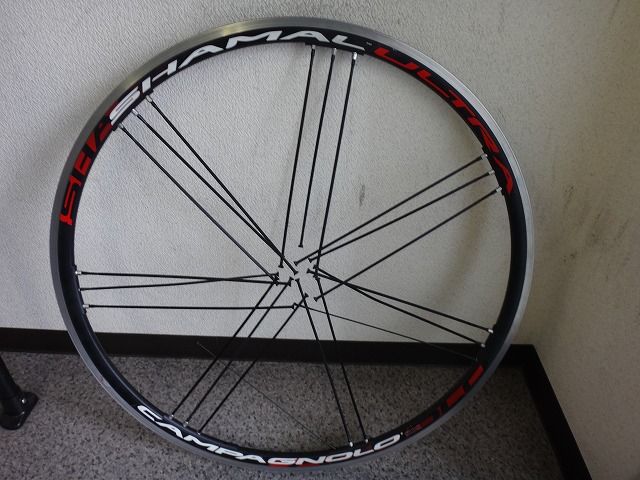
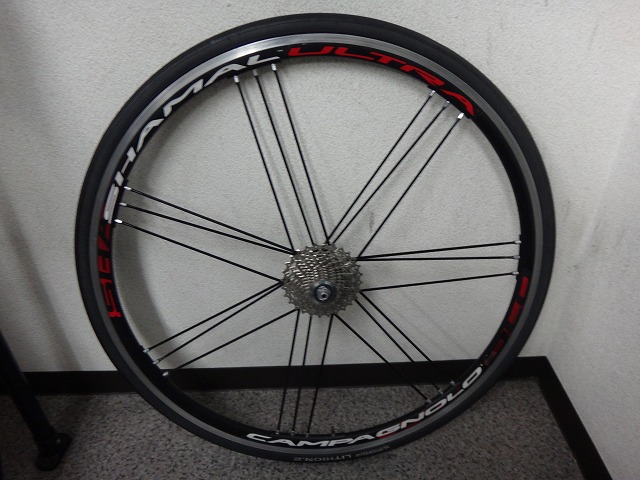
A customer brought me a Shamal Ultra (Campagnolo high-end wheel) to work on.
I have both front and rear wheels, but
let me start with the rear.
There's one spot with really terrible lateral runout.
No exaggeration — it's so bad the rim almost touches the brake shoe,
and if someone sets their brake shoes close together,
the rim would actually rub the shoes just from the wheel spinning.
When the customer took it to a nearby shop,
they tried various approaches but
ultimately said "we can't fix this."
At that point, they noticed what looked like impact marks on the rim.
The customer says they have an idea what caused those marks, so
that's fine, but
the reasoning the shop gave —
"The rim has an impact-like mark in one spot, and that area bent, throwing off the whole balance, blah blah..."—
just didn't sit right with me.
I can't promise it's fixable, but I told them to let me take a look,
and they sent the wheel to my shop.
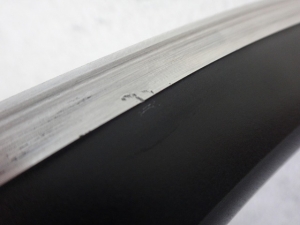
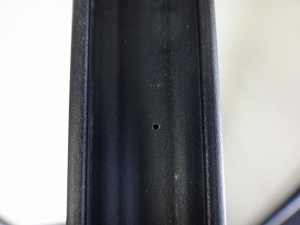
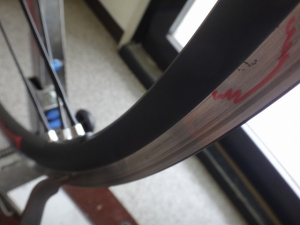
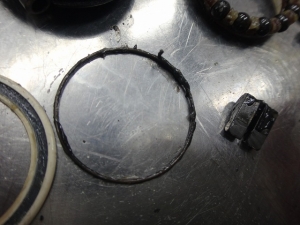
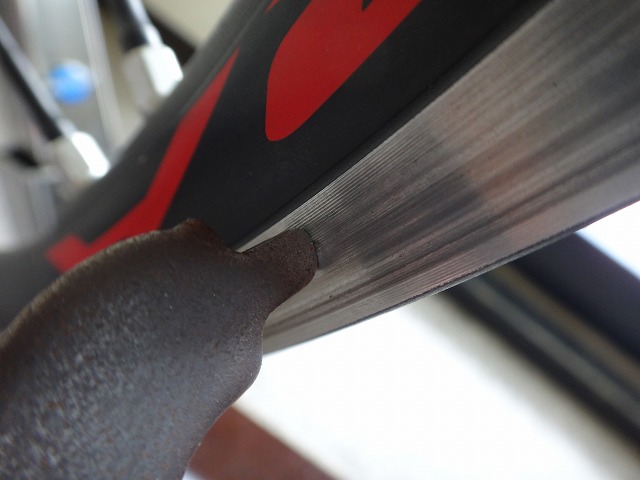
↑This is what those impact marks are.
I marked it with red scribble.
It's dented in subtly like this.
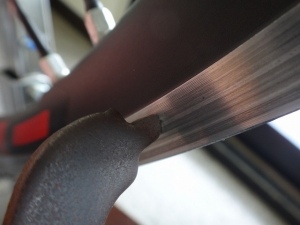
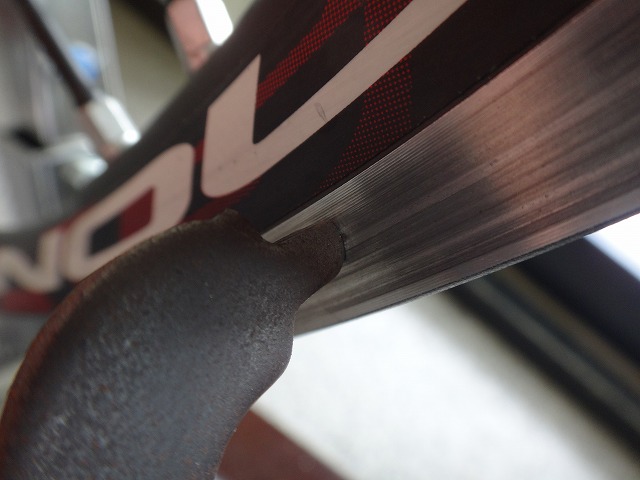
As for the bead seat right below that mark,
↑it's not bent at all.
If the bead seat were bent, I could force it straight to some degree, but
since the indentation is more toward the inner edge,
I can see that there's nothing I can do about the impact mark area.
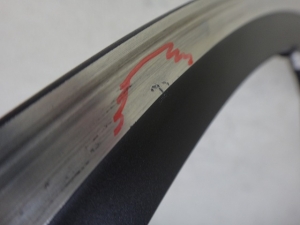
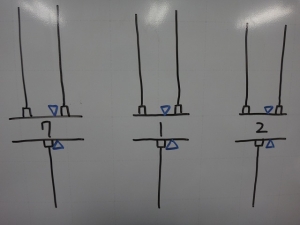
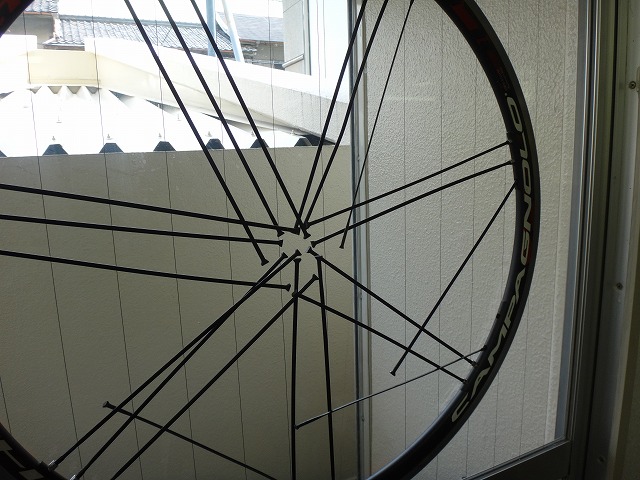
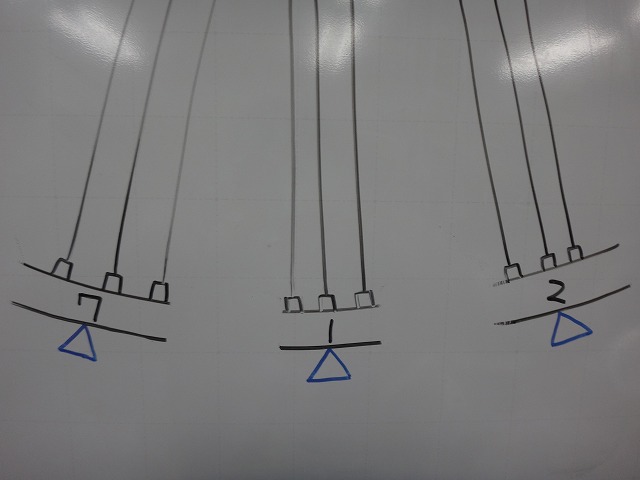
Now for the lateral runout:


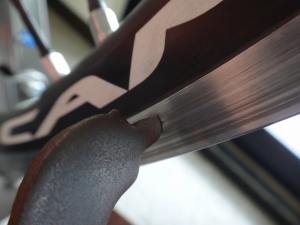
I checked the lateral runout directly below the G3 (Campagnolo G3 rim with 3-cross spoke pattern).
With 21 holes, there are 7 of these points.
It might look like they're all touching the same way
because I'm pushing the gauge pretty far inward,
but if I look carefully at those four images, runout exists between them too.
Also, looking at the gap between the gauge tip and the inner edge of the brake zone in the first and second images,
there's quite a bit of radial runout.
That's not original — it's from fiddling around looking only at lateral runout.
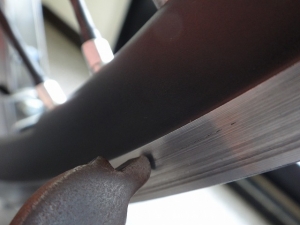
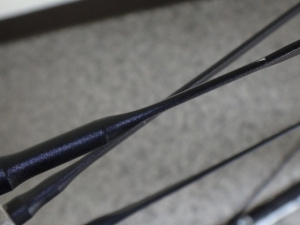
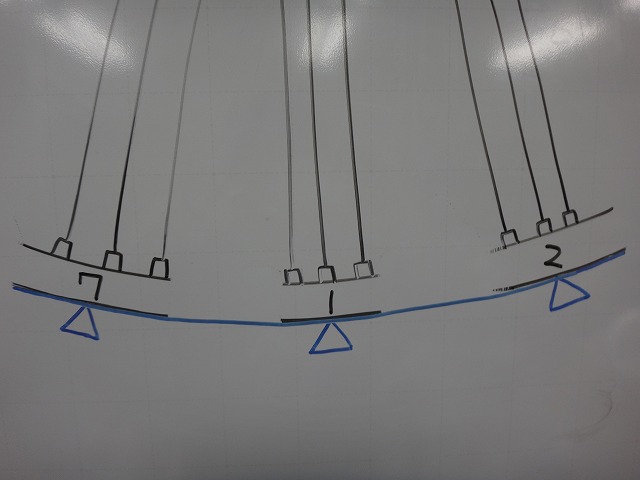
↑Here's where there's significant lateral runout.
If I open the gauge wide enough to catch the fine lateral runout at the other six spots,
there's a gap between the rim and gauge here that's about three times what the image shows.
But this isn't necessarily near the impact mark area.
I can't imagine any causal relationship between the subtle indentation with unbent bead seat
and this abnormal lateral runout at the G3 position.
If the maximum runout were in the gap between G3 positions, I'd understand it,
but returning a wheel to the customer with maximum runout directly below G3
just isn't right.
The "tried various approaches" I mentioned earlier is quoted verbatim from the customer's letter,
but the result was just "they introduced radial runout and sent it back."
I don't fully understand their excuse about the rim balance being off due to impact marks either,
but admittedly, if the rim is warped beyond a certain degree, it can't be fixed.
There's a way to verify that in one shot, but before that...
There were several twisted spokes.
Up to this point, I haven't touched any nipples with tools.
As for how to check the rim warp...
Of course, there's no way but to disassemble the wheel.
You can't get accurate readings with spoke tension applied.
My shop doesn't have a precision straightedge,
but a window pane is good enough to judge rim warp,
so I use it as a makeshift straightedge.
The formal name for this glass straightedge is
"I always end up touching something fragile,
my sparkle isn't decoration, I'm a glass straightedge,"
but making jokes like that might get me in trouble with corporate, so
I shouldn't call it by that official name.
I checked it from different angles multiple times,
and the rim is barely warped at all.
At least not warped enough to prevent building a decent wheel.
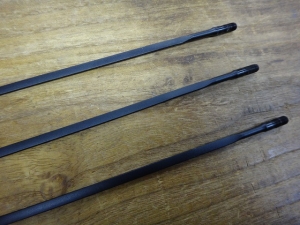
I determined that three twisted spokes needed replacement.
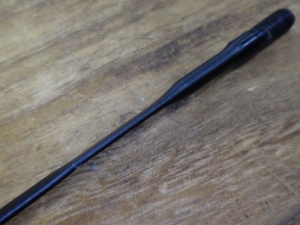
It looks like they used a spoke wrench with a short clamping width.
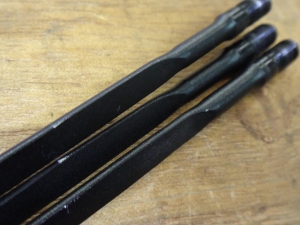
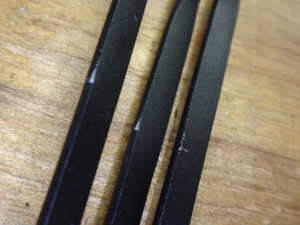
And since it was metal, it left identical marks in the same spots.
This clearly shows it wasn't from customer misuse or
external damage during riding (crashes or buckling).

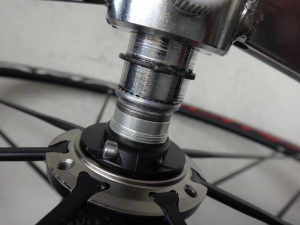
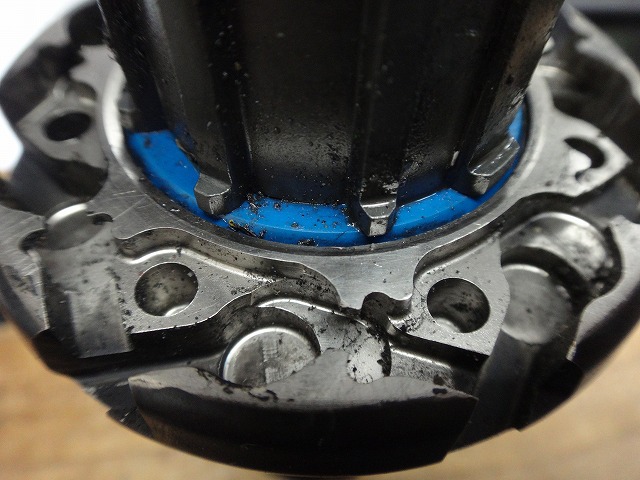
While I'm at it, I'll clean the hub.
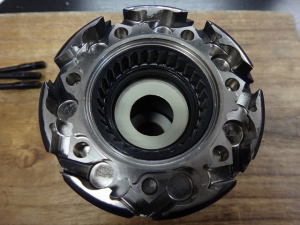
The flange area with its huge surface can finally get cleaned properly.

I also do internal hub cleaning and regreasing.
If you adjust the bearing play on a loose hub and build with it that way,
the flange gets pulled by spoke tension, making the bearing play loose and
introducing side play. But this hub either has
high flange rigidity from its large diameter aluminum axle or
its extra-large flange design means spoke tension distortion
doesn't transmit much to the hub shell.
It doesn't show that effect very noticeably.
With the same axle size on Record hand-built hubs, bearing play does change,
so it probably isn't just the large aluminum axle.
The freewheel pawl spring wasn't bent.
As I build the wheel, I'm numbering the seven positions around G3.
This way, for example, if I see "radial runout only at position 4 when adjusting the gauge finely,"
work becomes easier.
I don't usually do this even with new G3 rims,
but there might be flaws in a new rim I shouldn't assume don't exist,
so I numbered them.
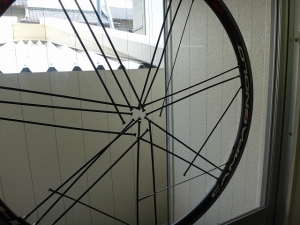
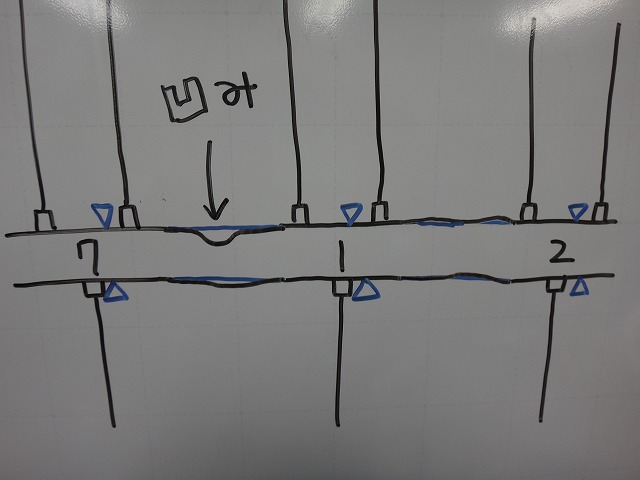
First, I get the radial runout very precise directly below G3.
The blue triangle in the diagram is the truing stand gauge.

I drew the blue line using the distance from wheel center to gauge as the radius.
If there were no rim deformation from spoke tension (= perfectly rigid),
the rim's outer edge should follow the blue line exactly, but

↑in reality, it looks like this.
With 2:1 spoked wheels, the radial runout compromise point naturally gets worse,
and with G3, the spoke hole phase density makes it even worse.
But we can keep it below tire deformation, so
it's not noticeable while riding.
Anyway, I got the radial runout below G3 quite tight.
Next I work on lateral runout, focusing only on the G3 position (ignoring the gaps for now).
This introduces slight radial runout, so I trim that, then
trim any new lateral runout that appears... iterating like this
until the radial and lateral runout below G3 converges.
Don't rush turning the nipples in one go.
It's more like gradually creeping toward the answer.
Once I've trimmed the lateral runout focusing only on the G3 position,
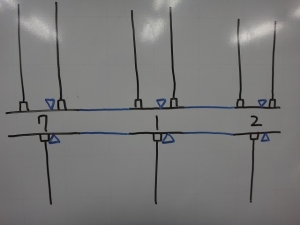
↑if there's no rim warp or indentation in the G3 gaps,
it should look like the blue line I added, but

it's not perfectly straight.
This happens even with new rims, but
if I can get the lateral runout in the G3 gaps below acceptable limits
through G3-position nipple adjustment, that's a saleable wheel.
This rim doesn't have the perfect straightness of a new rim,
but there's no section so bulged that it can't be repaired.
One reason I disassembled the wheel was to check rim warp,
but another was to completely reset the nipple tightness,
regardless of which areas I'd touched or hadn't touched.
That impact mark is between positions 1 and 7 on the freewheel side,
and when doing lateral runout truing in the brake zone, it's barely noticeable.
So the idea that this threw off the rim's overall balance is impossible.

I was conscious of not letting the wheel center shift much,
but after working through radial and lateral runout without a centering gauge,
I found a slight offset at the end, so I did a final
uniform adjustment on the non-freewheel side for centering.
I didn't check centering before disassembly.
With that much lateral runout, checking a temporary center doesn't help anyway,
and I was going to disassemble it regardless, so it didn't matter.

Done.
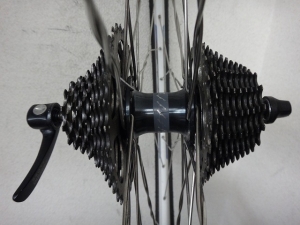
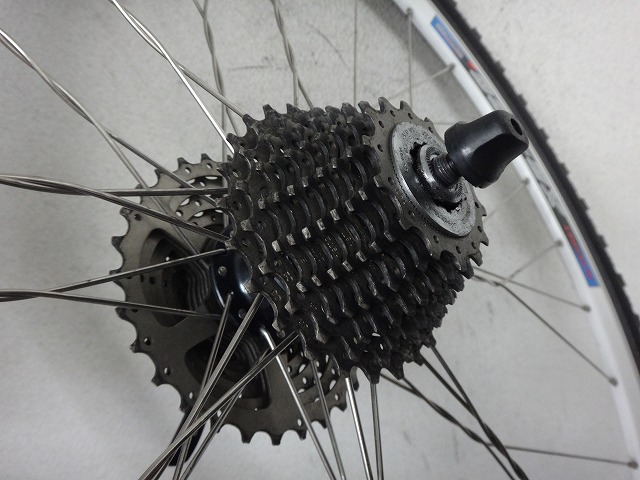
It came in with tire and sprocket already installed.
It was a Shimano 10-speed sprocket,
but the only other 10-speed I have is on my cyclocross bike,
so I installed it there.
When I spin the wheel, the impact mark area has a wavy feel,
but there's virtually no lateral runout anywhere else.
I took it out with rear brake set moderately and rode it,
and there was no brake drag or catching sensation —
I couldn't tell there was a rim indentation just by riding.
I focused hard on the rear tire contact patch during coasting on smooth pavement checking for radial runout,
but couldn't detect any.
(Actually, the radial runout is better than many off-the-shelf new ones,
so if I could feel it, I'd feel it on other Shamal Ultras too)
Bonus


My cyclocross bike's rear wheel currently has
11-12-13-14-15-17-19-21-24-28-
25-23-21-20-19-18-17-16-15-14 in a
20-speed configuration (never mind that some tooth counts repeat),
but I'm thinking of converting it to 22-speed.
Though I don't have the time.
Right now this might be the world's narrowest-flange rear hub,
but an 11-speed hub would be even narrower.
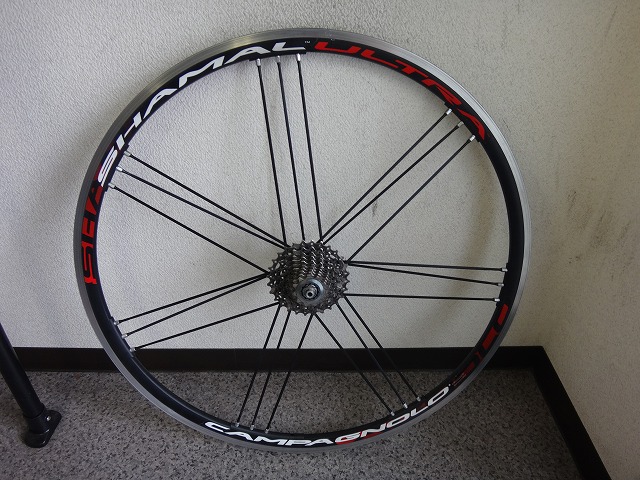
A customer brought me a Shamal Ultra (Campagnolo high-end wheel) to work on.
I have both front and rear wheels, but
let me start with the rear.
There's one spot with really terrible lateral runout.
No exaggeration — it's so bad the rim almost touches the brake shoe,
and if someone sets their brake shoes close together,
the rim would actually rub the shoes just from the wheel spinning.
When the customer took it to a nearby shop,
they tried various approaches but
ultimately said "we can't fix this."
At that point, they noticed what looked like impact marks on the rim.
The customer says they have an idea what caused those marks, so
that's fine, but
the reasoning the shop gave —
"The rim has an impact-like mark in one spot, and that area bent, throwing off the whole balance, blah blah..."—
just didn't sit right with me.
I can't promise it's fixable, but I told them to let me take a look,
and they sent the wheel to my shop.
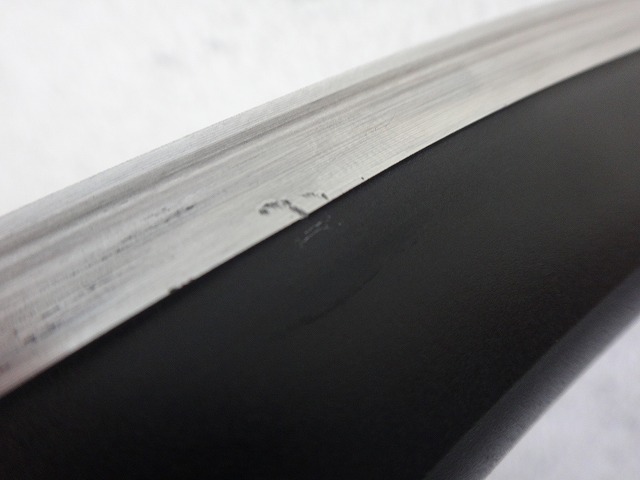
↑This is what those impact marks are.

I marked it with red scribble.
It's dented in subtly like this.

As for the bead seat right below that mark,
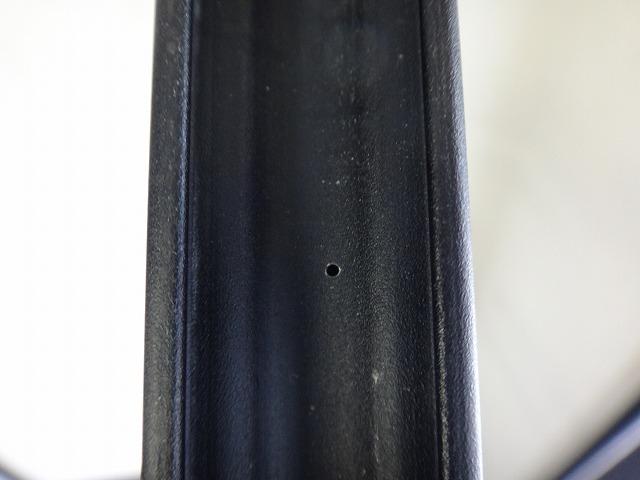
↑it's not bent at all.
If the bead seat were bent, I could force it straight to some degree, but
since the indentation is more toward the inner edge,
I can see that there's nothing I can do about the impact mark area.
Now for the lateral runout:


I checked the lateral runout directly below the G3 (Campagnolo G3 rim with 3-cross spoke pattern).
With 21 holes, there are 7 of these points.
It might look like they're all touching the same way
because I'm pushing the gauge pretty far inward,
but if I look carefully at those four images, runout exists between them too.
Also, looking at the gap between the gauge tip and the inner edge of the brake zone in the first and second images,
there's quite a bit of radial runout.
That's not original — it's from fiddling around looking only at lateral runout.

↑Here's where there's significant lateral runout.
If I open the gauge wide enough to catch the fine lateral runout at the other six spots,
there's a gap between the rim and gauge here that's about three times what the image shows.

But this isn't necessarily near the impact mark area.
I can't imagine any causal relationship between the subtle indentation with unbent bead seat
and this abnormal lateral runout at the G3 position.
If the maximum runout were in the gap between G3 positions, I'd understand it,
but returning a wheel to the customer with maximum runout directly below G3
just isn't right.
The "tried various approaches" I mentioned earlier is quoted verbatim from the customer's letter,
but the result was just "they introduced radial runout and sent it back."
I don't fully understand their excuse about the rim balance being off due to impact marks either,
but admittedly, if the rim is warped beyond a certain degree, it can't be fixed.
There's a way to verify that in one shot, but before that...
There were several twisted spokes.
Up to this point, I haven't touched any nipples with tools.
As for how to check the rim warp...
Of course, there's no way but to disassemble the wheel.
You can't get accurate readings with spoke tension applied.
My shop doesn't have a precision straightedge,
but a window pane is good enough to judge rim warp,
so I use it as a makeshift straightedge.
The formal name for this glass straightedge is
"I always end up touching something fragile,
my sparkle isn't decoration, I'm a glass straightedge,"
but making jokes like that might get me in trouble with corporate, so
I shouldn't call it by that official name.
I checked it from different angles multiple times,
and the rim is barely warped at all.
At least not warped enough to prevent building a decent wheel.

I determined that three twisted spokes needed replacement.

It looks like they used a spoke wrench with a short clamping width.


And since it was metal, it left identical marks in the same spots.
This clearly shows it wasn't from customer misuse or
external damage during riding (crashes or buckling).
While I'm at it, I'll clean the hub.

The flange area with its huge surface can finally get cleaned properly.

I also do internal hub cleaning and regreasing.
If you adjust the bearing play on a loose hub and build with it that way,
the flange gets pulled by spoke tension, making the bearing play loose and
introducing side play. But this hub either has
high flange rigidity from its large diameter aluminum axle or
its extra-large flange design means spoke tension distortion
doesn't transmit much to the hub shell.
It doesn't show that effect very noticeably.
With the same axle size on Record hand-built hubs, bearing play does change,
so it probably isn't just the large aluminum axle.
The freewheel pawl spring wasn't bent.
As I build the wheel, I'm numbering the seven positions around G3.
This way, for example, if I see "radial runout only at position 4 when adjusting the gauge finely,"
work becomes easier.
I don't usually do this even with new G3 rims,
but there might be flaws in a new rim I shouldn't assume don't exist,
so I numbered them.
First, I get the radial runout very precise directly below G3.
The blue triangle in the diagram is the truing stand gauge.
I drew the blue line using the distance from wheel center to gauge as the radius.
If there were no rim deformation from spoke tension (= perfectly rigid),
the rim's outer edge should follow the blue line exactly, but

↑in reality, it looks like this.
With 2:1 spoked wheels, the radial runout compromise point naturally gets worse,
and with G3, the spoke hole phase density makes it even worse.
But we can keep it below tire deformation, so
it's not noticeable while riding.
Anyway, I got the radial runout below G3 quite tight.
Next I work on lateral runout, focusing only on the G3 position (ignoring the gaps for now).
This introduces slight radial runout, so I trim that, then
trim any new lateral runout that appears... iterating like this
until the radial and lateral runout below G3 converges.
Don't rush turning the nipples in one go.
It's more like gradually creeping toward the answer.

Once I've trimmed the lateral runout focusing only on the G3 position,

↑if there's no rim warp or indentation in the G3 gaps,
it should look like the blue line I added, but
it's not perfectly straight.
This happens even with new rims, but
if I can get the lateral runout in the G3 gaps below acceptable limits
through G3-position nipple adjustment, that's a saleable wheel.
This rim doesn't have the perfect straightness of a new rim,
but there's no section so bulged that it can't be repaired.
One reason I disassembled the wheel was to check rim warp,
but another was to completely reset the nipple tightness,
regardless of which areas I'd touched or hadn't touched.
That impact mark is between positions 1 and 7 on the freewheel side,
and when doing lateral runout truing in the brake zone, it's barely noticeable.
So the idea that this threw off the rim's overall balance is impossible.

I was conscious of not letting the wheel center shift much,
but after working through radial and lateral runout without a centering gauge,
I found a slight offset at the end, so I did a final
uniform adjustment on the non-freewheel side for centering.
I didn't check centering before disassembly.
With that much lateral runout, checking a temporary center doesn't help anyway,
and I was going to disassemble it regardless, so it didn't matter.
Done.
It came in with tire and sprocket already installed.
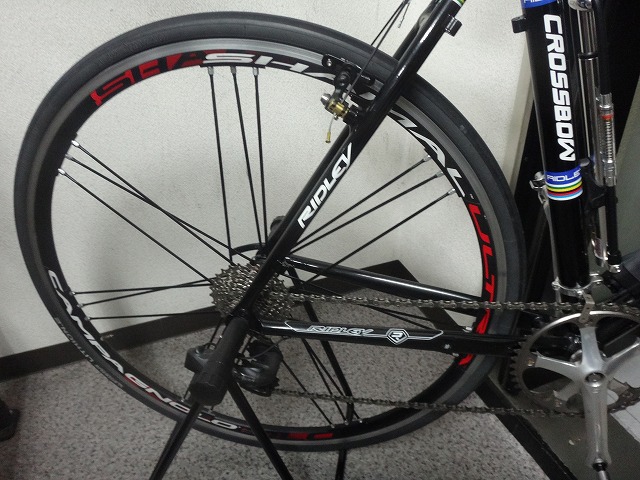
It was a Shimano 10-speed sprocket,
but the only other 10-speed I have is on my cyclocross bike,
so I installed it there.
When I spin the wheel, the impact mark area has a wavy feel,
but there's virtually no lateral runout anywhere else.
I took it out with rear brake set moderately and rode it,
and there was no brake drag or catching sensation —
I couldn't tell there was a rim indentation just by riding.
I focused hard on the rear tire contact patch during coasting on smooth pavement checking for radial runout,
but couldn't detect any.
(Actually, the radial runout is better than many off-the-shelf new ones,
so if I could feel it, I'd feel it on other Shamal Ultras too)
Bonus


My cyclocross bike's rear wheel currently has
11-12-13-14-15-17-19-21-24-28-
25-23-21-20-19-18-17-16-15-14 in a
20-speed configuration (never mind that some tooth counts repeat),
but I'm thinking of converting it to 22-speed.
Though I don't have the time.
Right now this might be the world's narrowest-flange rear hub,
but an 11-speed hub would be even narrower.