This wasn't just work on the STI lever alone, but part of a full bike overhaul, but

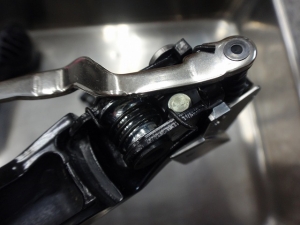
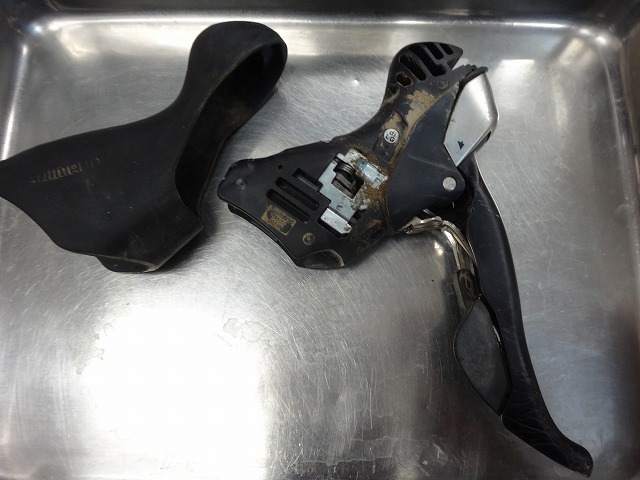
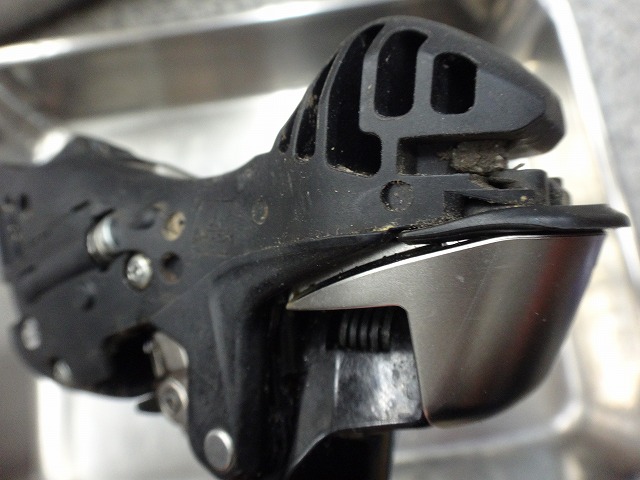
the brake and shift feel on the 5700-series 105 levers I've been using for cyclocross has been feeling really gritty and sluggish.
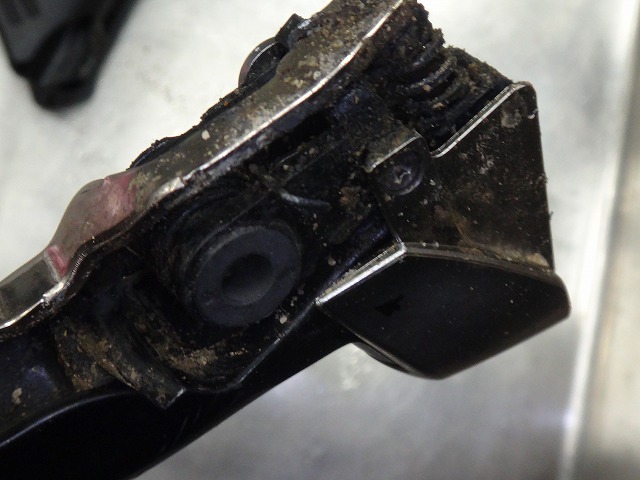
When I took a closer look, dirt had packed inside the lever.
It must have been dried mud.
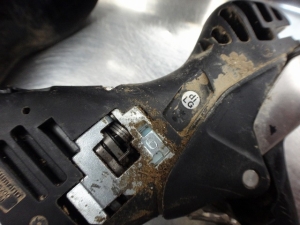
Soil had also worked its way in between the bracket and the cover.

There was a significant amount of dirt jammed into the springs and gears,
so it's no wonder the feel was gritty.
before

after
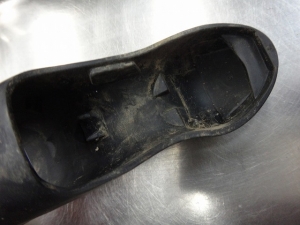
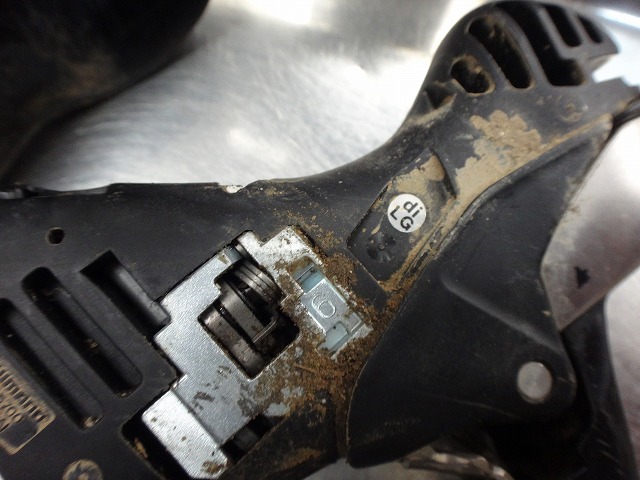
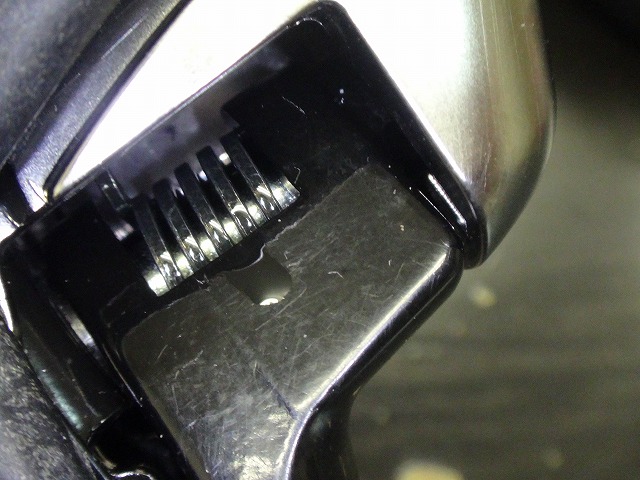
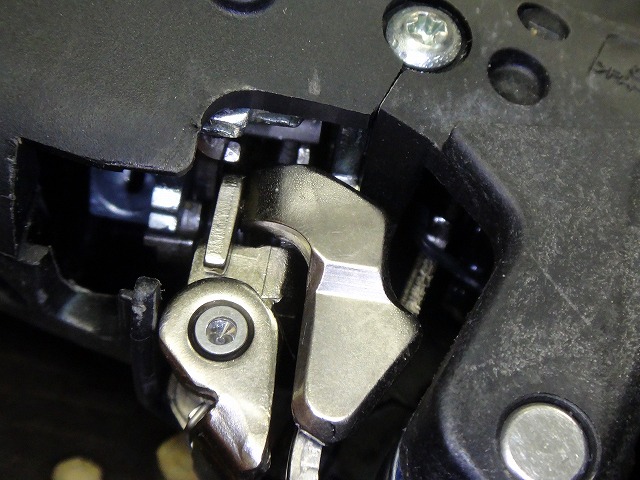
The square holes around the spring area were completely packed with dirt.

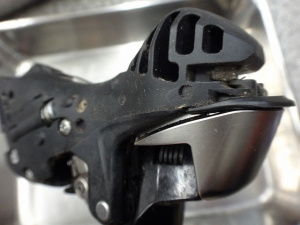
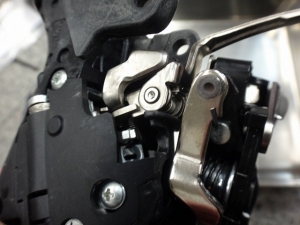
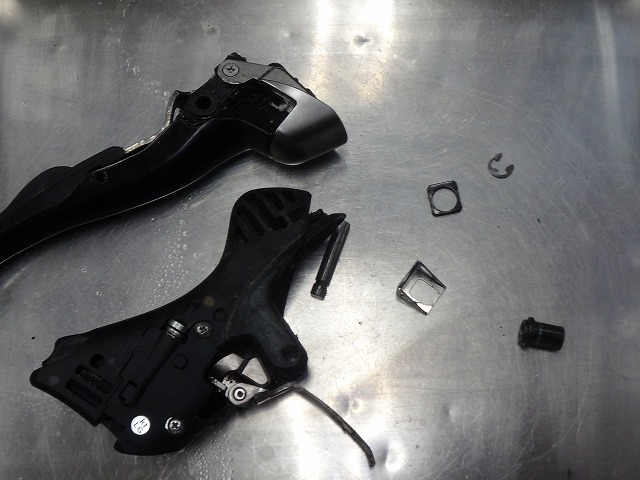
The 7900-series STI levers are relatively easy to disassemble
the brake lever section and the bracket section.
I say "relatively" because with the 7700 and 7800 series models
in the grades where wired Flight Deck shifter cables are built in internally,
handling the cable routing during lever removal is extremely tedious.
(Using the specialized elongated tool to manage the brake lever return spring
while fitting the lever under spring tension is also a bit of a hassle)
On the 7800 and earlier STI levers, the shift mechanism was located at the head of the brake lever
and was colloquially called the "head gear,"
but from the 7900 series onward, the shift mechanism moved to the bracket section, so
the brake lever section becomes just a brake lever except when it's working in conjunction with the shift-up lever during assembly,
making it much easier to clean.
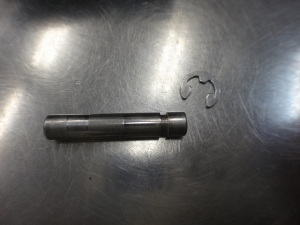
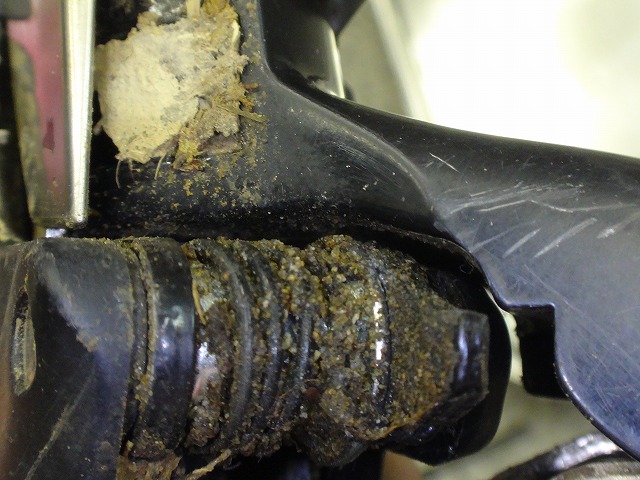
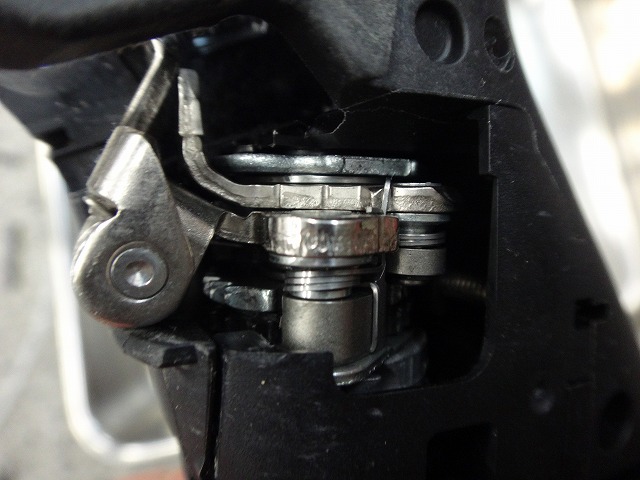
The shaft at the pivot point of the brake lever is secured with
a set screw on pre-7900 components, but on the 7900 it's a snap ring.
Removing and installing this isn't impossible without a specialized tool,
but the dedicated tool works so well that you're better off just buying one.

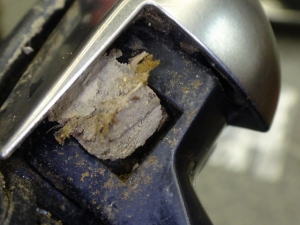
Without removing the brake lever

you can't really clean down to here.
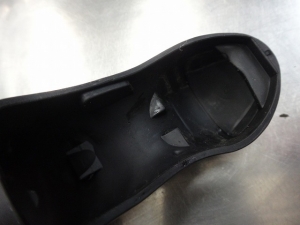
I could have replaced the bracket cover,
but since it wasn't excessively worn and had no tears, I just washed it and reused it.
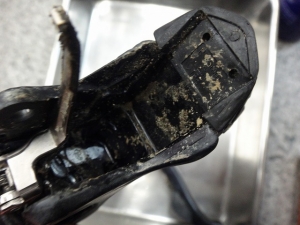
The left lever wasn't nearly as dirty from soil as the right one,

but I removed and cleaned the lever the same way.
all cleaned up

before

after
The most difficult part of STI lever maintenance isn't really the cleaning itself,
but rather deciding what kind of grease to use on the mechanical parts afterward.
You want something that's not too stiff, doesn't wash away easily, and doesn't emulsify readily,
but there's not enough space here to go into all the details.
the brake and shift feel on the 5700-series 105 levers I've been using for cyclocross has been feeling really gritty and sluggish.
When I took a closer look, dirt had packed inside the lever.
It must have been dried mud.
Soil had also worked its way in between the bracket and the cover.
There was a significant amount of dirt jammed into the springs and gears,
so it's no wonder the feel was gritty.

before
after
The square holes around the spring area were completely packed with dirt.

The 7900-series STI levers are relatively easy to disassemble
the brake lever section and the bracket section.
I say "relatively" because with the 7700 and 7800 series models
in the grades where wired Flight Deck shifter cables are built in internally,
handling the cable routing during lever removal is extremely tedious.
(Using the specialized elongated tool to manage the brake lever return spring
while fitting the lever under spring tension is also a bit of a hassle)
On the 7800 and earlier STI levers, the shift mechanism was located at the head of the brake lever
and was colloquially called the "head gear,"
but from the 7900 series onward, the shift mechanism moved to the bracket section, so
the brake lever section becomes just a brake lever except when it's working in conjunction with the shift-up lever during assembly,
making it much easier to clean.

The shaft at the pivot point of the brake lever is secured with
a set screw on pre-7900 components, but on the 7900 it's a snap ring.
Removing and installing this isn't impossible without a specialized tool,
but the dedicated tool works so well that you're better off just buying one.

Without removing the brake lever

you can't really clean down to here.

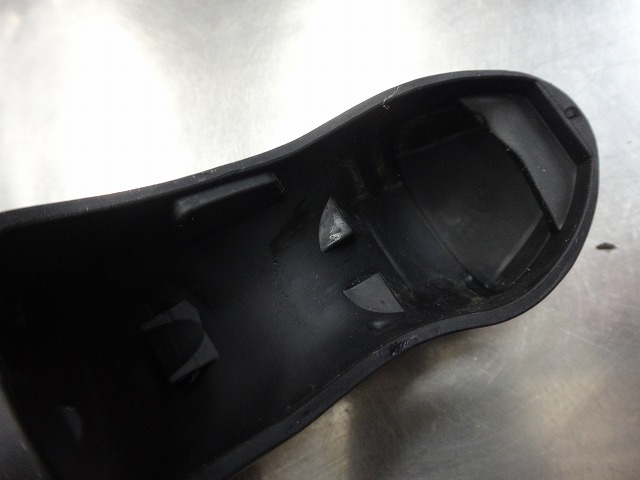
I could have replaced the bracket cover,
but since it wasn't excessively worn and had no tears, I just washed it and reused it.
The left lever wasn't nearly as dirty from soil as the right one,
but I removed and cleaned the lever the same way.

all cleaned up

before
after
The most difficult part of STI lever maintenance isn't really the cleaning itself,
but rather deciding what kind of grease to use on the mechanical parts afterward.
You want something that's not too stiff, doesn't wash away easily, and doesn't emulsify readily,
but there's not enough space here to go into all the details.