I received a Racing Zero Carbon from a customer.

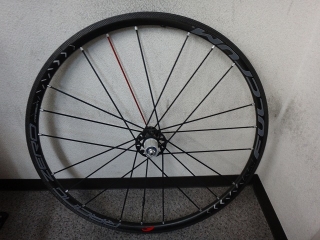
They wanted CULT bearing conversion and an inspection.
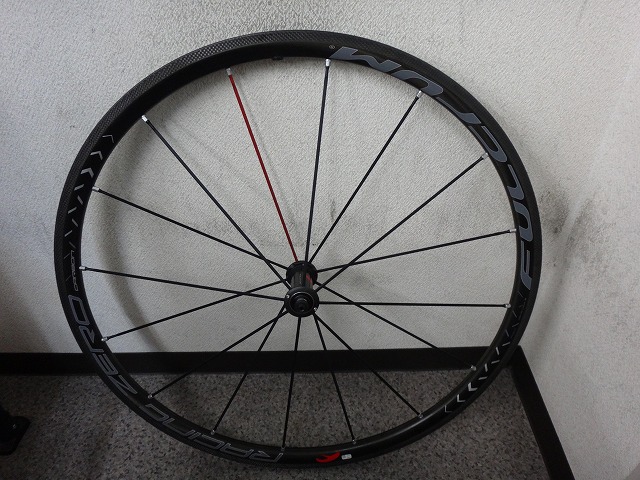
The top image shows the wheel after work, but per the customer's request
I converted it to a stylish "one red spoke" look.
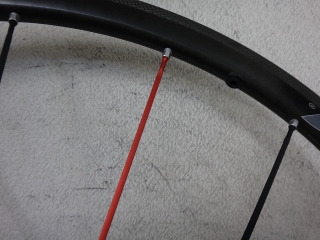
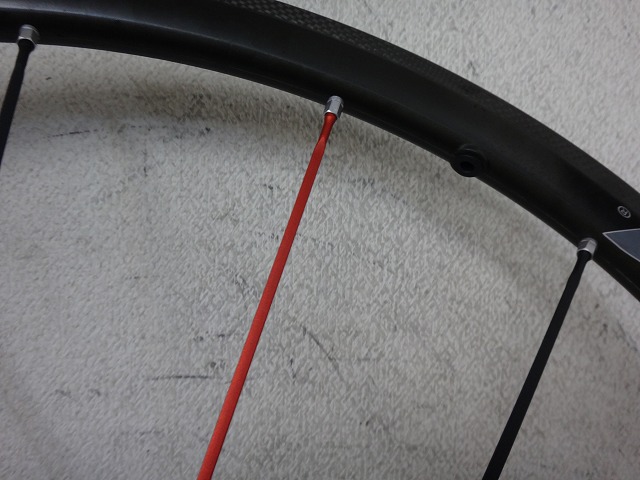
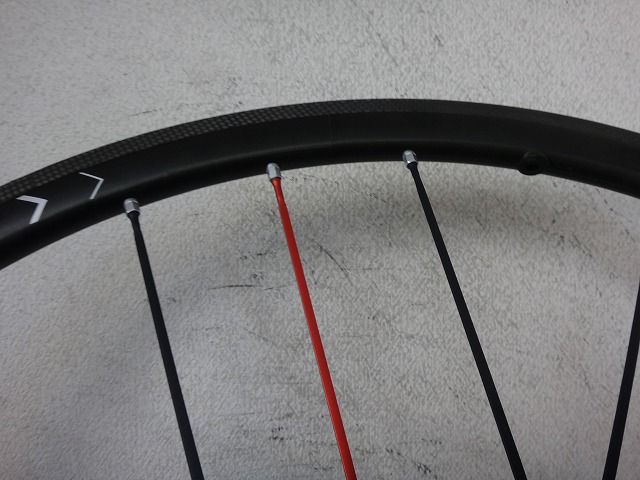
↑Front wheel left side—I replaced the spoke one position back from the valve hole (in the rotation direction) with a red one.
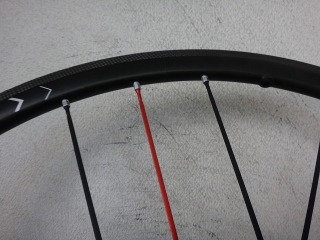
For the rear wheel, counting both sides, it's two positions back,
but I made the anti-freewheel side red because the rear left and front spokes
are the same length and part number.

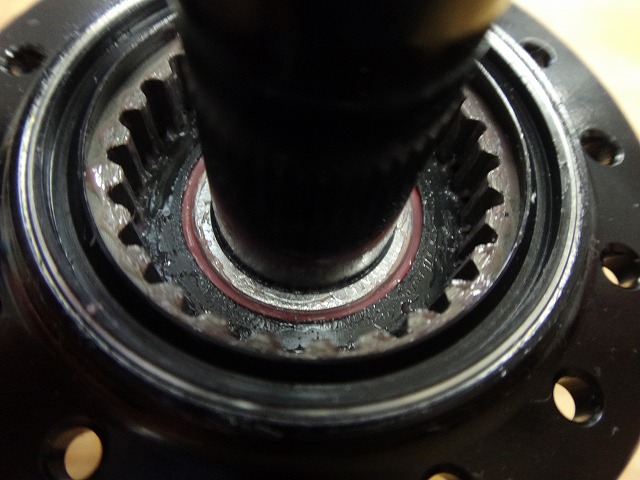
Removed the USB cone and
cleaned it.
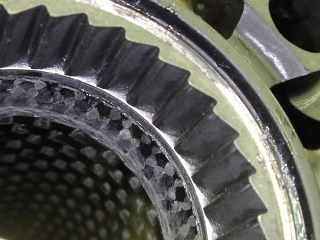
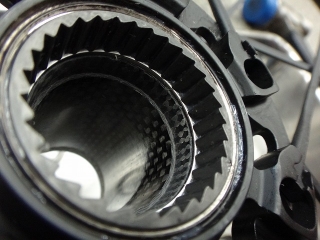
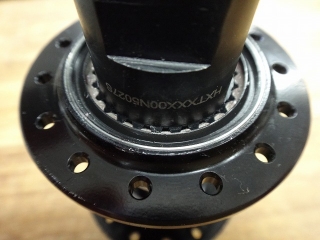
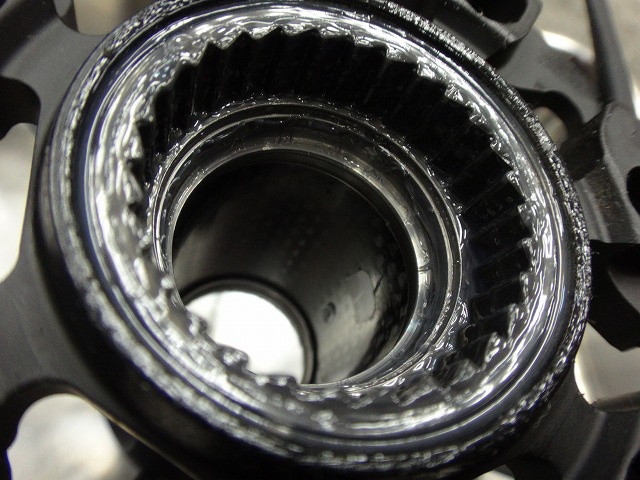
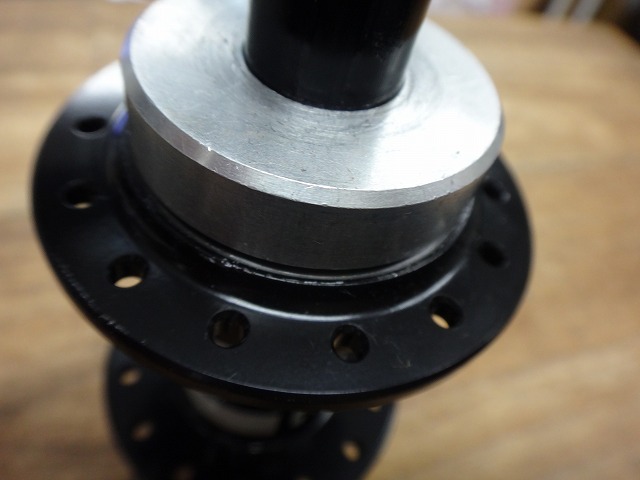
A bit of a tangent here, but about the teeth on this ratchet.

With Campagnolo Fulcrum hubs, you can replace this ratchet section.
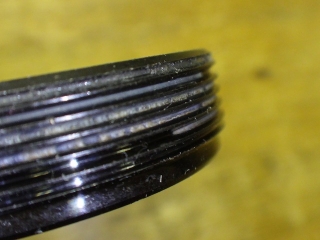
↑The side where the threads stop partway is the hub shell side.
Only the groove area where the pawl spring sits shows minimal wear.
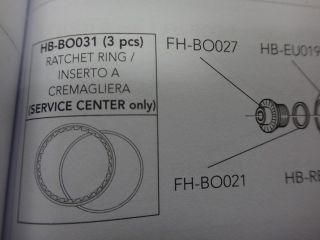
This part is sold in three-piece sets with pricing listed,
but retail shops cannot purchase it.
It's a "Service Center Only" part—available exclusively at service centers
(in Japan, that's Campagnolo Japan), and the tool to remove and install it
exists only at the service center.
So ratchet replacement requires sending it to Campagnolo Japan.
When the freewheel body occasionally catches during rotation
or the crank slips forward during pedaling,
ratchet replacement can sometimes fix it, and we've sent wheels in several times for this repair.
From experience, the symptoms often become pronounced when
replacing with a new freewheel body (switching to Shimano 11-speed with white aluminum).
It's like chain skip due to incompatibility between a new chain and heavily worn sprockets.
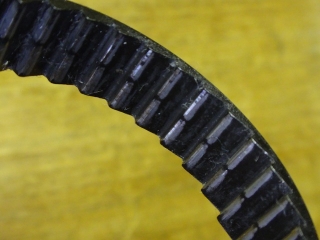
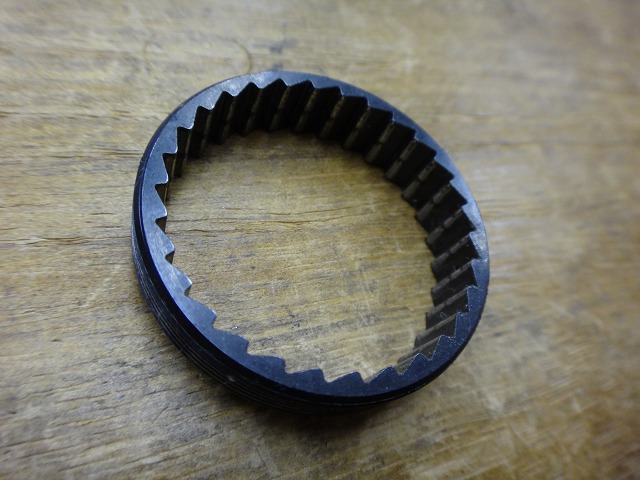
If your ratchet teeth are worn to the degree shown in the image above
and you're experiencing these symptoms, consult your local bike shop.
Regarding rear hubs with ratchets that come off with a dedicated tool—DT does this too,
but with DT, you can't remove the right bearing without the ratchet teeth coming off,
so the manufacturer supplies the tool.
With Campagnolo, the ratchet teeth sit nearly flush with the cone's outer diameter,
but with DT they sit completely over it.

↑DT Star Ratchet hub shell

↑The tool
Removing the ratchet from a bare hub is difficult—the wheel needs to be assembled.
The situation is similar to freewheel hubs, though that comparison
doesn't really register with people anymore.
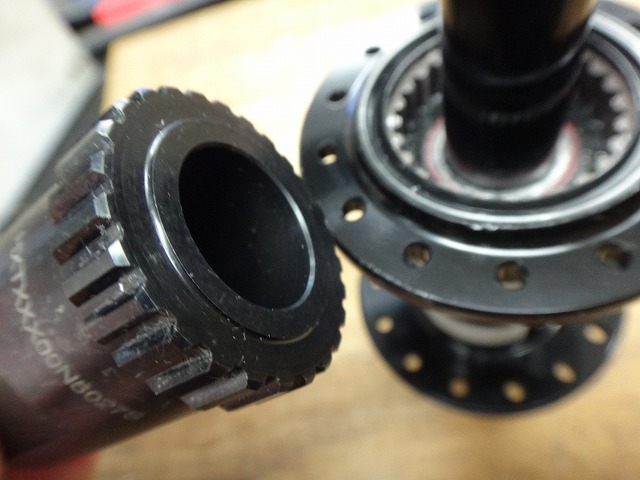
When removing the ratchet ring, a metal seal ring comes off with it,
and it's pressed in with considerable force, so after reinstalling
the ratchet ring, you can't hand-install the seal ring.
That's why there's a tool that presses down cleanly on just the base of the seal.

You can press it in with a pressing tool,
but the pressing tool for 15mm shaft hubs works on most hub types,
so it gets more use on Novatech-based and Zipp hubs.

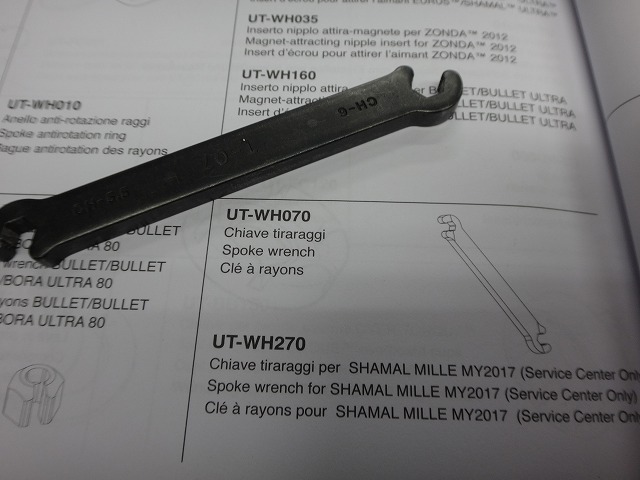
Speaking of Service Center Only—I just remembered.
The 6mm wrench for turning aluminum spoke nipples
has a new version separate from the traditional UT-WH070 (shown in the diagram and photo above),
but for some reason this is also Service Center Only.
If possible, please sell it at retail.
By the way, the UT-WH070 is a pain to use and leaves marks on the nipples, so it's a crappy tool I don't use.

There's a rule (at least officially) that Campagnolo spare parts can only be used with Campagnolo,
and Fulcrum spare parts can only be used with Fulcrum.
The Shimano 11-speed white aluminum freewheel body, black aluminum spokes for front and rear left,
the freewheel pawl springs, bearings, and so on—when they're in their boxes as individual parts,
you can't distinguish between Campagnolo and Fulcrum versions.
Frankly, you could mix them and nobody would notice—there's no way to tell.
But officially mixing is not allowed, and apparently there's
a voice from heaven telling me to make a show of following this rule,
so I'm noting it here for the record.
Traditionally, Campagnolo bearings were the same size front and rear,
but recent higher-end models have switched to slightly smaller diameter bearings up front.
The smaller CULT bearing was initially used only on the Bora Ultra,
and Fulcrum had no model with smaller CULT bearings, so during the period
when newer Racing Zeros were being converted to CULT,
it was a dead giveaway that an improper mix-and-match was happening.
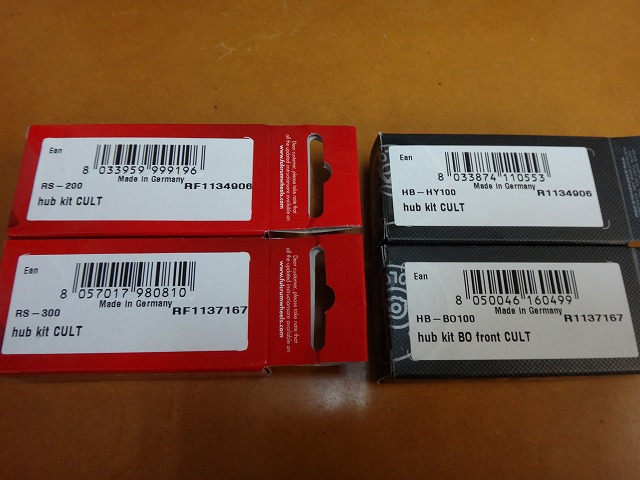
Currently,
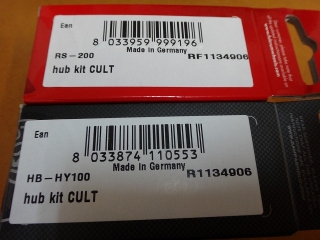
CULT bearings for the rear hub or old front size are
HB-HY100 for Campagnolo and
RS-200 for Fulcrum,
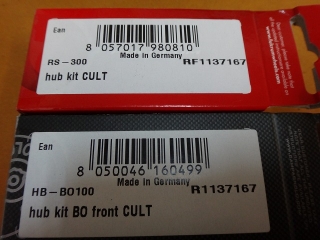
and CULT bearings for the new front hub are
HB-BO100 for Campagnolo and
RS-300 for Fulcrum.
Some of you might have noticed that the other part number for the former is R1134906
and for the latter is R1137167, which are completely identical—but don't think too hard about it.
Edit: Actually Fulcrum's starts with "RF".
Thanks to those who pointed that out in the comments.
This wheel originally had USB bearings.
The "B" in USB stands for bearing, so writing "USB bearing" becomes
"Ultra Smooth Bearing bearing"—but let's ignore that point.
The retainer ceramic bearings in USB and CULT are the same,
so technically you could get away with just replacing the cones and dust seals
if the wheel were unused and new.
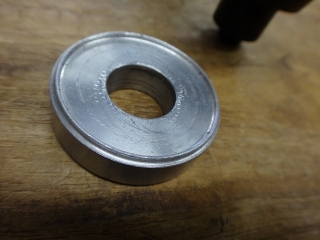
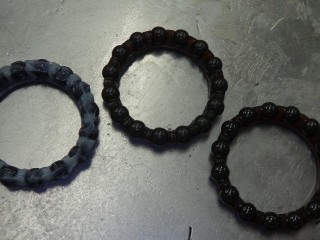
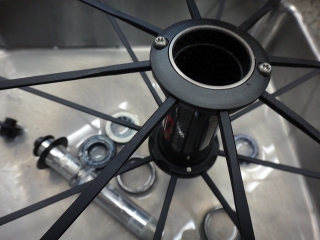
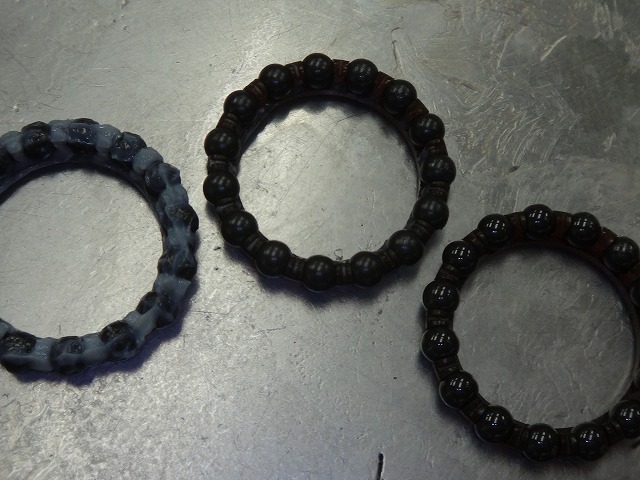
In the image above, from left: grease-packed USB, cleaned USB,
and new bearing from the CULT kit,
but the cleaned USB and new CULT show different gloss,
so I replaced the entire bearing set.
The front hub with smaller bearings is also one that has the possibility
of "new shaft explosion" defects.
This one loosened on the right side first.
Hold on, I'm not the kind to fall into traps like this.

I applied medium-strength threadlocker to the right end threads and fixed it to the shaft.
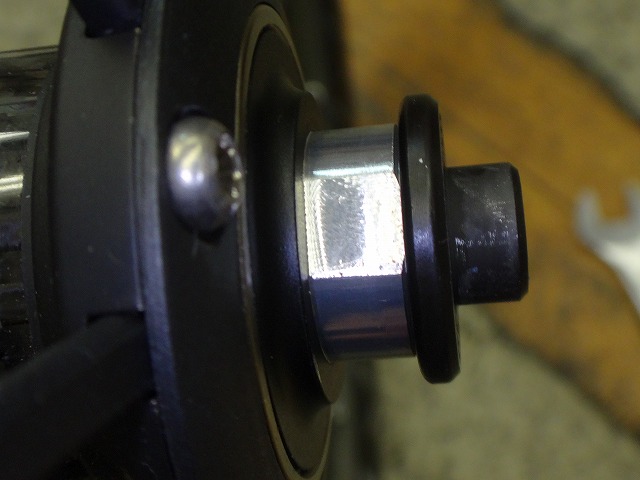
It's absolutely forbidden to grab the hollow shaft (with the end removed) and turn the left end—
that's something to be really careful about.
Using a custom-width 14mm wrench made just for this to hold the shaft
and turning the left end with a 5mm hex key,

I was able to loosen it with barely any tool marks,
I removed the USB cone.
At this point I hadn't replaced it with the red spoke yet.

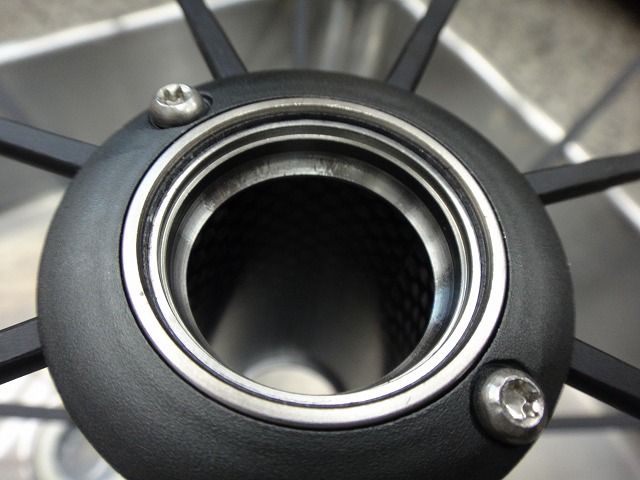
I pressed in the CULT cone.
The front wheel was perfectly centered and had almost no runout,
the rear wheel was very slightly off-center but had almost no runout.
Since I didn't check the preliminary center before work,
I can't confirm whether the cone removal and installation caused any centering shift.

They wanted CULT bearing conversion and an inspection.
The top image shows the wheel after work, but per the customer's request
I converted it to a stylish "one red spoke" look.
↑Front wheel left side—I replaced the spoke one position back from the valve hole (in the rotation direction) with a red one.
For the rear wheel, counting both sides, it's two positions back,
but I made the anti-freewheel side red because the rear left and front spokes
are the same length and part number.
Removed the USB cone and

cleaned it.

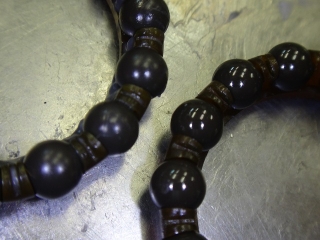
A bit of a tangent here, but about the teeth on this ratchet.
With Campagnolo Fulcrum hubs, you can replace this ratchet section.

↑The side where the threads stop partway is the hub shell side.

Only the groove area where the pawl spring sits shows minimal wear.

This part is sold in three-piece sets with pricing listed,
but retail shops cannot purchase it.
It's a "Service Center Only" part—available exclusively at service centers
(in Japan, that's Campagnolo Japan), and the tool to remove and install it
exists only at the service center.
So ratchet replacement requires sending it to Campagnolo Japan.
When the freewheel body occasionally catches during rotation
or the crank slips forward during pedaling,
ratchet replacement can sometimes fix it, and we've sent wheels in several times for this repair.
From experience, the symptoms often become pronounced when
replacing with a new freewheel body (switching to Shimano 11-speed with white aluminum).
It's like chain skip due to incompatibility between a new chain and heavily worn sprockets.
If your ratchet teeth are worn to the degree shown in the image above
and you're experiencing these symptoms, consult your local bike shop.
Regarding rear hubs with ratchets that come off with a dedicated tool—DT does this too,
but with DT, you can't remove the right bearing without the ratchet teeth coming off,
so the manufacturer supplies the tool.
With Campagnolo, the ratchet teeth sit nearly flush with the cone's outer diameter,
but with DT they sit completely over it.
↑DT Star Ratchet hub shell
↑The tool

Removing the ratchet from a bare hub is difficult—the wheel needs to be assembled.
The situation is similar to freewheel hubs, though that comparison
doesn't really register with people anymore.
When removing the ratchet ring, a metal seal ring comes off with it,
and it's pressed in with considerable force, so after reinstalling
the ratchet ring, you can't hand-install the seal ring.

That's why there's a tool that presses down cleanly on just the base of the seal.
You can press it in with a pressing tool,
but the pressing tool for 15mm shaft hubs works on most hub types,
so it gets more use on Novatech-based and Zipp hubs.
Speaking of Service Center Only—I just remembered.
The 6mm wrench for turning aluminum spoke nipples
has a new version separate from the traditional UT-WH070 (shown in the diagram and photo above),
but for some reason this is also Service Center Only.
If possible, please sell it at retail.
There's a rule (at least officially) that Campagnolo spare parts can only be used with Campagnolo,
and Fulcrum spare parts can only be used with Fulcrum.
The Shimano 11-speed white aluminum freewheel body, black aluminum spokes for front and rear left,
the freewheel pawl springs, bearings, and so on—when they're in their boxes as individual parts,
you can't distinguish between Campagnolo and Fulcrum versions.
Frankly, you could mix them and nobody would notice—there's no way to tell.
But officially mixing is not allowed, and apparently there's
a voice from heaven telling me to make a show of following this rule,
so I'm noting it here for the record.
Traditionally, Campagnolo bearings were the same size front and rear,
but recent higher-end models have switched to slightly smaller diameter bearings up front.
The smaller CULT bearing was initially used only on the Bora Ultra,
and Fulcrum had no model with smaller CULT bearings, so during the period
when newer Racing Zeros were being converted to CULT,
it was a dead giveaway that an improper mix-and-match was happening.
Currently,

CULT bearings for the rear hub or old front size are
HB-HY100 for Campagnolo and
RS-200 for Fulcrum,

and CULT bearings for the new front hub are
HB-BO100 for Campagnolo and
RS-300 for Fulcrum.
and for the latter is R1137167, which are completely identical—but don't think too hard about it.
Edit: Actually Fulcrum's starts with "RF".
Thanks to those who pointed that out in the comments.
This wheel originally had USB bearings.
The "B" in USB stands for bearing, so writing "USB bearing" becomes
"Ultra Smooth Bearing bearing"—but let's ignore that point.
The retainer ceramic bearings in USB and CULT are the same,
so technically you could get away with just replacing the cones and dust seals
if the wheel were unused and new.
In the image above, from left: grease-packed USB, cleaned USB,
and new bearing from the CULT kit,

but the cleaned USB and new CULT show different gloss,
so I replaced the entire bearing set.

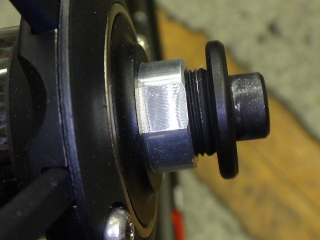
The front hub with smaller bearings is also one that has the possibility
of "new shaft explosion" defects.
This one loosened on the right side first.
Hold on, I'm not the kind to fall into traps like this.

I applied medium-strength threadlocker to the right end threads and fixed it to the shaft.
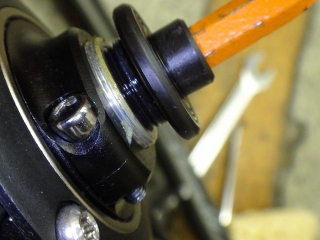
It's absolutely forbidden to grab the hollow shaft (with the end removed) and turn the left end—
that's something to be really careful about.
Using a custom-width 14mm wrench made just for this to hold the shaft
and turning the left end with a 5mm hex key,
I was able to loosen it with barely any tool marks,


I removed the USB cone.
At this point I hadn't replaced it with the red spoke yet.
I pressed in the CULT cone.
The front wheel was perfectly centered and had almost no runout,
the rear wheel was very slightly off-center but had almost no runout.
Since I didn't check the preliminary center before work,
I can't confirm whether the cone removal and installation caused any centering shift.