Another day, another wheel (etc.).
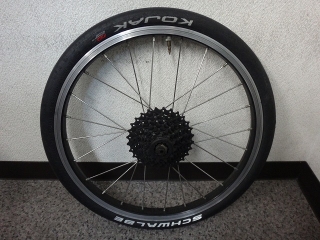
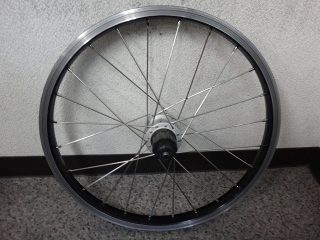
A customer brought me a Bike Friday rear wheel for service.

I'm lacing it with a Joytech 24H hub, all Champion spokes, in reverse Italian lacing pattern. This is a 16-inch wheel, but once you get too small a diameter, you can't do the crossed lacing anymore.
I thought the left-right spoke balance looked really good, but when I checked the centering, the rim was way off-center toward the non-drive side. No wonder the spoke tensions on both sides were so close.
It has a SRAM 8-speed cassette. Since it's an 8/9/10-speed freebody, it can handle up to 10-speed, but the customer wants to upgrade to a Capreo (compact drivetrain) with a 9-tooth top cog, so we'll need to rebuild with a dedicated rear hub.
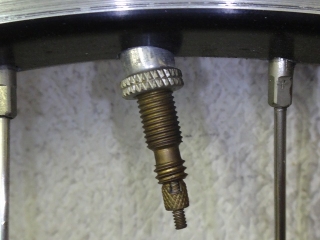
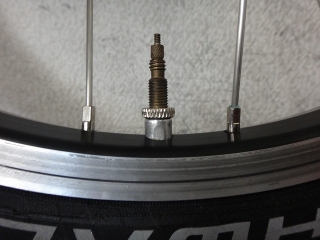
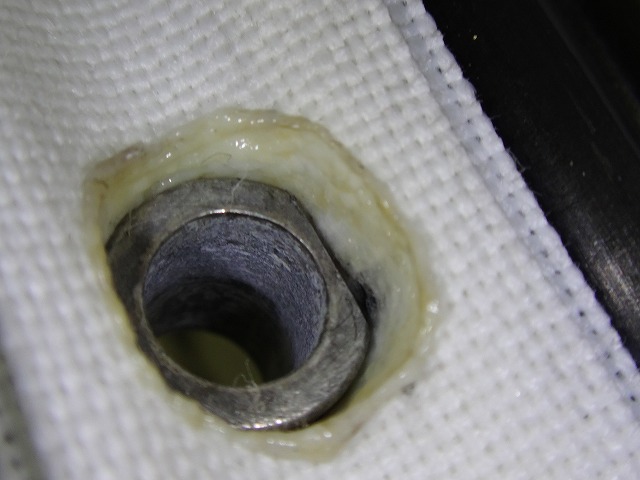
The adapter converting the rim's American/English valve hole to French appears to be in pretty rough shape. I'll sort that out later.

With a single-wall rim, having spokes stick out past the nipples is absolutely forbidden—it causes flats. For this reason, I've used relatively short spokes, but slightly longer ones would be better. Flush with the slot would be ideal.
I'm doing the rough lacing by turning the spoke slot with a minus-head driver bit. I use a similar tool myself, but shaped so it doesn't leave marks on the nipples like you see in the image above.
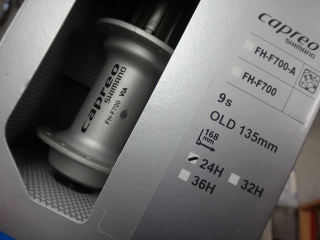
The Capreo hub comes in 24, 32, and 36 holes as shown on the box.

With Shimano components, their naming convention is: no letter prefix for road groupsets, "M" for MTB groupsets. From the 9100-series Dura-Ace, it became R9100, so road stuff gets an "R." Trekking components derived from MTB get a "T." Capreo has an "F"—I suppose that's for "Folding" bikes? Regardless of whether the bike being equipped is merely a small-wheel bike or actually has a folding mechanism. According to the 2017 catalog, only the two groupsets shown above are available.
The original Capreo rear derailleurs seem to be the RD-F700 (a different color version of the 4400-series Tiagra) and its successor RD-F800 (comes in SS and GS versions) which went to the MTB-style shadow design, but both are discontinued with only remaining stock available. By the way, the RD-F800-SS is a rare short-cage version with shadow design (the R9100 is technically middle-cage length, so a short-cage shadow is genuinely uncommon).
Regarding hub availability—from what I can find, the discontinued HB-F700 front hub is only available in 32H, while the still-listed FH-F700 rear hub is only available in 24H, and other specs appear to be sold out at the manufacturer. Wait a minute, that doesn't make sense. If FH-F700 is in the catalog, why would 32 and 36H be unobtainable as of 2017? I was just lucky that 24H happened to be available and needed for this job.

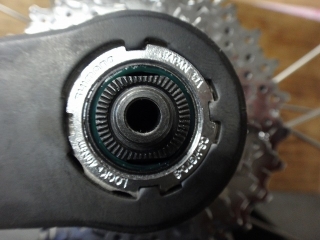
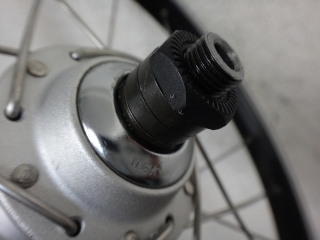
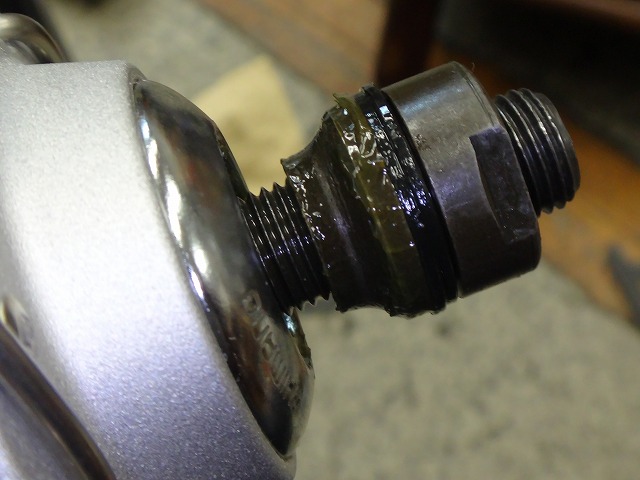
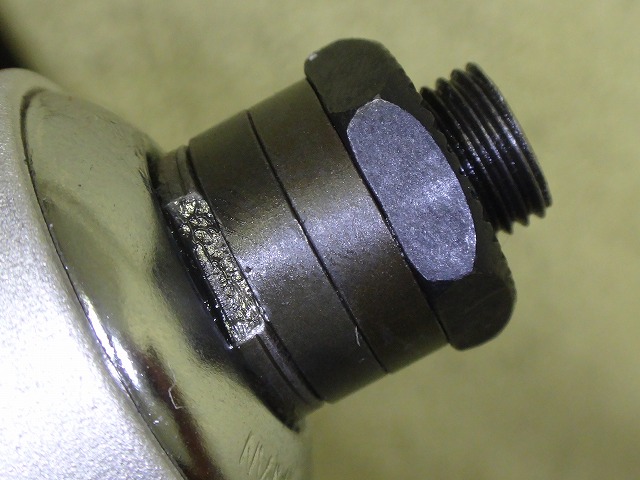
The Capreo rear hub's over-locknut dimension is nominally 135mm, but Bike Friday is 130mm, so I need to trim the left end. The left W-nut has an internal grip width of 15mm and external of 17mm, but I noticed the inner nut's grip portion was barely sinking into the dust seal. The hub came with three spacers; when I measured them with calipers, they were all 3.8mm. The spec is 3.75mm, so that's what they should be.
Looking through old catalogs, the original 2003 Capreo documentation listed one 3.75mm spacer and one 8mm spacer here.
Removing one 3.75mm spacer brought the over-locknut dimension to about 131mm, matching the previous hub, so I'll go with no further micro-adjustments like swapping in different spacer sizes.
Shortening the left end will dramatically worsen the left-right spoke balance due to dish (offset), but a 130mm road hub has roughly that same dimension anyway.

The new hub's rotation felt rough, so I greased it up.
It's laced. All Champion spokes in 4-cross Italian lacing. I rebuilt with all new spokes, but on the drive side it's still "four Champion spokes" as before. I secretly switched from reverse Italian to regular Italian lacing. And I made the spokes a bit longer.
The drive side is pretty tight. I even applied negative correction, but the non-drive side came out a bit further inward. With a thicker rim tape and the spokes tensioned tight enough that significant future truing is unlikely, there's no risk of the spokes poking through.
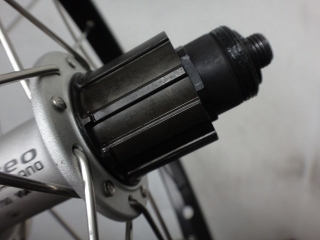
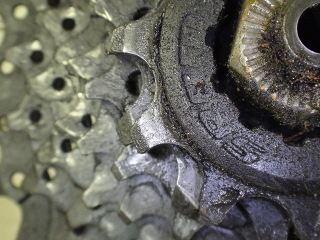
About the Capreo freebody:
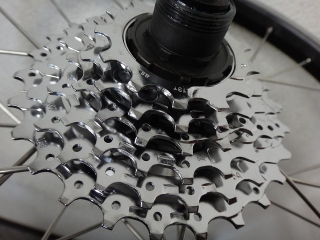
The first six cogs from the low side have the same spline as a standard Shimano freebody,

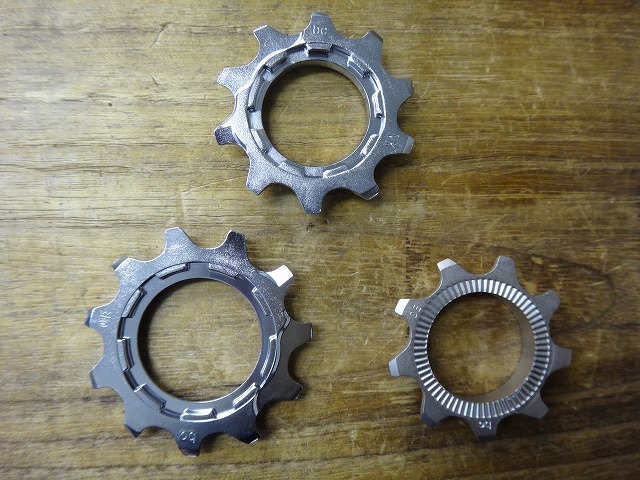
Top three cogs, outer side
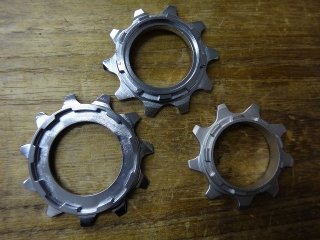
Top three cogs, inner side
The seventh cog's inner side from low acts as the end stop of the normal spline, then the tooth outer edges transition to a smaller-diameter spline form that allows engagement.
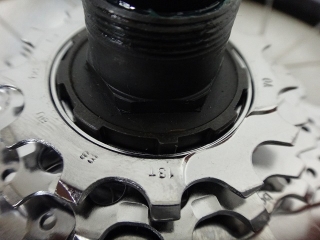
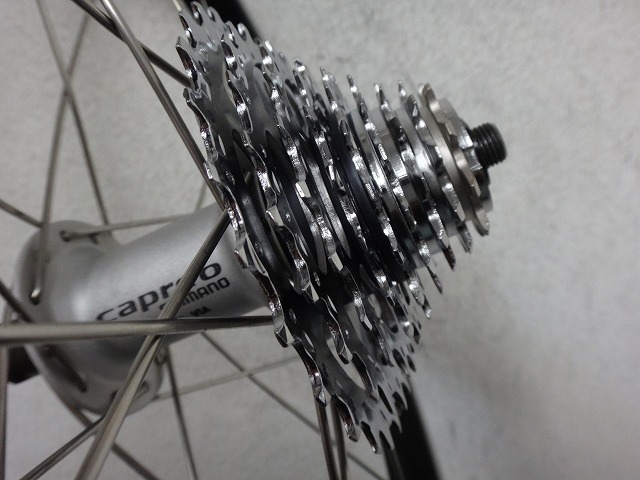
Tightening the Capreo-spec lockring with the dedicated tool

allows mounting of a 9-9 speed cassette (9 to 26T).
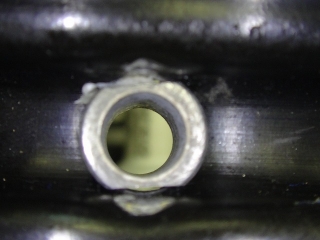
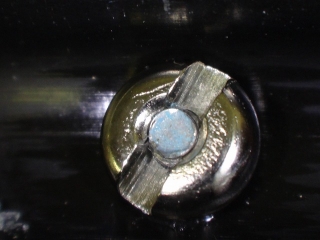
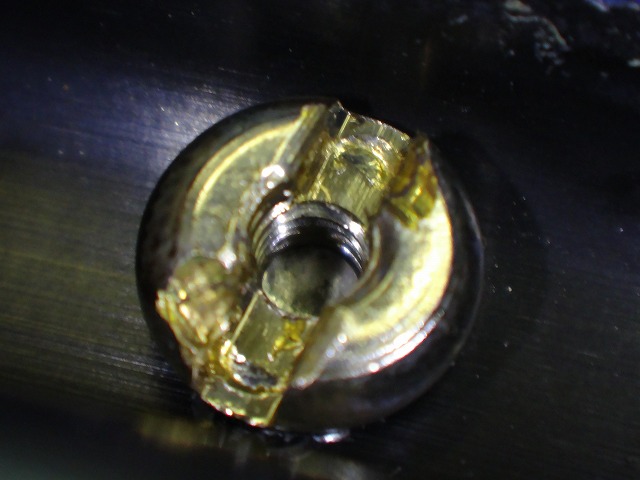
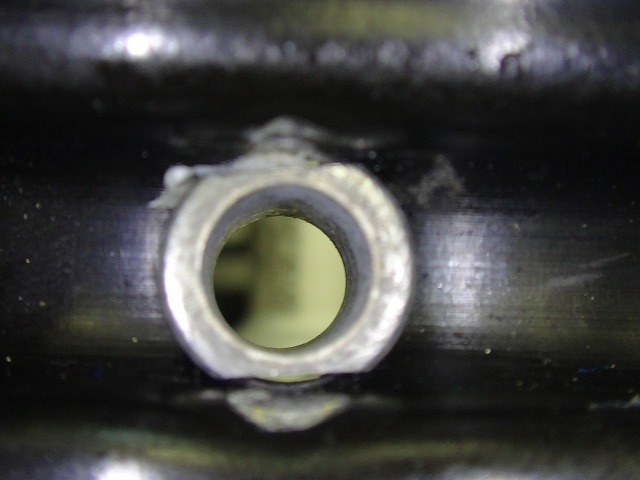
The valve hole adapter is basically a countersunk nut-like piece for fixing caliper brakes, with a flat milled parallel to match the rim's groove.

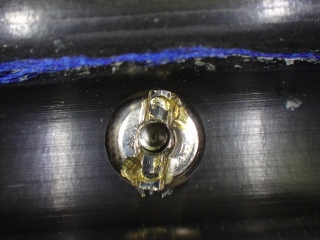
The hub's imprint visible through the valve hole is as close as I could get it.


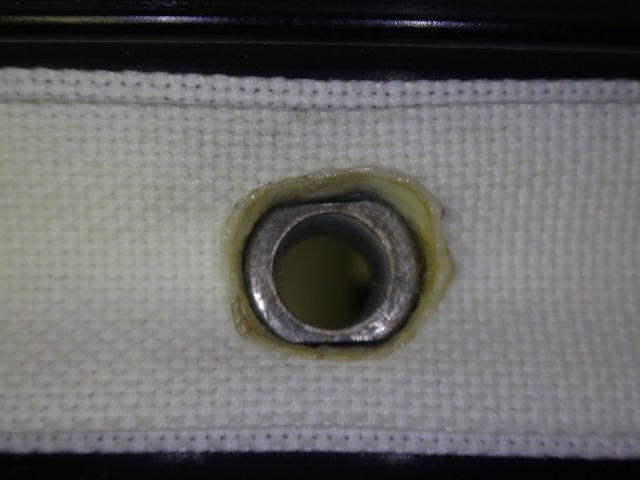
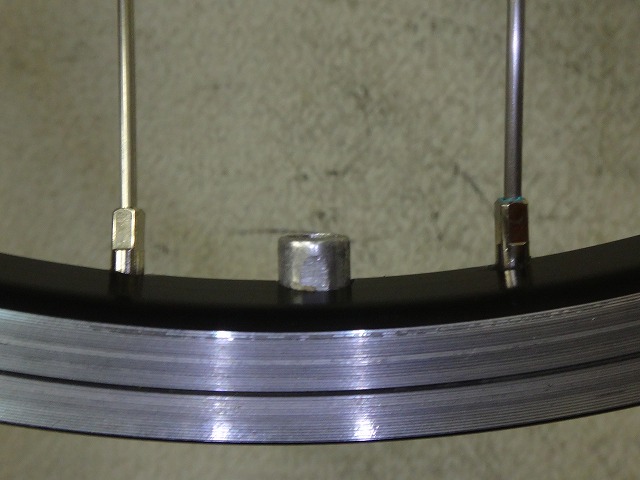
I wrapped fabric rim tape in three layers—right-offset, left-offset, and center—drilled a hole at the valve position with a soldering iron and fused the adapter in.
After mounting the tire and tube and pumping to 8 bar (tire max pressure), then removing the tire again, the rim tape sagged into the rim's depression and bunched up. It's doing its job in terms of protection and keeping the tube away from the nipples, but since it's not covering the full inner width of the rim, I'm not happy with it. Let me think of another approach. For what it's worth, the original setup had just one layer of Schwalbe's thin blue fabric tape, stuck only in the deepest part of the rim depression.

I wrapped Stan's tubeless-ready tape in three layers, drilled the valve hole with a soldering iron while fusing, and here it is after 8 bar with the tire removed. The rim tape stays in place covering the full width without sagging into the depression, so this is the way to go.Wrapping Stan's tape that many times means the tape costs more than the rim itself.

The valve adapter sits straight and doesn't rattle.
Tire remounted.

The left end has been trimmed. The left-right tension difference isn't much different from the previous wheel (which had reduced tension difference but was off-center), though if I hadn't done 4-cross lacing, it would've been much worse.
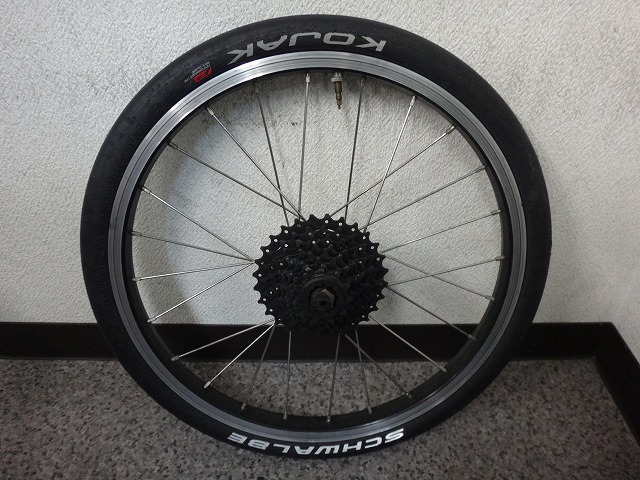
A customer brought me a Bike Friday rear wheel for service.

I'm lacing it with a Joytech 24H hub, all Champion spokes, in reverse Italian lacing pattern. This is a 16-inch wheel, but once you get too small a diameter, you can't do the crossed lacing anymore.
I thought the left-right spoke balance looked really good, but when I checked the centering, the rim was way off-center toward the non-drive side. No wonder the spoke tensions on both sides were so close.

It has a SRAM 8-speed cassette. Since it's an 8/9/10-speed freebody, it can handle up to 10-speed, but the customer wants to upgrade to a Capreo (compact drivetrain) with a 9-tooth top cog, so we'll need to rebuild with a dedicated rear hub.

The adapter converting the rim's American/English valve hole to French appears to be in pretty rough shape. I'll sort that out later.

With a single-wall rim, having spokes stick out past the nipples is absolutely forbidden—it causes flats. For this reason, I've used relatively short spokes, but slightly longer ones would be better. Flush with the slot would be ideal.
I'm doing the rough lacing by turning the spoke slot with a minus-head driver bit. I use a similar tool myself, but shaped so it doesn't leave marks on the nipples like you see in the image above.

The Capreo hub comes in 24, 32, and 36 holes as shown on the box.

With Shimano components, their naming convention is: no letter prefix for road groupsets, "M" for MTB groupsets. From the 9100-series Dura-Ace, it became R9100, so road stuff gets an "R." Trekking components derived from MTB get a "T." Capreo has an "F"—I suppose that's for "Folding" bikes? Regardless of whether the bike being equipped is merely a small-wheel bike or actually has a folding mechanism. According to the 2017 catalog, only the two groupsets shown above are available.
The original Capreo rear derailleurs seem to be the RD-F700 (a different color version of the 4400-series Tiagra) and its successor RD-F800 (comes in SS and GS versions) which went to the MTB-style shadow design, but both are discontinued with only remaining stock available. By the way, the RD-F800-SS is a rare short-cage version with shadow design (the R9100 is technically middle-cage length, so a short-cage shadow is genuinely uncommon).
Regarding hub availability—from what I can find, the discontinued HB-F700 front hub is only available in 32H, while the still-listed FH-F700 rear hub is only available in 24H, and other specs appear to be sold out at the manufacturer. Wait a minute, that doesn't make sense. If FH-F700 is in the catalog, why would 32 and 36H be unobtainable as of 2017? I was just lucky that 24H happened to be available and needed for this job.

The Capreo rear hub's over-locknut dimension is nominally 135mm, but Bike Friday is 130mm, so I need to trim the left end. The left W-nut has an internal grip width of 15mm and external of 17mm, but I noticed the inner nut's grip portion was barely sinking into the dust seal. The hub came with three spacers; when I measured them with calipers, they were all 3.8mm. The spec is 3.75mm, so that's what they should be.
Looking through old catalogs, the original 2003 Capreo documentation listed one 3.75mm spacer and one 8mm spacer here.
Removing one 3.75mm spacer brought the over-locknut dimension to about 131mm, matching the previous hub, so I'll go with no further micro-adjustments like swapping in different spacer sizes.
Shortening the left end will dramatically worsen the left-right spoke balance due to dish (offset), but a 130mm road hub has roughly that same dimension anyway.
The new hub's rotation felt rough, so I greased it up.
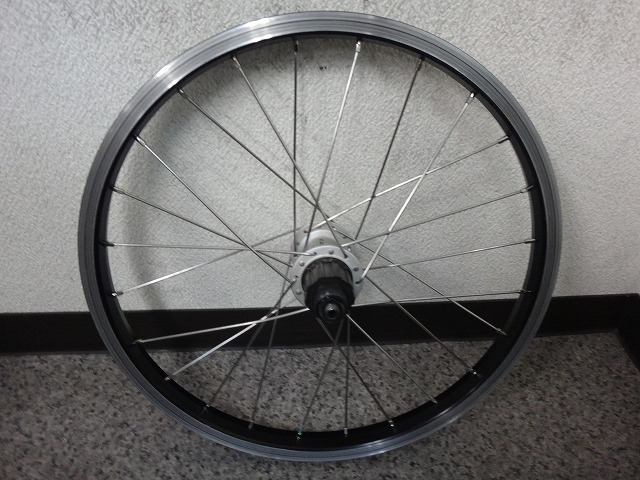
It's laced. All Champion spokes in 4-cross Italian lacing. I rebuilt with all new spokes, but on the drive side it's still "four Champion spokes" as before. I secretly switched from reverse Italian to regular Italian lacing. And I made the spokes a bit longer.

The drive side is pretty tight. I even applied negative correction, but the non-drive side came out a bit further inward. With a thicker rim tape and the spokes tensioned tight enough that significant future truing is unlikely, there's no risk of the spokes poking through.
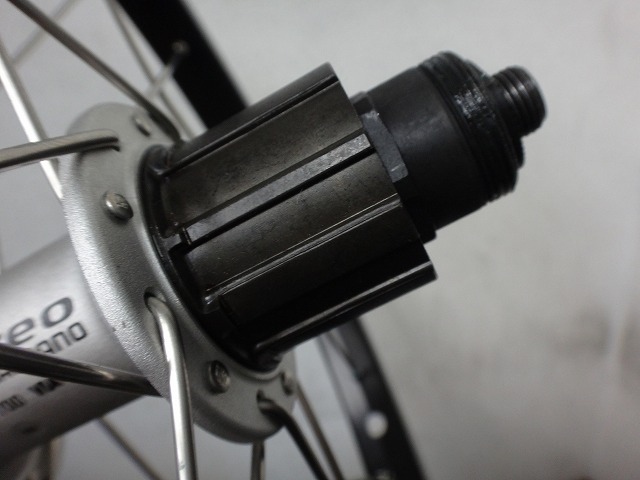
About the Capreo freebody:


The first six cogs from the low side have the same spline as a standard Shimano freebody,
Top three cogs, outer side

Top three cogs, inner side
The seventh cog's inner side from low acts as the end stop of the normal spline, then the tooth outer edges transition to a smaller-diameter spline form that allows engagement.

Tightening the Capreo-spec lockring with the dedicated tool
allows mounting of a 9-9 speed cassette (9 to 26T).
The valve hole adapter is basically a countersunk nut-like piece for fixing caliper brakes, with a flat milled parallel to match the rim's groove.

The hub's imprint visible through the valve hole is as close as I could get it.
I wrapped fabric rim tape in three layers—right-offset, left-offset, and center—drilled a hole at the valve position with a soldering iron and fused the adapter in.
After mounting the tire and tube and pumping to 8 bar (tire max pressure), then removing the tire again, the rim tape sagged into the rim's depression and bunched up. It's doing its job in terms of protection and keeping the tube away from the nipples, but since it's not covering the full inner width of the rim, I'm not happy with it. Let me think of another approach. For what it's worth, the original setup had just one layer of Schwalbe's thin blue fabric tape, stuck only in the deepest part of the rim depression.

I wrapped Stan's tubeless-ready tape in three layers, drilled the valve hole with a soldering iron while fusing, and here it is after 8 bar with the tire removed. The rim tape stays in place covering the full width without sagging into the depression, so this is the way to go.
The valve adapter sits straight and doesn't rattle.

Tire remounted.

The left end has been trimmed. The left-right tension difference isn't much different from the previous wheel (which had reduced tension difference but was off-center), though if I hadn't done 4-cross lacing, it would've been much worse.