I built Muralab Wheel #5 with a disc brake hub.
The rim for #5 is currently out of stock with no confirmed restock date,
but this wheel was built using a rim that had been waiting for a hub from a pre-order.
First, about wheel building with a disc brake hub.
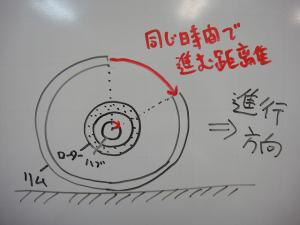
Similar diagram to the rim brake version from last time.
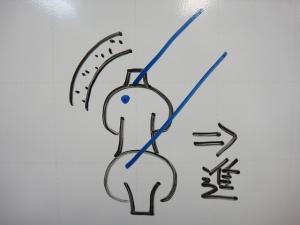
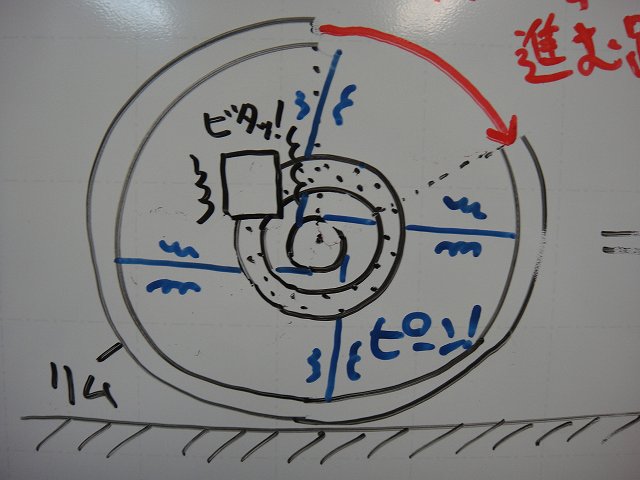
Think of the disc rotor and hub as a single rigid body.
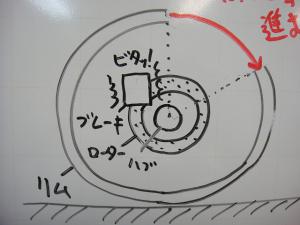
With disc brakes and similar systems (like band brakes on utility bikes),
braking happens at the hub.
During braking, the rim side is still rotating.
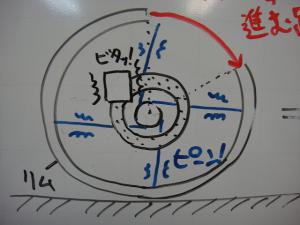
The spokes that get really tight at that moment
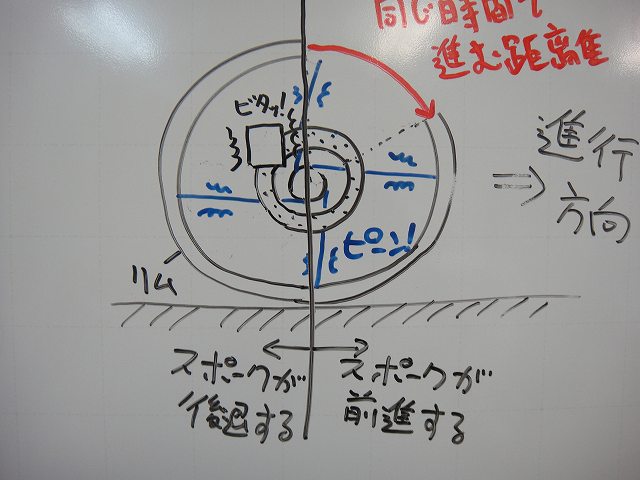
are the ones on the upper side of the wheel, pointing forward relative to the direction of travel.
These are what I call "anti-porcupine direction" spokes on this blog.
Since we want the outboard spokes (that is, inpokes) to handle the stopping power,
it's best to build so that the blue spokes in the diagram above are inpokes.
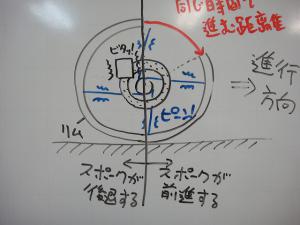
In my previous post, I received a comment saying
"the behavior of spokes getting tight is not the same
whether the wheel is moving forward or backward."
Since a wheel isn't floating in air but is in contact with the ground while moving forward,
that's certainly a fair point.
Explaining this would get extremely long, so I'll skip it this time.
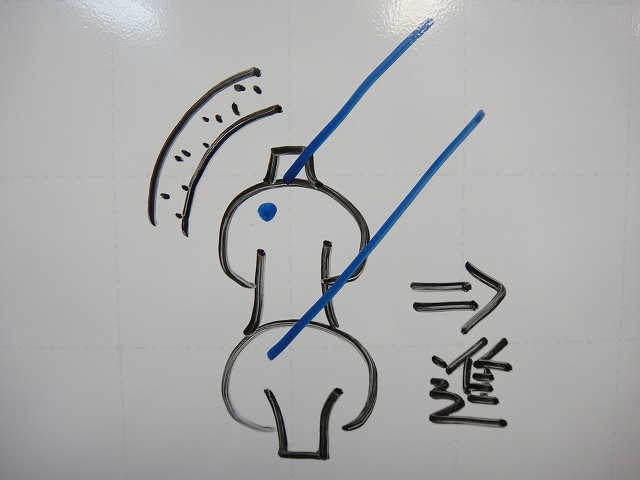
Anyway, for the front wheel, you build so that inpokes on both sides
are in the anti-porcupine direction—in other words, reverse Italian lacing.

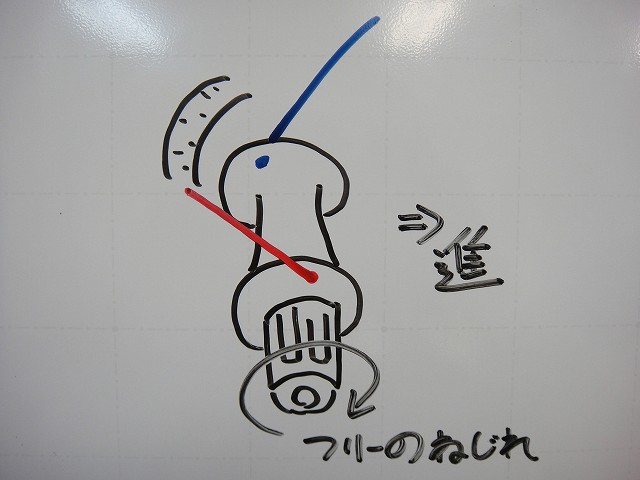
The rear wheel is different.
The freewheel body twist must be absorbed by inpokes,
so the inpokes on the freewheel side must be in the porcupine direction.
On the non-freewheel side, the inpokes are positioned in the anti-porcupine direction
to handle the braking power from the hub-side disc brake.
That's basically JIS lacing.
So, today too I'm building a whee— (and so on).
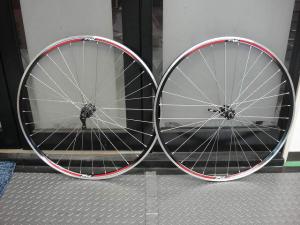
Actually built it.
Front hub is XT, rear hub is SLX with thru-axle.

For the rear wheel, I did JIS 48-spoke lacing.
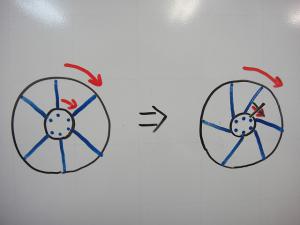
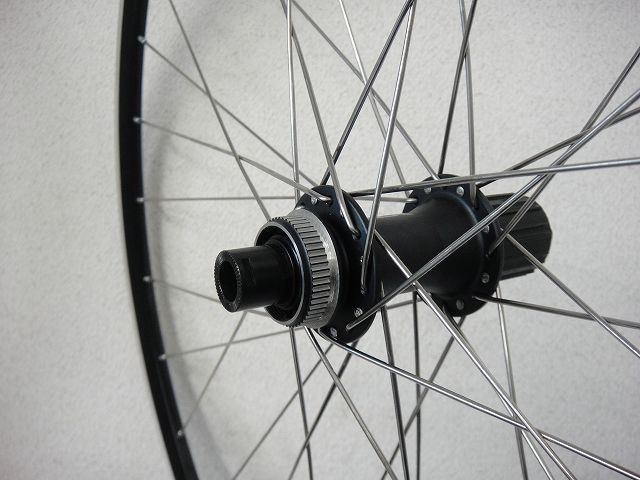
These hubs both prohibit radial lacing, but
if you were to build radial, you'd get
the kind of twisting shown above during braking.
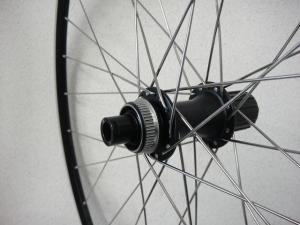
So I thought that if I used the most tangential lacing possible—
the complete opposite of radial—I could better absorb
the twisting stress during braking.
That's why I did 8-spoke lacing on the non-freewheel side.
This also helps balance the spoke tension between left and right.
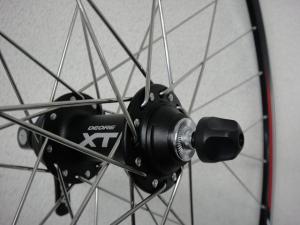
Next, the front wheel.
Because the disc rotor mounts on the left side,
the left flange width is narrower.
While not as extreme as the rear hub's right side,
this means I can't build with equal spoke tension left to right.
I thought that since the flange width difference is less severe than on the rear hub,
I might balance things with 84-spoke lacing (the reverse of 48),
but building the rear wheel's brake side away from radial lacing
while doing the opposite on the front seemed inconsistent.
So I ended up doing reverse Italian 66-spoke lacing instead.
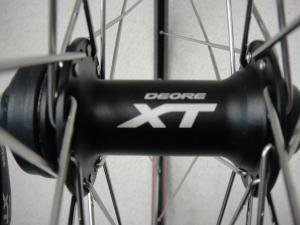
↑This hub has ever-so-slightly hi-lo flanges.
Since the hub itself shows a bit of consideration, I went with that.
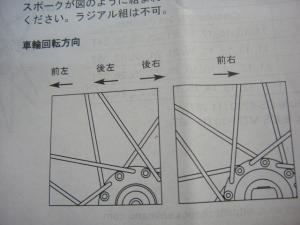
Front wheel in reverse Italian, rear wheel in JIS—
I didn't come up with this; it's common practice.
Shimano's instruction manuals specify this kind of lacing too,
(the image above basically says the same thing)
though not in explicit written terms.
Written out, it would be:
"Front wheel: both sides should have tangent lacing where spokes
threaded from inside to outside the hub flange are pointing forward in the wheel's upper half relative to direction of travel.
Same for the rear wheel's freewheel side. Only the rear wheel's non-freewheel side should be laced the opposite way."
Shimano's manuals read like a Rosetta Stone with text in every language,
but since terms like "JIS lacing" don't universally translate across the world,
lacing patterns have to be explained this way.
This blog goes through the bother of repeatedly writing "spokes threaded from inside to outside the hub flange,"
so that's why I coined the term "inpoke."
Tangent note: SRAM component manuals are even wilder.
They explain assembly procedures mostly with diagrams, barely using any text at all.
It's like looking at model kit or IKEA flat-pack furniture instructions.
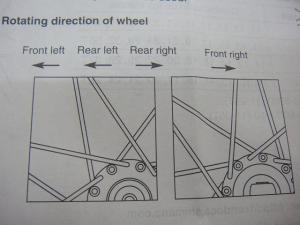
↑English
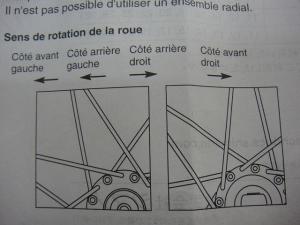
↑French
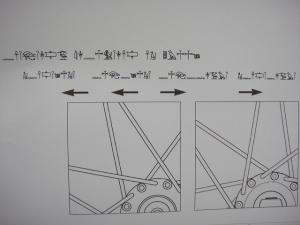
↑Egyptian hieroglyphics
The rim for #5 is currently out of stock with no confirmed restock date,
but this wheel was built using a rim that had been waiting for a hub from a pre-order.
First, about wheel building with a disc brake hub.
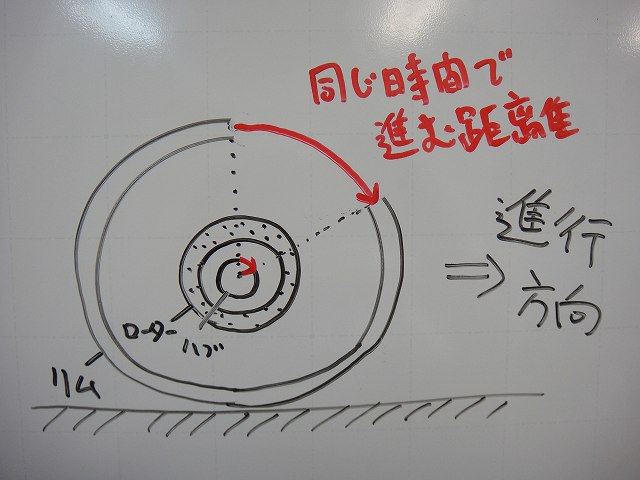
Similar diagram to the rim brake version from last time.
Think of the disc rotor and hub as a single rigid body.
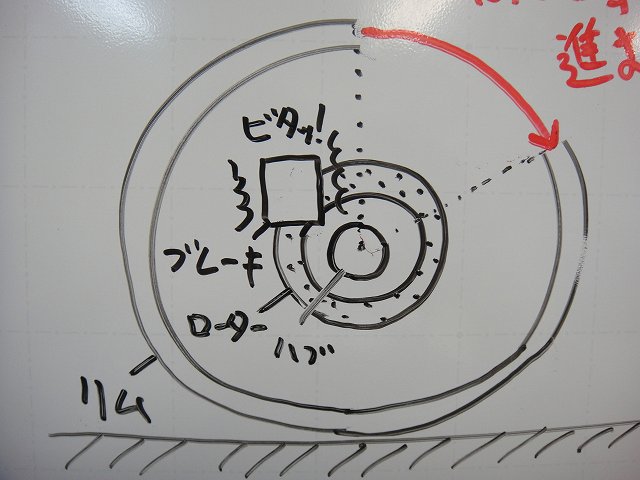
With disc brakes and similar systems (like band brakes on utility bikes),
braking happens at the hub.
During braking, the rim side is still rotating.
The spokes that get really tight at that moment
are the ones on the upper side of the wheel, pointing forward relative to the direction of travel.
These are what I call "anti-porcupine direction" spokes on this blog.
Since we want the outboard spokes (that is, inpokes) to handle the stopping power,
it's best to build so that the blue spokes in the diagram above are inpokes.
In my previous post, I received a comment saying
"the behavior of spokes getting tight is not the same
whether the wheel is moving forward or backward."
Since a wheel isn't floating in air but is in contact with the ground while moving forward,
that's certainly a fair point.
Explaining this would get extremely long, so I'll skip it this time.
Anyway, for the front wheel, you build so that inpokes on both sides
are in the anti-porcupine direction—in other words, reverse Italian lacing.
The rear wheel is different.
The freewheel body twist must be absorbed by inpokes,
so the inpokes on the freewheel side must be in the porcupine direction.
On the non-freewheel side, the inpokes are positioned in the anti-porcupine direction
to handle the braking power from the hub-side disc brake.
That's basically JIS lacing.
So, today too I'm building a whee— (and so on).
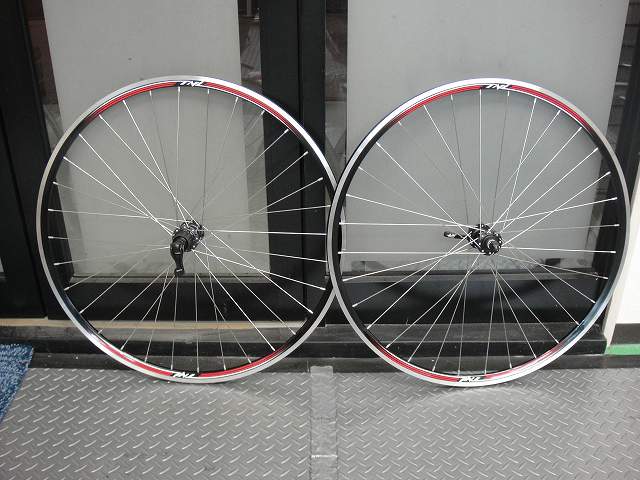
Actually built it.
Front hub is XT, rear hub is SLX with thru-axle.
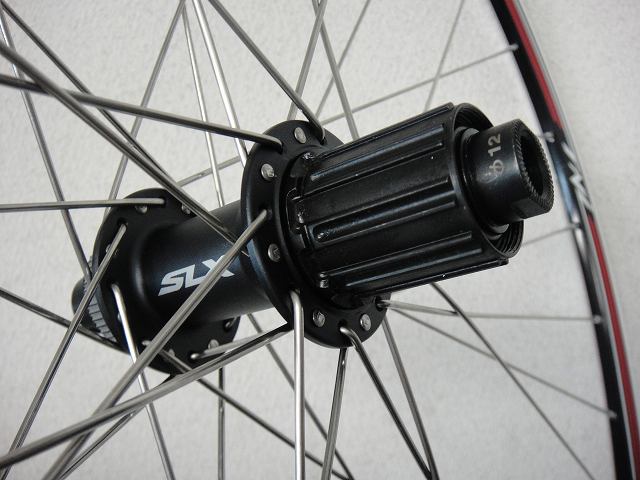
For the rear wheel, I did JIS 48-spoke lacing.

These hubs both prohibit radial lacing, but
if you were to build radial, you'd get
the kind of twisting shown above during braking.
So I thought that if I used the most tangential lacing possible—
the complete opposite of radial—I could better absorb
the twisting stress during braking.
That's why I did 8-spoke lacing on the non-freewheel side.
This also helps balance the spoke tension between left and right.
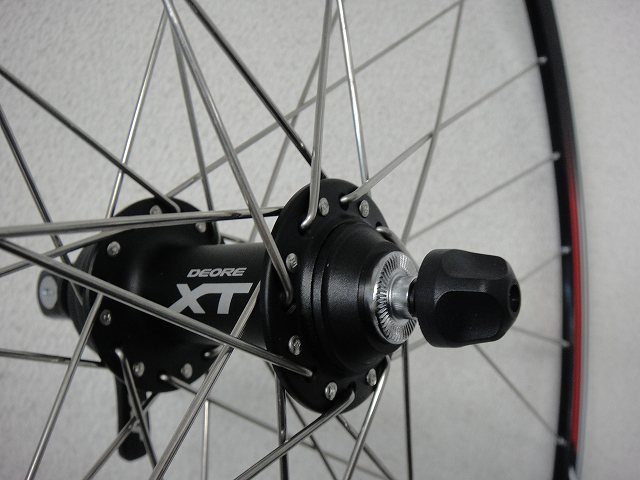
Next, the front wheel.
Because the disc rotor mounts on the left side,
the left flange width is narrower.
While not as extreme as the rear hub's right side,
this means I can't build with equal spoke tension left to right.
I thought that since the flange width difference is less severe than on the rear hub,
I might balance things with 84-spoke lacing (the reverse of 48),
but building the rear wheel's brake side away from radial lacing
while doing the opposite on the front seemed inconsistent.
So I ended up doing reverse Italian 66-spoke lacing instead.
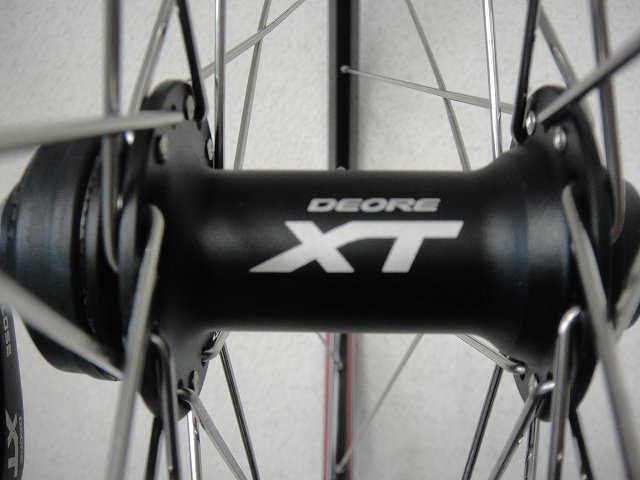
↑This hub has ever-so-slightly hi-lo flanges.
Since the hub itself shows a bit of consideration, I went with that.
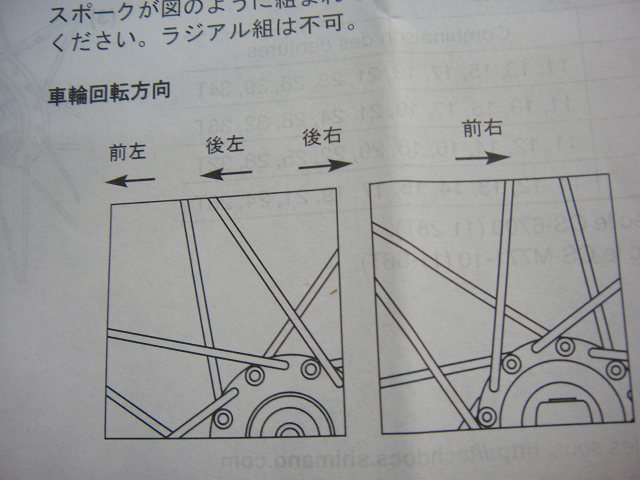
Front wheel in reverse Italian, rear wheel in JIS—
I didn't come up with this; it's common practice.
Shimano's instruction manuals specify this kind of lacing too,
(the image above basically says the same thing)
though not in explicit written terms.
Written out, it would be:
"Front wheel: both sides should have tangent lacing where spokes
threaded from inside to outside the hub flange are pointing forward in the wheel's upper half relative to direction of travel.
Same for the rear wheel's freewheel side. Only the rear wheel's non-freewheel side should be laced the opposite way."
Shimano's manuals read like a Rosetta Stone with text in every language,
but since terms like "JIS lacing" don't universally translate across the world,
lacing patterns have to be explained this way.
This blog goes through the bother of repeatedly writing "spokes threaded from inside to outside the hub flange,"
so that's why I coined the term "inpoke."
Tangent note: SRAM component manuals are even wilder.
They explain assembly procedures mostly with diagrams, barely using any text at all.
It's like looking at model kit or IKEA flat-pack furniture instructions.
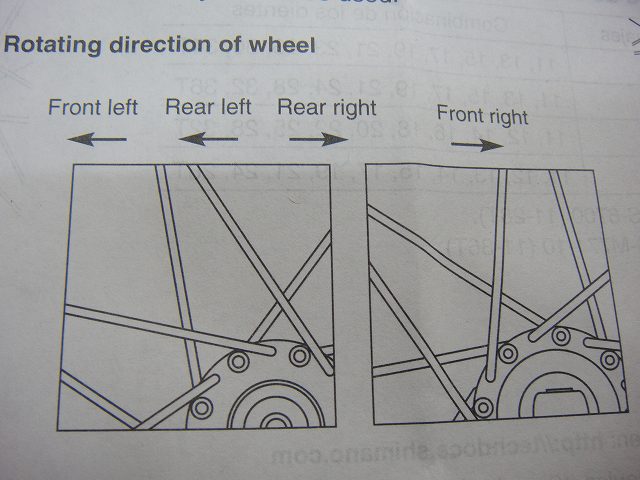
↑English

↑French
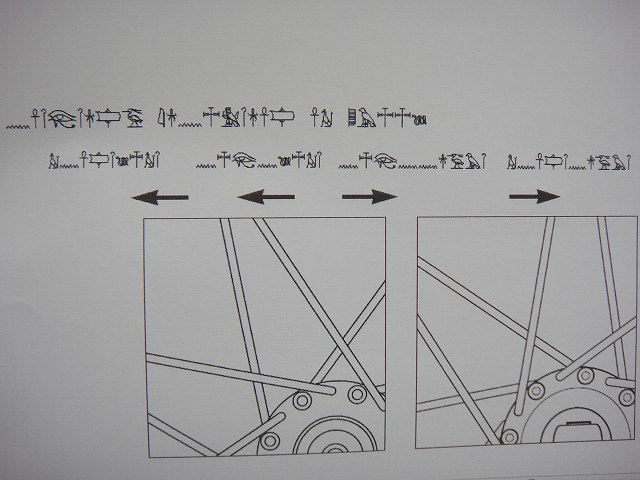
↑Egyptian hieroglyphics