The drill screams to life!
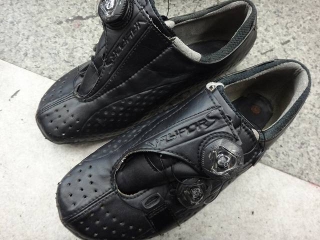
A customer left me a pair of BONT shoes.
BONT shoes often have surprisingly poor craftsmanship.
Though it seems they've gotten somewhat better recently.
And the domestic distributors' staff don't really understand technical matters either, which is painful.
In their defense, since the shoe construction—precision and finishing—is genuinely terrible, it's just their job to keep saying this is the specification, this is the specification.
But when other manufacturers almost never have such defects, yet the response is always just "that's also the specification so we can't exchange it," I have to say it's a bit much.
If BONT shoes happen to fit your feet, or if you love the design and want a pair, the only self-defense strategy before buying is to carefully examine the actual product.
Since this particular job doesn't involve any defects or negligence on BONT's part, I won't write any further about that.
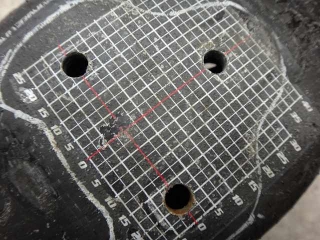
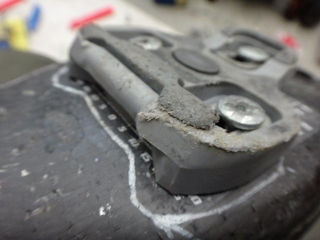
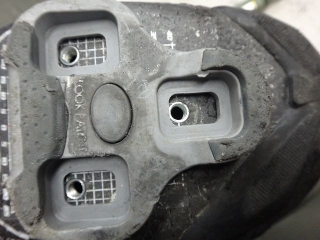
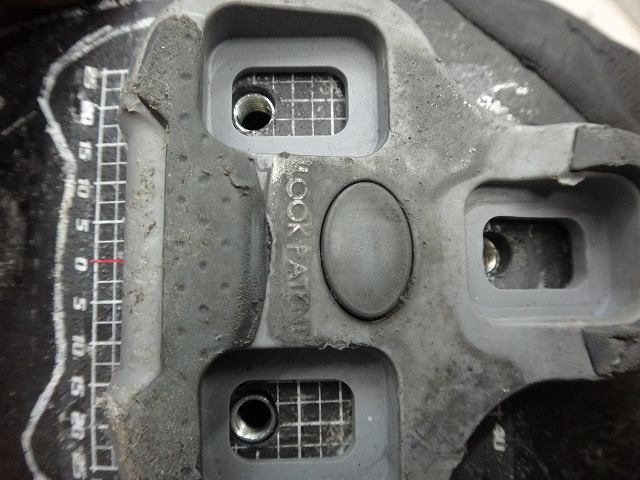
The person wearing these is female, and the three cleat holes are positioned quite close to the heel. She wants to move the cleat forward more, but can't go any further with the existing holes, so she's asking for three new holes positioned further forward.
The claim that the cleat holes are heel-biased isn't unfounded—comparing them to her previous Specialized shoes, the difference is clear.
I'd already heard about this beforehand, so I'd told her that if the shoe had a structure where the cleat nuts could be removed from the shoe side, it would probably be possible.

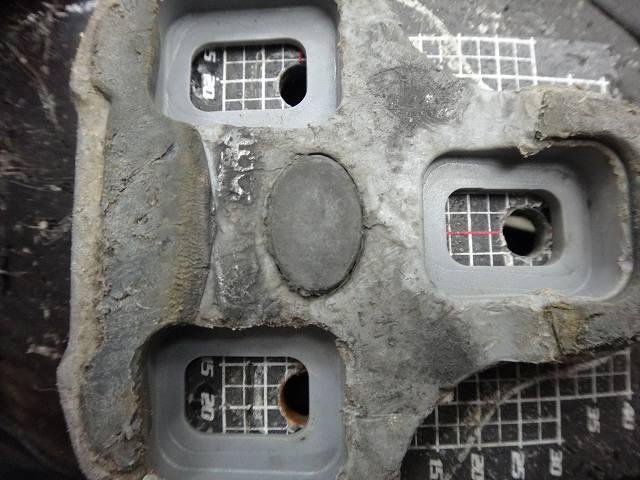
I removed the cleats.
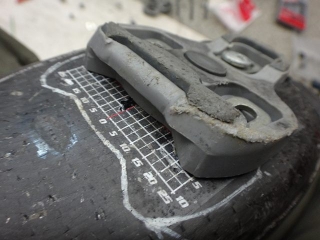
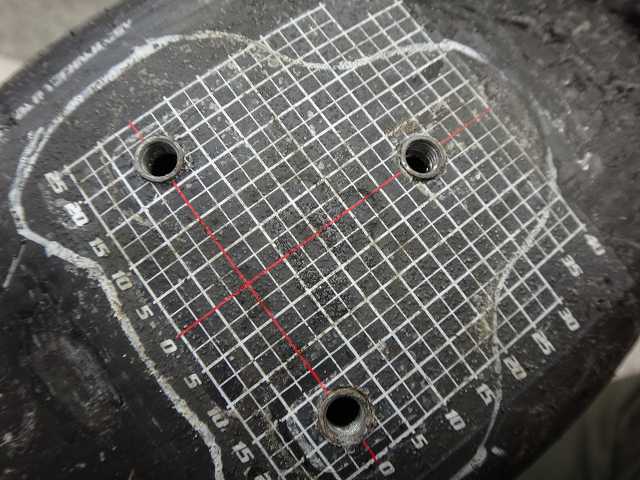
First thing I did was align the heel edges of the left and right shoes and compare them sole to sole.
I've seen cases in the past where the front-back positions of the three holes differ between left and right shoes (specification, they say), so I don't trust them.
Turns out the customer had already done this exact check.
Ha, right—that's definitely where you start.

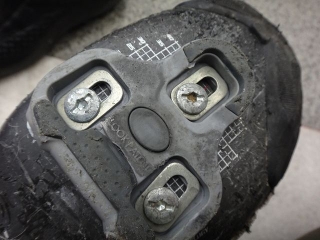
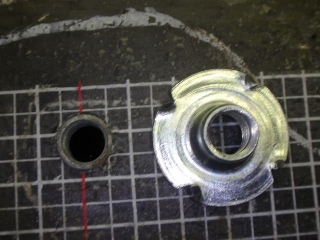
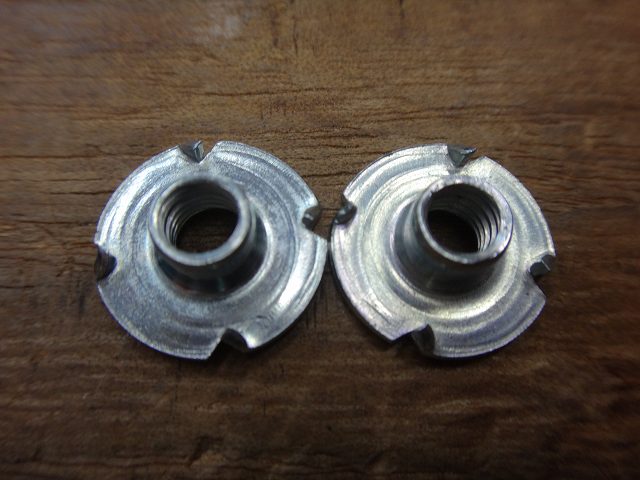
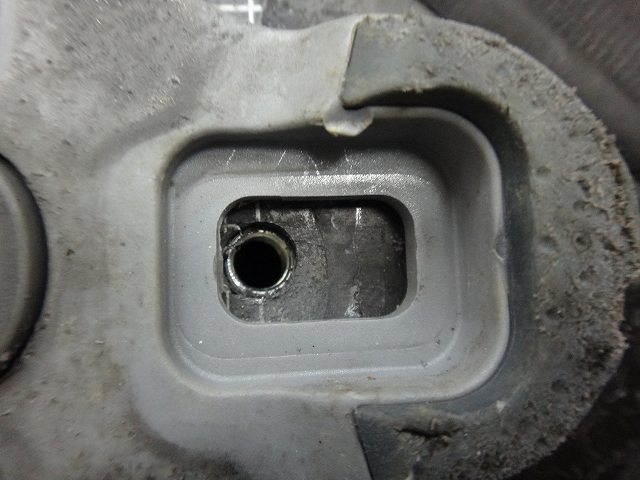
The cleat nuts are designed to bite into the shoe side when called by the cleat mounting bolt.

The customer had spare cleat nuts on hand, which was a huge help.
Not because I wanted to use new ones, but because understanding the structure of the currently seated cleat nuts lets me proceed with confidence.
Replacing the cleat nuts isn't essential, but the customer wanted it done, so I did it.

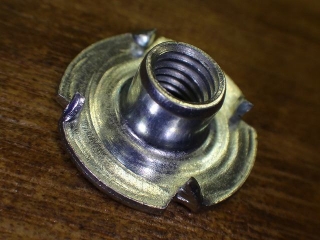
The flange has spikes on it that bite into the shoe.
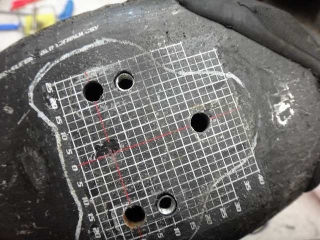
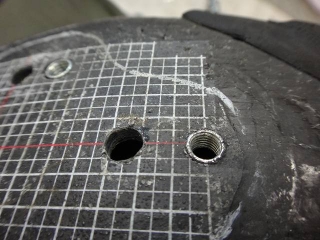
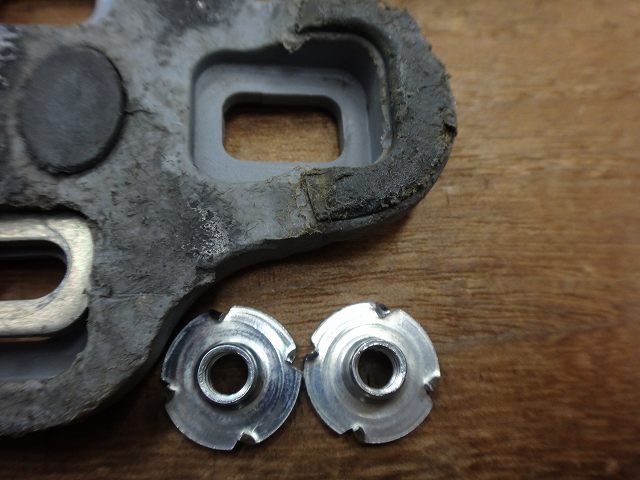
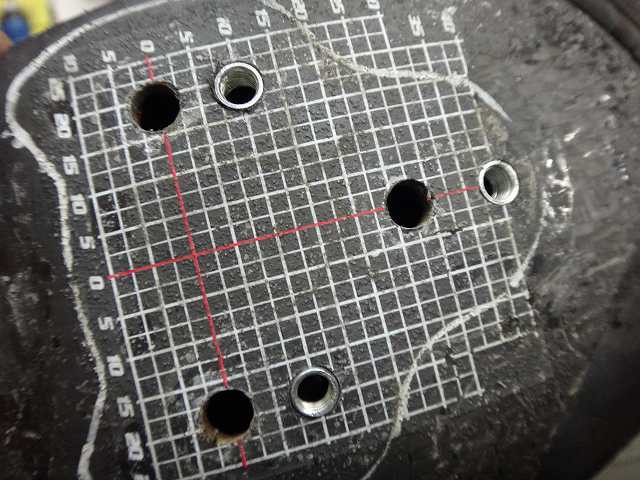
The problem here is determining how far forward to drill the holes.
I can't just connect them into a single slot—I need to maintain some distance.
Plus, if I don't remove the old cleat nuts, the flanges of the old and new cleat nuts will interfere.

The shortest distance where old and new cleat nuts don't interfere (without modifying the flanges) would be like this, but

that's larger than the cleat's adjustment range, meaning "the rearmost position of the new hole is further forward than the rearmost position of the old hole," creating positions that can't be accessed from either hole set.
The customer wants to move forward quite a bit, so that itself isn't a problem, but
↑if I use the shortest distance without removing the old cleat nuts, it goes forward too much, so I need to tighten the spacing.
I consulted with the customer to decide how far forward to go.
I removed the cleat nuts.
If I just drill holes the same size in a straight line forward at the same spacing... yeah right, that's stupid. Don't drag me into your dumbass shoe design.
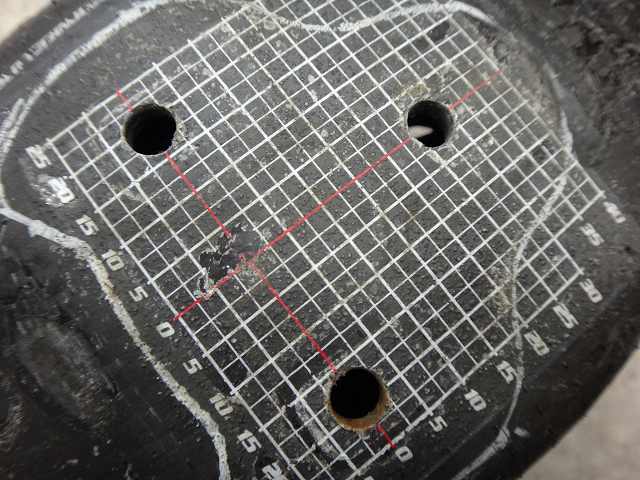
I aligned the cleat's slot with the rear two holes of the old holes.
But the front hole is covered by the cleat, so I can't fix it in this position.

Now I aligned the cleat's slot with the front one of the old holes.
This time the rear two holes are blocked.
The customer's previous position with the old holes was as far forward as possible without this happening, so

↑it was here.
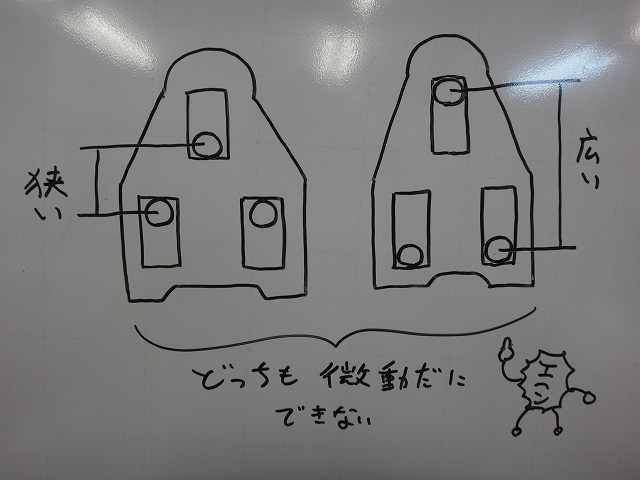
The hole positioning wasn't designed to use the full range of cleat adjustment.
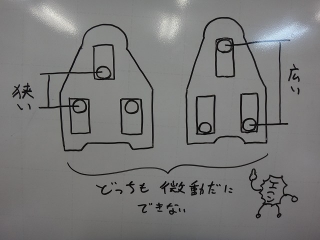
Whether the spacing between the cleat's front and rear holes is wide or narrow, it kills the cleat's range of motion.
Extremely speaking, with the hole positions shown above, the cleat can't move at all.
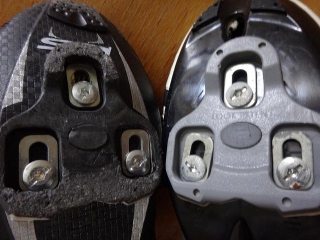
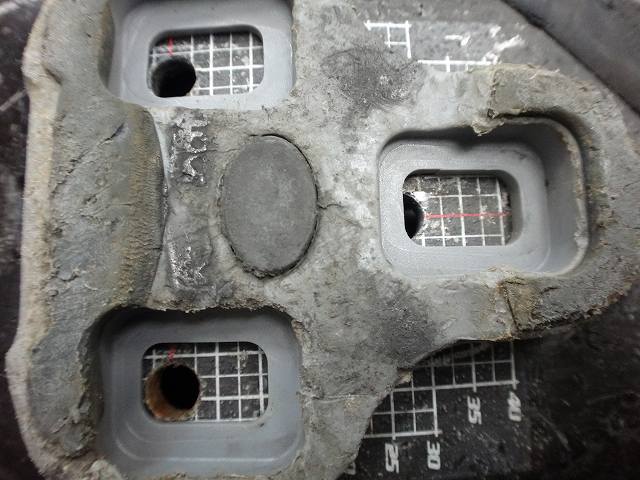
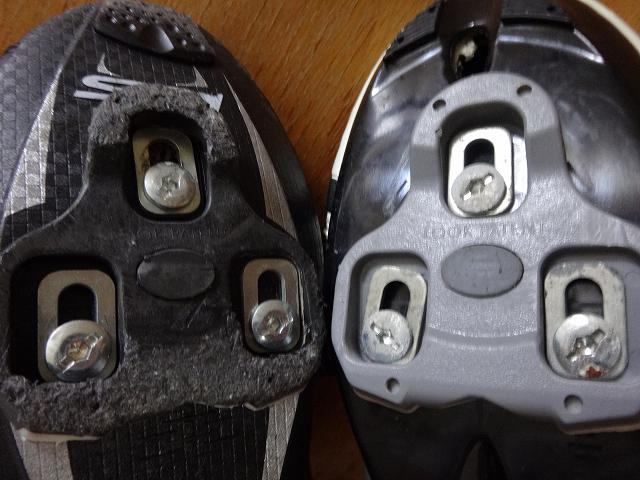
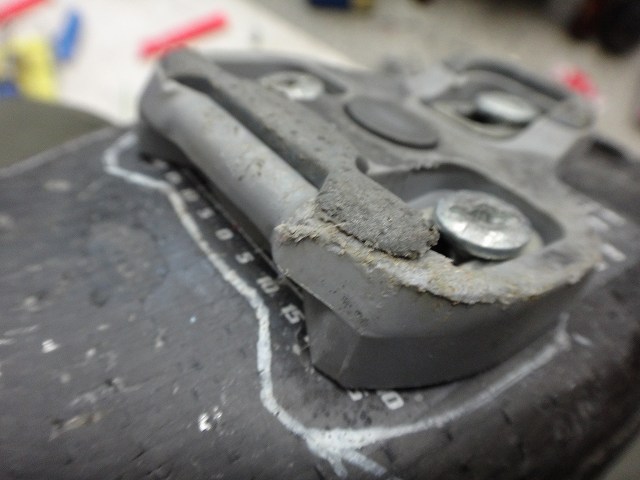
These are my Sidi and Shimano shoes, and the bolt positions relative to the cleat slots are roughly the same.
Sidi's is a bit "wide," but BONT's "narrow" spacing is such that when the front hole aligns with the rear end of the slot, the rear two holes are about in the middle of the slot. This means the cleat's adjustment range is only about half what it should be.
I get that manufacturers include redundancy because pedal specifications vary, but I can't accept how narrow this is.
This isn't a defect—it's "specification"—so it's not covered under warranty replacement.
About that "examination" I mentioned earlier: checking both the front-back position of the three holes themselves and your pedal standard's cleat adjustment range is important.
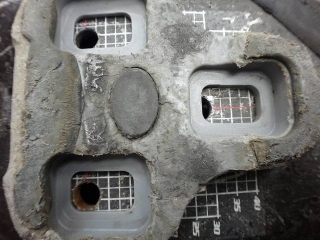
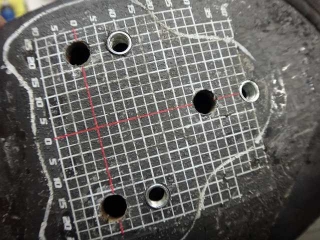
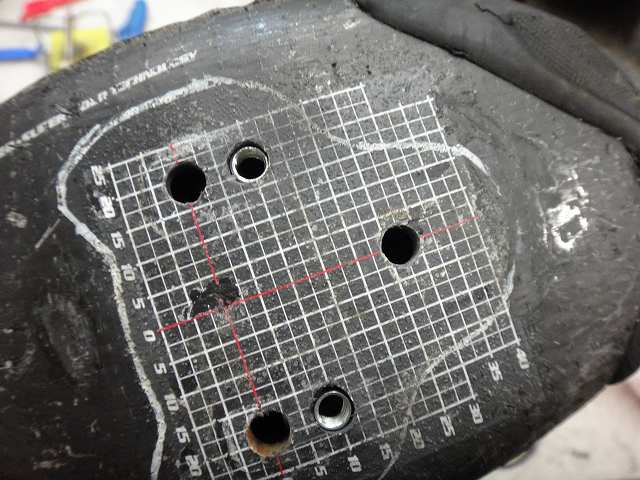
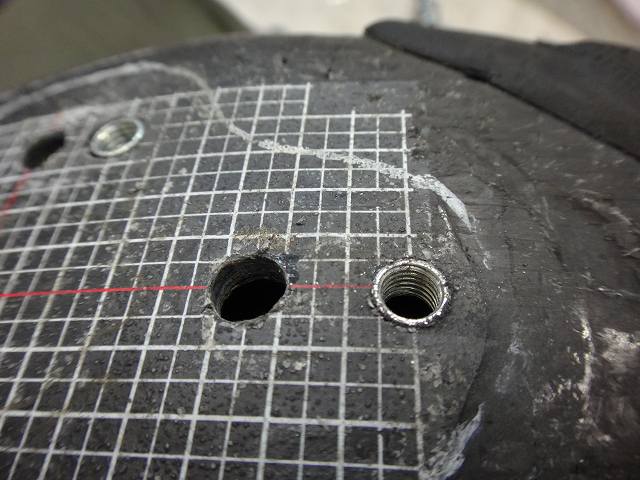
First I drilled the two rear holes.
As I mentioned, I removed the old cleat nuts, so the spacing is tighter than the absolute minimum needed to avoid flange interference.

Next I drilled the front hole.
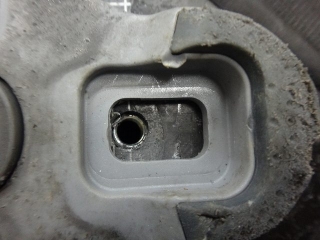
Now the cleat can use its full range of motion.
↑pushed all the way back, it looks like this.
The cleat nut looks recessed because I haven't engaged the spikes yet.
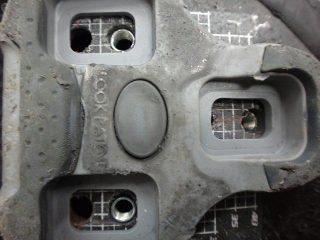
↑the rearmost position of the new holes.
The old cleat position is marked with a white line, and there's a gap where you can't set the cleat.
But the customer wants to move it well forward, and I've confirmed she's okay with that.
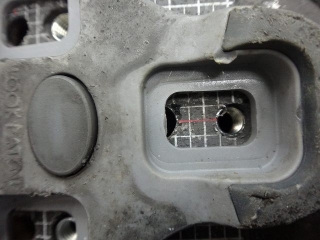
↑the foremost position of the new holes.
I tightened the cleat mounting bolt to engage the spikes.

Then the other shoe.
Done.
Front view~

Back view~

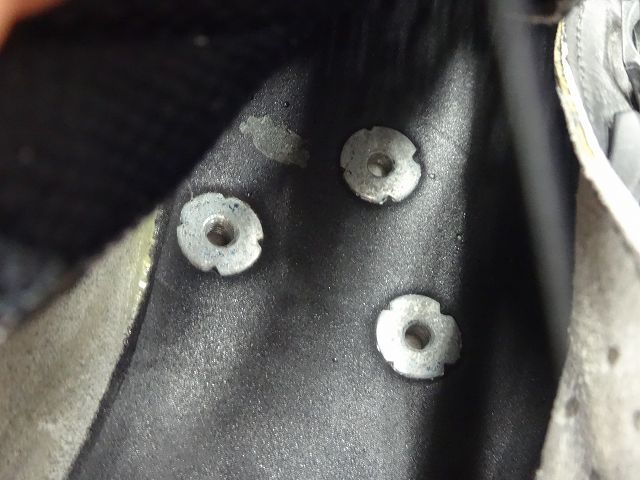
↑Inside the shoe.
The front hole's cleat nut advances more than the rear two holes, meaning the old setup really was "narrow."
If you can still feel the indent of the old cleat nuts when the insole is in place, just cover them with duct tape or something.
On this same customer's bike, the seat tube had three bottle cage holes, but someone forgot to install a rivet nut in the lowest hole (though the hole itself exists), so fixing the bottle cage with just the top two holes makes long bottles basically unusable. I installed a rivet nut on that frame, but there's nothing special to say about it so I didn't take photos for a post.
Anyway, the customer probably transports the bike with just the front wheel off, but they left with the bike fully assembled, front wheel and all, so they forgot the wheel bag that the front wheel was supposed to go in.
If you're reading this, that's what happened, so please get in touch.

A customer left me a pair of BONT shoes.
BONT shoes often have surprisingly poor craftsmanship.
Though it seems they've gotten somewhat better recently.
And the domestic distributors' staff don't really understand technical matters either, which is painful.
In their defense, since the shoe construction—precision and finishing—is genuinely terrible, it's just their job to keep saying this is the specification, this is the specification.
But when other manufacturers almost never have such defects, yet the response is always just "that's also the specification so we can't exchange it," I have to say it's a bit much.
If BONT shoes happen to fit your feet, or if you love the design and want a pair, the only self-defense strategy before buying is to carefully examine the actual product.
Since this particular job doesn't involve any defects or negligence on BONT's part, I won't write any further about that.

The person wearing these is female, and the three cleat holes are positioned quite close to the heel. She wants to move the cleat forward more, but can't go any further with the existing holes, so she's asking for three new holes positioned further forward.
The claim that the cleat holes are heel-biased isn't unfounded—comparing them to her previous Specialized shoes, the difference is clear.
I'd already heard about this beforehand, so I'd told her that if the shoe had a structure where the cleat nuts could be removed from the shoe side, it would probably be possible.
I removed the cleats.
First thing I did was align the heel edges of the left and right shoes and compare them sole to sole.
I've seen cases in the past where the front-back positions of the three holes differ between left and right shoes (specification, they say), so I don't trust them.
Turns out the customer had already done this exact check.
Ha, right—that's definitely where you start.
The cleat nuts are designed to bite into the shoe side when called by the cleat mounting bolt.

The customer had spare cleat nuts on hand, which was a huge help.
Not because I wanted to use new ones, but because understanding the structure of the currently seated cleat nuts lets me proceed with confidence.
Replacing the cleat nuts isn't essential, but the customer wanted it done, so I did it.
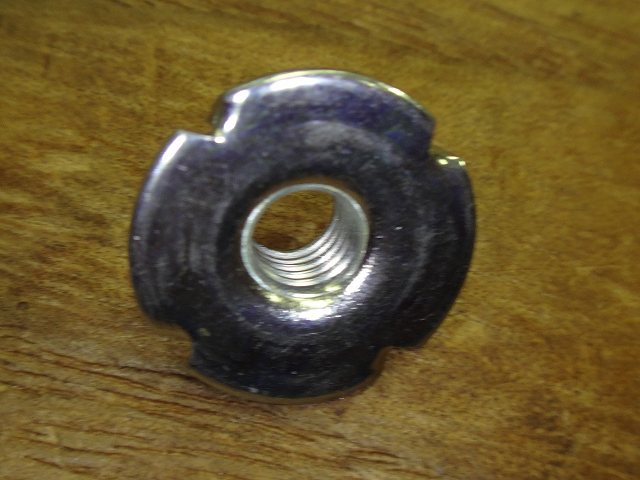

The flange has spikes on it that bite into the shoe.
The problem here is determining how far forward to drill the holes.
I can't just connect them into a single slot—I need to maintain some distance.
Plus, if I don't remove the old cleat nuts, the flanges of the old and new cleat nuts will interfere.
The shortest distance where old and new cleat nuts don't interfere (without modifying the flanges) would be like this, but
that's larger than the cleat's adjustment range, meaning "the rearmost position of the new hole is further forward than the rearmost position of the old hole," creating positions that can't be accessed from either hole set.
The customer wants to move forward quite a bit, so that itself isn't a problem, but

↑if I use the shortest distance without removing the old cleat nuts, it goes forward too much, so I need to tighten the spacing.
I consulted with the customer to decide how far forward to go.
I removed the cleat nuts.
If I just drill holes the same size in a straight line forward at the same spacing... yeah right, that's stupid. Don't drag me into your dumbass shoe design.
I aligned the cleat's slot with the rear two holes of the old holes.
But the front hole is covered by the cleat, so I can't fix it in this position.
Now I aligned the cleat's slot with the front one of the old holes.
This time the rear two holes are blocked.
The customer's previous position with the old holes was as far forward as possible without this happening, so

↑it was here.
The hole positioning wasn't designed to use the full range of cleat adjustment.
Whether the spacing between the cleat's front and rear holes is wide or narrow, it kills the cleat's range of motion.
Extremely speaking, with the hole positions shown above, the cleat can't move at all.
These are my Sidi and Shimano shoes, and the bolt positions relative to the cleat slots are roughly the same.
Sidi's is a bit "wide," but BONT's "narrow" spacing is such that when the front hole aligns with the rear end of the slot, the rear two holes are about in the middle of the slot. This means the cleat's adjustment range is only about half what it should be.
I get that manufacturers include redundancy because pedal specifications vary, but I can't accept how narrow this is.
This isn't a defect—it's "specification"—so it's not covered under warranty replacement.
About that "examination" I mentioned earlier: checking both the front-back position of the three holes themselves and your pedal standard's cleat adjustment range is important.
First I drilled the two rear holes.
As I mentioned, I removed the old cleat nuts, so the spacing is tighter than the absolute minimum needed to avoid flange interference.
Next I drilled the front hole.
Now the cleat can use its full range of motion.


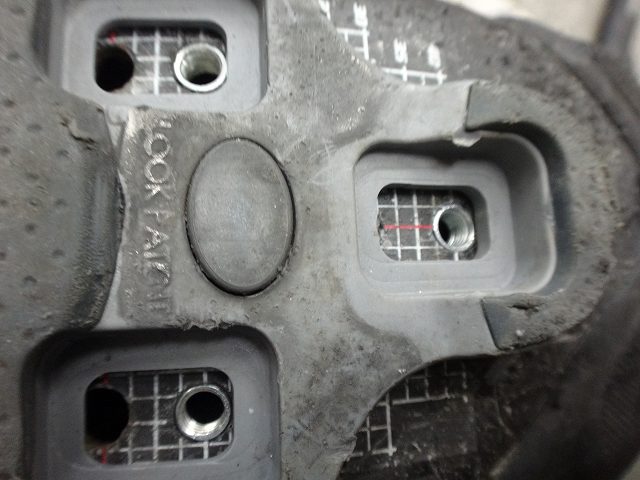
↑pushed all the way back, it looks like this.
The cleat nut looks recessed because I haven't engaged the spikes yet.
↑the rearmost position of the new holes.
The old cleat position is marked with a white line, and there's a gap where you can't set the cleat.
But the customer wants to move it well forward, and I've confirmed she's okay with that.

↑the foremost position of the new holes.
I tightened the cleat mounting bolt to engage the spikes.

Then the other shoe.
Done.

Front view~
Back view~
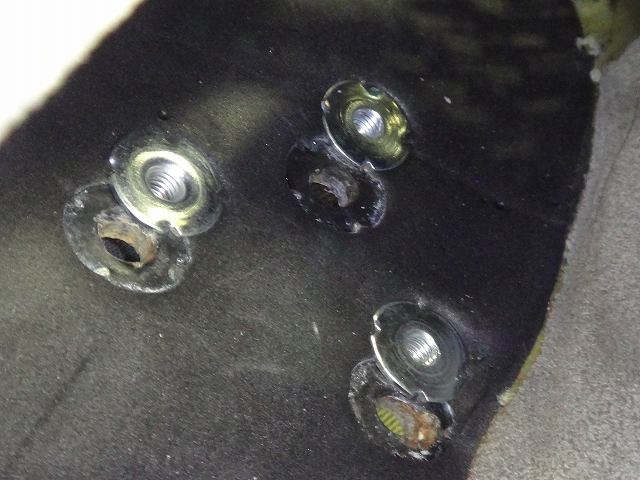
↑Inside the shoe.
The front hole's cleat nut advances more than the rear two holes, meaning the old setup really was "narrow."
If you can still feel the indent of the old cleat nuts when the insole is in place, just cover them with duct tape or something.
On this same customer's bike, the seat tube had three bottle cage holes, but someone forgot to install a rivet nut in the lowest hole (though the hole itself exists), so fixing the bottle cage with just the top two holes makes long bottles basically unusable. I installed a rivet nut on that frame, but there's nothing special to say about it so I didn't take photos for a post.
Anyway, the customer probably transports the bike with just the front wheel off, but they left with the bike fully assembled, front wheel and all, so they forgot the wheel bag that the front wheel was supposed to go in.
If you're reading this, that's what happened, so please get in touch.