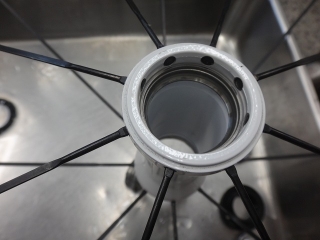
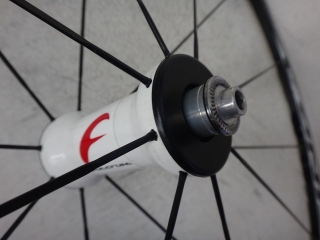
A customer brought in a Racing 3 for me to work on.

They want a complete overhaul of both the front and rear wheels.
I hadn't planned to write about this, so I only have fragmented photos,
but there are a few things I want to write about.

When I looked at the front wheel from the right side (the side without the bearing adjustment nut),
the logo on the hub shell was upside down—a "reverse Fulcrum" hub—so
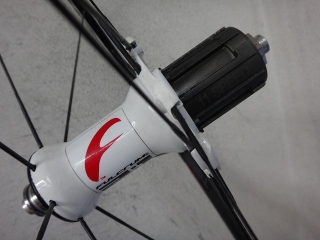
the rear wheel happened to be a "correct Fulcrum" hub.
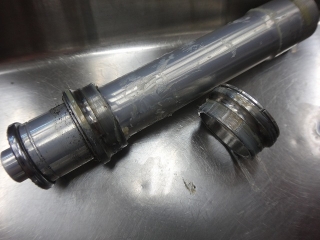
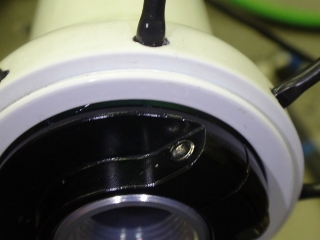
So while I was doing the overhaul, I decided to
reverse the direction of the front hub axle.
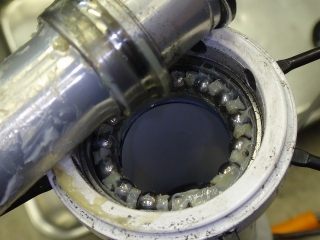
It had a silver ball race with steel ball bearings.
I think this is the second-best combination for resisting rust pitting after CULT,
and it maintains its initial performance for a long time
(the black ball race USB is the worst).
The bearings didn't have damage severe enough to replace,
but one side was slightly duller than the other,
so I needed to reassemble them in their original configuration.
Since I'm not removing the races that are pressed into the hub shell,
I'll swap the left and right ball cups.
By this point in the photo, I've already swapped the ball cups.
Cleaning the hub interior...
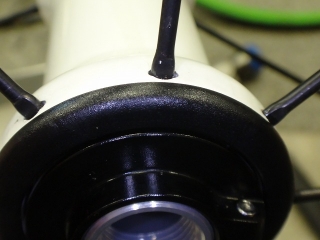
These are plastic snap-on parts at the end of the hub shell,
but this side doesn't really work as a dust seal.
It's pretty much just decorative.
I need to swap these left and right too, but
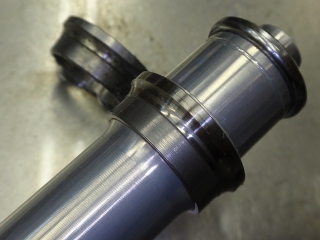
if hydrolysis has progressed far enough, they can break easily,
and just the other day I was carefully removing one of these—knowing they're fragile—and broke it anyway.
Since it was my mistake, I replaced it for free.
I try to keep this part in stock,
but that was the last one I had, and I've got a new one on order,
so right now I don't have any in stock.
I explained to the customer about "reversing the front hub axle direction,"
but it wasn't really their original request—
rather, it's something I decided to do on my own—
and with no spare parts immediately available,
I was pretty nervous taking these on and off.
When removing the hub axle from the hub shell,
I always need to remove this side's part first.
This side actually functions better as a dust seal than the other side.
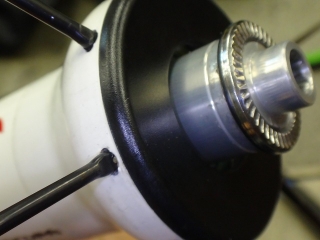
I oriented the hub shell sticker to match the rear hub.
Before disassembling the rear hub,
I told the customer, "The pawl spring is probably deformed,"
and sure enough, it was.
I could tell from how weak the freewheel felt when I spun the freehub body by hand.
Usually when this spring is deformed, the end bends inward,
but this time it had bent outward.
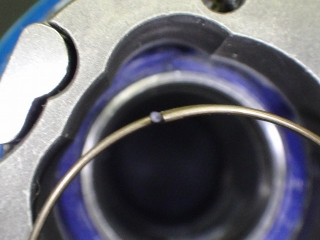
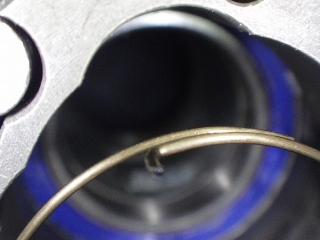
With a brand new spring, when viewed from the side,
the overlapping section doesn't protrude.

They want a complete overhaul of both the front and rear wheels.
I hadn't planned to write about this, so I only have fragmented photos,
but there are a few things I want to write about.

When I looked at the front wheel from the right side (the side without the bearing adjustment nut),
the logo on the hub shell was upside down—a "reverse Fulcrum" hub—so

the rear wheel happened to be a "correct Fulcrum" hub.
So while I was doing the overhaul, I decided to
reverse the direction of the front hub axle.

It had a silver ball race with steel ball bearings.
I think this is the second-best combination for resisting rust pitting after CULT,
and it maintains its initial performance for a long time
(the black ball race USB is the worst).

The bearings didn't have damage severe enough to replace,
but one side was slightly duller than the other,
so I needed to reassemble them in their original configuration.
Since I'm not removing the races that are pressed into the hub shell,
I'll swap the left and right ball cups.

By this point in the photo, I've already swapped the ball cups.

Cleaning the hub interior...


These are plastic snap-on parts at the end of the hub shell,
but this side doesn't really work as a dust seal.
It's pretty much just decorative.
I need to swap these left and right too, but
if hydrolysis has progressed far enough, they can break easily,
and just the other day I was carefully removing one of these—knowing they're fragile—and broke it anyway.
Since it was my mistake, I replaced it for free.
I try to keep this part in stock,
but that was the last one I had, and I've got a new one on order,
so right now I don't have any in stock.
I explained to the customer about "reversing the front hub axle direction,"
but it wasn't really their original request—
rather, it's something I decided to do on my own—
and with no spare parts immediately available,
I was pretty nervous taking these on and off.

When removing the hub axle from the hub shell,
I always need to remove this side's part first.
This side actually functions better as a dust seal than the other side.

I oriented the hub shell sticker to match the rear hub.

Before disassembling the rear hub,
I told the customer, "The pawl spring is probably deformed,"
and sure enough, it was.
I could tell from how weak the freewheel felt when I spun the freehub body by hand.
Usually when this spring is deformed, the end bends inward,
but this time it had bent outward.


With a brand new spring, when viewed from the side,
the overlapping section doesn't protrude.