Sorry for the long delay.
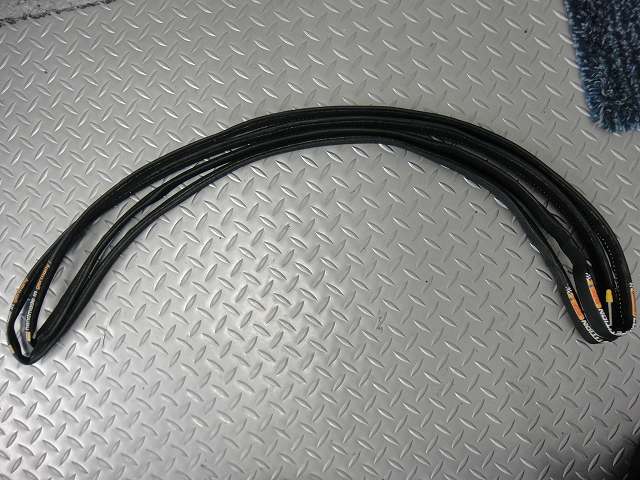
This is a continuation from the rim cement vs. rim tape discussion (→here).
I'll write about the basic handling of rim cement.
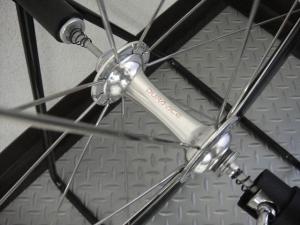
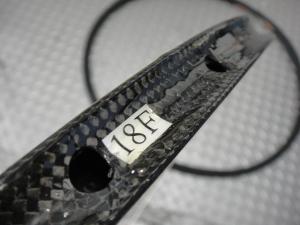
If you have a stand like this at home, you can fit a rear quick release onto the front wheel too
to get into a state like this, which makes the work much easier.
Since rim cement dripping onto the floor is a pain, I strongly recommend laying down newspaper.
I'm not responsible if it drips onto your Persian rug.
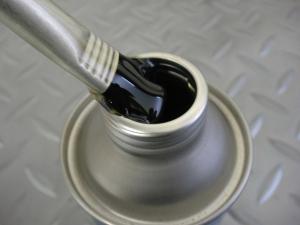
You should avoid wiping the brush tip of brush-equipped rim cement cans
on the rim of the can opening.
If rim cement gets on the threads...
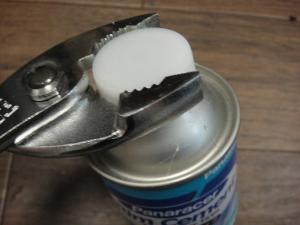
you'll end up having to open it with pliers next time.
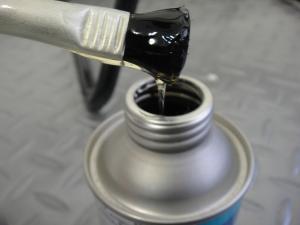
The correct(?) technique for cleanly removing excess rim cement from the brush tip
is to "rotate the brush tip in circles."
Think of honey.
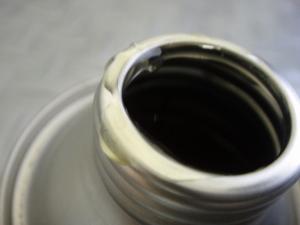
The key point is to avoid dripping cement onto the threads.
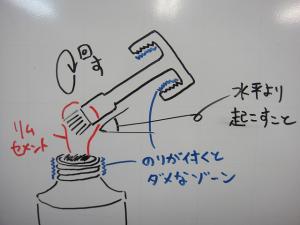
↑ There are also threads at the base of the brush.
If you tilt the shaft below horizontal, cement will flow down the shaft
to the cap's threads. Be careful about this too.
This is really "just basic handling."
We haven't even opened the cap yet.
First, create a bed. It's not strictly necessary, but
if you're tackling rim cement, it's worth doing.
Apply thickly and let it dry.
If touching it causes stringing or cement sticks to your finger, it's not dry yet.
Keep drying until touching it feels only slightly tacky
and no cement transfers to your finger.
If cement stays on the rim side (brake zone),
it causes squeaking noises during braking, so wipe it clean with parts cleaner.
Rather than removing it while still tacky,
it's easier to wait until it's dry enough to roll between your fingers,
though you should still wipe the rim down afterwards.
Repeat this process several times. Two or three times is enough.
If you don't overheat the rim, you can use a hair dryer.
It's better to let the bed sit for a few days, but
if you're in a hurry, you can glue the tire on the same day.

With the exception of some models like TUFO tubular tires,
most tubular tires will orient sideways when inflated without being on the rim.
Inflate until the tire's bead faces straight up.

Inflate more than that and it'll flip over.
It's better to apply rim cement to the tire side as well to increase adhesion.
There's an advanced technique of deliberately applying less than full adhesion
to make removal easier later, but for shop work I apply it to the tire too.
One coat on the tire side is sufficient.
Also, rim cement users mount a spare tire without using cement
in case of a roadside puncture, so
you need some residual rim cement on the bead for that.
The spare can be an old punctured tire, but you can also create a
"factory-made spare" by coating the bead of a new tire with rim cement and letting it dry.
About tire mounting. Regardless of whether you made a bed,
apply cement all over the rim surface.
Dry it until touching it feels only tacky without stringing.
Don't let it fully dry.
This timing varies by season (really by temperature),
but it's around 15 minutes.
Mount the tire before it fully dries.
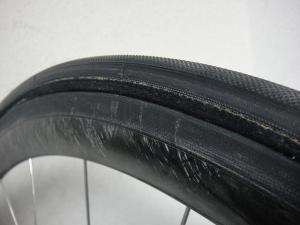
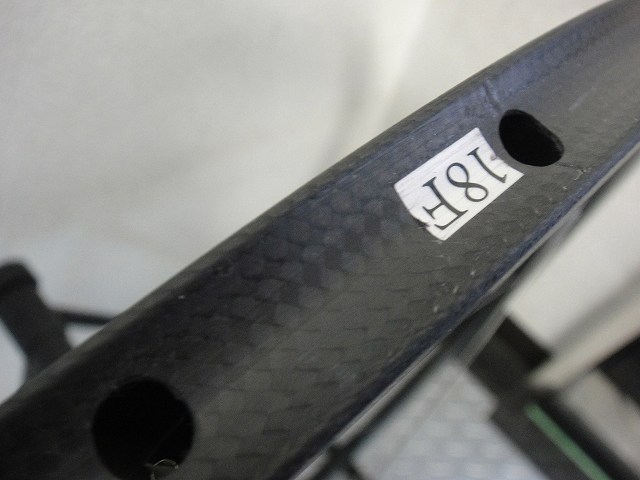
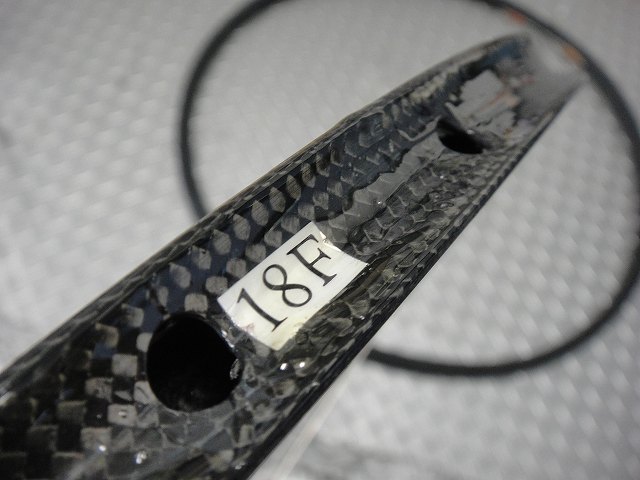
Simply laying it on the rim doesn't center it correctly, as in the image above.
Those two images show the left and right of the same position.
The tire isn't going straight on.
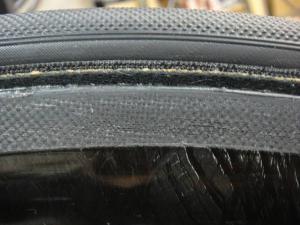
Inflate to around 1 bar and center the tire.
This means lifting the tire and reseating it straight.
If you fumble around here and the cement dries, you're out of luck.
Rim tape's advantage is that you can take as much time as you want at this stage.
The aim is to have even bead visibility left and right,
and uniform all the way around on both sides.
Unless it's a very high-end tire, perfect centering is unrealistic
(especially near the valve base), so don't obsess over it too much.
Of course, the tire shouldn't wobble excessively either.
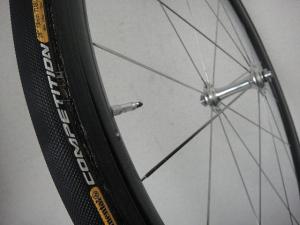
It's on.

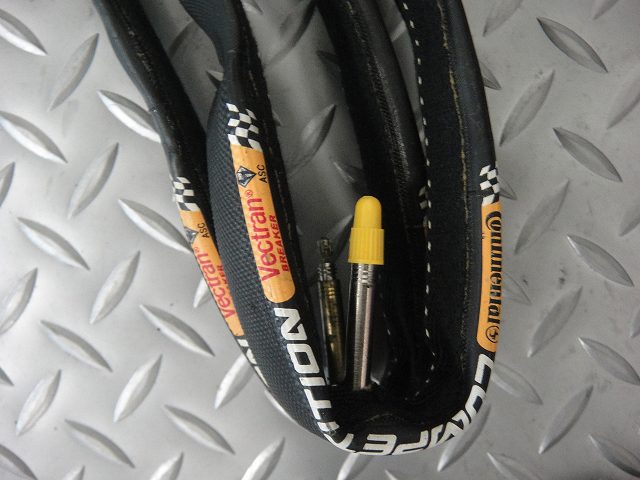
As a side note, Continental's high-end models have a very small inner diameter.
I use a Stretcher Y (tire stretcher) to stretch and widen them.
Before and after stretching,

if you align this side,
the other side differs this much.
If you don't have a Stretcher Y at home and Continental tires won't fit,
you might want to have your local bike shop stretch the tire for you.

About spare tires.
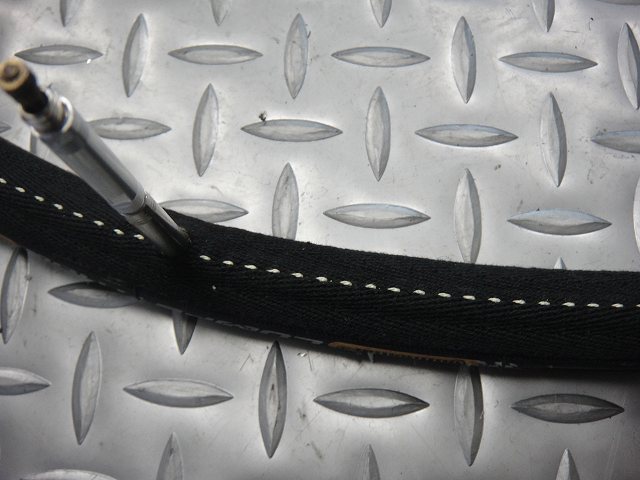
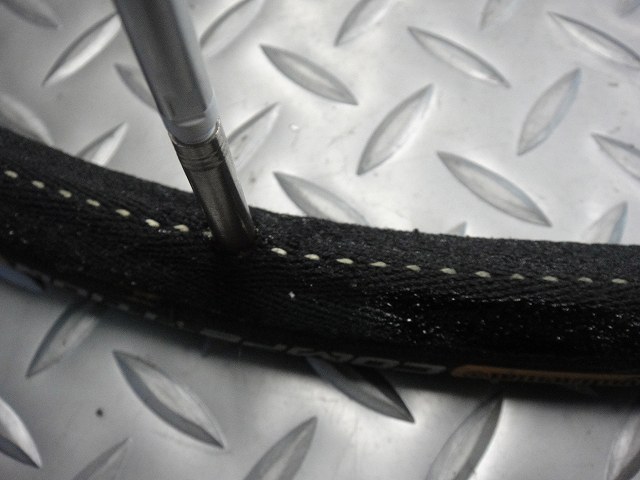
Stretch the tire flat from the opposite side of the valve hole.
Think of pushing air out of the stretched section.

After stretching and gathering the air, press the valve periodically to release it.
↑Create a state like this, with the front and back completely flat.
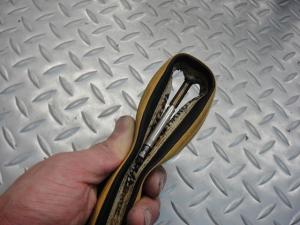
Then fold from the valve area.

This is a worn-out tire, but at the first fold the beads contact each other,
and from the second fold the bead contacts the tread.
Even if cement is on the bead at this point,
if it's dry it won't stick. You're fine.
But even so, if you mount it at the roadside without reapplying cement,
it won't usually peel off.

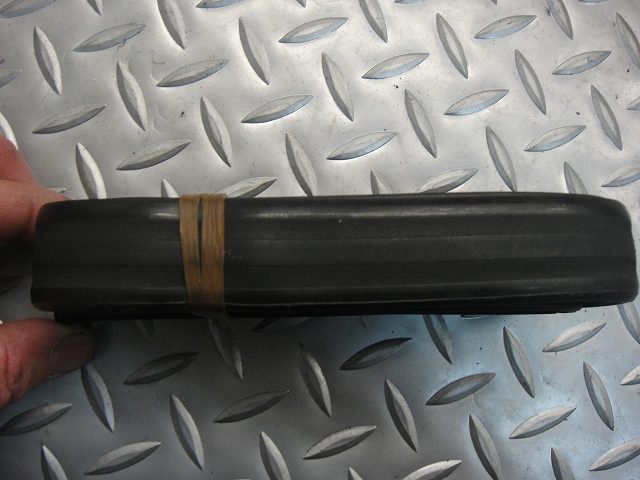
The final fold is
ideal when it ends flush like this, but

if there's an awkward amount sticking out to wrap, redo it.
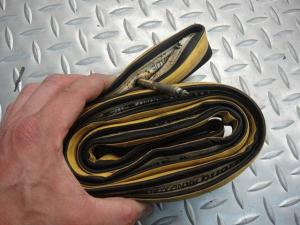
The spare tire's packed diameter depends on the tire thickness and fold length,
so try different sizes several times to get the optimal diameter
for bottle cage mounting or saddle-back carrying.

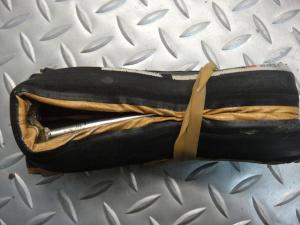
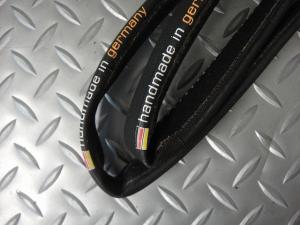
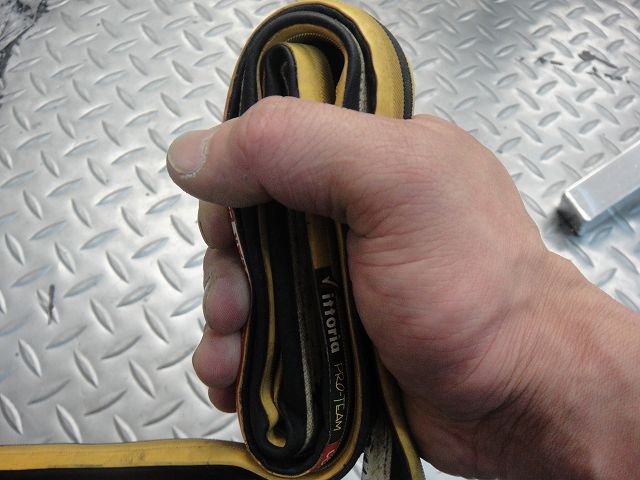
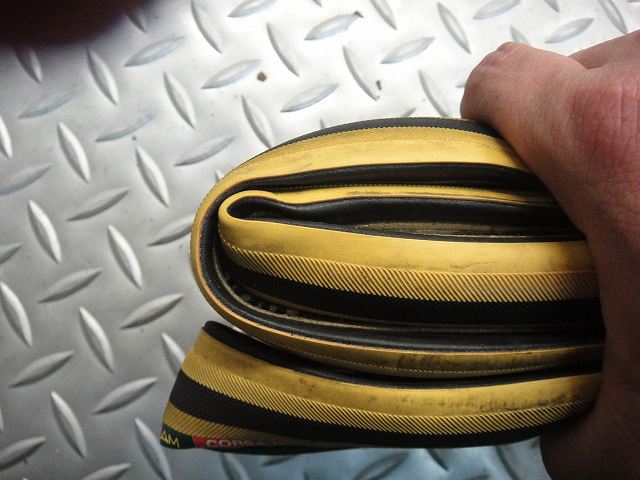
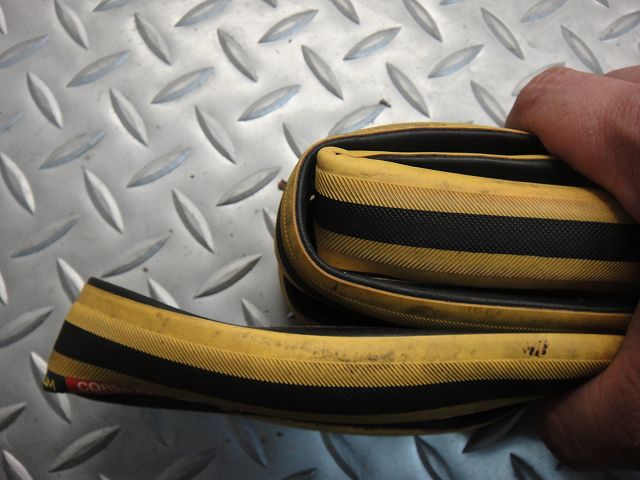
↑This is a Veloflex Servizio Corsa (premium Italian tubular tire), which
is quite narrow, but this is how to fold it for saddle-back mounting.
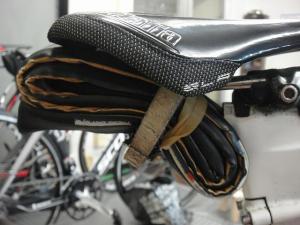
Tie this to the saddle rails with toe straps.
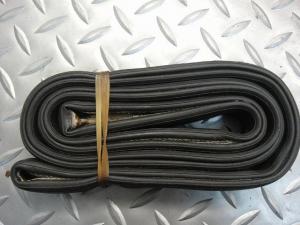

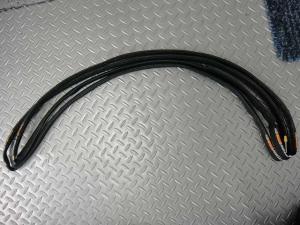
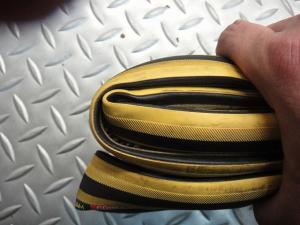
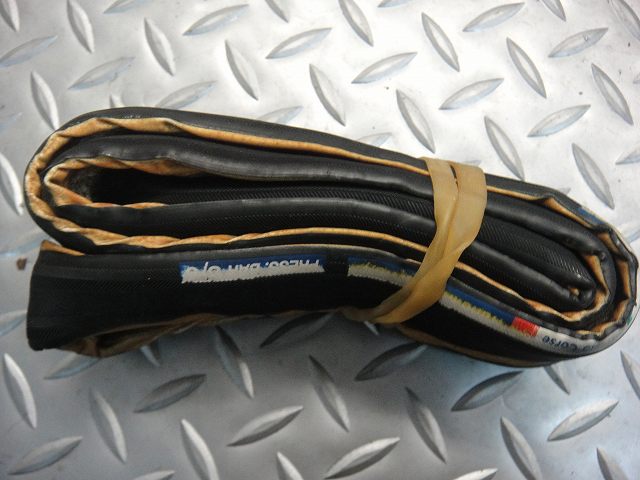
↑This is a TUFO tire, folded to fit in a jersey pocket.
Since this is also a tire that packs small, it might not be much of a reference.
I'll respond to a comment from the previous article.
I received a comment asking whether cement is still better for 29er MTB tubular tires.
In cyclocross, mud and water cause rim tape to swell,
leading to frequently occurring incidents of tire slipping or even coming off.
So to prevent trouble, cement is the only choice.
MTB conditions are similarly or even more severe,
so I think cement would be better.
By the way, the person who left this comment apparently lives abroad and also said...
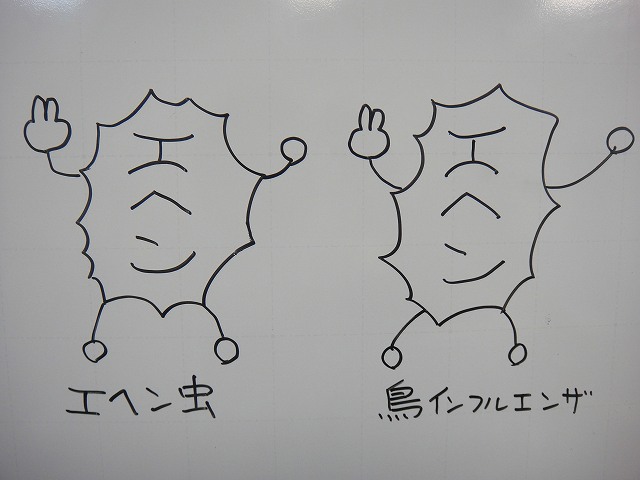
"P.S.: Recently bird flu has been spreading in my neighborhood, but is it
a relative of your Ghouls creature? I want to become a person with excellent
flow-through characteristics, so please emit crab beams westward at full power!!"
(original text preserved)
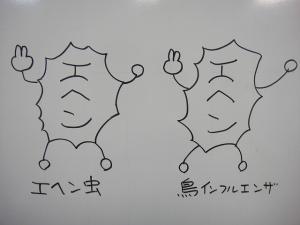
↑ As the image above shows, Ghouls and bird flu are completely different creatures.
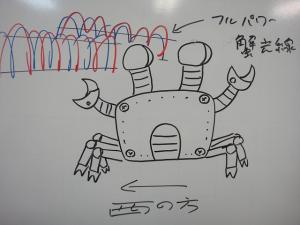
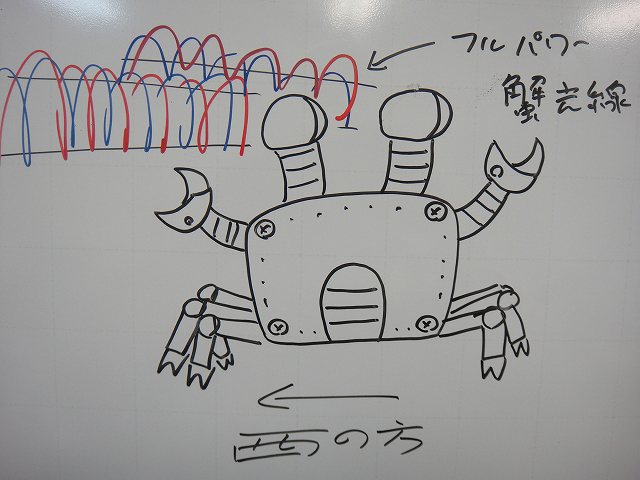
Also, it's unclear if it helps against bird flu, but
I did emit crab beams westward at full power.
Hope they reach.
Next, someone asked me a question about why I recommend
Panaracer rim cement, so I'll answer.
Panaracer rim cement has very fast drying
compared to rim cements in general.
Most other brands' rim cements have longer drying times
than Panaracer's.
Panaracer rim cement can be used within hours of mounting.
(The manufacturer says it reaches maximum adhesion after 24+ hours,
so I don't recommend that)
The drying-time-based adhesion is predictable from experience,
and it has a proven track record of holding firmly,
so I recommend Panaracer.
Continental makes a carbon-specific rim cement that's heat-resistant and suitable
for carbon surfaces, but if you build a solid base with Panaracer cement,
there shouldn't be any particular issues with carbon rims.
Also, regarding the concern about only asking questions without buying anything at the shop—
don't worry about it at all.
Addendum:
For those using tube-type rim cement instead of cans:
If you spread the cement from the tube onto the rim with a finger wrapped in plastic wrap,
the work goes much easier.
Addendum 2:
If you properly build up a base and mount fresh tires before the season,
in the absence of punctures they'll easily last at least a year.
(You won't need to redo the mounting because the cement adhesion gets questionable.)
Addendum 3:
Someone commented that after reading this, it didn't seem nearly as tedious as they'd expected,
but I suspect most people's motivation for using tubular tires these days is
simply that nearly everything is tubular when buying carbon rims.
As for me, I'm a cyclist from before 1996 when there were no complete wheelsets,
thinking "road bikes are basically tubular"
(worth noting: WO rims were already fairly common back then)
so I don't particularly find tubular tires "tedious."
Of the three options—WO, rim-tape tubular, and cement-mounted tubular—
if you get a roadside puncture, the time from that moment until you're rolling again
is probably shortest with cement-mounted tubular tires.
Especially if you've "adjusted the adhesion to not fully stick for easier removal later."
But the scary part is if you puncture more times than you have spares.
I carry two spare tubular tires—one under the saddle and one in my jersey pocket—
but if I puncture three times in a day, I'm out of luck.
And yes, I have punctured three times in a day.
The spare was a retired race tire that was already heavily worn,
making it weak as a spare.
For example, if ten people ride together,
the total number of spare tubular tires matters.
If I have 2 and there are 10 of us...
The 10 of us have 2 spares total, and I'm the only one with tubular
—those were unfortunate times. Sad math puzzle.
But lately more people use carbon wheels regularly, so
it's rare to find a group of ten all on WO.
While one person might puncture three times in a day,
ten people won't puncture thirty times, so
with enough riders around, you probably don't need two spares.
On the day I triple-punctured, I borrowed a tire from someone.
Usually I'm the one lending them out.
With WO, if you have a spare tube and patch kit,
you can fix most flats roadside except for cuts or bursts.
That's a reassuring advantage.
With tubular tires, whether it's a cut or debris still stuck,
the flat tire goes straight to the trash as a rule.
This is also why tubular tire changes are faster—you don't need to identify the puncture cause.
But yeah, once you get home, whether you keep the spare tire or swap for a new one,
you'll need to do a cement remount anyway.
In the end it's a matter of familiarity, but tubular tires definitely require
more skill development than WO. That's why I'm promoting them like this.
This is a continuation from the rim cement vs. rim tape discussion (→here).
I'll write about the basic handling of rim cement.
If you have a stand like this at home, you can fit a rear quick release onto the front wheel too

to get into a state like this, which makes the work much easier.
Since rim cement dripping onto the floor is a pain, I strongly recommend laying down newspaper.
I'm not responsible if it drips onto your Persian rug.

You should avoid wiping the brush tip of brush-equipped rim cement cans
on the rim of the can opening.
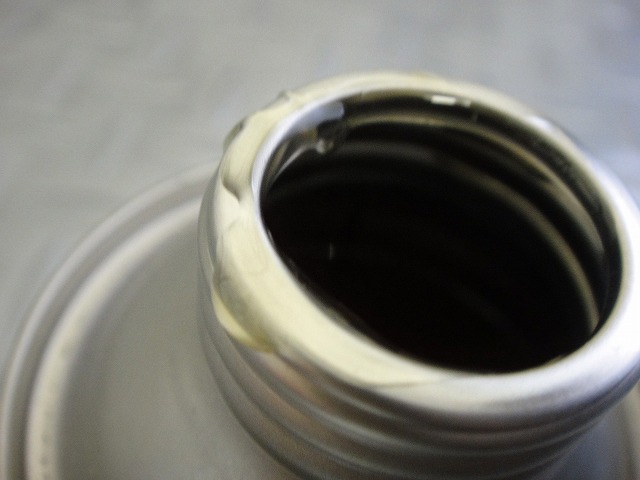
If rim cement gets on the threads...

you'll end up having to open it with pliers next time.

The correct(?) technique for cleanly removing excess rim cement from the brush tip
is to "rotate the brush tip in circles."
Think of honey.
The key point is to avoid dripping cement onto the threads.
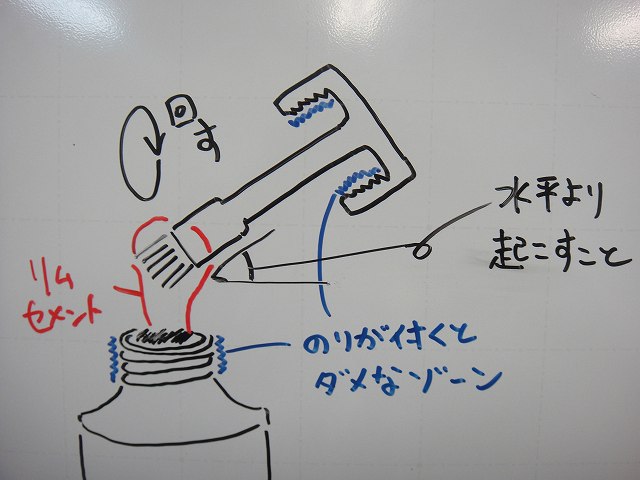
↑ There are also threads at the base of the brush.
If you tilt the shaft below horizontal, cement will flow down the shaft
to the cap's threads. Be careful about this too.
This is really "just basic handling."
We haven't even opened the cap yet.
First, create a bed. It's not strictly necessary, but
if you're tackling rim cement, it's worth doing.
Apply thickly and let it dry.
If touching it causes stringing or cement sticks to your finger, it's not dry yet.
Keep drying until touching it feels only slightly tacky
and no cement transfers to your finger.
If cement stays on the rim side (brake zone),
it causes squeaking noises during braking, so wipe it clean with parts cleaner.
Rather than removing it while still tacky,
it's easier to wait until it's dry enough to roll between your fingers,
though you should still wipe the rim down afterwards.
Repeat this process several times. Two or three times is enough.
If you don't overheat the rim, you can use a hair dryer.
It's better to let the bed sit for a few days, but
if you're in a hurry, you can glue the tire on the same day.

With the exception of some models like TUFO tubular tires,
most tubular tires will orient sideways when inflated without being on the rim.
Inflate until the tire's bead faces straight up.

Inflate more than that and it'll flip over.
It's better to apply rim cement to the tire side as well to increase adhesion.
There's an advanced technique of deliberately applying less than full adhesion
to make removal easier later, but for shop work I apply it to the tire too.
One coat on the tire side is sufficient.
Also, rim cement users mount a spare tire without using cement
in case of a roadside puncture, so
you need some residual rim cement on the bead for that.
The spare can be an old punctured tire, but you can also create a
"factory-made spare" by coating the bead of a new tire with rim cement and letting it dry.

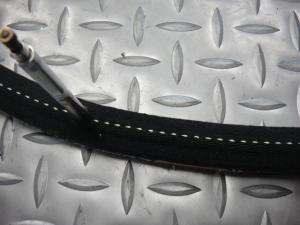
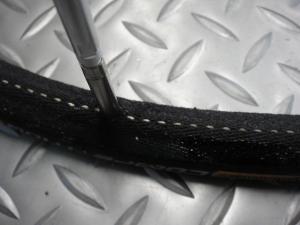
About tire mounting. Regardless of whether you made a bed,
apply cement all over the rim surface.
Dry it until touching it feels only tacky without stringing.
Don't let it fully dry.
This timing varies by season (really by temperature),
but it's around 15 minutes.
Mount the tire before it fully dries.
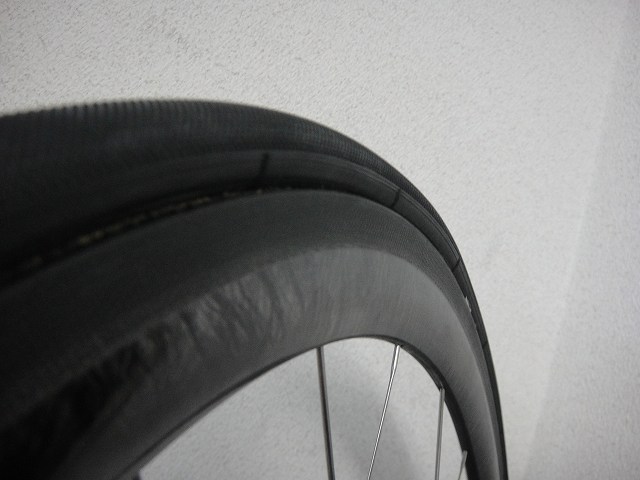
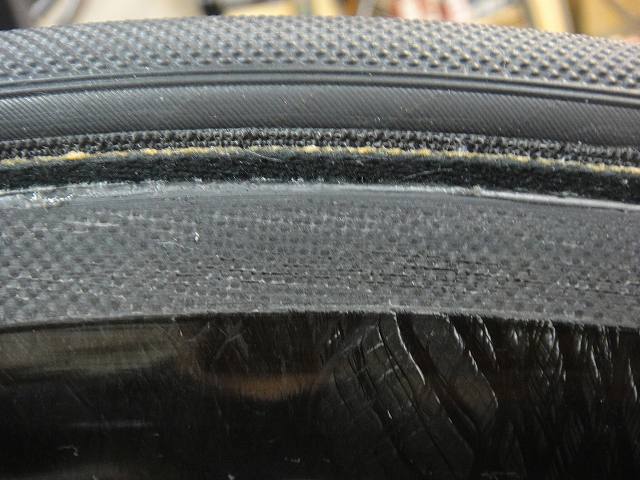
Simply laying it on the rim doesn't center it correctly, as in the image above.
Those two images show the left and right of the same position.
The tire isn't going straight on.
Inflate to around 1 bar and center the tire.
This means lifting the tire and reseating it straight.
If you fumble around here and the cement dries, you're out of luck.
Rim tape's advantage is that you can take as much time as you want at this stage.
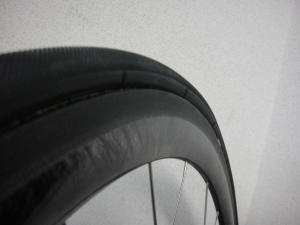
The aim is to have even bead visibility left and right,
and uniform all the way around on both sides.
Unless it's a very high-end tire, perfect centering is unrealistic
(especially near the valve base), so don't obsess over it too much.
Of course, the tire shouldn't wobble excessively either.
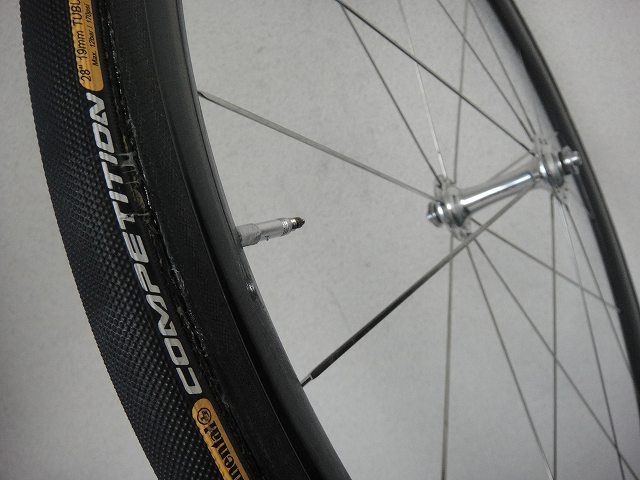
It's on.
As a side note, Continental's high-end models have a very small inner diameter.
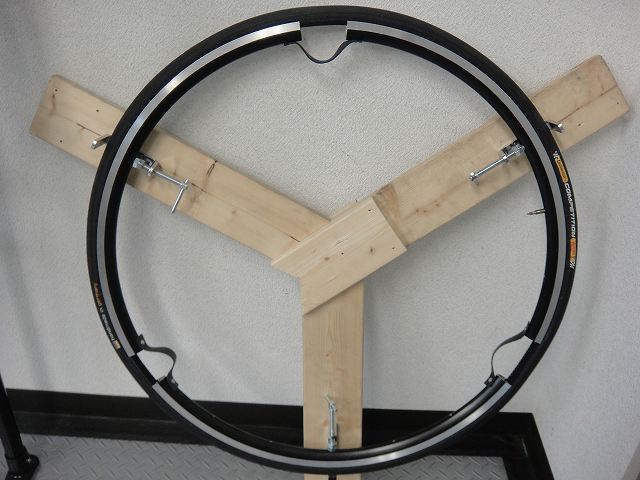
I use a Stretcher Y (tire stretcher) to stretch and widen them.
Before and after stretching,
if you align this side,
the other side differs this much.
If you don't have a Stretcher Y at home and Continental tires won't fit,
you might want to have your local bike shop stretch the tire for you.
About spare tires.
Stretch the tire flat from the opposite side of the valve hole.
Think of pushing air out of the stretched section.
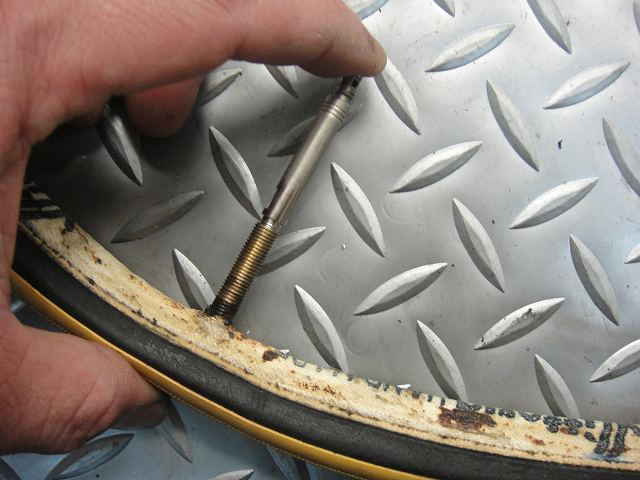
After stretching and gathering the air, press the valve periodically to release it.

↑Create a state like this, with the front and back completely flat.
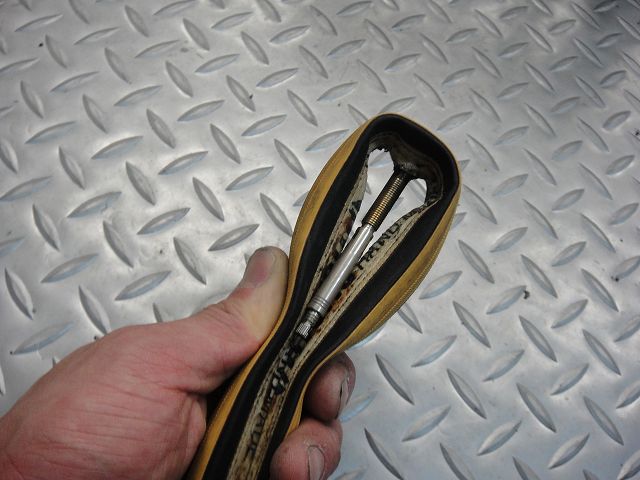
Then fold from the valve area.
This is a worn-out tire, but at the first fold the beads contact each other,
and from the second fold the bead contacts the tread.
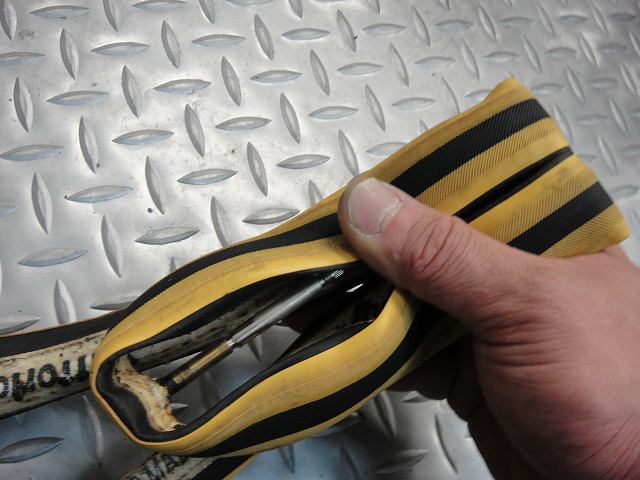
Even if cement is on the bead at this point,
if it's dry it won't stick. You're fine.
But even so, if you mount it at the roadside without reapplying cement,
it won't usually peel off.
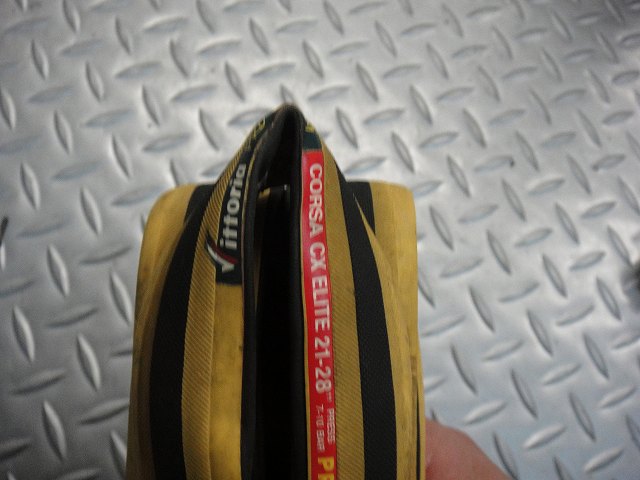
The final fold is
ideal when it ends flush like this, but
if there's an awkward amount sticking out to wrap, redo it.
The spare tire's packed diameter depends on the tire thickness and fold length,
so try different sizes several times to get the optimal diameter
for bottle cage mounting or saddle-back carrying.

↑This is a Veloflex Servizio Corsa (premium Italian tubular tire), which
is quite narrow, but this is how to fold it for saddle-back mounting.

Tie this to the saddle rails with toe straps.

↑This is a TUFO tire, folded to fit in a jersey pocket.
Since this is also a tire that packs small, it might not be much of a reference.
I'll respond to a comment from the previous article.
I received a comment asking whether cement is still better for 29er MTB tubular tires.
In cyclocross, mud and water cause rim tape to swell,
leading to frequently occurring incidents of tire slipping or even coming off.
So to prevent trouble, cement is the only choice.
MTB conditions are similarly or even more severe,
so I think cement would be better.
By the way, the person who left this comment apparently lives abroad and also said...
"P.S.: Recently bird flu has been spreading in my neighborhood, but is it
a relative of your Ghouls creature? I want to become a person with excellent
flow-through characteristics, so please emit crab beams westward at full power!!"
(original text preserved)
↑ As the image above shows, Ghouls and bird flu are completely different creatures.
Also, it's unclear if it helps against bird flu, but
I did emit crab beams westward at full power.
Hope they reach.
Next, someone asked me a question about why I recommend
Panaracer rim cement, so I'll answer.
Panaracer rim cement has very fast drying
compared to rim cements in general.
Most other brands' rim cements have longer drying times
than Panaracer's.
Panaracer rim cement can be used within hours of mounting.
(The manufacturer says it reaches maximum adhesion after 24+ hours,
so I don't recommend that)
The drying-time-based adhesion is predictable from experience,
and it has a proven track record of holding firmly,
so I recommend Panaracer.
Continental makes a carbon-specific rim cement that's heat-resistant and suitable
for carbon surfaces, but if you build a solid base with Panaracer cement,
there shouldn't be any particular issues with carbon rims.
Also, regarding the concern about only asking questions without buying anything at the shop—
don't worry about it at all.
Addendum:
For those using tube-type rim cement instead of cans:
If you spread the cement from the tube onto the rim with a finger wrapped in plastic wrap,
the work goes much easier.
Addendum 2:
If you properly build up a base and mount fresh tires before the season,
in the absence of punctures they'll easily last at least a year.
(You won't need to redo the mounting because the cement adhesion gets questionable.)
Addendum 3:
Someone commented that after reading this, it didn't seem nearly as tedious as they'd expected,
but I suspect most people's motivation for using tubular tires these days is
simply that nearly everything is tubular when buying carbon rims.
As for me, I'm a cyclist from before 1996 when there were no complete wheelsets,
thinking "road bikes are basically tubular"
(worth noting: WO rims were already fairly common back then)
so I don't particularly find tubular tires "tedious."
Of the three options—WO, rim-tape tubular, and cement-mounted tubular—
if you get a roadside puncture, the time from that moment until you're rolling again
is probably shortest with cement-mounted tubular tires.
Especially if you've "adjusted the adhesion to not fully stick for easier removal later."
But the scary part is if you puncture more times than you have spares.
I carry two spare tubular tires—one under the saddle and one in my jersey pocket—
but if I puncture three times in a day, I'm out of luck.
And yes, I have punctured three times in a day.
The spare was a retired race tire that was already heavily worn,
making it weak as a spare.
For example, if ten people ride together,
the total number of spare tubular tires matters.
If I have 2 and there are 10 of us...
The 10 of us have 2 spares total, and I'm the only one with tubular
—those were unfortunate times. Sad math puzzle.
But lately more people use carbon wheels regularly, so
it's rare to find a group of ten all on WO.
While one person might puncture three times in a day,
ten people won't puncture thirty times, so
with enough riders around, you probably don't need two spares.
On the day I triple-punctured, I borrowed a tire from someone.
Usually I'm the one lending them out.
With WO, if you have a spare tube and patch kit,
you can fix most flats roadside except for cuts or bursts.
That's a reassuring advantage.
With tubular tires, whether it's a cut or debris still stuck,
the flat tire goes straight to the trash as a rule.
This is also why tubular tire changes are faster—you don't need to identify the puncture cause.
But yeah, once you get home, whether you keep the spare tire or swap for a new one,
you'll need to do a cement remount anyway.
In the end it's a matter of familiarity, but tubular tires definitely require
more skill development than WO. That's why I'm promoting them like this.