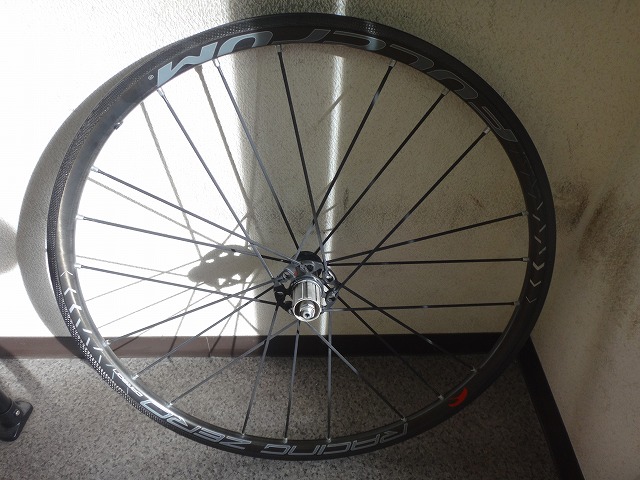
I took in a Racing Zero Carbon from a customer.
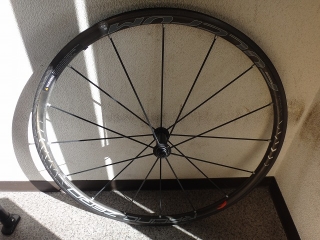
Starting with the front wheel.
The customer destroyed the new hub shaft and needs me to fix it. Since the customer caused the damage themselves, I won't be too harsh about it.

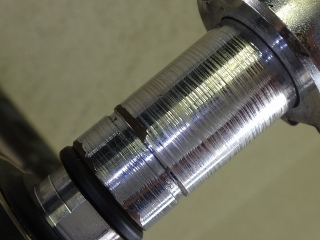
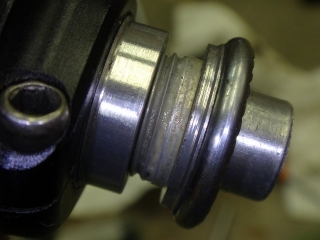
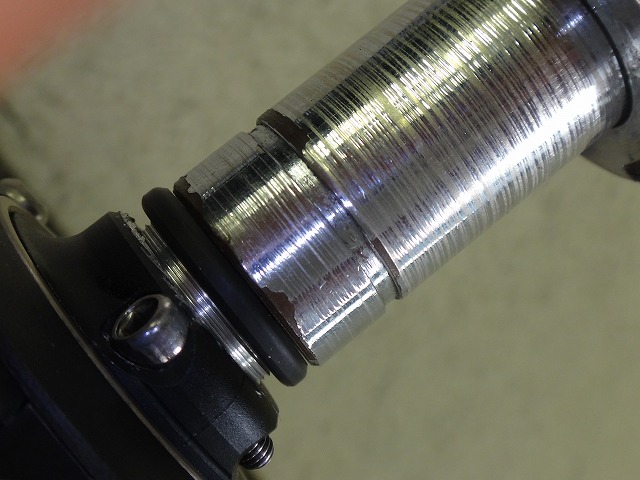
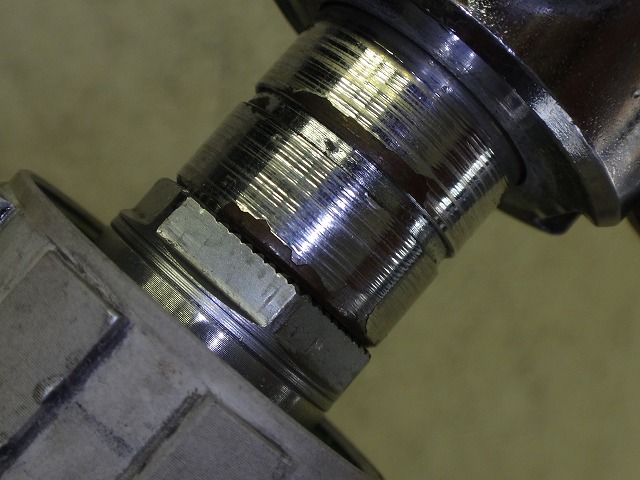
↑The right end has a stripped grip surface for the 14mm wrench, with marks showing a 14mm hub wrench was applied in about 5 or 6 places.
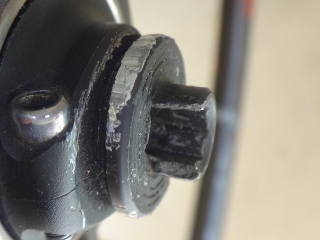
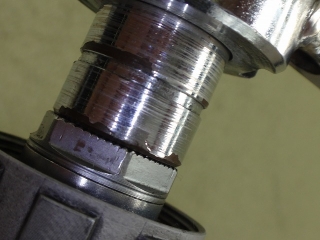
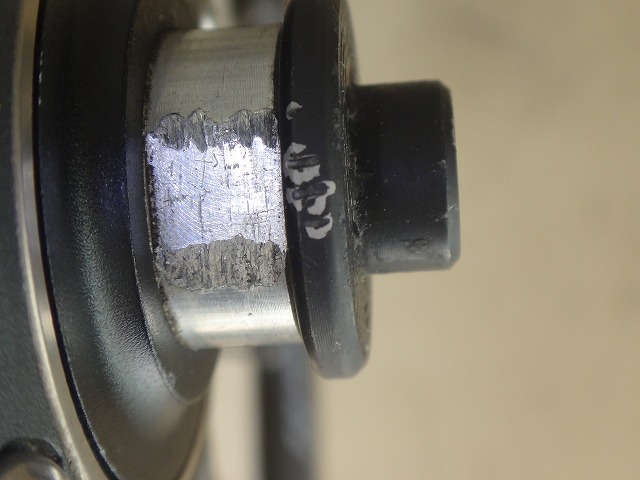
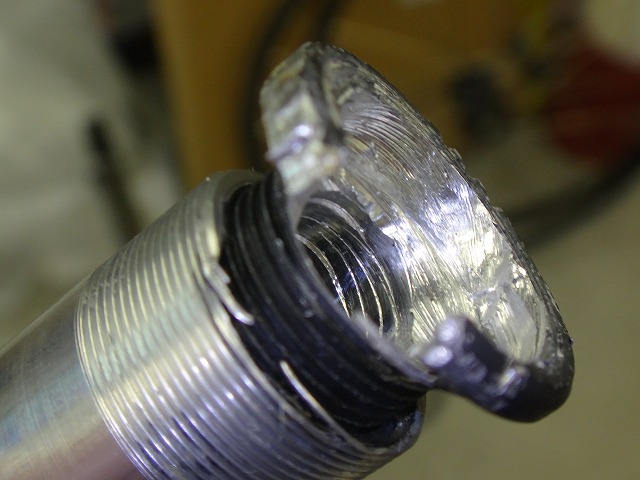
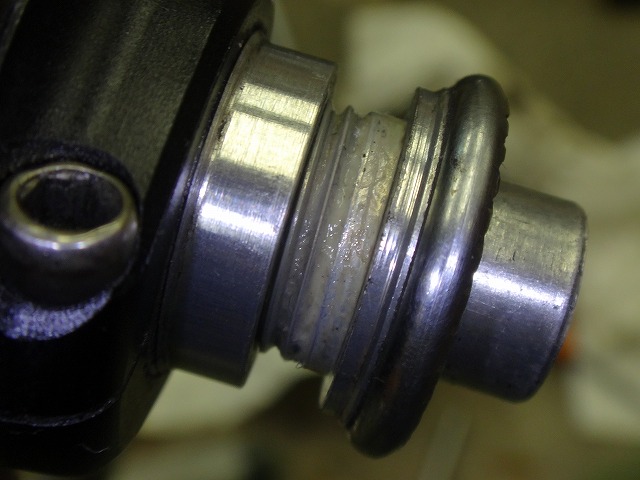
The left end has a cracked hex socket.
At minimum the left end needs replacement, and considering future serviceability, the customer approved replacing the hub shaft and right end too. So I don't need to be careful about the rough work on the left end spreading to the hub shaft. What changes is just the drill bit diameter and work time. I'll reuse the bearing cone adjustment nut—or rather, I'll recover it so it can be reused.

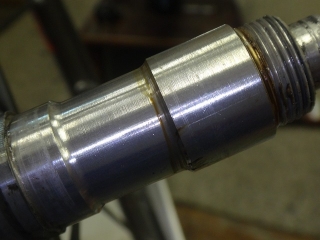
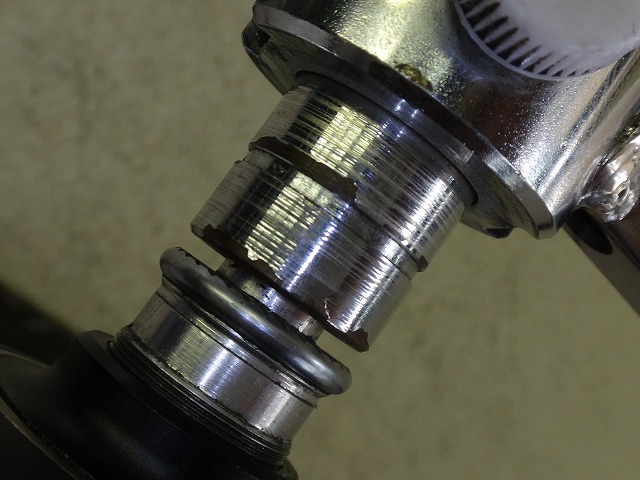
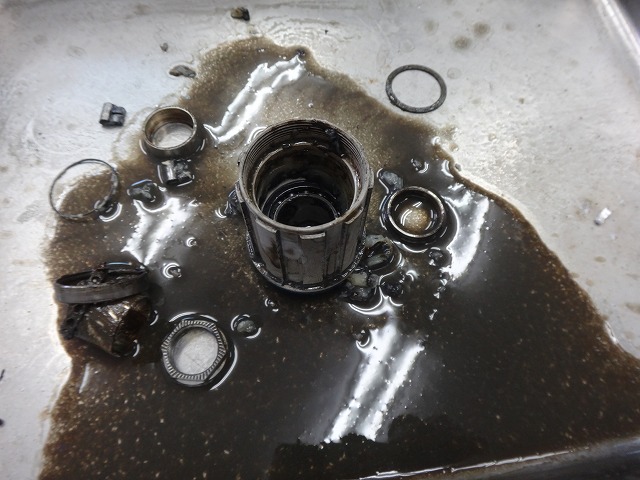
↑This is what rough removal looks like. Once I drill off the flange on the left end, the shaft comes out of the hub body. Once the flange loses its surface pressure, the remaining threads on the broken end usually spin easily. If I carefully increased the drill bit diameter gradually, I could break it more cleanly, but this time I started with a relatively large diameter bit.
Apart from the new shaft catastrophe, the hub bearings are grinding, so the customer wants them replaced—and instead of the original USB spec, they want CULT bearings.
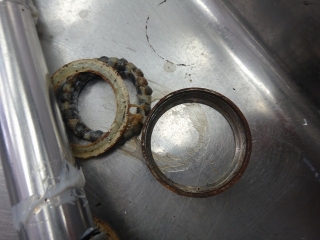
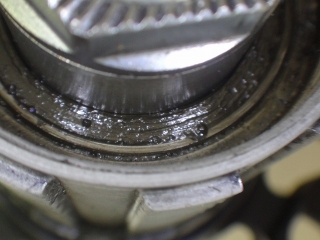
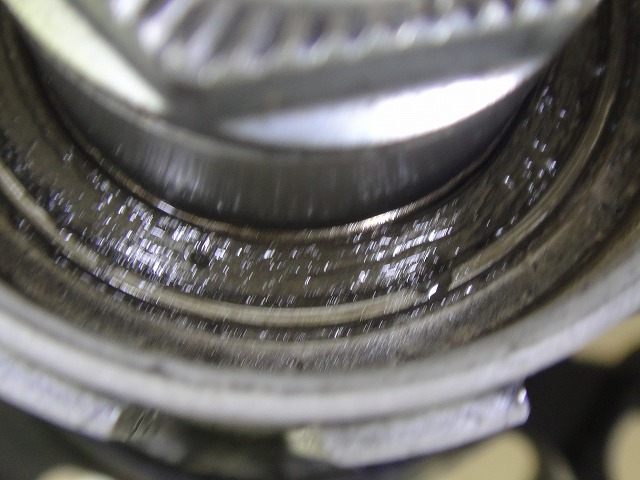
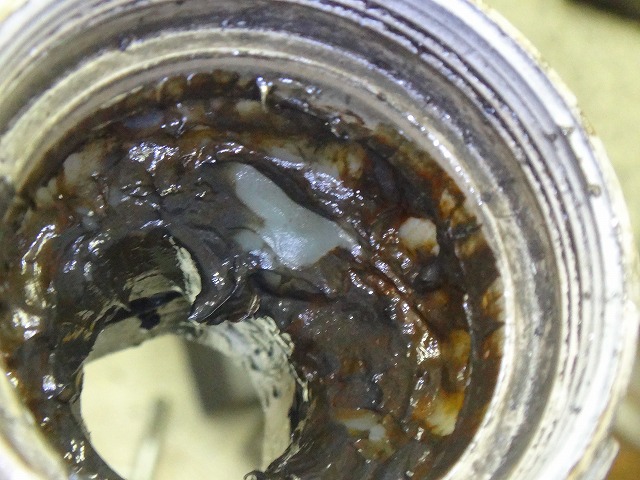
I removed the rusty USB bearing set. The manufacturer's original white grease that got into the hub body looks fine, but the bearings were quite damaged.

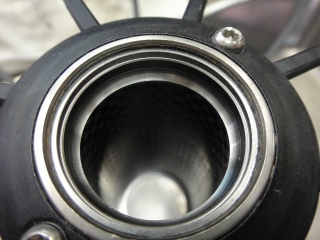
I pressed in the CULT bearing set.

Hub shaft and right end, and

left end nut being replaced. I keep these in stock. As long as several identical jobs don't come in back-to-back, I'm good.


There's supposed to be a center offset, but with the runout present too, there might have been a phase where a temporary center was dead-on if I'd looked for it.

I did runout truing and centering.

Next, the rear wheel.

There's severe center offset, but according to the customer, there's no history of truing on this wheel. The customer is the original owner, so they're not unaware of the previous owner's history either. Strictly speaking, this rear wheel isn't actually offset. It just reads as if it is. I'll explain that later.
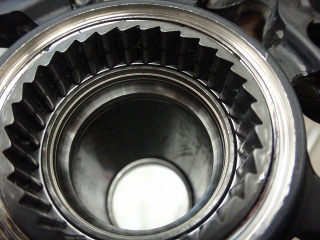
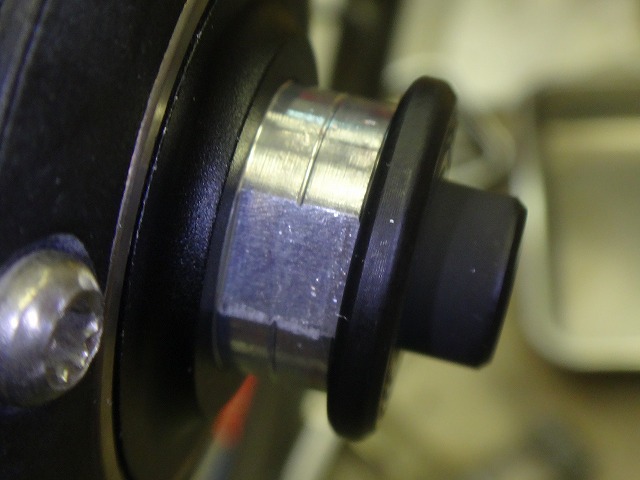
The bearing on the outside of the freebody has rusted away internally, creating play. When you hold the freebody, there's eccentric play relative to the hub shaft. This causes noise and if you grab it with the sprocket, the play is much more obvious, but it's unusual to detect this much play on just the freebody alone.
When I push the end downward in the image, the bearing inner race hides behind the end, and

when I push upward it becomes visible—that's how much play there is.

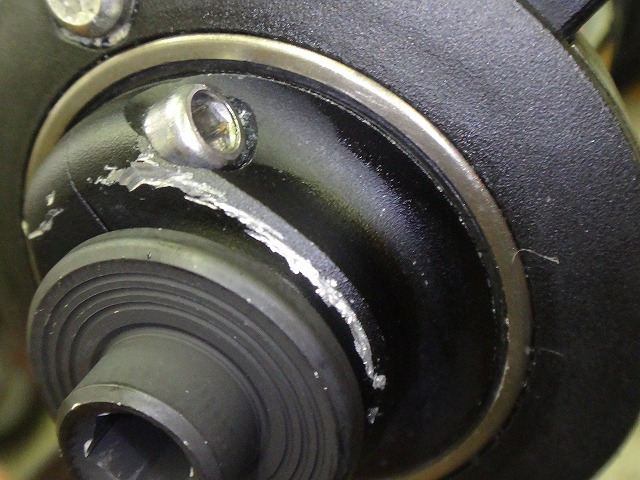
I removed the outer bearing.

Wow.
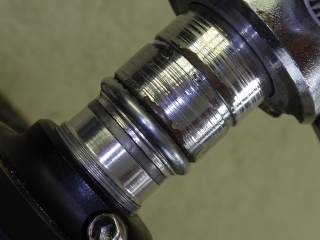
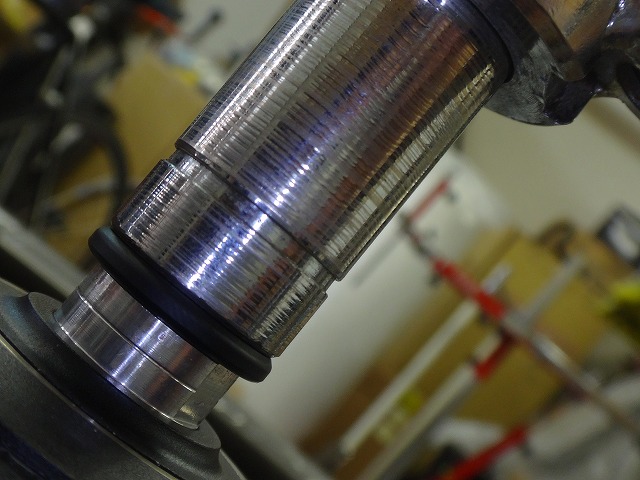
However, directly below the outer bearing on the hub shaft there's almost no damage or false rust, yet there are traces of rubbing directly below the inner bearing that I didn't judge to require replacement. The severity of bearing wear and false rust on the hub shaft usually correlate, but occasionally you see cases like this.
Hub bearing replacement isn't absolutely mandatory, but it's what the customer wants, so I'm converting to CULT. I noticed while doing this that the spacer (washer) that should be between the hub shaft and the hollow end bolt was missing. The customer apparently disassembled it before, so I won't be harsh about it. Both front and rear hubs have spacers here, but the front uses a thin one and the rear uses a thick one. Especially on the rear, the overlock nut dimension strays quite a bit (and of course, the wheel center too). That earlier "center offset" was caused by this missing part.
Converted to CULT.

Due to subtle differences in press-fit from bearing set replacement and how the centering washer seats, even if this rear wheel had been perfectly centered and dead-on before, when I apply a center gauge after hub work, it might be off by about the thickness of a sheet of paper. However, once I finished the hub CULT conversion and replenished the genuine spacer, the wheel center was dead-on. I did some light truing, but that didn't throw off the center at that point. That's what the images above show.

Starting with the front wheel.
The customer destroyed the new hub shaft and needs me to fix it. Since the customer caused the damage themselves, I won't be too harsh about it.
↑The right end has a stripped grip surface for the 14mm wrench, with marks showing a 14mm hub wrench was applied in about 5 or 6 places.

The left end has a cracked hex socket.
At minimum the left end needs replacement, and considering future serviceability, the customer approved replacing the hub shaft and right end too. So I don't need to be careful about the rough work on the left end spreading to the hub shaft. What changes is just the drill bit diameter and work time. I'll reuse the bearing cone adjustment nut—or rather, I'll recover it so it can be reused.
↑This is what rough removal looks like. Once I drill off the flange on the left end, the shaft comes out of the hub body. Once the flange loses its surface pressure, the remaining threads on the broken end usually spin easily. If I carefully increased the drill bit diameter gradually, I could break it more cleanly, but this time I started with a relatively large diameter bit.
Apart from the new shaft catastrophe, the hub bearings are grinding, so the customer wants them replaced—and instead of the original USB spec, they want CULT bearings.

I removed the rusty USB bearing set. The manufacturer's original white grease that got into the hub body looks fine, but the bearings were quite damaged.


I pressed in the CULT bearing set.
Hub shaft and right end, and
left end nut being replaced. I keep these in stock. As long as several identical jobs don't come in back-to-back, I'm good.

There's supposed to be a center offset, but with the runout present too, there might have been a phase where a temporary center was dead-on if I'd looked for it.

I did runout truing and centering.
Next, the rear wheel.

There's severe center offset, but according to the customer, there's no history of truing on this wheel. The customer is the original owner, so they're not unaware of the previous owner's history either. Strictly speaking, this rear wheel isn't actually offset. It just reads as if it is. I'll explain that later.
The bearing on the outside of the freebody has rusted away internally, creating play. When you hold the freebody, there's eccentric play relative to the hub shaft. This causes noise and if you grab it with the sprocket, the play is much more obvious, but it's unusual to detect this much play on just the freebody alone.

When I push the end downward in the image, the bearing inner race hides behind the end, and
when I push upward it becomes visible—that's how much play there is.
I removed the outer bearing.
Wow.

However, directly below the outer bearing on the hub shaft there's almost no damage or false rust, yet there are traces of rubbing directly below the inner bearing that I didn't judge to require replacement. The severity of bearing wear and false rust on the hub shaft usually correlate, but occasionally you see cases like this.
Hub bearing replacement isn't absolutely mandatory, but it's what the customer wants, so I'm converting to CULT. I noticed while doing this that the spacer (washer) that should be between the hub shaft and the hollow end bolt was missing. The customer apparently disassembled it before, so I won't be harsh about it. Both front and rear hubs have spacers here, but the front uses a thin one and the rear uses a thick one. Especially on the rear, the overlock nut dimension strays quite a bit (and of course, the wheel center too). That earlier "center offset" was caused by this missing part.

Converted to CULT.

Due to subtle differences in press-fit from bearing set replacement and how the centering washer seats, even if this rear wheel had been perfectly centered and dead-on before, when I apply a center gauge after hub work, it might be off by about the thickness of a sheet of paper. However, once I finished the hub CULT conversion and replenished the genuine spacer, the wheel center was dead-on. I did some light truing, but that didn't throw off the center at that point. That's what the images above show.