Another day of wheelbuilding (and so on).
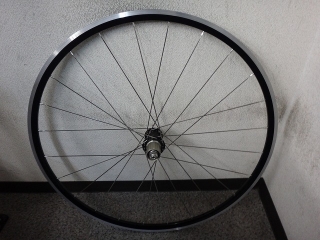
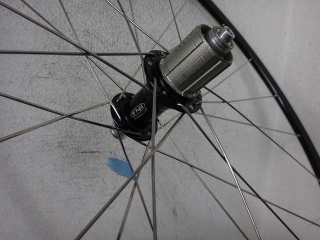
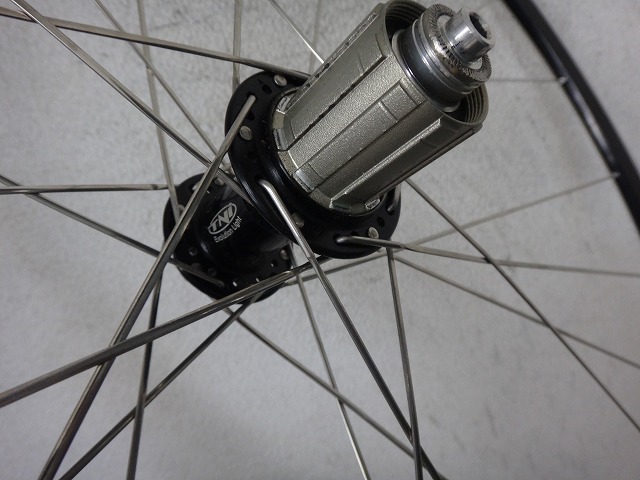
A customer dropped off a rear wheel built with a Tni AL22 rim and
Evolite hub.
Specs-wise it's the same as the Nomu Lab Wheel No. 5, but
it wasn't built by us.
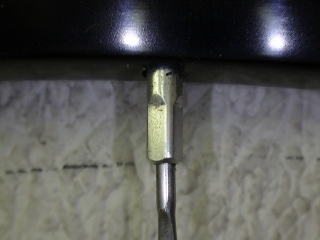
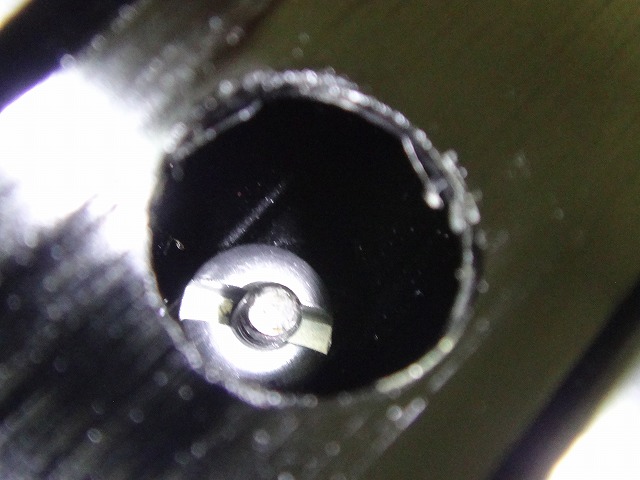
I identified it as an AL22 rim rather than XR200
because residual adhesive from a Tni sticker was still visible (←removed now).

Evolite 24H hub, all CX-RAY 6/6 Italian pattern lacing.
This is the kind of work done by "that shop that wastes Crisking"—
I only use the phrase "wasting Crisking" for one particular shop.
In the past, I've had to rebuild complete garbage wheels
laced with Ursus and Reynolds rims.
Since I don't do all CX-RAY 6/6 lacing anymore,
this is in a way a valuable sample.
The drive-side tension isn't quite at the dead-end point,
but it's quite tight, and further tightening won't make a dramatic difference.
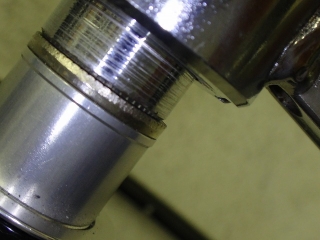
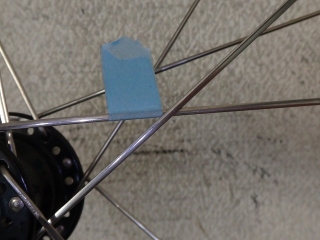
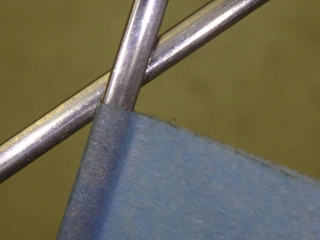
Squeezing the non-drive-side final crossing until it deformed completely
gave results like this,


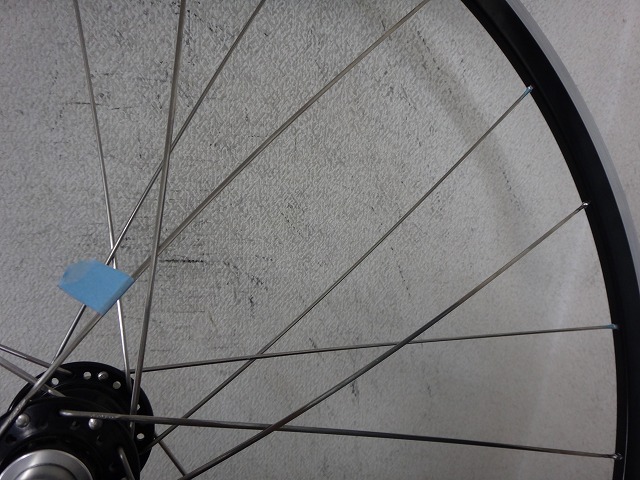
The rim is offset toward the non-drive side,
so the non-drive side should be under more tension than if centered.
The offset direction isn't consistent with wear-induced drift,
so the offset was there from the start.
Spoke length was appropriate.
I'm rebuilding it as a semi-comp 4/6 pattern,
wanting to reuse the non-drive-side CX-RAY 6-spoke set.
If spokes protrude excessively from the nipple,
they'd need cutting.
For a different reason, cutting 1mm would have been justified,
but this time I reused them as-is.
It was built with Sapim 14mm aluminum nipples,
so I'm replacing all of them with DT 12mm aluminum nipples.
If I swap them one by one,
I could rebuild without completely disassembling the wheel, but
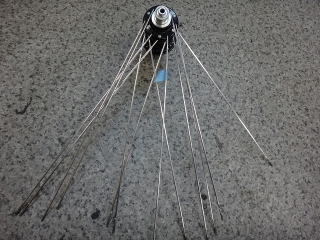
I disassembled it.
I won't deny that I disassembled it partly to satisfy the "another day of wheelbuilding" condition,
but I also wanted to deburr the rim hole perimeters,
and when I released some tension, the nipples came loose by hand easily
(no threadlocker was applied),
so I wanted to apply that.
Actually, applying threadlocker doesn't strictly require disassembly.

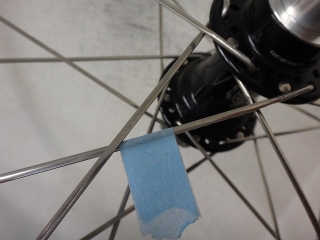
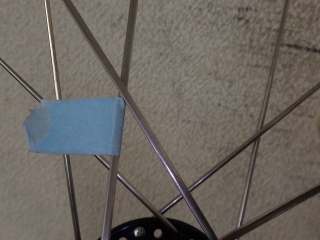
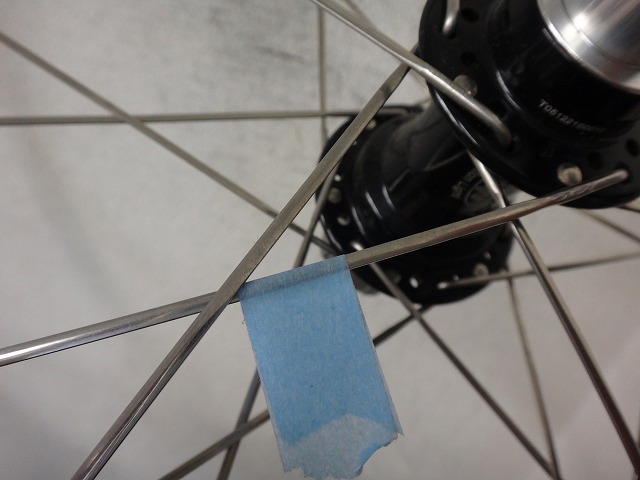
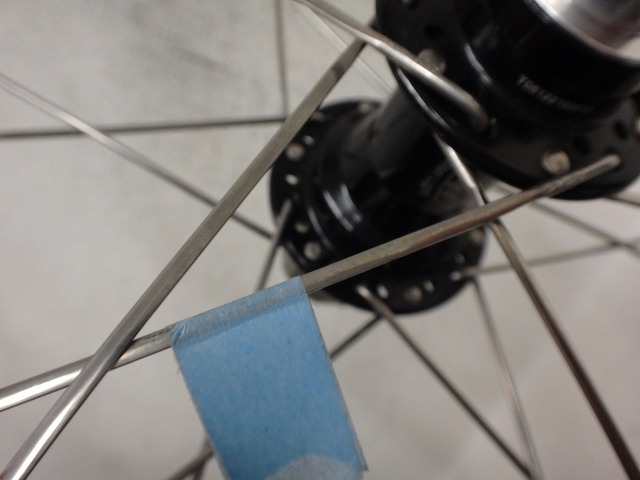
↑In a completely loose trial assembly,
this is how the final crossing and tape relate.
I pushed the offset somewhat to the extreme for the article,
but I set up minimal radial and lateral runout with drive-side tension
slightly below final state
(since tightening non-drive side also increases drive side),
centering heavily offset toward the drive side.
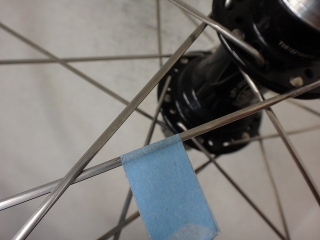
From here, I can tighten non-drive side unidirectionally until centered,
but at this stage
the final crossing and tape position looked like this.
The original had some vertical runout,
and wear marks moved up and down as the rim rotated,
but since the marks weren't heavily worn (for reasons I'll explain later),
it's not as obvious as usual.
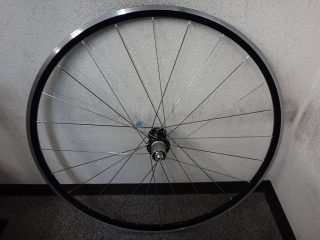
Built.
Built as semi-comp 4/6. I'll do the lacing later.
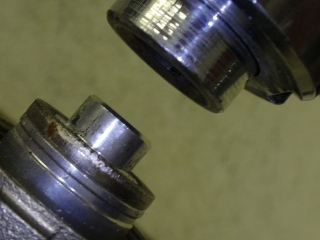
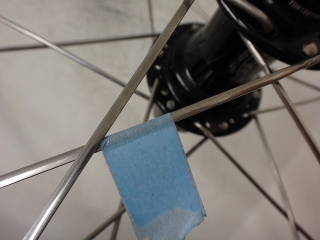
The final crossing with tape,

from the outside looks pushed together and flattened.
From inside it looks like this.
Same spokes, same lacing pattern, but different thread engagement amounts—
I wanted to show how much this changes,
but looking at just this spot, the difference wasn't quite as dramatic as I'd hoped.

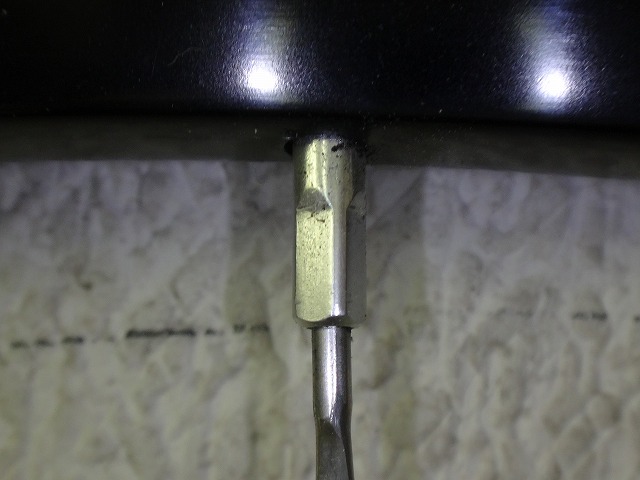
The spoke ends on the non-drive side now protrude from the nipple.
I had a feeling this would happen, so I considered cutting 1mm,
but eh, never mind.

Results from squeezing the final crossing as hard as possible here too.
To be fair, I even squeezed harder than before rebuilding.


Of course, it's centered.
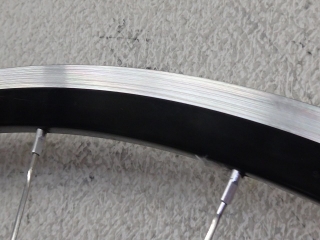
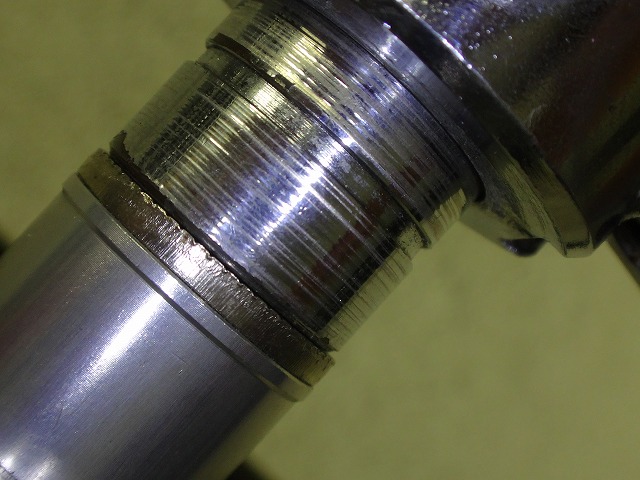
Going back in time, this is the state before rebuilding—
the braking surface isn't very dirty.
It was built about two years ago
for a hillclimb race at Ibuki or Odaigahara (can't remember which),
but after trying it out, it was so sluggish that
the customer stopped using it and has kept it in storage.
I asked the obvious question:
"If we're rebuilding at our shop anyway,
why not just go with the Nomu Lab Wheel No. 5 from the start?"
And got back a painfully honest answer—
Nomu Lab has long lead times, so they gave up back then. My sincere apologies.
If you're reading this, please bring the matching front wheel
when you come pick up the rear wheel.
I'm very suspicious about its centering.
I'll do a runout inspection free of charge
(included in the rear wheel labor).

A customer dropped off a rear wheel built with a Tni AL22 rim and
Evolite hub.
Specs-wise it's the same as the Nomu Lab Wheel No. 5, but
it wasn't built by us.
I identified it as an AL22 rim rather than XR200
because residual adhesive from a Tni sticker was still visible (←removed now).
Evolite 24H hub, all CX-RAY 6/6 Italian pattern lacing.
This is the kind of work done by "that shop that wastes Crisking"—
I only use the phrase "wasting Crisking" for one particular shop.
In the past, I've had to rebuild complete garbage wheels
laced with Ursus and Reynolds rims.
Since I don't do all CX-RAY 6/6 lacing anymore,
this is in a way a valuable sample.
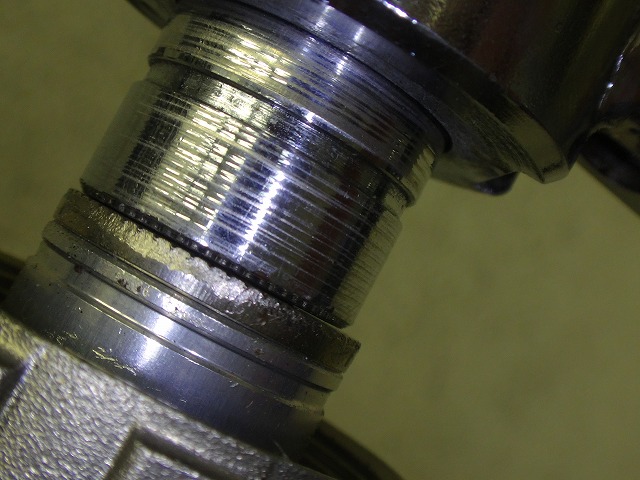
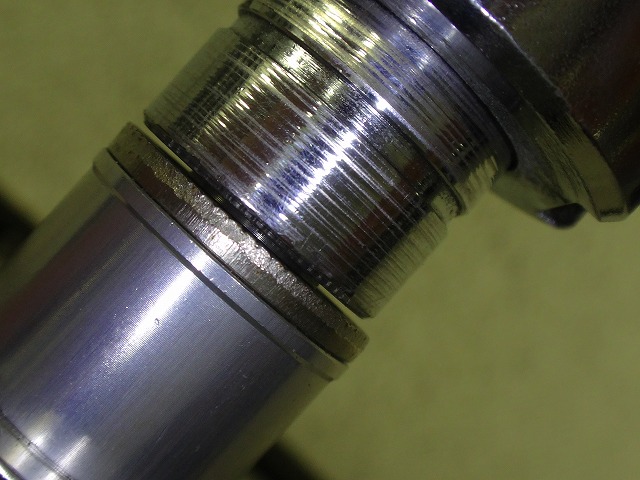
The drive-side tension isn't quite at the dead-end point,
but it's quite tight, and further tightening won't make a dramatic difference.

Squeezing the non-drive-side final crossing until it deformed completely
gave results like this,
The rim is offset toward the non-drive side,
so the non-drive side should be under more tension than if centered.
The offset direction isn't consistent with wear-induced drift,
so the offset was there from the start.

Spoke length was appropriate.
I'm rebuilding it as a semi-comp 4/6 pattern,
wanting to reuse the non-drive-side CX-RAY 6-spoke set.
If spokes protrude excessively from the nipple,
they'd need cutting.
For a different reason, cutting 1mm would have been justified,
but this time I reused them as-is.
It was built with Sapim 14mm aluminum nipples,
so I'm replacing all of them with DT 12mm aluminum nipples.
If I swap them one by one,
I could rebuild without completely disassembling the wheel, but

I disassembled it.
I won't deny that I disassembled it partly to satisfy the "another day of wheelbuilding" condition,
but I also wanted to deburr the rim hole perimeters,
and when I released some tension, the nipples came loose by hand easily
(no threadlocker was applied),
so I wanted to apply that.
Actually, applying threadlocker doesn't strictly require disassembly.
↑In a completely loose trial assembly,
this is how the final crossing and tape relate.

I pushed the offset somewhat to the extreme for the article,
but I set up minimal radial and lateral runout with drive-side tension
slightly below final state
(since tightening non-drive side also increases drive side),
centering heavily offset toward the drive side.
From here, I can tighten non-drive side unidirectionally until centered,
but at this stage

the final crossing and tape position looked like this.

The original had some vertical runout,
and wear marks moved up and down as the rim rotated,
but since the marks weren't heavily worn (for reasons I'll explain later),
it's not as obvious as usual.

Built.

Built as semi-comp 4/6. I'll do the lacing later.

The final crossing with tape,
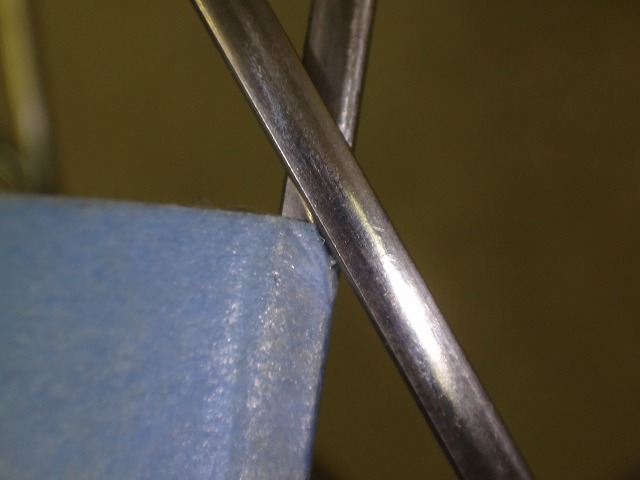
from the outside looks pushed together and flattened.

From inside it looks like this.
Same spokes, same lacing pattern, but different thread engagement amounts—
I wanted to show how much this changes,
but looking at just this spot, the difference wasn't quite as dramatic as I'd hoped.
The spoke ends on the non-drive side now protrude from the nipple.
I had a feeling this would happen, so I considered cutting 1mm,
but eh, never mind.

Results from squeezing the final crossing as hard as possible here too.
To be fair, I even squeezed harder than before rebuilding.

Of course, it's centered.

Going back in time, this is the state before rebuilding—
the braking surface isn't very dirty.
It was built about two years ago
for a hillclimb race at Ibuki or Odaigahara (can't remember which),
but after trying it out, it was so sluggish that
the customer stopped using it and has kept it in storage.
I asked the obvious question:
"If we're rebuilding at our shop anyway,
why not just go with the Nomu Lab Wheel No. 5 from the start?"
And got back a painfully honest answer—
Nomu Lab has long lead times, so they gave up back then. My sincere apologies.
If you're reading this, please bring the matching front wheel
when you come pick up the rear wheel.
I'm very suspicious about its centering.
I'll do a runout inspection free of charge
(included in the rear wheel labor).