Another wheel day (and so on).
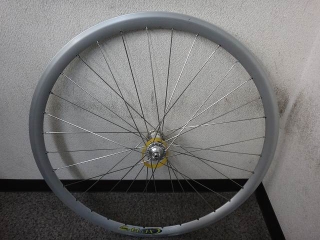
A customer entrusted me with a front wheel built with a Mavic CXP14 rim.
It's a 650C rim, by the way.
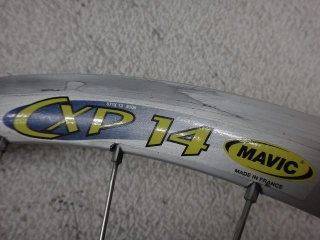
There was uneven brake bite at the rim seam, so
they tried filing it down, but it only made things worse.
However, another CXP14 rim I have on hand shows the opposite problem—
instead of a protrusion at the seam, there's a depression.
If this wheel had the same issue, filing would be counterproductive.

Tradizione hub, 32H, pillar aero spokes,
laced 4-4 Italian style with Rib Strong running through the hub shell.
The customer wants it done the same way after rebuilding.
These pillar spokes have a cross-section close to a diamond shape,
with almost no flat surface on the sides of the butted section,
so most spoke wrenches won't fit them.
We have one or two tools that work, so no real problem there.
The spoke length is correct.
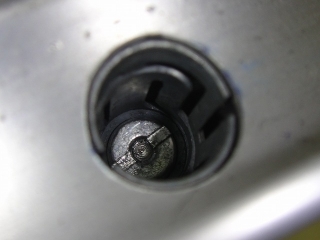
This rim's expanding eyelets (→here)
weren't installed later—they came with the original.
The replacement rim had them all pre-installed too.
Since the expanding eyelets aren't fixed to the rim itself,
the bare rim rattles with a little clatter when you shake it.
The narrow width and shape of the nipple slot
suggests a star-type nipple.
The 3.4mm grip width is fine, but
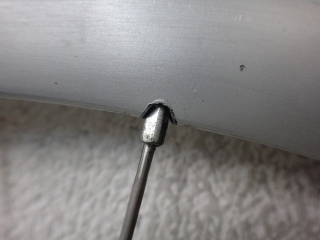
it was built with 12mm-length nipples. That's the problem.
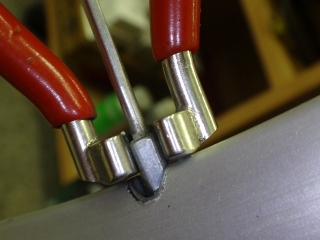
The nipple wrench only engages this much.

Skipping ahead in time—this is after rebuilding.
I switched to DT Swiss 16mm brass nipples.
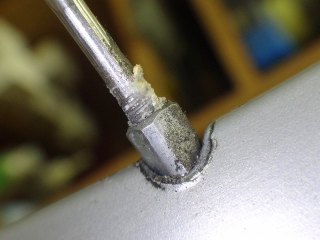
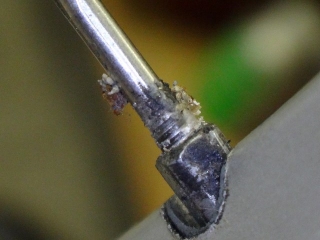
Even though the tension isn't particularly high,
the nipple turns incredibly stiff.
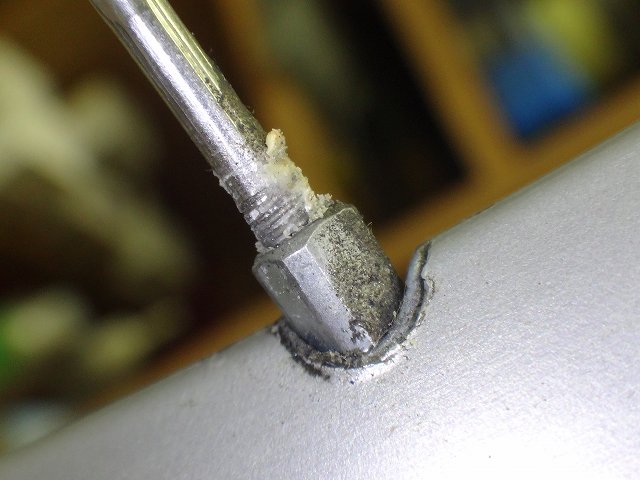
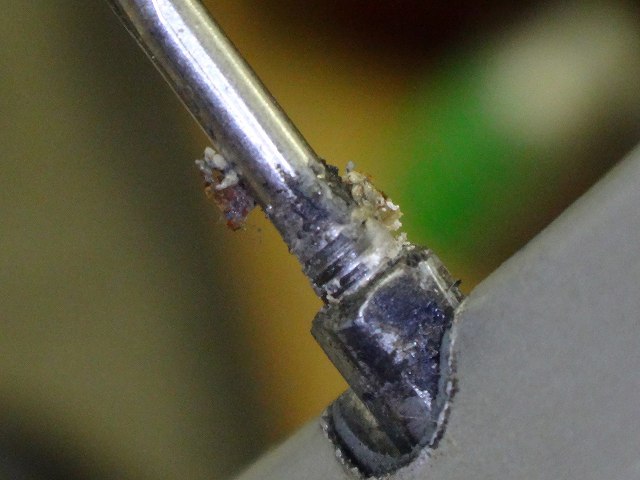
It turned out there was some kind of soft adhesive—like rim cement or bond—
on the spoke threads.
Separately from that, there's also a white thread-lock compound on the threads,
though I'm not sure if it was factory-applied to the spokes originally.
This needs cleaning, so
I'm not doing a rim swap.
Definitely not just to keep up the "another wheel day" streak.
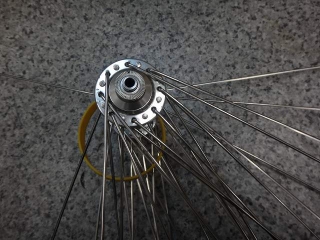
Took it apart.
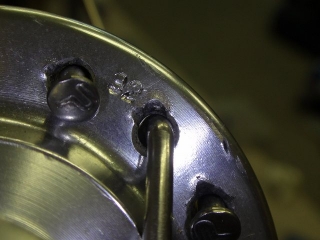
Originally it was built 4-4,
but there were also marks where tension had been applied in a 6-6 direction.
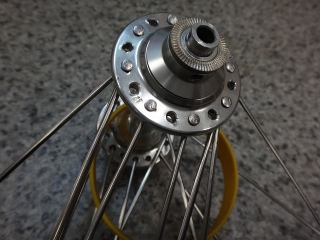
I removed only the inpokes.
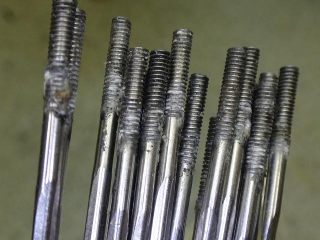
before
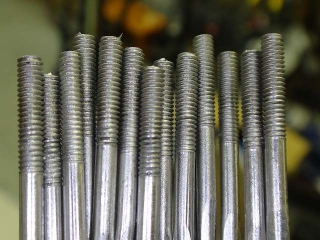
after
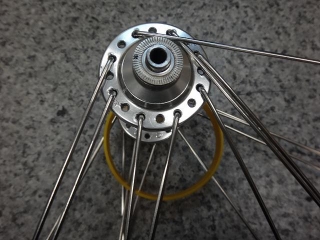
I put the inpokes back on the hub and removed the outpokes.
After cleaning them the same way and reinstalling the outpokes,
I hit a snag I never saw coming.
When I started rebuilding, something felt wrong.
I couldn't get an Italian lace to work.
But the original was definitely Italian laced.
Looking closer, I realized the original spoke routing was right-drop,
meaning they'd Italian laced with right/left same-side spokes in a right-drop pattern—
which means the valve hole sat within one of the four-spoke pairs in the final cross.
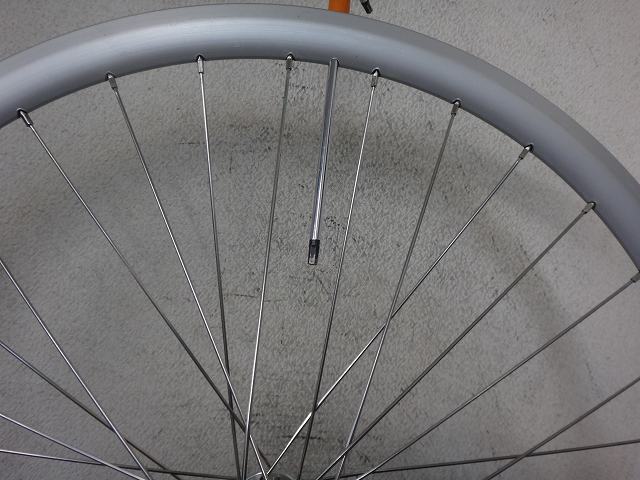
This rim's valve hole notch is easy to see from the side,
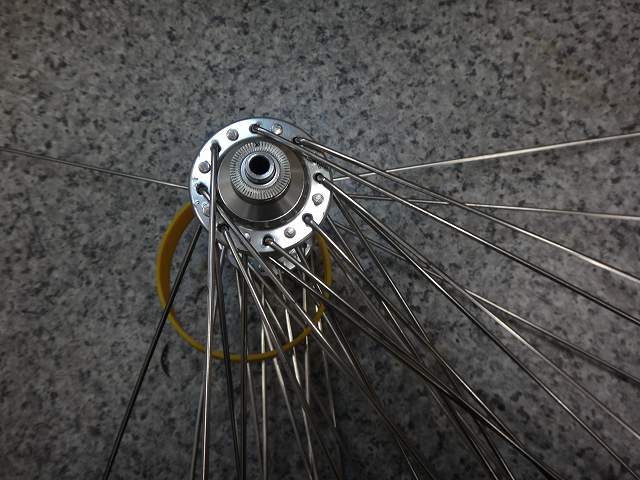
but looking back at the opening photo (pretty much straight down showing the valve hole phase),
the valve hole position was indeed within one four-spoke pair.

↑I test-laced one spot as an example.
This is what happens.
The opening shot was taken from the right side,
and this one from the left,
so the valve hole offset appears in different directions,
but from the right side they'd look the same.
If you mix up right-drop and left-drop on new spokes,
you can just flip one inpoke and one outpoke from one flange side.
But with reused spokes, I don't want to change
which spokes were originally inpokes and which were outpokes.
So I remove one inpoke,
then shift the remaining spokes one hole over, keeping their orientation—
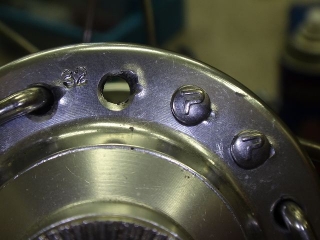
—and I'm one move short of finishing when we're at this state.
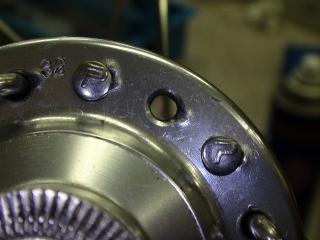
I shifted the outpoke to the next hole, keeping its orientation.
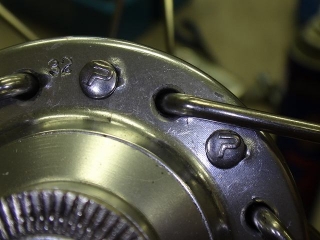
I plugged in the first inpoke I removed.
Now I've converted from right-drop to left-drop
while preserving which spokes were originally inpokes and outpokes.
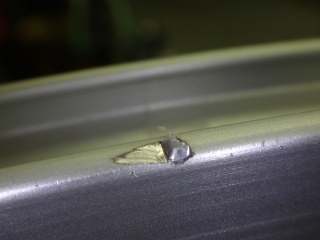
The replacement rim had a burr on the edge that interfered with truing,
(though you could just avoid it with the gauge placement),
so I filed it off. It doesn't affect the brake zone.
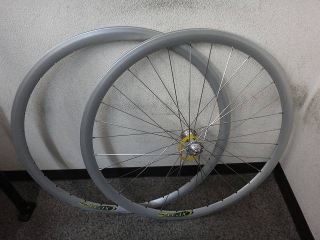
It's built.
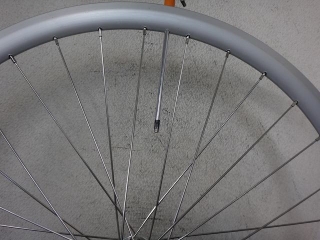
Left-drop Italian lace, 4-4 normal rim geometry,
with the valve hole positioned between a four-spoke pair.
In other words, standard lacing.
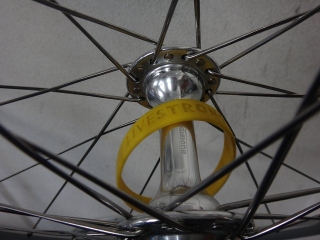
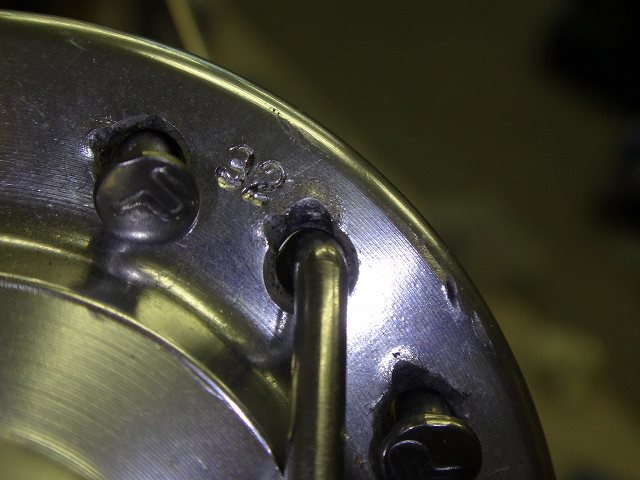
From the right side, the hub shell lettering isn't reversed,
and the Rib Strong reads the right way,
which is how it was originally.
I confirmed that first, so I never removed the Rib Strong
from the hub shell during the entire job.

A customer entrusted me with a front wheel built with a Mavic CXP14 rim.
It's a 650C rim, by the way.
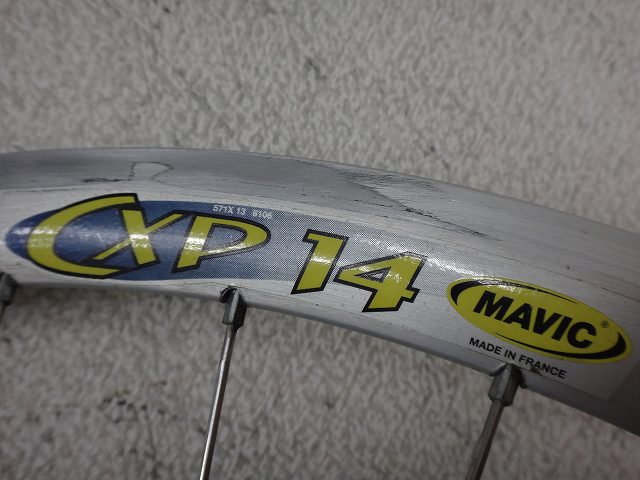
There was uneven brake bite at the rim seam, so
they tried filing it down, but it only made things worse.
However, another CXP14 rim I have on hand shows the opposite problem—
instead of a protrusion at the seam, there's a depression.
If this wheel had the same issue, filing would be counterproductive.
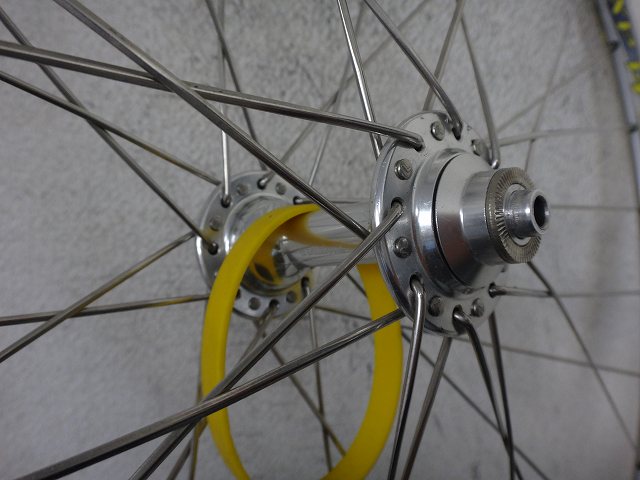
Tradizione hub, 32H, pillar aero spokes,
laced 4-4 Italian style with Rib Strong running through the hub shell.
The customer wants it done the same way after rebuilding.
These pillar spokes have a cross-section close to a diamond shape,
with almost no flat surface on the sides of the butted section,
so most spoke wrenches won't fit them.
We have one or two tools that work, so no real problem there.

The spoke length is correct.
This rim's expanding eyelets (→here)
weren't installed later—they came with the original.
The replacement rim had them all pre-installed too.
Since the expanding eyelets aren't fixed to the rim itself,
the bare rim rattles with a little clatter when you shake it.
The narrow width and shape of the nipple slot
suggests a star-type nipple.
The 3.4mm grip width is fine, but
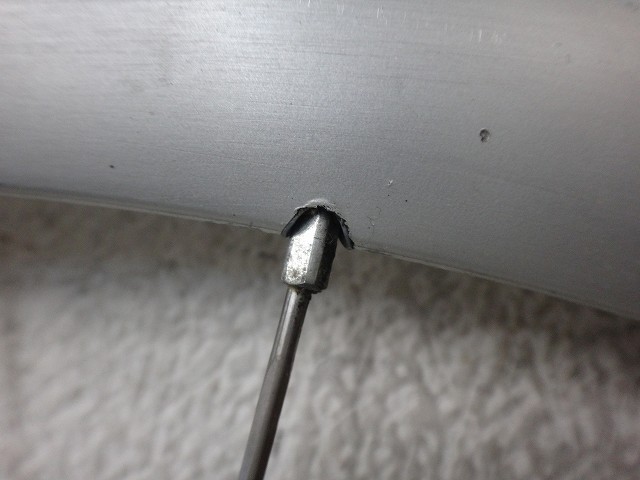
it was built with 12mm-length nipples. That's the problem.
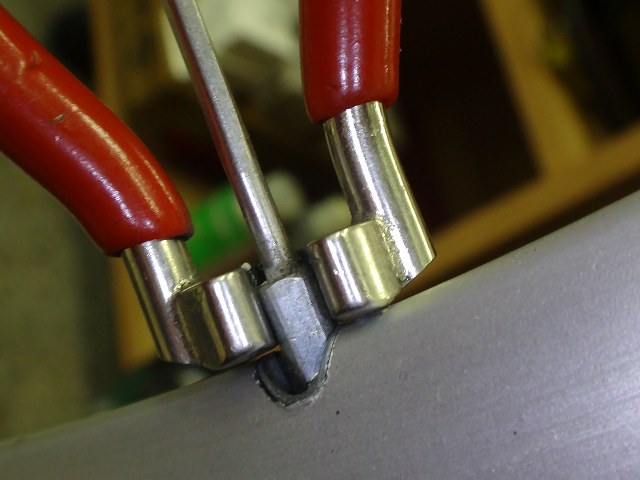
The nipple wrench only engages this much.

Skipping ahead in time—this is after rebuilding.
I switched to DT Swiss 16mm brass nipples.
Even though the tension isn't particularly high,
the nipple turns incredibly stiff.
It turned out there was some kind of soft adhesive—like rim cement or bond—
on the spoke threads.
Separately from that, there's also a white thread-lock compound on the threads,
though I'm not sure if it was factory-applied to the spokes originally.
This needs cleaning, so
I'm not doing a rim swap.
Took it apart.
Originally it was built 4-4,
but there were also marks where tension had been applied in a 6-6 direction.
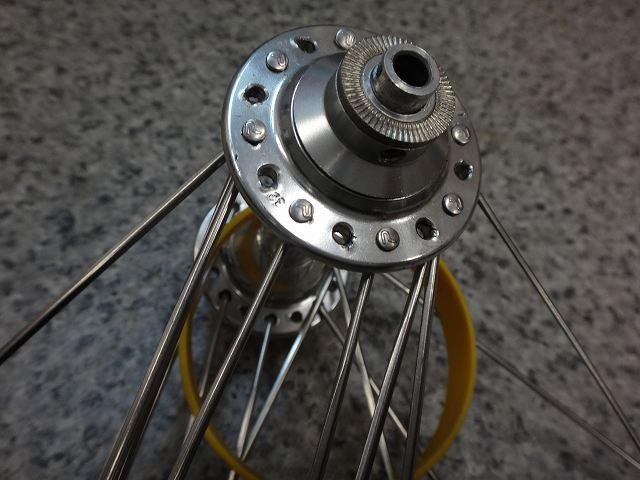
I removed only the inpokes.
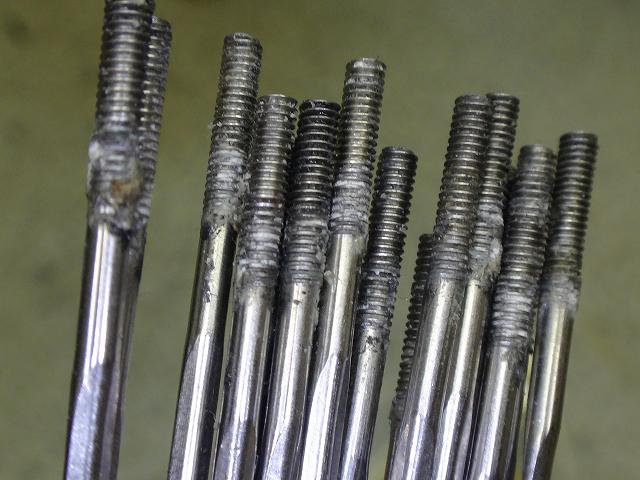
before
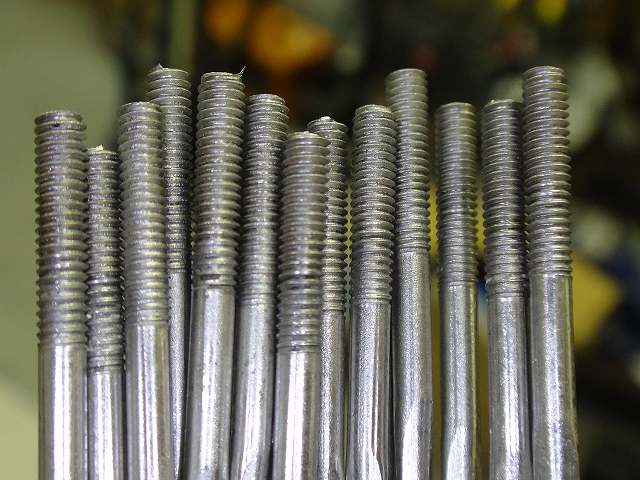
after
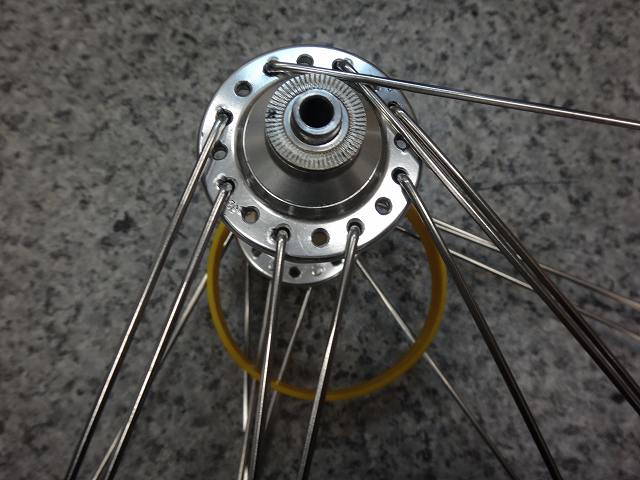
I put the inpokes back on the hub and removed the outpokes.
After cleaning them the same way and reinstalling the outpokes,
I hit a snag I never saw coming.
When I started rebuilding, something felt wrong.
I couldn't get an Italian lace to work.
But the original was definitely Italian laced.
Looking closer, I realized the original spoke routing was right-drop,
meaning they'd Italian laced with right/left same-side spokes in a right-drop pattern—
which means the valve hole sat within one of the four-spoke pairs in the final cross.
This rim's valve hole notch is easy to see from the side,
but looking back at the opening photo (pretty much straight down showing the valve hole phase),
the valve hole position was indeed within one four-spoke pair.
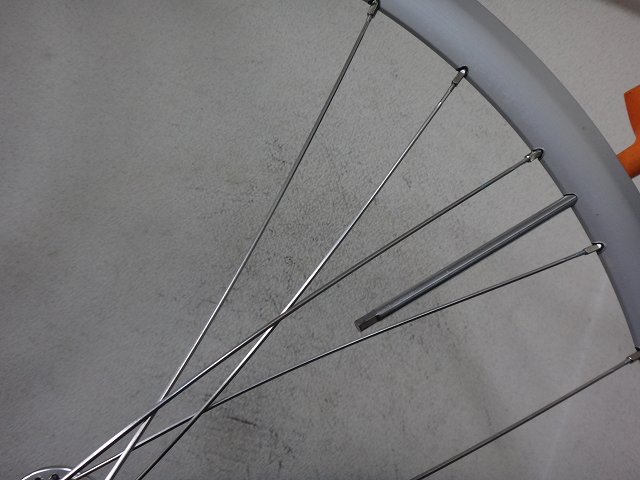
↑I test-laced one spot as an example.
This is what happens.
The opening shot was taken from the right side,
and this one from the left,
so the valve hole offset appears in different directions,
but from the right side they'd look the same.
If you mix up right-drop and left-drop on new spokes,
you can just flip one inpoke and one outpoke from one flange side.
But with reused spokes, I don't want to change
which spokes were originally inpokes and which were outpokes.
So I remove one inpoke,
then shift the remaining spokes one hole over, keeping their orientation—

—and I'm one move short of finishing when we're at this state.
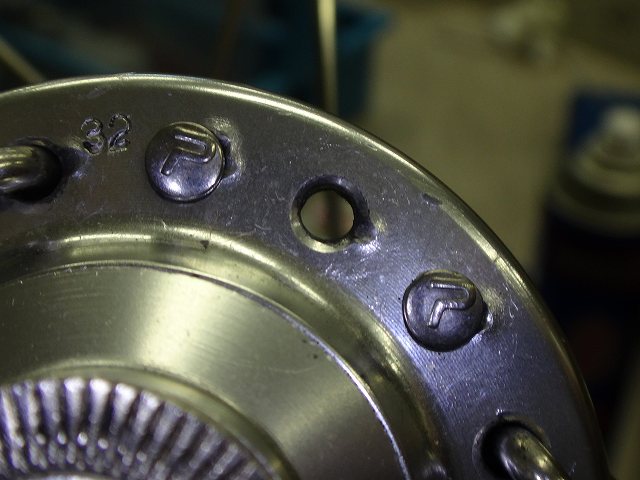
I shifted the outpoke to the next hole, keeping its orientation.
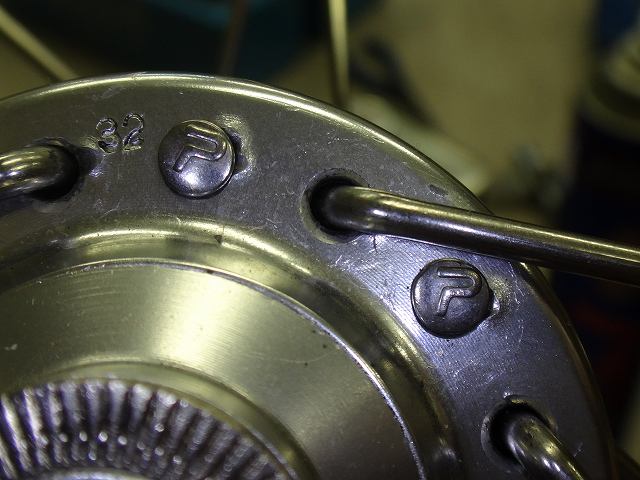
I plugged in the first inpoke I removed.
Now I've converted from right-drop to left-drop
while preserving which spokes were originally inpokes and outpokes.

The replacement rim had a burr on the edge that interfered with truing,
(though you could just avoid it with the gauge placement),
so I filed it off. It doesn't affect the brake zone.
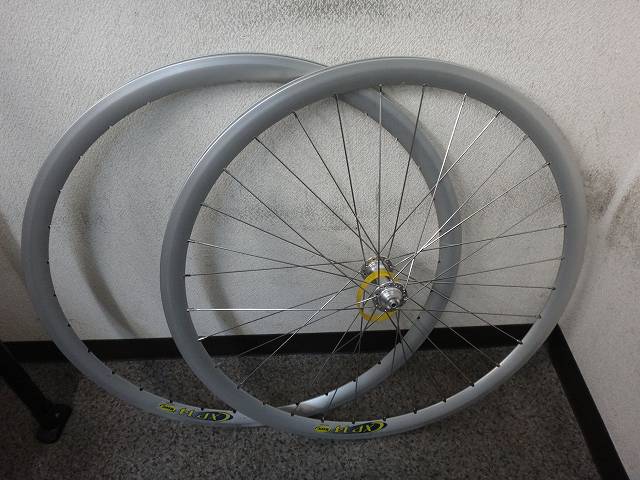
It's built.
Left-drop Italian lace, 4-4 normal rim geometry,
with the valve hole positioned between a four-spoke pair.
In other words, standard lacing.

From the right side, the hub shell lettering isn't reversed,
and the Rib Strong reads the right way,
which is how it was originally.
I confirmed that first, so I never removed the Rib Strong
from the hub shell during the entire job.