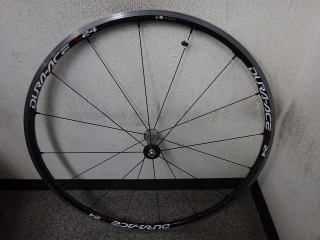
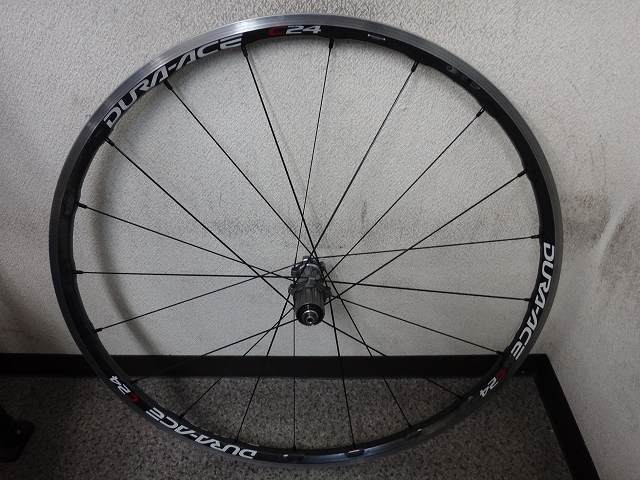
I received a WH-7900 C24 WO wheel from a customer.

They wanted a hub overhaul and inspection.
Let me start with the rear wheel.

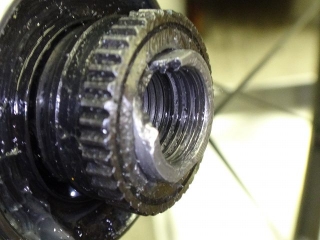
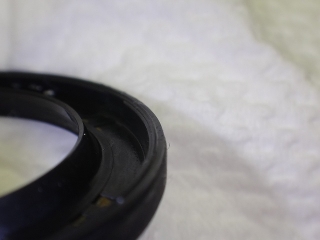
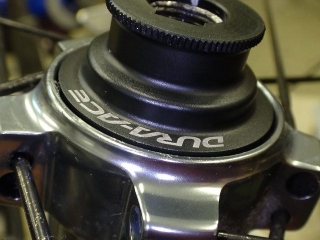
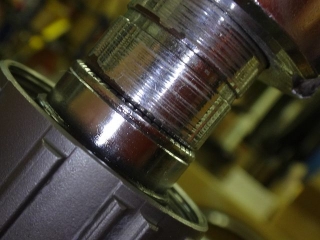
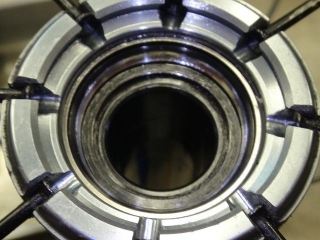
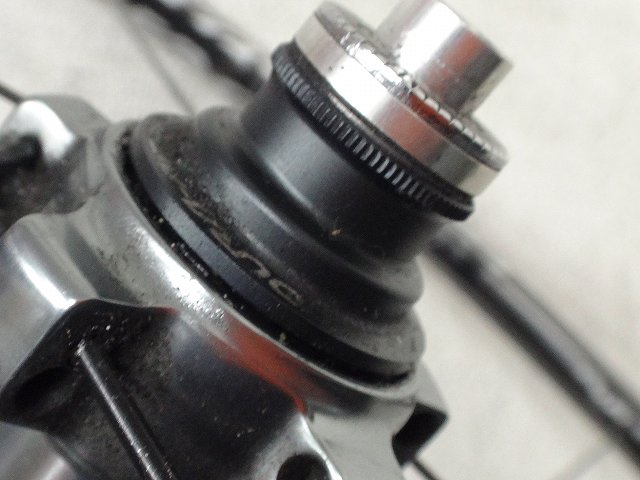
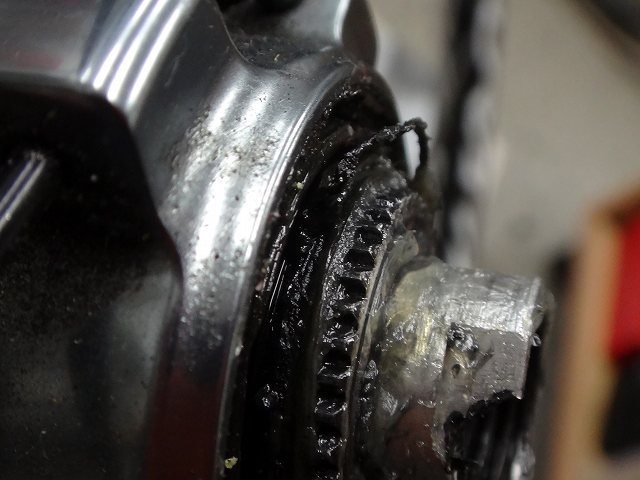
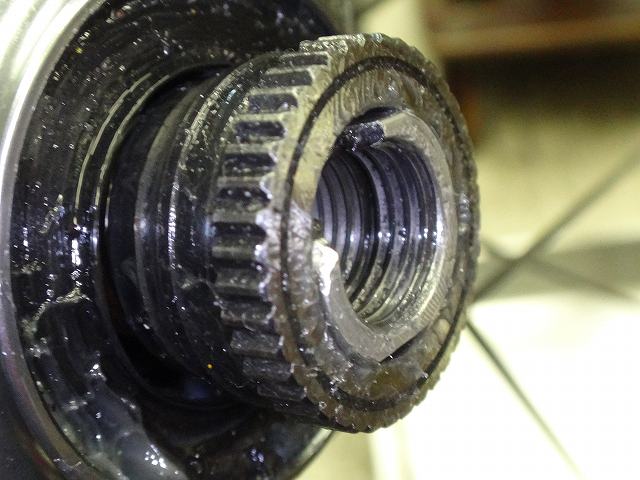
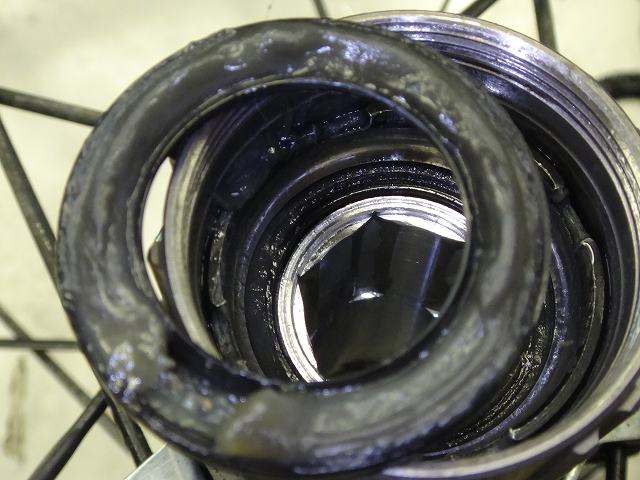
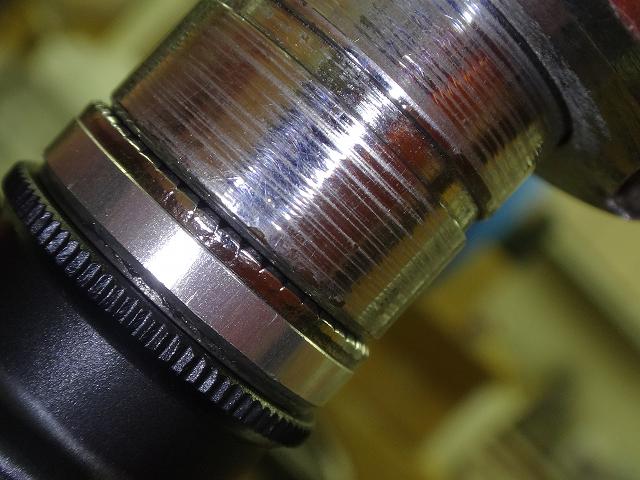
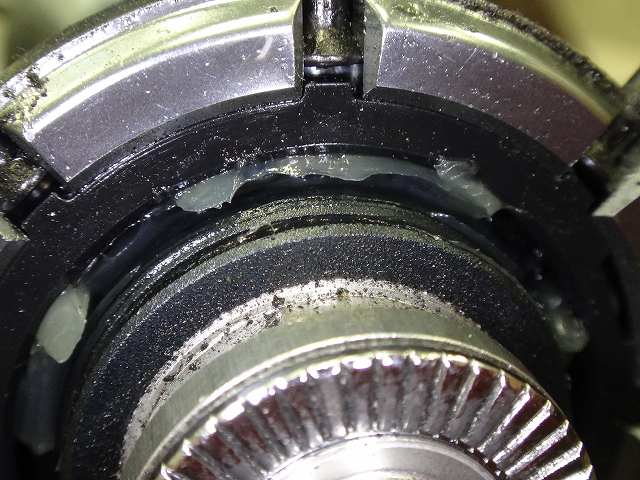
The dust cap on the left side is clearly in bad shape.
There should never be a gap like this between the dust cap and the hub body.
The hub shaft rotates smoothly with no play.
I've seen several other wheels from this customer in the past,
and they've all been butchered by a nearby shop—this one too.
The customer definitely didn't touch this themselves.
I confirmed this directly with them.
Looking back at previous wheels, the bearing cone adjustments were consistently too tight,
some so tight you could barely rotate the hub shaft by hand.
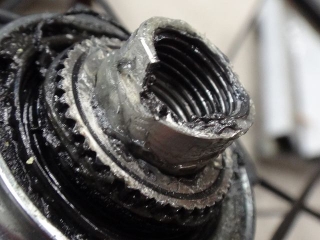
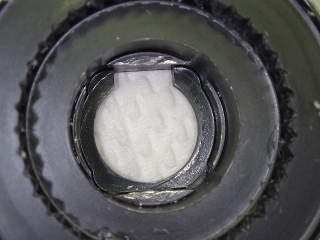
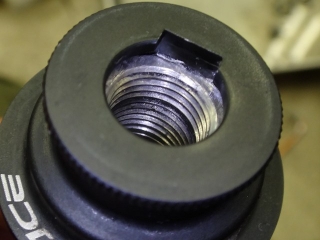
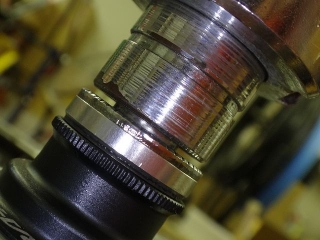
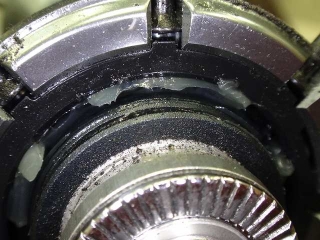
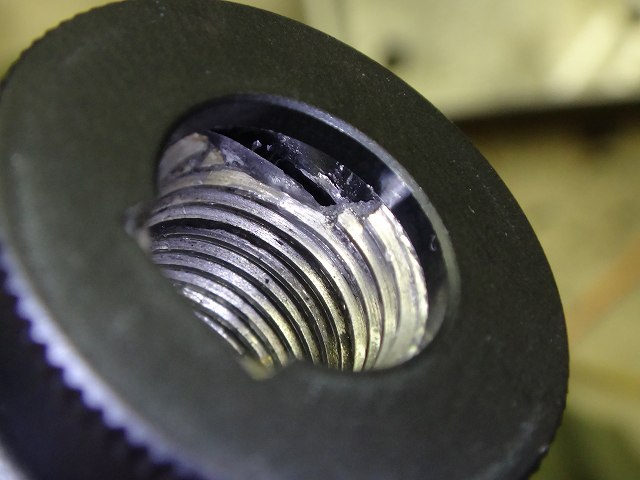
I removed the hollow end bolt and the dust cap, which doubles as a stopper for the digital ratchet bearing cone adjustment mechanism.
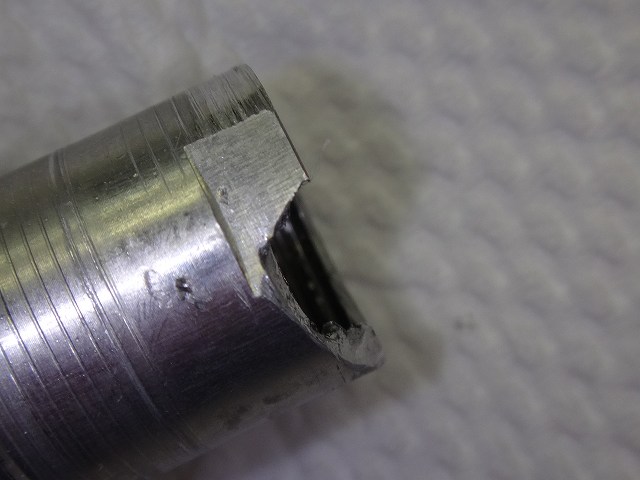
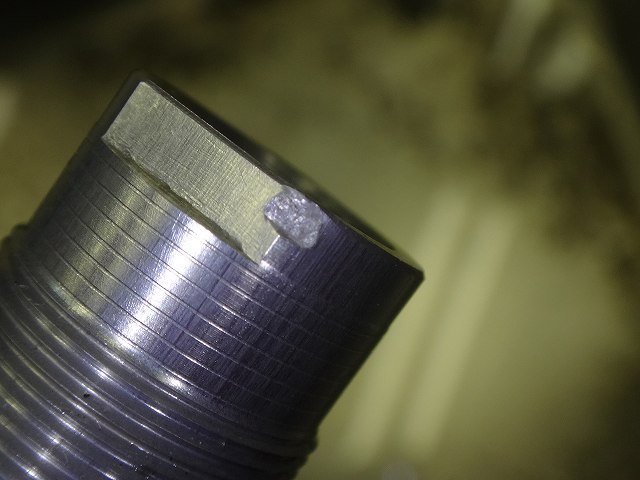
The end of the hub shaft is chipped and broken.

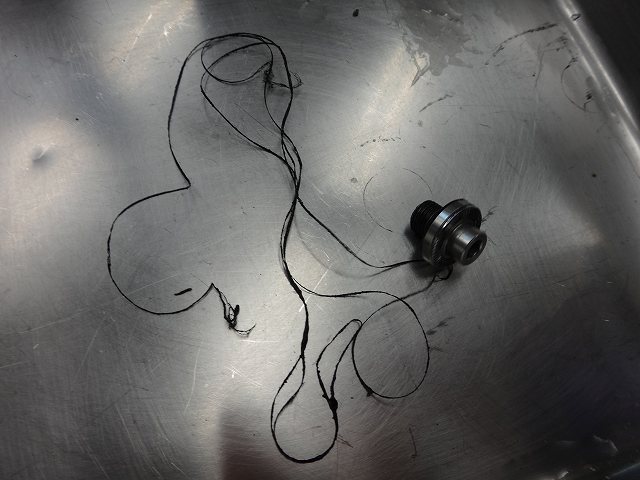
Thread has gotten tangled in the bearing cone area through the gap in the dust cap.
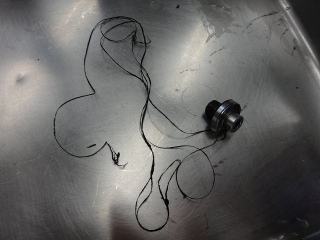
↑This
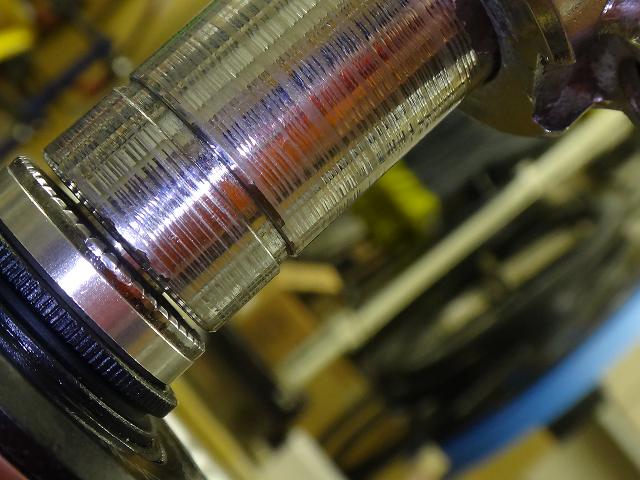
I'd already removed it in the opening photo,
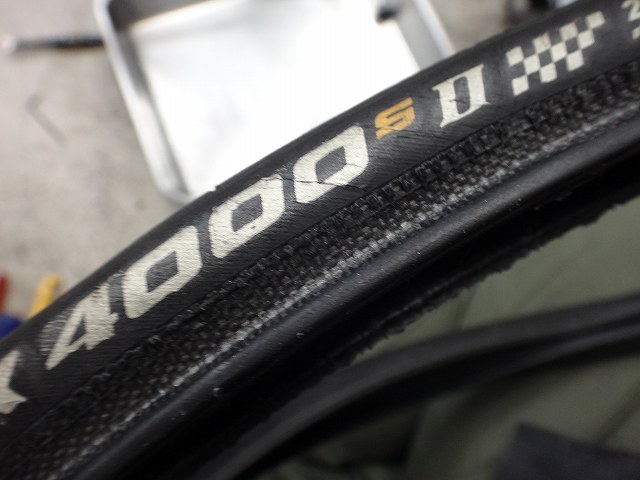
but when I first received the wheel, it had a tire on it.
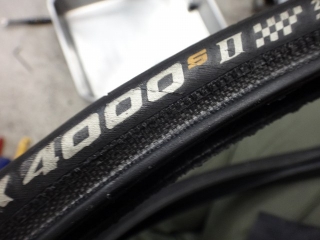
The thread that came out from the side of this Gp4000S II tire
is the culprit thread that got tangled.
I often see this thread wrapped around the back of sprockets and rear derailleur pulleys.
It seems the manufacturing changed with the Gp5000,
as this thread no longer appears.
The fact that thread was tangled means the customer used this wheel
for a considerable period with the dust cap gap present.
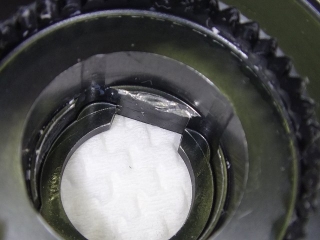
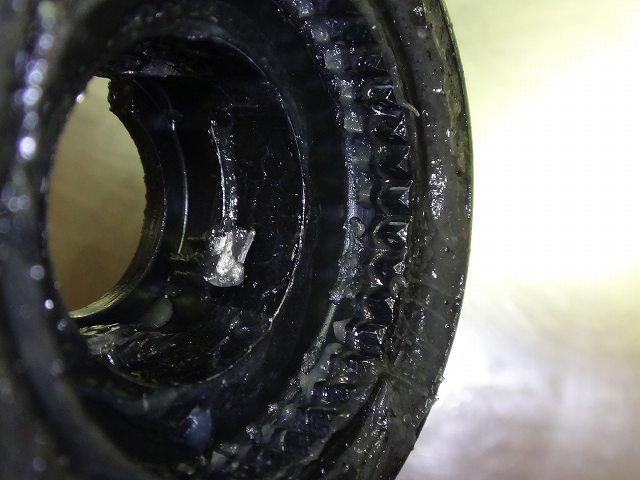
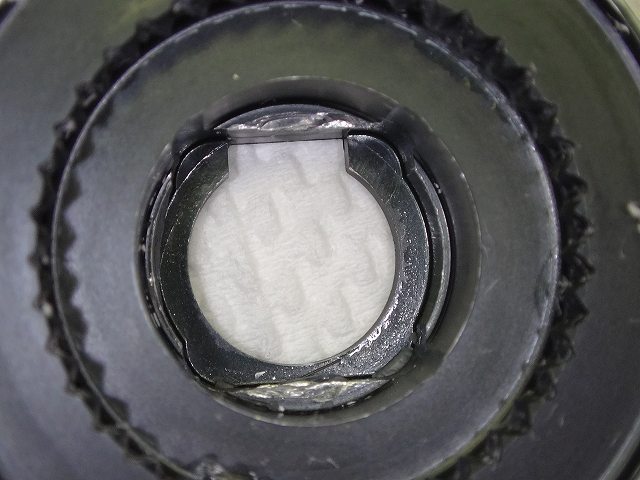
The digital ratchet works by aligning the notches on the dust cap side with the two notches 180° apart on the hub shaft end,
while also matching the serrations on the bearing cone to fix the adjustment.
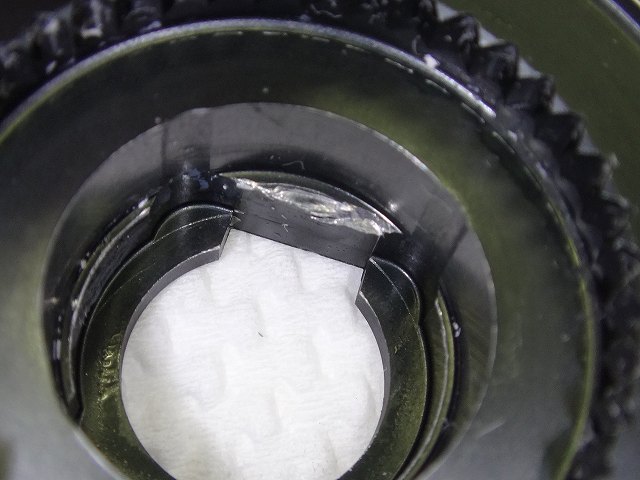
But someone aligned it only with the bearing cone serrations
and tightened the end bolt, which broke the hub shaft end.
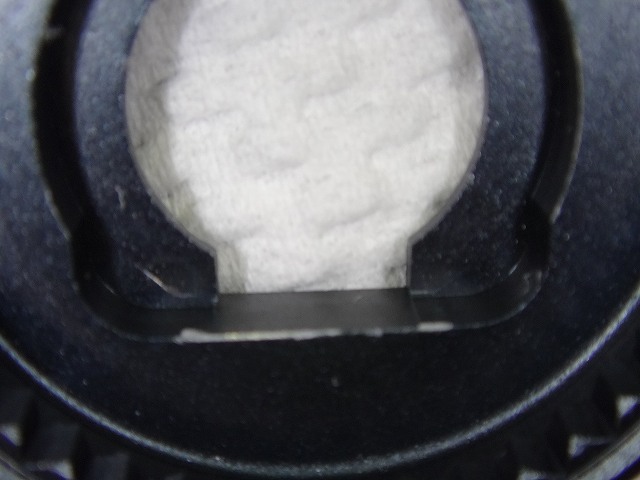
There's a "window" on the dust cap to check if the notches are aligned,
but it's pointless to provide one if someone doesn't understand its purpose.

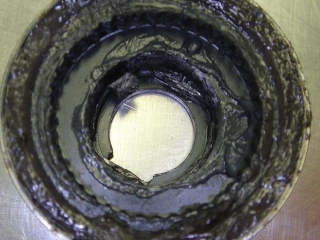
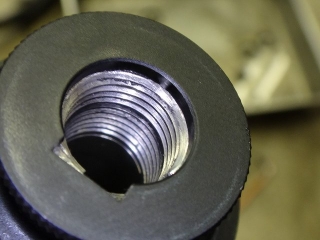
A fragment of the hub shaft remained.
This can't be restored, so I'm discarding it.
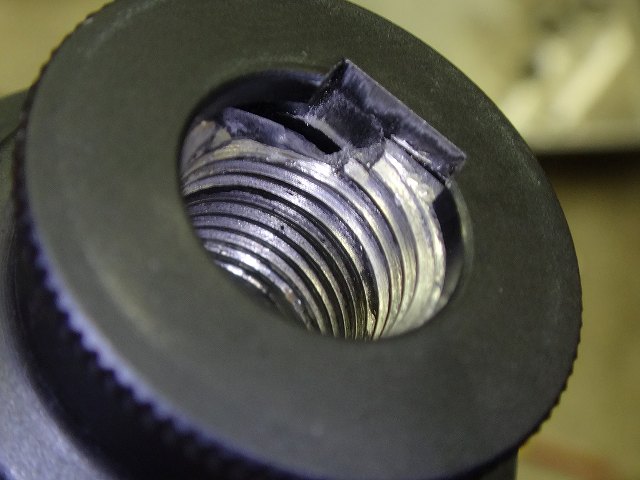
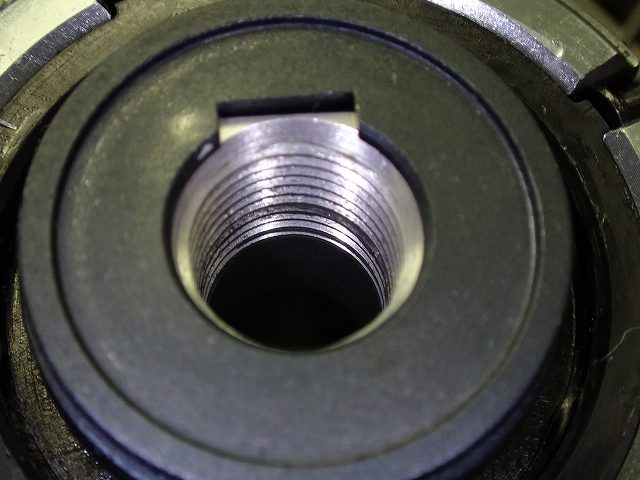
The bearing cone and hub shaft are connected by threads,
but since everything was completely unscrewed, the bearing cone can now move left and right.

However, there's a burr on the hub shaft end,
so I can't pull the bearing cone off.

I managed to remove the hub shaft.
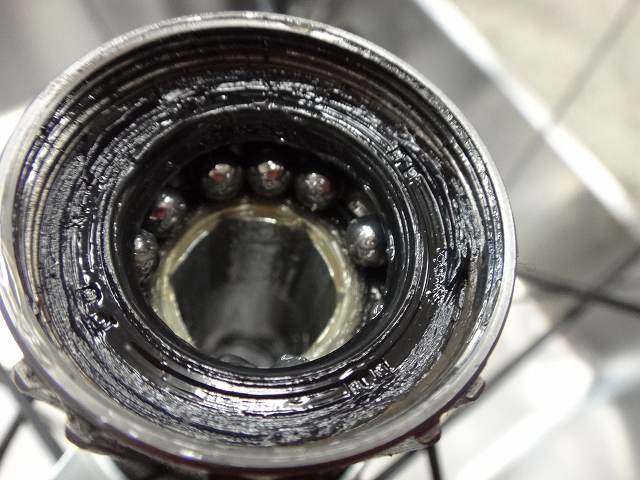
The WH-7850 early model uses loose balls on both sides,
but the later model uses a retainer bearing only on the non-freewheel side.
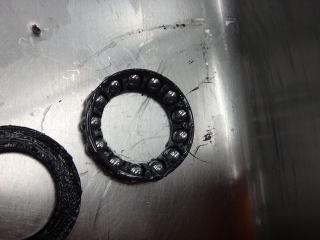
The WH-7900 also has a retainer only on the non-freewheel side,
so it's easy to distinguish which balls go where.
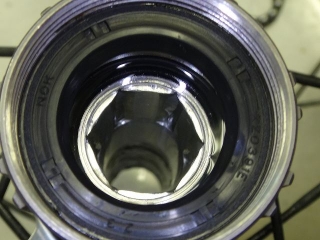
Anyway... this thing...

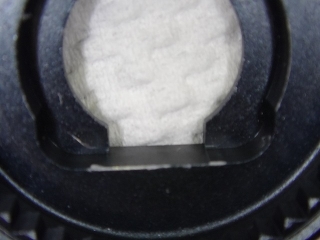
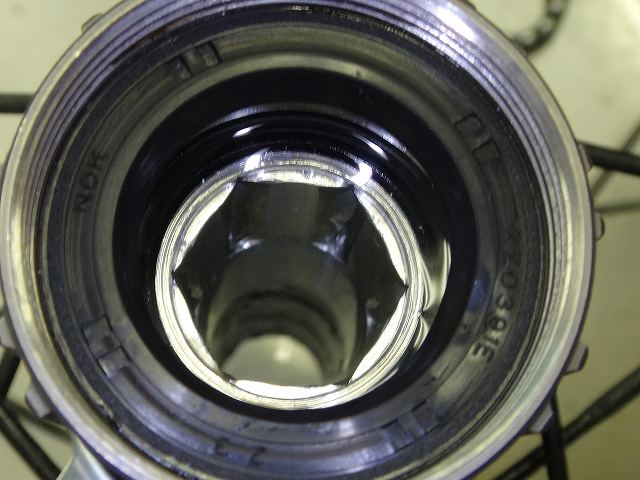
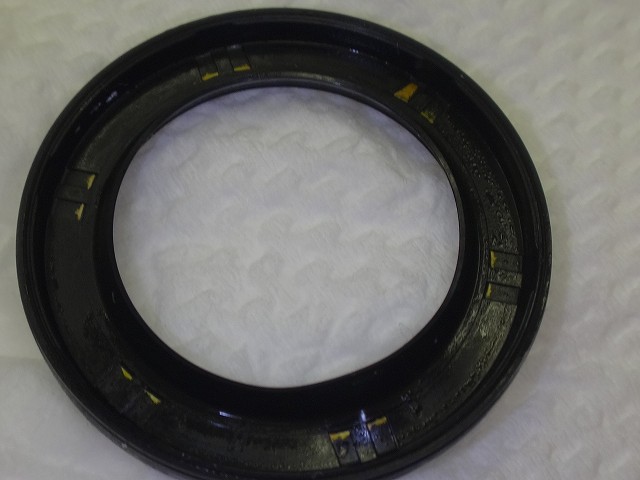
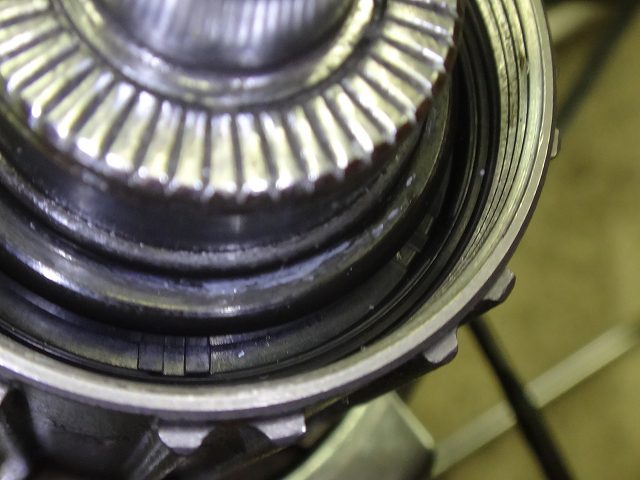
The dust seal is installed backwards.
Come on, seriously?
When this seal is installed backwards,
you should only be able to rotate the hub shaft by hand in the direction where freewheel motion is connected
(→here),
but this time the seal friction was gone,
so the hub shaft rotated smoothly in both directions from the start.

The side that should face outward is packed with grease.
I cleaned it.
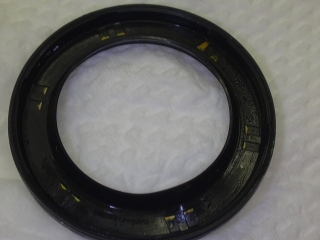
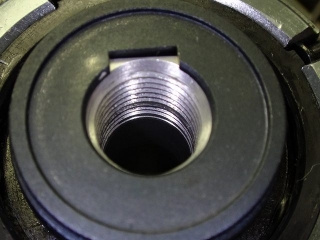
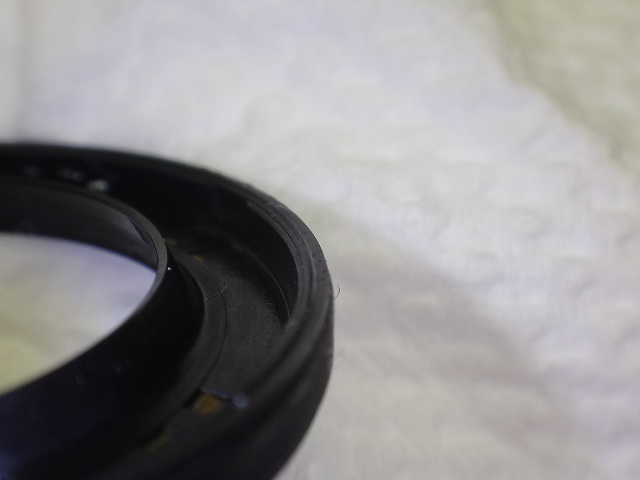
The side with the U-shaped notch faces outward.


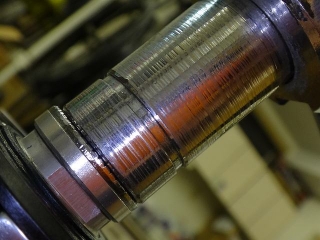
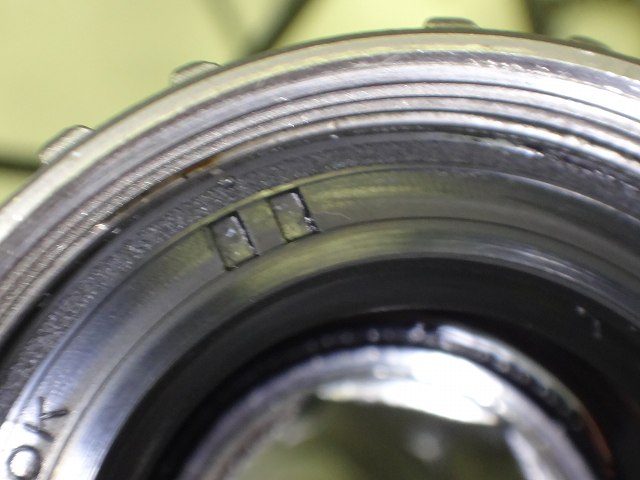
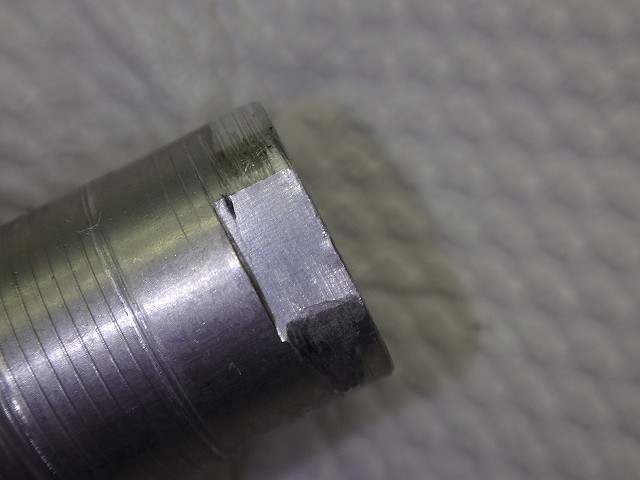
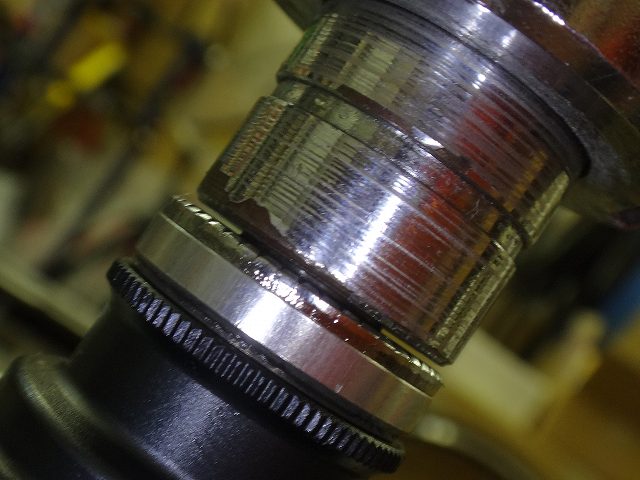
One end of the hub shaft is rounded, and the other is chipped.
The corresponding dust cap side also
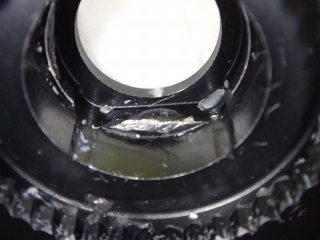
has burrs,
so I couldn't align and fit the notches on the hub shaft with the dust cap.

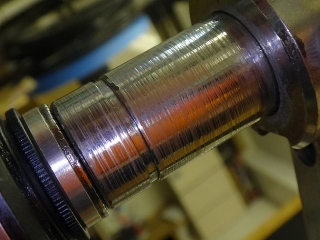
I machined it so it fits cleanly all the way in.
In the upper image, I'm aligning the window that shows if the notches match
with the notch on the damaged side, but either way works,

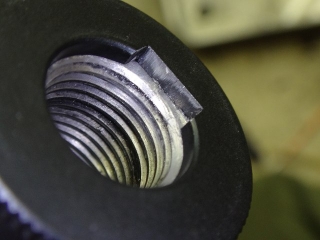
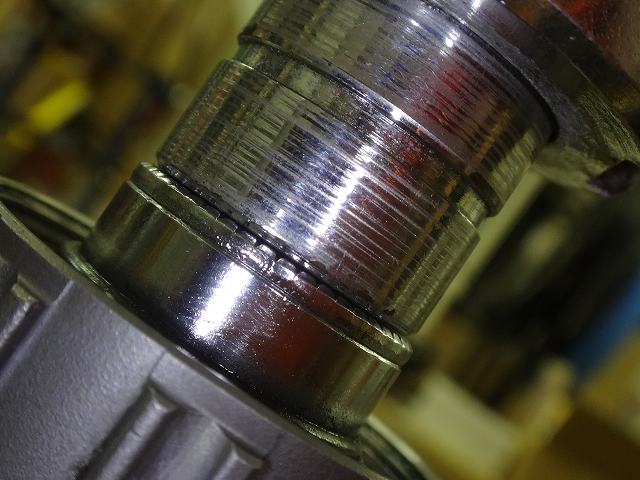
and if you flip it, it looks like this.
The dust cap sits cleanly now.
The notches got rounded and damaged, but there's a reliable way to prevent this:
just make sure the notches are properly seated before tightening the end bolt.
Trying to press them in by tightening the end bolt is what causes problems.

↑The freewheel side seal looks like this
The rim was off-center to an impossible degree.
Since it's easier to tighten on the low-tension non-freewheel side,
they probably did the spoke straightening with uptightening on that side only,
then finished without using a centering gauge.
Though to be fair, when I received it there was definitely runout in multiple places on both sides.
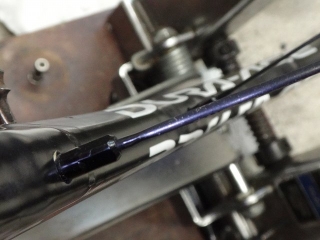
This wheel has no anti-rotation feature at the spoke head,
so the direction of the flattened spoke can rotate. This happens especially on the non-freewheel side.
Looking at the image above, there are even spokes on the freewheel side pointing nearly horizontal,
and more than half the spokes needed correction.


I straightened the lateral runout mostly by uptightening on the freewheel side.
The center offset is reduced, but I couldn't eliminate it with this alone.


I then achieved center with additional uptightening on the freewheel side only.
Even though this rear wheel is built with different spoke lengths on each side,
if you loosen the non-freewheel side even slightly, the spokes get drastically loose.
Next, the front wheel.
I'll overhaul the hub before straightening this one too.
Originally, it rotated smoothly with no side play.

The front hub shaft has only one notch, unlike the rear.
And this one also had rounded corners.
The dust cap side also has marks from end bolt pressure, but
there's no major burring, so
there's no problem with aligning the phases and seating them.
Going back in the timeline, both front and rear hubs
were using a different grease than Shimano's premium grease (formerly called Dura-Ace grease).
In terms of consistency, it's very loose—the rotation is actually lighter than Shimano grease.
It might be Belhammer grease.
Custom tuning with non-original grease! I seem to remember
there being a lot to learn from this kind of thing in the past.


There's center offset, but
fortunately there was also some decent runout.
It worked out well—doing spoke straightening with uptightening in the direction that reduces center offset
also brings the center into line as a bonus!
They wanted a hub overhaul and inspection.
Let me start with the rear wheel.
The dust cap on the left side is clearly in bad shape.
There should never be a gap like this between the dust cap and the hub body.
The hub shaft rotates smoothly with no play.
I've seen several other wheels from this customer in the past,
and they've all been butchered by a nearby shop—this one too.
The customer definitely didn't touch this themselves.
I confirmed this directly with them.
Looking back at previous wheels, the bearing cone adjustments were consistently too tight,
some so tight you could barely rotate the hub shaft by hand.

I removed the hollow end bolt and the dust cap, which doubles as a stopper for the digital ratchet bearing cone adjustment mechanism.
The end of the hub shaft is chipped and broken.
Thread has gotten tangled in the bearing cone area through the gap in the dust cap.
↑This
I'd already removed it in the opening photo,
but when I first received the wheel, it had a tire on it.
The thread that came out from the side of this Gp4000S II tire
is the culprit thread that got tangled.
I often see this thread wrapped around the back of sprockets and rear derailleur pulleys.
It seems the manufacturing changed with the Gp5000,
as this thread no longer appears.
The fact that thread was tangled means the customer used this wheel
for a considerable period with the dust cap gap present.

The digital ratchet works by aligning the notches on the dust cap side with the two notches 180° apart on the hub shaft end,
while also matching the serrations on the bearing cone to fix the adjustment.
But someone aligned it only with the bearing cone serrations
and tightened the end bolt, which broke the hub shaft end.
There's a "window" on the dust cap to check if the notches are aligned,
but it's pointless to provide one if someone doesn't understand its purpose.
A fragment of the hub shaft remained.
This can't be restored, so I'm discarding it.

The bearing cone and hub shaft are connected by threads,
but since everything was completely unscrewed, the bearing cone can now move left and right.
However, there's a burr on the hub shaft end,
so I can't pull the bearing cone off.
I managed to remove the hub shaft.
The WH-7850 early model uses loose balls on both sides,
but the later model uses a retainer bearing only on the non-freewheel side.

The WH-7900 also has a retainer only on the non-freewheel side,
so it's easy to distinguish which balls go where.
Anyway... this thing...
The dust seal is installed backwards.
Come on, seriously?
When this seal is installed backwards,
you should only be able to rotate the hub shaft by hand in the direction where freewheel motion is connected
(→here),
but this time the seal friction was gone,
so the hub shaft rotated smoothly in both directions from the start.
The side that should face outward is packed with grease.
I cleaned it.
The side with the U-shaped notch faces outward.
One end of the hub shaft is rounded, and the other is chipped.
The corresponding dust cap side also

has burrs,

so I couldn't align and fit the notches on the hub shaft with the dust cap.

I machined it so it fits cleanly all the way in.
In the upper image, I'm aligning the window that shows if the notches match
with the notch on the damaged side, but either way works,

and if you flip it, it looks like this.

The dust cap sits cleanly now.
The notches got rounded and damaged, but there's a reliable way to prevent this:
just make sure the notches are properly seated before tightening the end bolt.
Trying to press them in by tightening the end bolt is what causes problems.
↑The freewheel side seal looks like this


The rim was off-center to an impossible degree.
Since it's easier to tighten on the low-tension non-freewheel side,
they probably did the spoke straightening with uptightening on that side only,
then finished without using a centering gauge.
Though to be fair, when I received it there was definitely runout in multiple places on both sides.

This wheel has no anti-rotation feature at the spoke head,
so the direction of the flattened spoke can rotate. This happens especially on the non-freewheel side.
Looking at the image above, there are even spokes on the freewheel side pointing nearly horizontal,
and more than half the spokes needed correction.

I straightened the lateral runout mostly by uptightening on the freewheel side.
The center offset is reduced, but I couldn't eliminate it with this alone.
I then achieved center with additional uptightening on the freewheel side only.
Even though this rear wheel is built with different spoke lengths on each side,
if you loosen the non-freewheel side even slightly, the spokes get drastically loose.

Next, the front wheel.

I'll overhaul the hub before straightening this one too.
Originally, it rotated smoothly with no side play.
The front hub shaft has only one notch, unlike the rear.
And this one also had rounded corners.
The dust cap side also has marks from end bolt pressure, but
there's no major burring, so
there's no problem with aligning the phases and seating them.
Going back in the timeline, both front and rear hubs
were using a different grease than Shimano's premium grease (formerly called Dura-Ace grease).
In terms of consistency, it's very loose—the rotation is actually lighter than Shimano grease.
It might be Belhammer grease.
Custom tuning with non-original grease! I seem to remember
there being a lot to learn from this kind of thing in the past.

There's center offset, but
fortunately there was also some decent runout.


It worked out well—doing spoke straightening with uptightening in the direction that reduces center offset
also brings the center into line as a bonus!