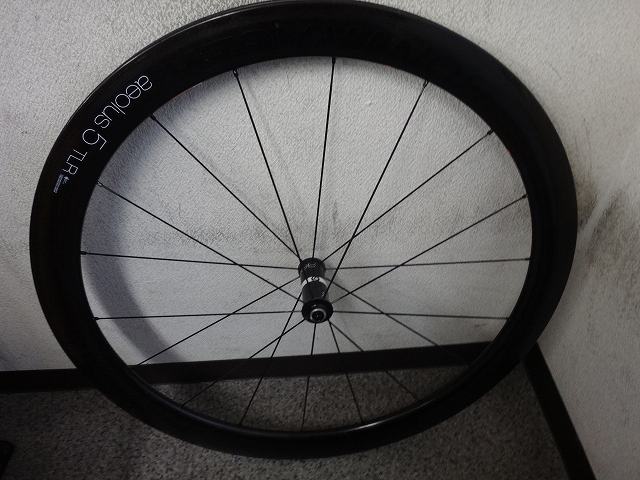
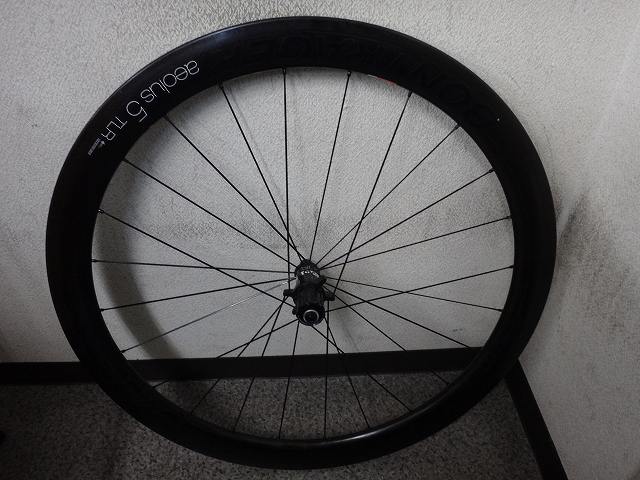
I took in an Aeolos 5 Tubeless Ready wheel from a customer.
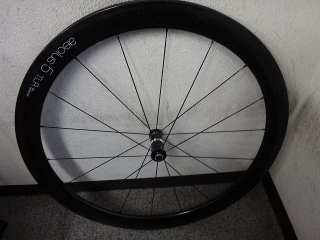
Starting with the front wheel.
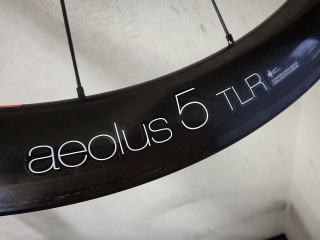
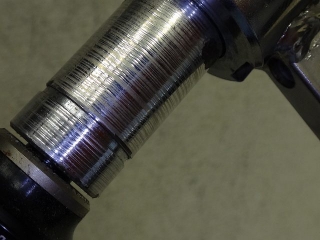
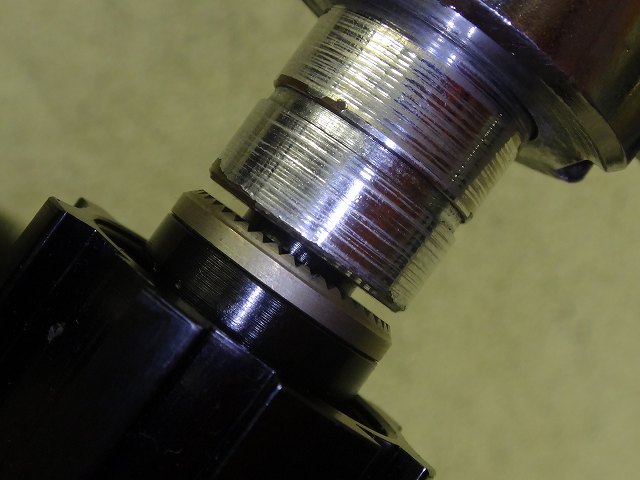
As the rim marking indicates, this is a tubeless ready rim.

I've written many times before that you shouldn't use stretch-band type rim tape on tubeless-ready rims with a central depression,
and even if you're only running it tubeless-free, you should use tape-type rim tape meant for tubeless setups.
This wheel has a stretch-band type rim tape on a tubeless ready rim, but
this is an exceptional case where it's OK.

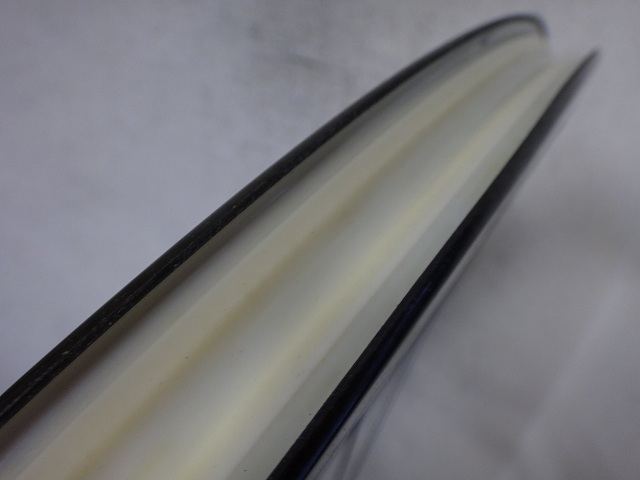
This is Bontrager's TLR Rim Strip, a rim tape that, despite being stretch-band type, is compatible with tubeless ready rims.
Compatibility with rims isn't universal though—it needs to be a rim that's compatible with this tape.
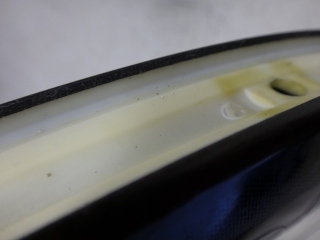

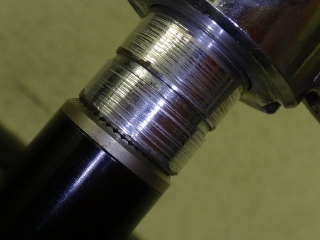
The tape grips all the way to the inside of the rim sidewall.
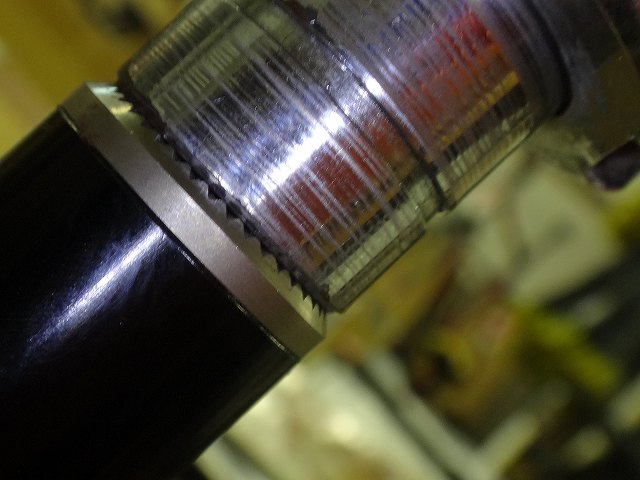
There was a centering error.
If it's just about a sheet of paper off, maybe they used a low-precision center gauge, but this isn't good.
Moreover, this isn't just the inherent precision of the wheel out of the box—
someone went back and touched it afterwards and ended up with this result.

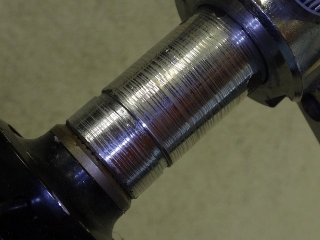
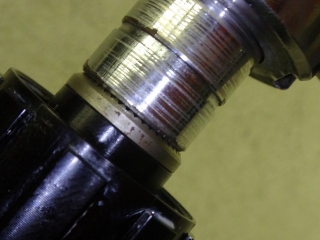
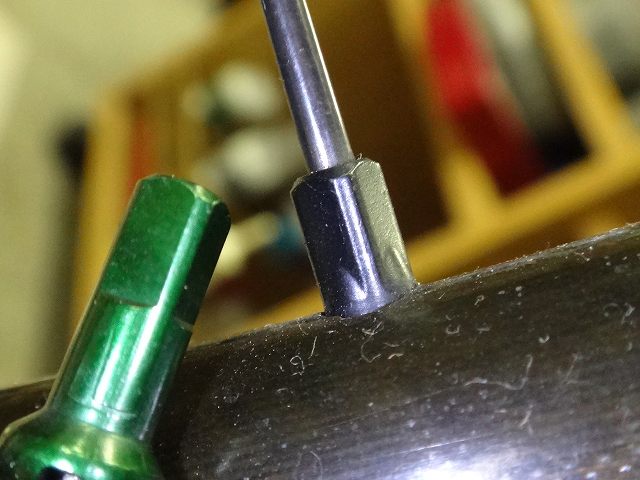
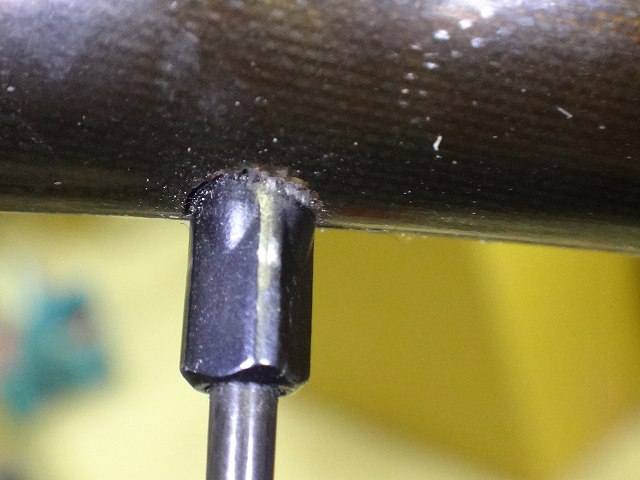
↑The green nipples in the image are DT 12mm length ones, but
since this wheel's nipples can be turned from the outer edge too,
the grip height on the inner edge is short and
the corners are oddly rounded.
So basically, except for extremely fine adjustments,
you shouldn't work the tool on the inner edge at all.
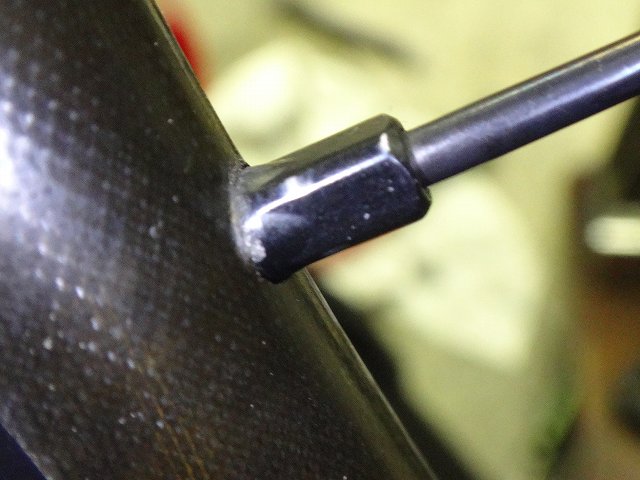
But on the square on the inner edge,
I found traces of anodizing peeled off at 2 of the 4 corners.
This is not something that happened during factory assembly.
And with the tools I use, you don't get marks like this.
I write "scars" rather than "marks" to emphasize
that these are defects that shouldn't be there in the first place.
Honestly, I'd like someone to tell me what kind of tool makes these scars.
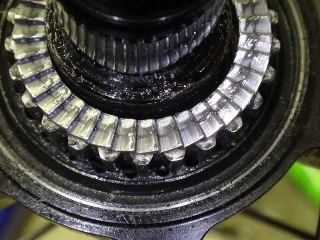
These scars appeared on all the nipples of the left-side spokes,
judging from the markings on the hub body.

The right side isn't completely free of marks, but they're not nearly as pronounced as the left side.
I'm shooting the faint spots I can find, but there are places with none at all.
What's confusing me is that the centering error I mentioned at the start
showed the rim shifted to the left.
It's clear they were turning the nipples on one side unevenly,
so I assume they were trying to center the wheel. But if that's the case,
they tightened the left-side nipples and shifted the rim further left.
If they intended centering, they would have used a center gauge beforehand, and
if they did, then after the work, no matter how lousy the gauge,
it should have detected an error that size.
Even if they loosened instead of tightened on one side, the story still doesn't add up.
If the centering error had been nearly nonexistent and I only needed to do fine radial truing,
I would have grabbed the nipples from the inner edge to adjust.
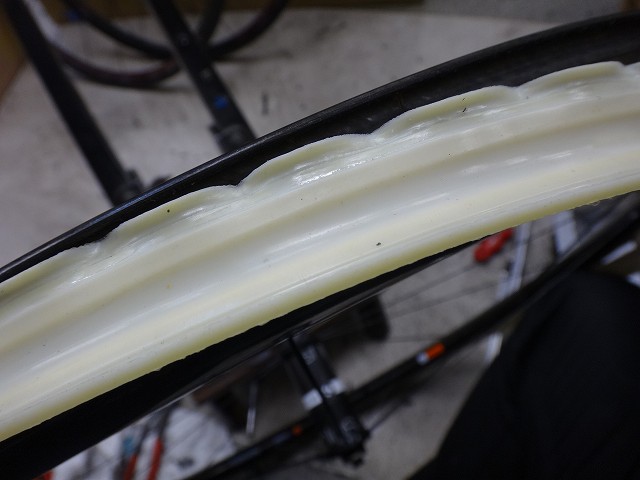
But Bontrager's TLR Rim Strip, once installed and then removed,
gets the part that gripped the rim sidewall crimped like a dumpling skin,
making it difficult to reinstall cleanly on the rim.
Also, while the manufacturer doesn't outright prohibit it,
they don't recommend reuse.
When I asked the customer, they said they're currently only running it tubeless-free.
I removed the rim tape.
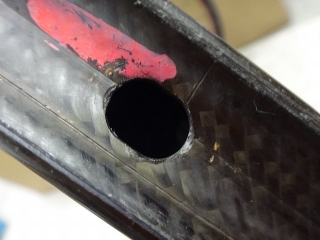
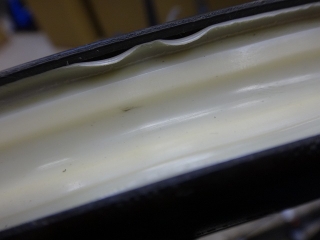
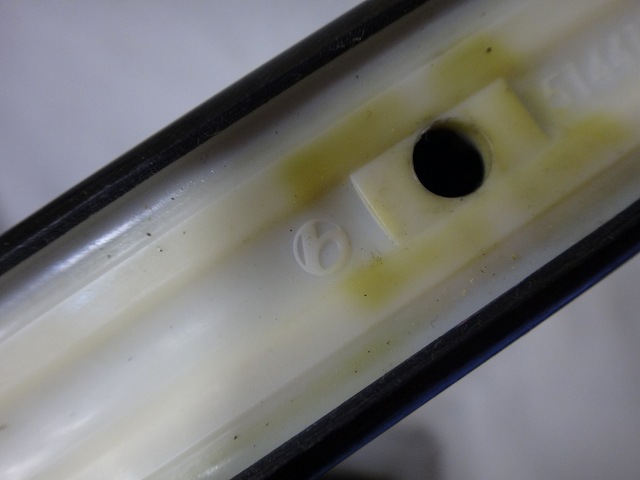
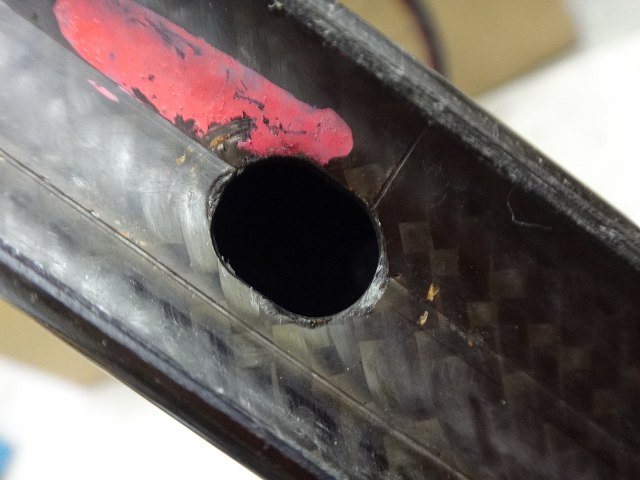
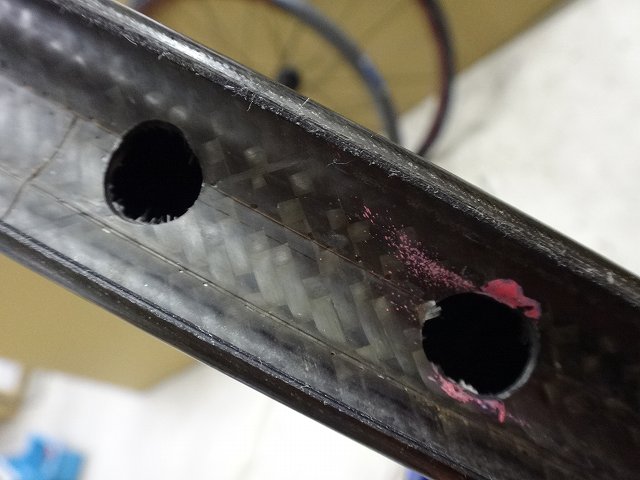
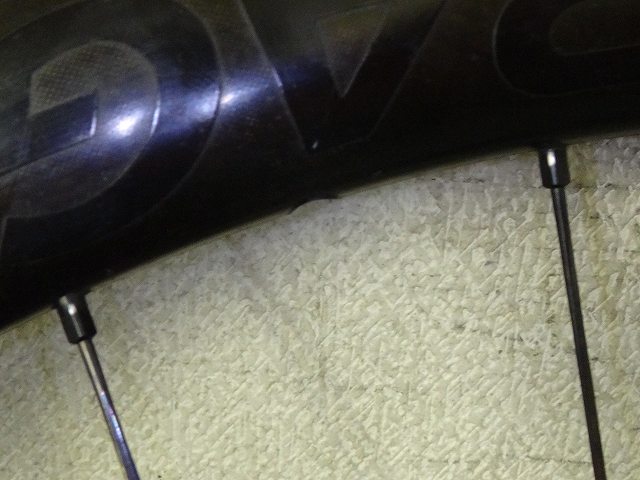
The holes in the image aren't the rim holes for spokes, but
holes located 120° in phase from the valve hole at 2 positions—
presumably for balloon deflation.

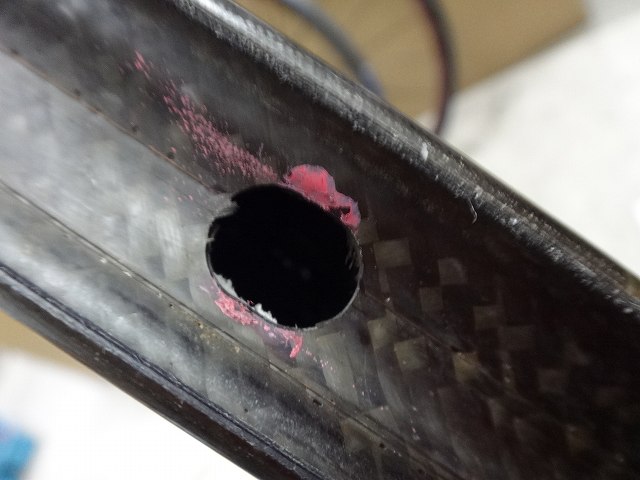
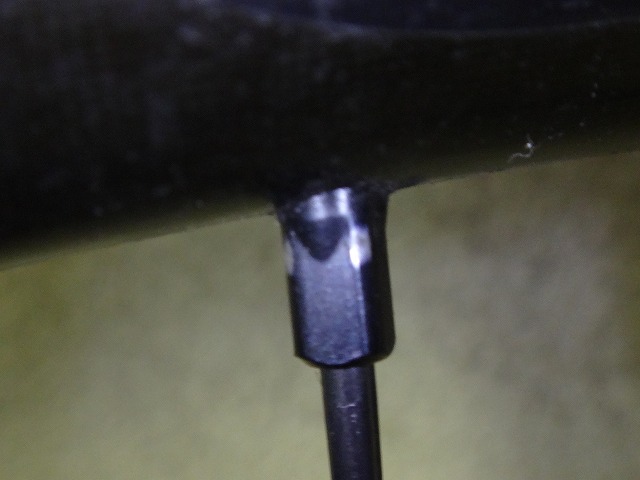
↑Here's the other one.
Both are unusually large oblong holes, but
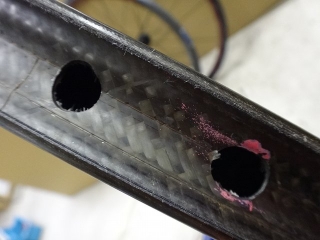
the normal rim holes are perfectly round.
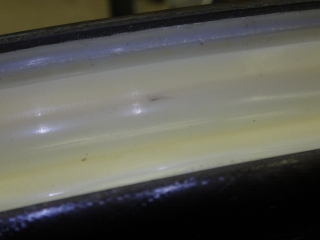
The rim made a rustling noise when shaken, so I removed the foreign object.
It was leftover balloon material from molding. Still some in there.

I did centering and truing with one-sided (right-side) tightening.
I only worked the outer grip area.

As I mentioned earlier,
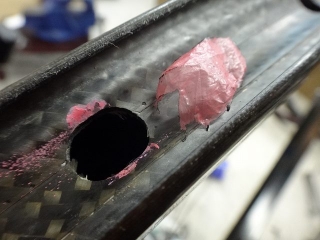
when you remove the TLR Rim Strip from the rim,
part of the edge ends up like this.
The non-wavy parts fit cleanly
into the rim sidewall interior, but
the wavy parts end up like this.
Usually though, it comes out fine.
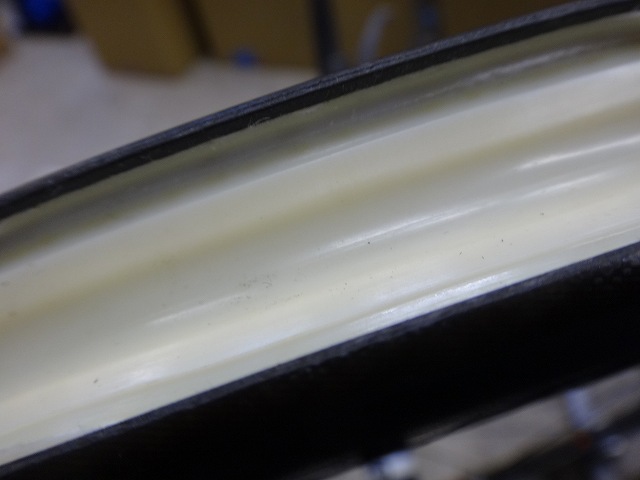
Looking at the dirt on the rim tape in the image,
it's the same spot as the previous image.

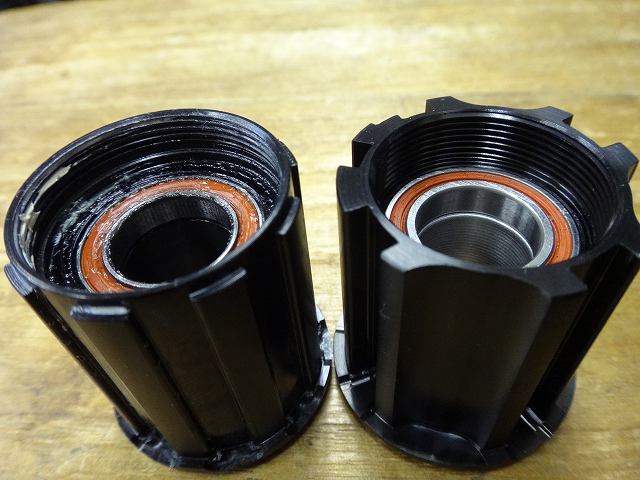
Next, the rear wheel.
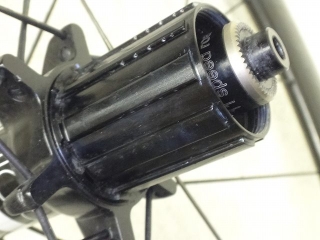
They want me to swap the Shimano 11-speed freebody for a Campagnolo one
and replace the star ratchet part with a 54-tooth version.

↑These are the rim holes on either side of the valve hole, but

both had those telltale nipple scars.
The rear wheel has been touched all over without distinguishing left from right.
Surprisingly, the rough centering was dead on.
Later when I looked it had runout, so
if I searched, I'd probably find spots where there's a sheet-of-paper-sized centering error somewhere,
but that degree isn't something I'd flag. The front wheel's error is inexcusable.
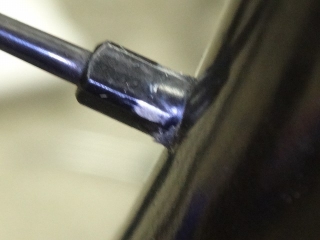
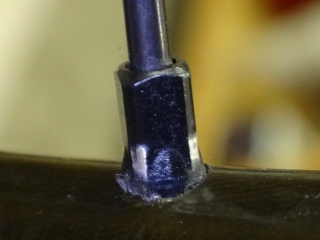
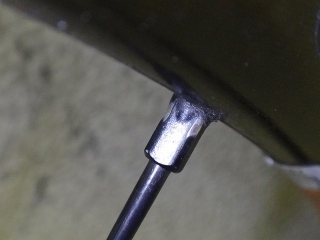
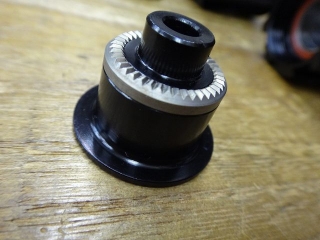
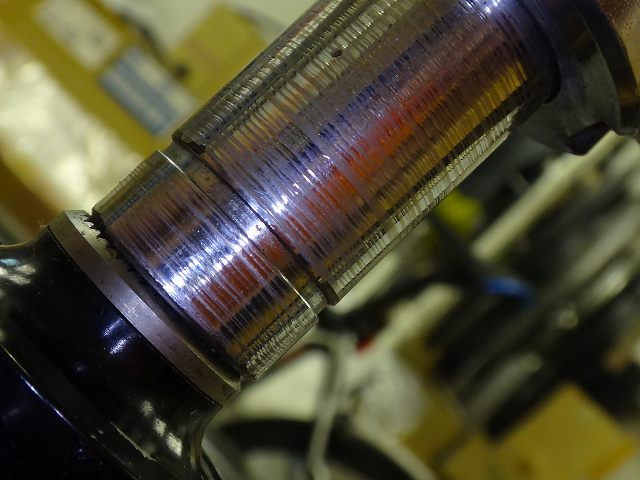
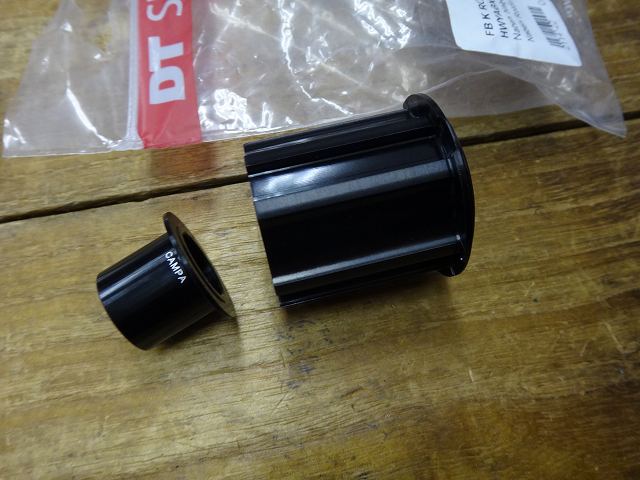
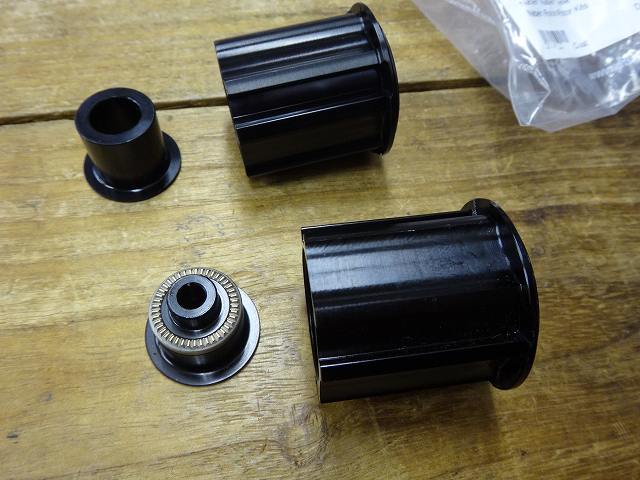
The original star ratchet part
had been swapped to 36-tooth where it's normally 18-tooth.

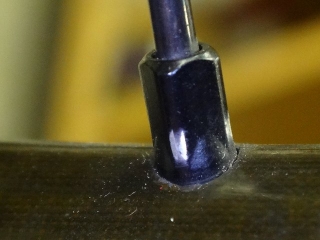
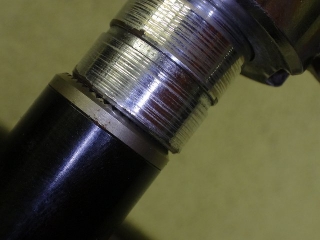
↑Here's the 54-tooth ratchet part and
the Campagnolo rotor kit.
At DT, a rotor kit is the freebody plus right end, and
the right end dimensions change depending on the freebody spec,
so they need to be swapped as a set.
That's why there's no freebody-only sales option
(though there was back when Shimano did 10-speed).
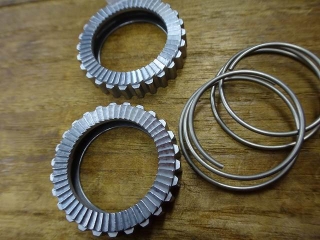
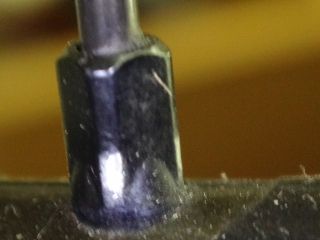
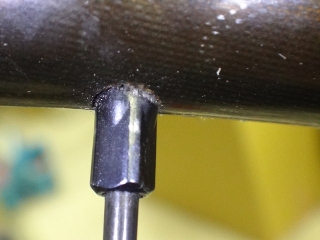
↑This is the 54-tooth part.

↑Wait a minute, this Campagnolo rotor kit
has a thru-axle right end?
Ugh, seriously?
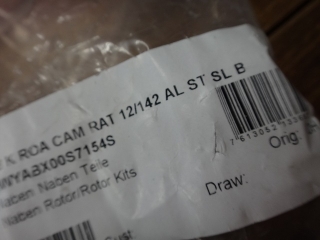
The bag says 12mm diameter, 142mm width.
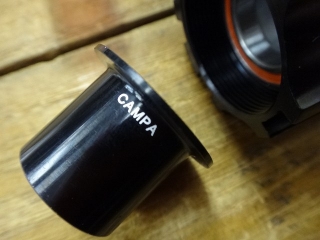
Even the thru-axle right end for Campagnolo uses proprietary dimensions.
Since this is something the customer brought in,
this isn't my mistake, but it's become a real problem.
Going back in the timeline a bit,
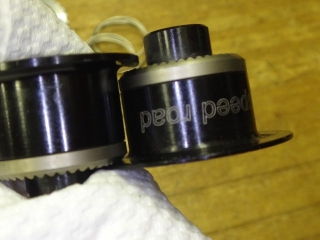
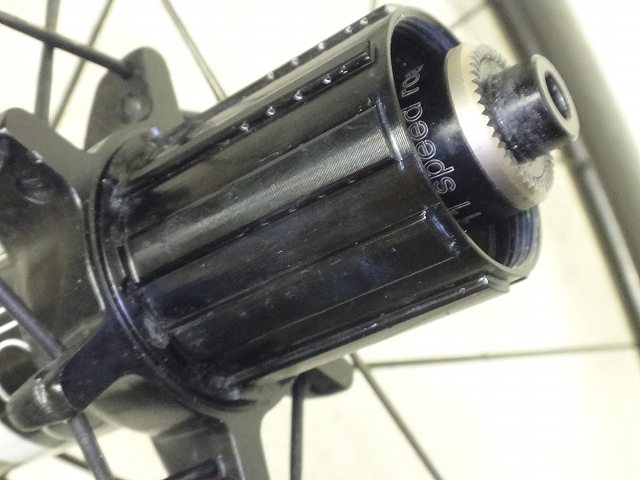
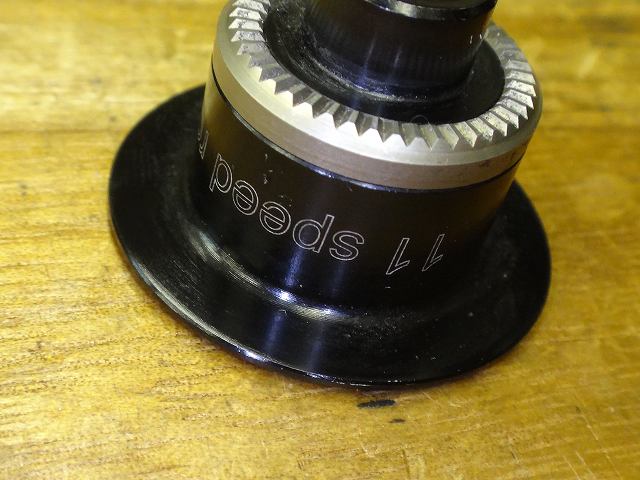
the Shimano 11-speed freebody right end has
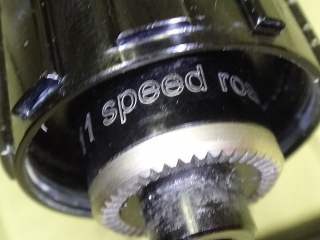
"11 speed road" stamped on it.
For Shimano 10-speed, there's nothing printed.

I removed and cleaned it.
This right end is longer than the 10-speed version, so
when you swap the rotor kit to 11-speed,
the wheel center shifts with the rim moving away from the freewheel side
compared to the original state.
(Also, shift adjustment positions don't match
with Shimano OEM and most Shimano 11-speed compatible freebodies).
To fix that centering error, you either need to
overtighten the already-tight freewheel side, or
loosen the normally-loose non-freewheel side even more
(except for 2:1 lacing).
And Trek officially says you shouldn't bother fixing
centering errors from DT hub rotor kit swaps.
This wheel isn't that old, but it's still using
equal-spoke-count rear wheels with non-freewheel-side radial lacing,
which is absolutely moronic. It's weird how companies like Roval and Shimano
make decent stuff for everything else
but their wheel building IQ drops instantly.

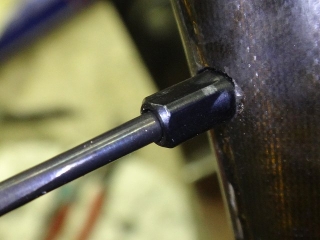
Actually, the shop has a Campagnolo rotor kit in stock.
The freebody part is the same on both,
and since the customer will handle the rotor kit on their end,
I decided to temporarily install this right end and do centering.
The Campagnolo right end,
like the Shimano 10-speed, has no marking.
Campagnolo has been using aluminum freewheel bodies since way back, and
they couldn't make them as thin as Shimano back then, so
the lockring thread diameter is also smaller.
Modern complete wheels only feature the white anodized,
thin aluminum freebody for Shimano, but
being able to do that came much later.
The Campagnolo freebody has thicker splines, so
the right-end flange diameter is smaller than on Shimano versions.
Earlier I said rotor kits don't have freebody-only sales,
but left and right ends do have some single sales.
As spare parts for some complete wheels,
there are drop-in ends only, and
some DT complete wheels allow you to swap just the end
from quick-release to thru-axle or BOOST standard and vice versa,
and some of these share dimensions with standard 240 hubs, so
buying just the end is possible in those cases.
Comparing Campagnolo and Shimano 11-speed right ends,

the Campagnolo one is longer.
In terms of right-end length,
it's longer than the Shimano 11-speed, which is already longer than the 10-speed.
So in theory, after a rotor kit swap, the rim should shift toward the non-freewheel side, but

actually it shifts toward the freewheel side.
That means the low-tension side can be tightened, which is actually great.
The reason the rim shifts right even though the right end got longer is

the Campagnolo freebody seats the end deeper on the inside, and
this dimensional difference is larger than the end difference.
I tightened the non-freewheel side half-turn at a time.
It flipped over instantly.
Non-freewheel side moves more than freewheel side, and radial lacing moves more than tangential,
so non-freewheel-side radial lacing jumps a ton with just a little turning.
 Technical archive
Starting with the front wheel.

As the rim marking indicates, this is a tubeless ready rim.
I've written many times before that you shouldn't use stretch-band type rim tape on tubeless-ready rims with a central depression,
and even if you're only running it tubeless-free, you should use tape-type rim tape meant for tubeless setups.
This wheel has a stretch-band type rim tape on a tubeless ready rim, but
this is an exceptional case where it's OK.
This is Bontrager's TLR Rim Strip, a rim tape that, despite being stretch-band type, is compatible with tubeless ready rims.
Compatibility with rims isn't universal though—it needs to be a rim that's compatible with this tape.


The tape grips all the way to the inside of the rim sidewall.


There was a centering error.
If it's just about a sheet of paper off, maybe they used a low-precision center gauge, but this isn't good.
Moreover, this isn't just the inherent precision of the wheel out of the box—
someone went back and touched it afterwards and ended up with this result.
↑The green nipples in the image are DT 12mm length ones, but
since this wheel's nipples can be turned from the outer edge too,
the grip height on the inner edge is short and
the corners are oddly rounded.
So basically, except for extremely fine adjustments,
you shouldn't work the tool on the inner edge at all.

But on the square on the inner edge,
I found traces of anodizing peeled off at 2 of the 4 corners.
This is not something that happened during factory assembly.
And with the tools I use, you don't get marks like this.
I write "scars" rather than "marks" to emphasize
that these are defects that shouldn't be there in the first place.
Honestly, I'd like someone to tell me what kind of tool makes these scars.


These scars appeared on all the nipples of the left-side spokes,
judging from the markings on the hub body.

The right side isn't completely free of marks, but they're not nearly as pronounced as the left side.
I'm shooting the faint spots I can find, but there are places with none at all.
What's confusing me is that the centering error I mentioned at the start
showed the rim shifted to the left.
It's clear they were turning the nipples on one side unevenly,
so I assume they were trying to center the wheel. But if that's the case,
they tightened the left-side nipples and shifted the rim further left.
If they intended centering, they would have used a center gauge beforehand, and
if they did, then after the work, no matter how lousy the gauge,
it should have detected an error that size.
Even if they loosened instead of tightened on one side, the story still doesn't add up.
If the centering error had been nearly nonexistent and I only needed to do fine radial truing,
I would have grabbed the nipples from the inner edge to adjust.
But Bontrager's TLR Rim Strip, once installed and then removed,
gets the part that gripped the rim sidewall crimped like a dumpling skin,
making it difficult to reinstall cleanly on the rim.
Also, while the manufacturer doesn't outright prohibit it,
they don't recommend reuse.
When I asked the customer, they said they're currently only running it tubeless-free.
I removed the rim tape.
The holes in the image aren't the rim holes for spokes, but
holes located 120° in phase from the valve hole at 2 positions—
presumably for balloon deflation.
↑Here's the other one.
Both are unusually large oblong holes, but
the normal rim holes are perfectly round.

The rim made a rustling noise when shaken, so I removed the foreign object.
It was leftover balloon material from molding. Still some in there.

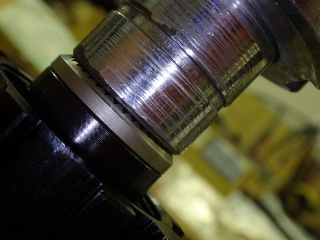
I did centering and truing with one-sided (right-side) tightening.
I only worked the outer grip area.
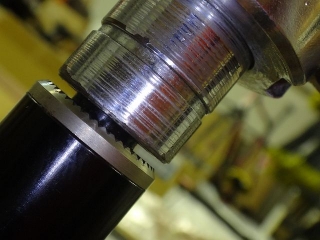
As I mentioned earlier,
when you remove the TLR Rim Strip from the rim,
part of the edge ends up like this.
The non-wavy parts fit cleanly
into the rim sidewall interior, but

the wavy parts end up like this.

Usually though, it comes out fine.
Looking at the dirt on the rim tape in the image,
it's the same spot as the previous image.
Next, the rear wheel.
They want me to swap the Shimano 11-speed freebody for a Campagnolo one
and replace the star ratchet part with a 54-tooth version.
↑These are the rim holes on either side of the valve hole, but

both had those telltale nipple scars.
The rear wheel has been touched all over without distinguishing left from right.


Surprisingly, the rough centering was dead on.
Later when I looked it had runout, so
if I searched, I'd probably find spots where there's a sheet-of-paper-sized centering error somewhere,
but that degree isn't something I'd flag. The front wheel's error is inexcusable.

The original star ratchet part
had been swapped to 36-tooth where it's normally 18-tooth.

↑Here's the 54-tooth ratchet part and
the Campagnolo rotor kit.
At DT, a rotor kit is the freebody plus right end, and
the right end dimensions change depending on the freebody spec,
so they need to be swapped as a set.
That's why there's no freebody-only sales option
(though there was back when Shimano did 10-speed).

↑This is the 54-tooth part.
↑Wait a minute, this Campagnolo rotor kit
has a thru-axle right end?
Ugh, seriously?
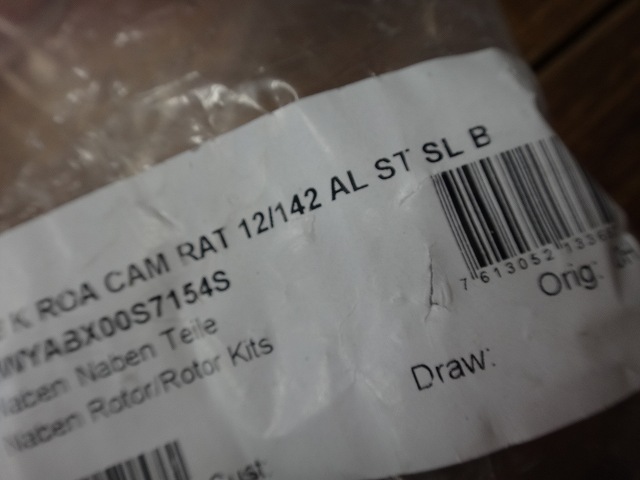
The bag says 12mm diameter, 142mm width.

Even the thru-axle right end for Campagnolo uses proprietary dimensions.
Since this is something the customer brought in,
this isn't my mistake, but it's become a real problem.
Going back in the timeline a bit,
the Shimano 11-speed freebody right end has

"11 speed road" stamped on it.
For Shimano 10-speed, there's nothing printed.
I removed and cleaned it.
This right end is longer than the 10-speed version, so
when you swap the rotor kit to 11-speed,
the wheel center shifts with the rim moving away from the freewheel side
compared to the original state.
(Also, shift adjustment positions don't match
with Shimano OEM and most Shimano 11-speed compatible freebodies).
To fix that centering error, you either need to
overtighten the already-tight freewheel side, or
loosen the normally-loose non-freewheel side even more
(except for 2:1 lacing).
And Trek officially says you shouldn't bother fixing
centering errors from DT hub rotor kit swaps.
This wheel isn't that old, but it's still using
equal-spoke-count rear wheels with non-freewheel-side radial lacing,
which is absolutely moronic. It's weird how companies like Roval and Shimano
make decent stuff for everything else
but their wheel building IQ drops instantly.
Actually, the shop has a Campagnolo rotor kit in stock.
The freebody part is the same on both,
and since the customer will handle the rotor kit on their end,
I decided to temporarily install this right end and do centering.

The Campagnolo right end,
like the Shimano 10-speed, has no marking.
Campagnolo has been using aluminum freewheel bodies since way back, and
they couldn't make them as thin as Shimano back then, so
the lockring thread diameter is also smaller.
Modern complete wheels only feature the white anodized,
thin aluminum freebody for Shimano, but
being able to do that came much later.
The Campagnolo freebody has thicker splines, so
the right-end flange diameter is smaller than on Shimano versions.
Earlier I said rotor kits don't have freebody-only sales,
but left and right ends do have some single sales.
As spare parts for some complete wheels,
there are drop-in ends only, and
some DT complete wheels allow you to swap just the end
from quick-release to thru-axle or BOOST standard and vice versa,
and some of these share dimensions with standard 240 hubs, so
buying just the end is possible in those cases.

Comparing Campagnolo and Shimano 11-speed right ends,

the Campagnolo one is longer.
In terms of right-end length,
it's longer than the Shimano 11-speed, which is already longer than the 10-speed.
So in theory, after a rotor kit swap, the rim should shift toward the non-freewheel side, but

actually it shifts toward the freewheel side.
That means the low-tension side can be tightened, which is actually great.
The reason the rim shifts right even though the right end got longer is
the Campagnolo freebody seats the end deeper on the inside, and
this dimensional difference is larger than the end difference.


I tightened the non-freewheel side half-turn at a time.
It flipped over instantly.
Non-freewheel side moves more than freewheel side, and radial lacing moves more than tangential,
so non-freewheel-side radial lacing jumps a ton with just a little turning.
 Technical archive
Products Mentioned in This Article
- 🛒 Bontrager TLR Rim Strip tubeless ready rim tape
- 🛒 DT Swiss 12mm spoke nipple
- 🛒 Shimano 11-speed freebody cassette
- 🛒 Campagnolo freebody rotor kit
* Amazon affiliate links — prices may vary
Original Japanese post: のむラボ日記 #5721