Another day, more wheels (and so on).

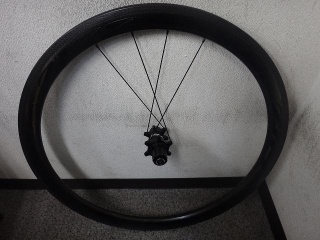
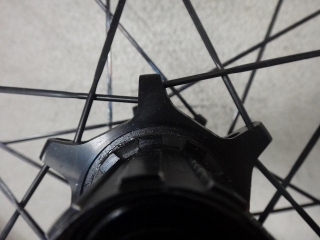
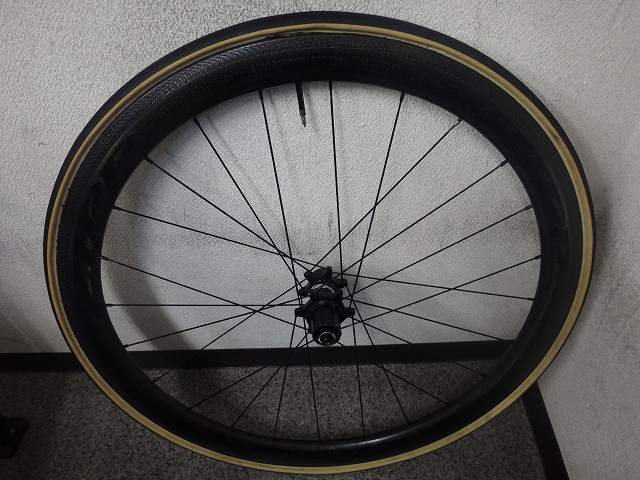
A customer dropped off a ZIPP 404 rim rear wheel.
The rim is tubular-specific.
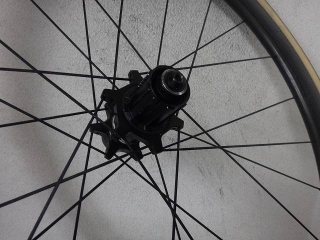
ZIPP hub, 24H, all-black CX-RAY straight, laced 2-cross on both sides.
He said the hub spins too freely—he absolutely can't stand it—and wants me to rebuild it.
I could rebuild it with an Evo hub in black, semi-competizione, 46-spoke lacing with tie-ins
(which is actually what the customer is hoping for),
but this rear hub has gotten gritty,
and we've already replaced its bearings once here at the shop.
It feels wasteful to scrap a hub we once spent thousands of yen on
just to swap it for one around ¥12,000,
and since this ZIPP hub uses straight spokes so the lacing is constrained anyway,
and the hub dimensions and lacing method aren't particularly bad—
unlike some older builds where one side was radial—
if I put plain spokes like Champion or Leader on the freewheel side
(plain competizione-grade straight spokes just aren't consistently available anymore)
and use asymmetric cross-lacing on both sides, tensioned strongly,
the wheel should actually turn out decent even with this hub.
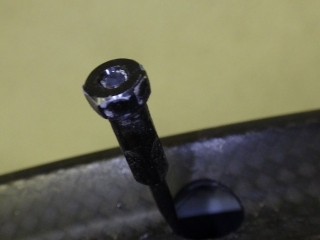
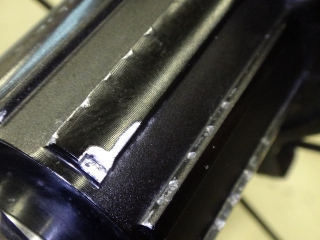
Between the rim and nipple is a Sapim nipple washer Type B.
When I brought a magnet near it, there was almost no reaction, so it's definitely the new B.
For more on the new B (→see here).
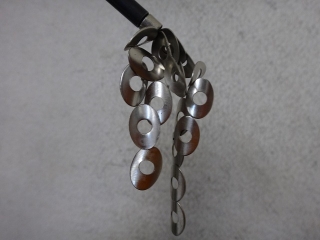
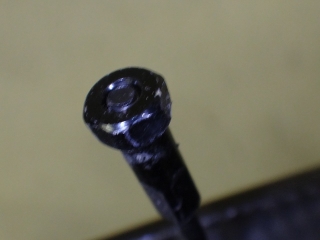
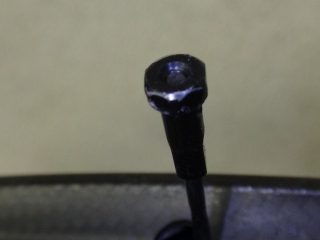
↑This is the old B washer—a material that magnetic sticks to readily.
With the old B, you didn't even have to carefully recover the washers when disassembling the wheel;
you could just slap a magnet near and grab them all at once. Workflow was easier.
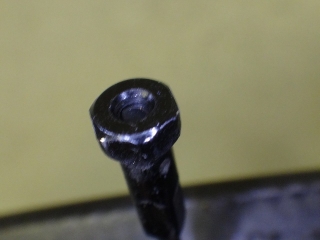
↑The new B washer does react slightly to a magnet.
About as much as fake Starbright on star spokes.
If that top image were an old B, there's no way it wouldn't stick at that distance.

The brake track has machining marks, and since the groove profile is mirror-symmetric left-to-right,
the rim has left/right orientation.
You have to check this before disassembling the wheel.
But they printed a rotation direction arrow on the rim
so that even if you completely disassemble it and forget which way it goes,
you're still covered.
If someone manages to miss noticing the left/right distinction in the brake zone AND misses the arrow,
and reassembles the rim backwards with 50/50 odds... well, they're beyond help.
You might wonder: for this job, couldn't you just pull out the spokes on the freewheel side
and re-tension them? Do you really need to completely disassemble the wheel?
Well, sometimes the nipples aren't what you want, or the spoke length is wrong,
and you need to cut it down a bit. I want to check those things,
which is why I completely disassemble it.
It's not just so I can keep saying "another day, more wheels (and so on)." It's not. Really.
↑The usual method
Carefully disassembling clockwise from the valve hole,
I left four final crossing spokes without loosening any nipples—
two pairs on the final cross, one from each side.
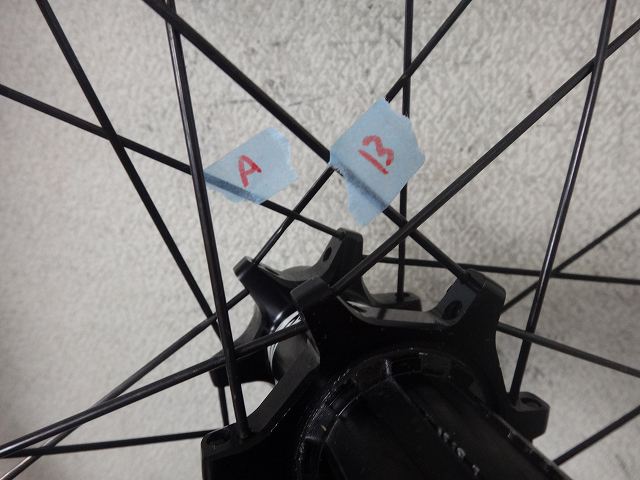
From there, calling them A, B, C, D from the side farthest from the valve hole,
I checked the spoke lengths.
↑A – Non-freewheel side – spoke end is flush with the nipple end
↑B – Freewheel side – spoke end is flush with the nipple end
↑C – Non-freewheel side – spoke doesn't reach the nipple end
↑D – Freewheel side – spoke doesn't reach the nipple end
That's what I found.
The variation in the relationship between spoke end and nipple end
exceeds what you'd normally expect from natural scatter.
There's a reason for this:
Spokes coming from the same hub flange
form a high-low flange pattern on one side.

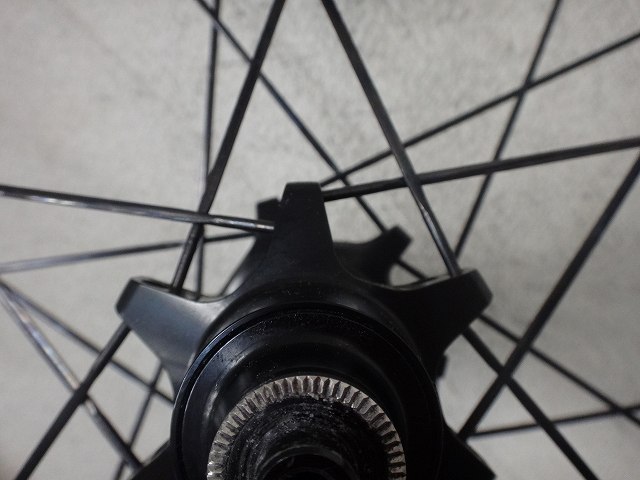
Jumping ahead in time, here's the rebuilt wheel.
Using the same A, B, C, D naming as before,
I taped labels on the spokes.
If I move these labels to the hub side of the same spokes,

A and B are from the large flange,
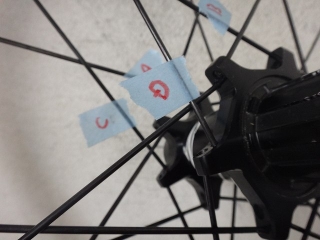
and C and D are from the small flange.
Taking this into account, and planning to tension the non-freewheel side more than before,
I thought: if I trim C slightly—well, actually C is already short, so leave it as-is; trim A a little—
then when built up, both A and C should have spokes flush with nipple ends.
And for B and D, which I'm changing to 14-gauge plain spokes,
I could use different lengths for large and small flanges.
But I didn't go that deep with it
(well, I did a teensy bit).
Still, recognizing that this situation exists in the first place—that's what matters.
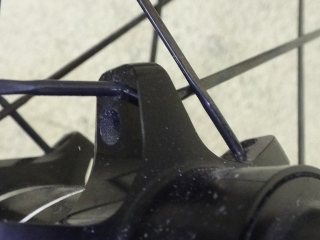
↑Freewheel side

↑Non-freewheel side
Jumping back in time, these are pre-rebuild images.
On both sides, of the six first crosses, three cross large-to-large,
and another three cross small-to-small.
So the shape of the space inside the first cross—between hub and rim—differs.
Another way to look at it: at every final cross, the two crossing spokes come from one small and one large flange,
so these two spokes have strictly different spoke tension.
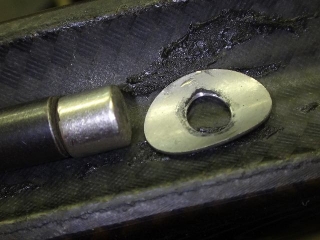
For the rebuild, I decided to reuse the nipples.
Inside they're 3.2mm across flats (like standard nipples),
and outside they're 6mm across flats (six-sided, turnable that way),
but the part contacting the rim (washer) is thicker than standard nipples
(less prone to nipple failure), and the inside grip lets you adjust tension.
That's why I kept them.
DT Squorx nipples and the outside-turnable nipples used on Reynolds complete wheels
have short inside grip sections. Especially on Reynolds, the corners are oddly rounded,
so practically speaking you can't actually grab and turn from the inside.
Try it and you'll strip it instantly.
Consider them a trap for the uninitiated.
So with those nipples, no matter how annoying it is to peel tubulars,
no matter how much tubeless tape and sealant you waste,
you have to turn them from the outside.
For Reynolds wheels being rebuilt (not just trued), I swap in DT nipples.
With these ZIPP nipples, if you've already glued the tubular on,
grabbing the inside isn't "taking a shortcut"—it's fine.
So I reused them.
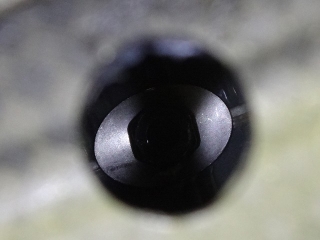
Unrelated, but yeah,
this is "evidence of having locked down the lockring
with the top gear phasing wrong."
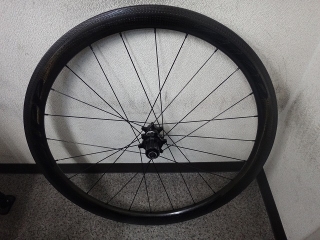
It's laced up.

Black semi-competizione Champion straight.
I'll do the tie-ins later.
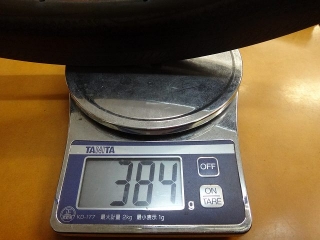
By the way, since this involved completely disassembling the wheel,
that means I had a chance to weigh the rim.
Of course, I'm not telling anyone what it weighs.
↑Wow, that guy's got a bad vibe
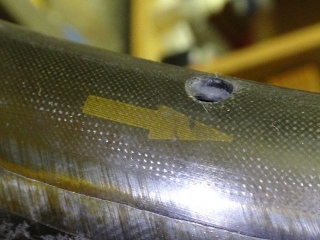
We Apologize For The Wait! Please Examine The Image Below!
Please Note The Tiny Trace Of Tubeless Tape
Remaining On The Rim!
↑STOP IT!
A customer dropped off a ZIPP 404 rim rear wheel.
The rim is tubular-specific.

ZIPP hub, 24H, all-black CX-RAY straight, laced 2-cross on both sides.
He said the hub spins too freely—he absolutely can't stand it—and wants me to rebuild it.
I could rebuild it with an Evo hub in black, semi-competizione, 46-spoke lacing with tie-ins
(which is actually what the customer is hoping for),
but this rear hub has gotten gritty,
and we've already replaced its bearings once here at the shop.
It feels wasteful to scrap a hub we once spent thousands of yen on
just to swap it for one around ¥12,000,
and since this ZIPP hub uses straight spokes so the lacing is constrained anyway,
and the hub dimensions and lacing method aren't particularly bad—
unlike some older builds where one side was radial—
if I put plain spokes like Champion or Leader on the freewheel side
(plain competizione-grade straight spokes just aren't consistently available anymore)
and use asymmetric cross-lacing on both sides, tensioned strongly,
the wheel should actually turn out decent even with this hub.

Between the rim and nipple is a Sapim nipple washer Type B.
When I brought a magnet near it, there was almost no reaction, so it's definitely the new B.
For more on the new B (→see here).

↑This is the old B washer—a material that magnetic sticks to readily.
With the old B, you didn't even have to carefully recover the washers when disassembling the wheel;
you could just slap a magnet near and grab them all at once. Workflow was easier.

↑The new B washer does react slightly to a magnet.
If that top image were an old B, there's no way it wouldn't stick at that distance.
The brake track has machining marks, and since the groove profile is mirror-symmetric left-to-right,
the rim has left/right orientation.
You have to check this before disassembling the wheel.

But they printed a rotation direction arrow on the rim
so that even if you completely disassemble it and forget which way it goes,
you're still covered.
If someone manages to miss noticing the left/right distinction in the brake zone AND misses the arrow,
and reassembles the rim backwards with 50/50 odds... well, they're beyond help.
You might wonder: for this job, couldn't you just pull out the spokes on the freewheel side
and re-tension them? Do you really need to completely disassemble the wheel?
Well, sometimes the nipples aren't what you want, or the spoke length is wrong,
and you need to cut it down a bit. I want to check those things,
which is why I completely disassemble it.
It's not just so I can keep saying "another day, more wheels (and so on)." It's not. Really.

↑The usual method
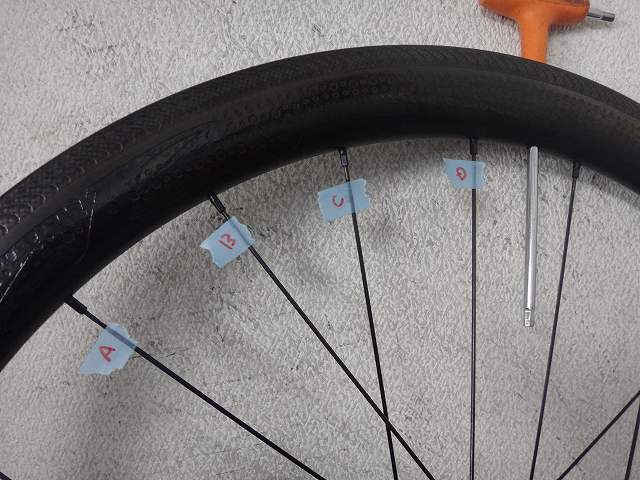
Carefully disassembling clockwise from the valve hole,
I left four final crossing spokes without loosening any nipples—
two pairs on the final cross, one from each side.
From there, calling them A, B, C, D from the side farthest from the valve hole,
I checked the spoke lengths.

↑A – Non-freewheel side – spoke end is flush with the nipple end

↑B – Freewheel side – spoke end is flush with the nipple end

↑C – Non-freewheel side – spoke doesn't reach the nipple end

↑D – Freewheel side – spoke doesn't reach the nipple end
That's what I found.
The variation in the relationship between spoke end and nipple end
exceeds what you'd normally expect from natural scatter.
There's a reason for this:

Spokes coming from the same hub flange
form a high-low flange pattern on one side.
Jumping ahead in time, here's the rebuilt wheel.
Using the same A, B, C, D naming as before,
I taped labels on the spokes.
If I move these labels to the hub side of the same spokes,
A and B are from the large flange,

and C and D are from the small flange.
Taking this into account, and planning to tension the non-freewheel side more than before,
I thought: if I trim C slightly—well, actually C is already short, so leave it as-is; trim A a little—
then when built up, both A and C should have spokes flush with nipple ends.
And for B and D, which I'm changing to 14-gauge plain spokes,
I could use different lengths for large and small flanges.
But I didn't go that deep with it
(well, I did a teensy bit).
Still, recognizing that this situation exists in the first place—that's what matters.

↑Freewheel side
↑Non-freewheel side
Jumping back in time, these are pre-rebuild images.
On both sides, of the six first crosses, three cross large-to-large,
and another three cross small-to-small.
So the shape of the space inside the first cross—between hub and rim—differs.
Another way to look at it: at every final cross, the two crossing spokes come from one small and one large flange,
so these two spokes have strictly different spoke tension.
For the rebuild, I decided to reuse the nipples.
Inside they're 3.2mm across flats (like standard nipples),
and outside they're 6mm across flats (six-sided, turnable that way),
but the part contacting the rim (washer) is thicker than standard nipples
(less prone to nipple failure), and the inside grip lets you adjust tension.
That's why I kept them.
DT Squorx nipples and the outside-turnable nipples used on Reynolds complete wheels
have short inside grip sections. Especially on Reynolds, the corners are oddly rounded,
so practically speaking you can't actually grab and turn from the inside.
Try it and you'll strip it instantly.
Consider them a trap for the uninitiated.
So with those nipples, no matter how annoying it is to peel tubulars,
no matter how much tubeless tape and sealant you waste,
you have to turn them from the outside.
For Reynolds wheels being rebuilt (not just trued), I swap in DT nipples.
With these ZIPP nipples, if you've already glued the tubular on,
grabbing the inside isn't "taking a shortcut"—it's fine.
So I reused them.

Unrelated, but yeah,
this is "evidence of having locked down the lockring
with the top gear phasing wrong."

It's laced up.

Black semi-competizione Champion straight.
I'll do the tie-ins later.
By the way, since this involved completely disassembling the wheel,
that means I had a chance to weigh the rim.
Of course, I'm not telling anyone what it weighs.
↑Wow, that guy's got a bad vibe
We Apologize For The Wait! Please Examine The Image Below!

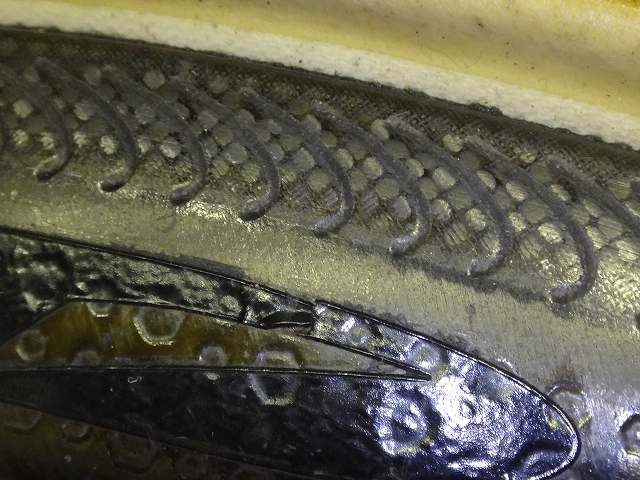
Please Note The Tiny Trace Of Tubeless Tape
Remaining On The Rim!
↑STOP IT!