Another wheel day (and so on).
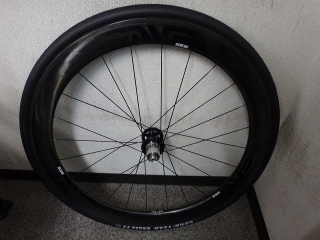
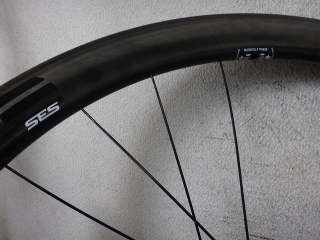
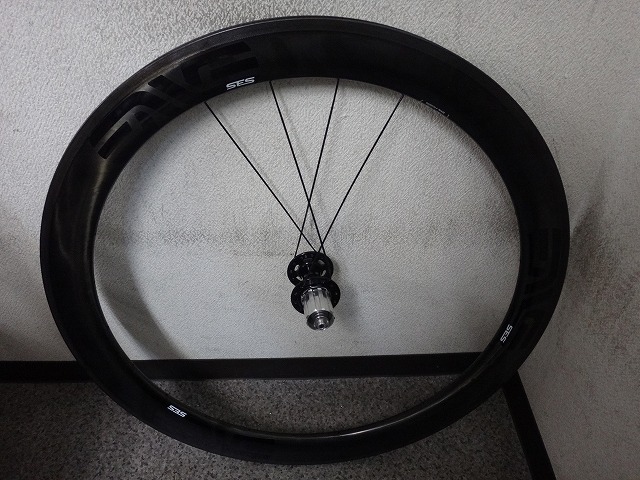
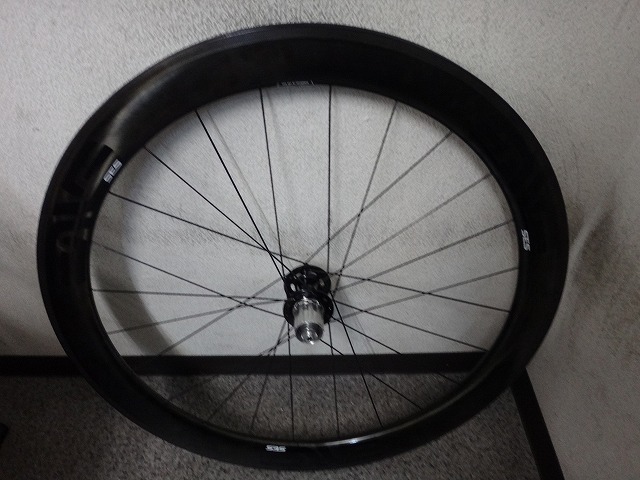
A customer brought in a rear wheel from a Smart Envi System 4.5 for me to work on.
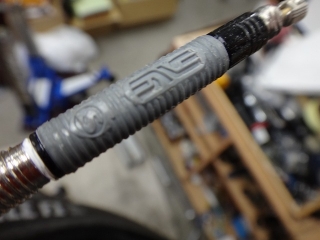
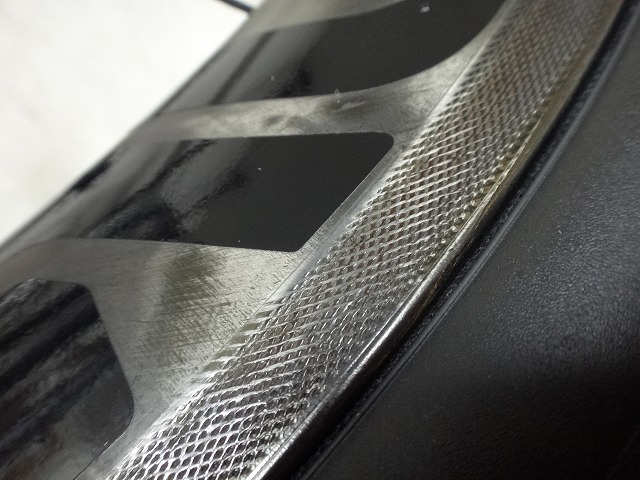
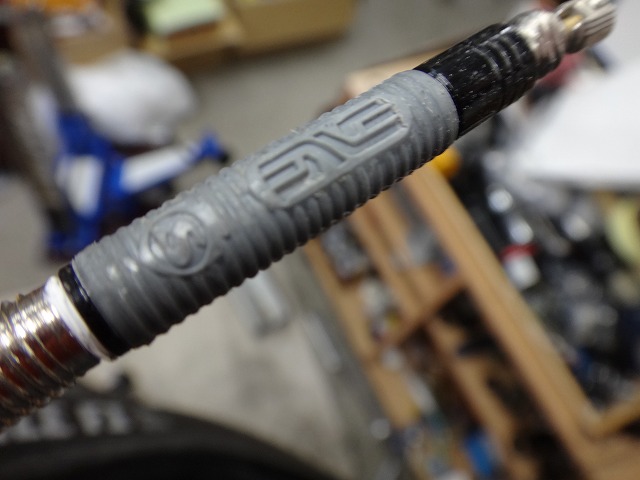
The rim is a tubeless-incompatible clincher,
and it had a stretch-band type rim tape with the ENVE logo on it.
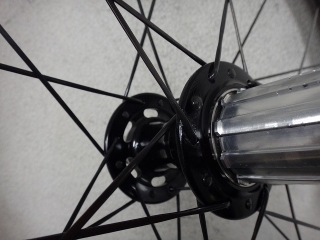
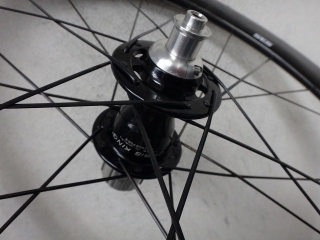
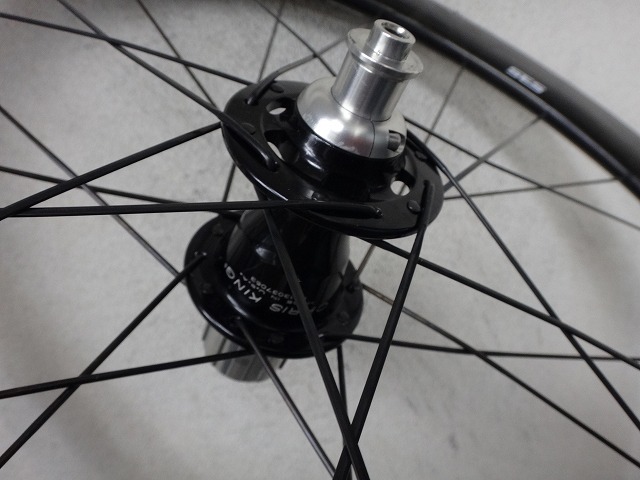
Chris King R45 hub, 24 spoke
All-black aero-lite in reverse Italian lacing.
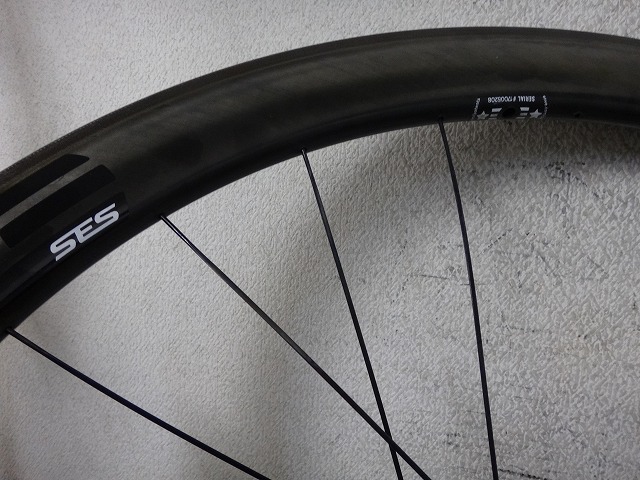
The fact that it's reverse Italian laced, combined with the spokes being DT aero-lite—
which currently aren't regularly stocked by Japanese distributors—
plus the fact that just beyond where the spoke threads end,
there's a small square flat spot for gripping with a tool—separate from the aero shaping—
which is primarily a wheel manufacturer specification,
all strongly suggests this is an off-the-shelf manufacturer build.
The customer said the wheel was rubbing the brake shoe and asked if I could fix it.

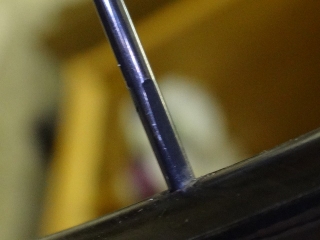
Rims with file-marked brake zones
also have a brake-rub warning function built in,
so while brake rub on a rim without file marks
is mostly only noticeable to the rider,
file-marked rims alert the brake shoe to the rub.
Any typos or letter swaps are intentional, by the way.
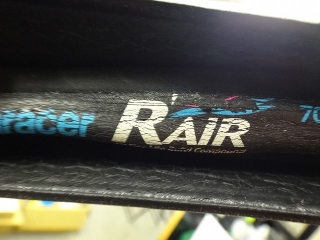
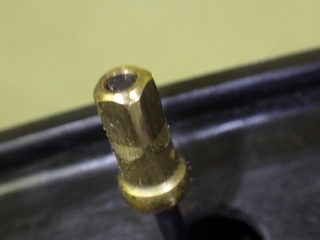
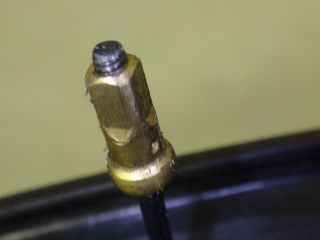
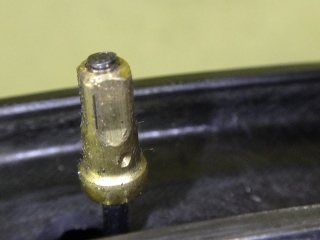
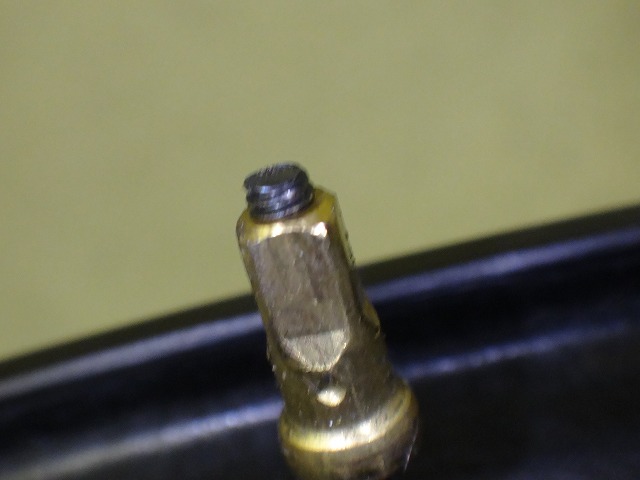
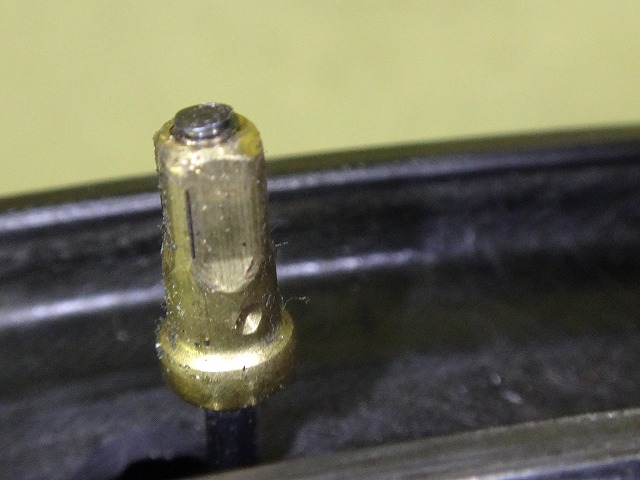
The tube was an R-Air, but that brand's tubes used to only come with a one-piece valve core that couldn't be removed.
This one, however, is what's called a two-piece valve with a removable valve core.
It was extended with an ENVE rubber-equipped extender.
The grey rubber section is aligned with the hole on the inner rim to reduce valve wobble noise.
Looking closely, there's also an "S" logo in a circle besides the ENVE mark—
that's Silca pump branding, so this is a Silca-made part.


The rim is shifted toward the non-drive side.
Since I'm taking it apart anyway, it doesn't really matter.
There was also a faint lateral wobble that didn't significantly affect this tendency
(even if I deliberately aligned the phase that had the rim deflecting most toward the drive side,
the rim would still end up offset toward the non-drive side rather than centered).

↑ the usual
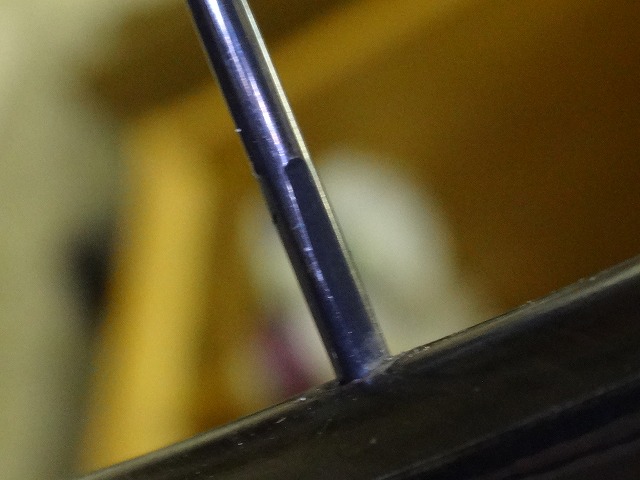
Starting from the valve hole and working clockwise, I removed spokes,
leaving four spokes at a time—two sets of the final crosses on each side—
with their nipples completely untightened.
This lets me see directly how the spoke length related to the nipple face-end inside the rim.

↑ non-drive side
↑ drive side
↑ non-drive side
↑ drive side
The non-drive side is noticeably longer.
When rebuilding, I kept the drive-side lacing pattern the same, but
without measuring the original spokes first (to avoid bias),
I calculated the spoke length from the hub and rim dimensions.
When I then measured the original drive-side spoke length,
my calculated value came out 1mm shorter.
There's almost no doubt I'll need to advance the threads more than in the original state,
so I'm going with the calculated value.
The non-drive side is changing from 4-spoke to 6-spoke lacing, but
according to my calculations, the nipple-to-spoke relationship should be similar to the drive side,
so the spoke won't protrude from the nipple as much as before the rebuild.

It's built.
24-spoke, black half-comp, 4x6 Italian lacing.
I'll do the truing later.
I'm specifically mentioning Italian lacing because
the original wasn't laced that way.

Perfectly centered.
The thing is, when you take a wheel apart like this, you know what comes next.
If you're already hearing the entrance music in your head,
you've been seriously poisoned by this blog,
but I have to follow protocol, so...
The rim weight? Who do you think I am?
↑ yikes, what an unpleasant guy
Sorry for the wait!
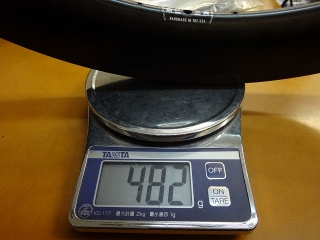
Please take a look at this image!
↑ stop it already!

A customer brought in a rear wheel from a Smart Envi System 4.5 for me to work on.
The rim is a tubeless-incompatible clincher,
and it had a stretch-band type rim tape with the ENVE logo on it.

Chris King R45 hub, 24 spoke
All-black aero-lite in reverse Italian lacing.
The fact that it's reverse Italian laced, combined with the spokes being DT aero-lite—
which currently aren't regularly stocked by Japanese distributors—
plus the fact that just beyond where the spoke threads end,
there's a small square flat spot for gripping with a tool—separate from the aero shaping—
which is primarily a wheel manufacturer specification,
all strongly suggests this is an off-the-shelf manufacturer build.
The customer said the wheel was rubbing the brake shoe and asked if I could fix it.
Rims with file-marked brake zones
also have a brake-rub warning function built in,
so while brake rub on a rim without file marks
is mostly only noticeable to the rider,
file-marked rims alert the brake shoe to the rub.
Any typos or letter swaps are intentional, by the way.
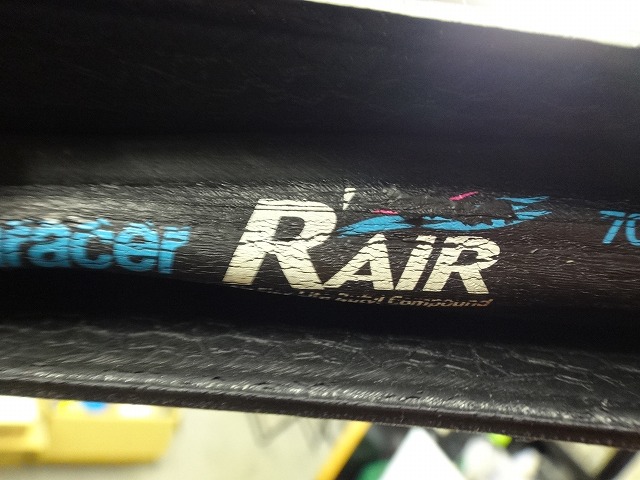
The tube was an R-Air, but that brand's tubes used to only come with a one-piece valve core that couldn't be removed.
This one, however, is what's called a two-piece valve with a removable valve core.
It was extended with an ENVE rubber-equipped extender.
The grey rubber section is aligned with the hole on the inner rim to reduce valve wobble noise.
Looking closely, there's also an "S" logo in a circle besides the ENVE mark—
that's Silca pump branding, so this is a Silca-made part.


The rim is shifted toward the non-drive side.
Since I'm taking it apart anyway, it doesn't really matter.
There was also a faint lateral wobble that didn't significantly affect this tendency
(even if I deliberately aligned the phase that had the rim deflecting most toward the drive side,
the rim would still end up offset toward the non-drive side rather than centered).
↑ the usual
Starting from the valve hole and working clockwise, I removed spokes,
leaving four spokes at a time—two sets of the final crosses on each side—
with their nipples completely untightened.
This lets me see directly how the spoke length related to the nipple face-end inside the rim.
↑ non-drive side

↑ drive side

↑ non-drive side
↑ drive side
The non-drive side is noticeably longer.
When rebuilding, I kept the drive-side lacing pattern the same, but
without measuring the original spokes first (to avoid bias),
I calculated the spoke length from the hub and rim dimensions.
When I then measured the original drive-side spoke length,
my calculated value came out 1mm shorter.
There's almost no doubt I'll need to advance the threads more than in the original state,
so I'm going with the calculated value.
The non-drive side is changing from 4-spoke to 6-spoke lacing, but
according to my calculations, the nipple-to-spoke relationship should be similar to the drive side,
so the spoke won't protrude from the nipple as much as before the rebuild.
It's built.
24-spoke, black half-comp, 4x6 Italian lacing.
I'll do the truing later.
I'm specifically mentioning Italian lacing because
the original wasn't laced that way.

Perfectly centered.
The thing is, when you take a wheel apart like this, you know what comes next.
If you're already hearing the entrance music in your head,
you've been seriously poisoned by this blog,
but I have to follow protocol, so...
The rim weight? Who do you think I am?
↑ yikes, what an unpleasant guy
Sorry for the wait!

Please take a look at this image!
↑ stop it already!