I forgot to bring my digital camera from home to the shop
so the images in this article and the next one were taken with my smartphone.
As long as I'm not doing macro shots at the spoke thread level,
there's no problem, but transferring the images to my PC is a hassle. Anyway...
Today it's wheels again (and so on).
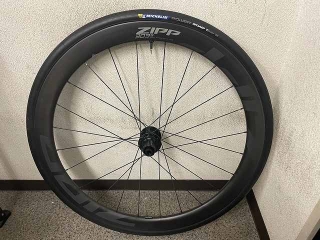
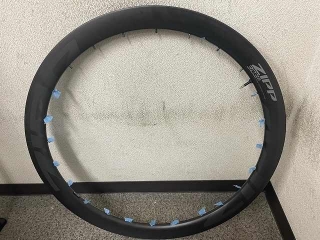
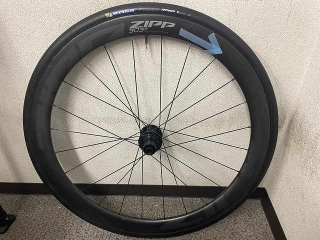
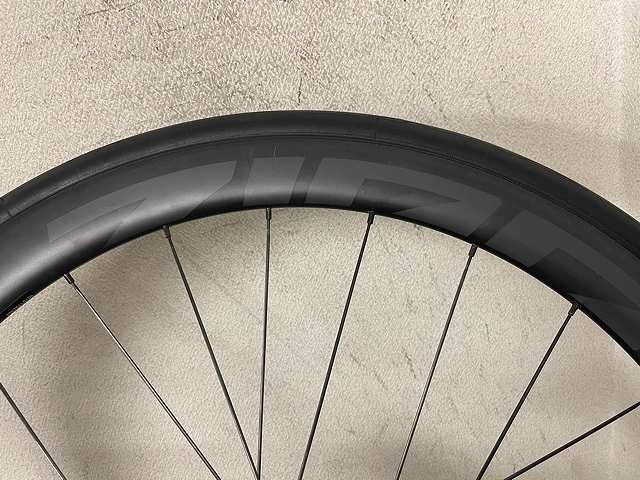
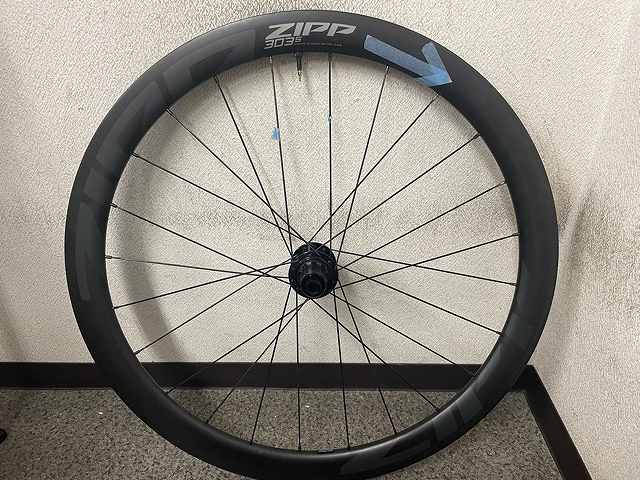
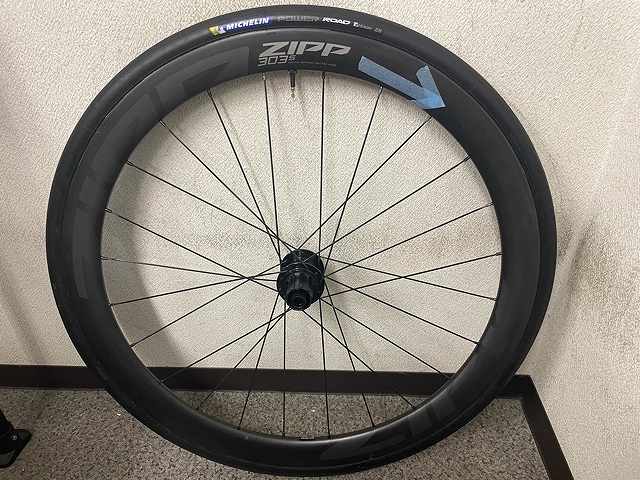
A customer left me the rear wheel of a ZIPP 303S.
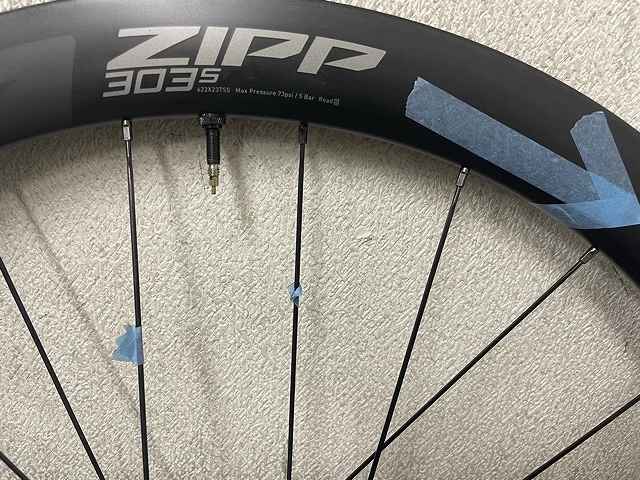
Unlike the 303S Firecrest, the rim side doesn't have dimple processing,
and the 303S has a rim height of 45mm and internal rim width of 23mm,
while the 303S Firecrest has a rim height of 40mm and internal rim width of 25mm—
so the rim specs are quite different.
From the angle of the image above, with the valve hole at the apex (12 o'clock position)
and viewing the wheel from the freewheel side,
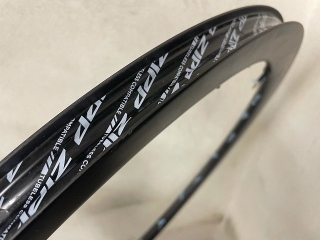
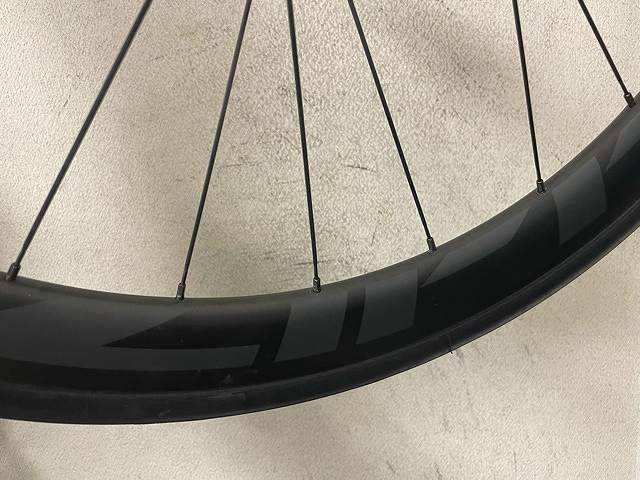
the ZIPP logo appears in two locations: 12-3 o'clock and 6-9 o'clock phases.
This large ZIPP logo:

has the top half of ZIPP on one side of the rim,

and on the opposite side at the same phase is the bottom half of ZIPP—
it's printed that way.
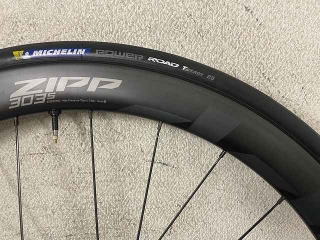
So from the freewheel side, starting from the valve hole
and going clockwise, there's the ZIPP text right away,
but on the non-freewheel side
it's reversed
(the arrow tape I stuck on the rim
currently runs opposite to the rotation direction).
Because the logo phase relative to the valve hole differs between front and rear wheels,
the customer's request is to disassemble the rear wheel and swap the rim left-to-right.
The critical thing to watch out for is the spoke offset on the rim.
If there's no offset, or if the offset is the same alternating left-right,
there's no problem. But if it's not right-left-right-left...
but rather center-left-center-left... with offset only on the non-freewheel side
(this is common on 2:1 lacing rims),
then left-right reversal won't work.
According to the customer, after doing various research,
ZIPP's logo on this wheel is pretty sloppy—
sometimes the logo phase matches between front and rear,
and sometimes it doesn't.
There was a serial number sticker on one spot at the rim apex,
and it was oriented to read in the correct direction when viewing the wheel from the right side (freewheel side).
I told the customer that if we flip the rim left-to-right,
the serial number sticker would end up upside down. However,
on the front wheel, when viewed from the right side,
that sticker is already facing the reverse direction, so
it would actually make the orientation consistent front-to-rear.
I suggested maybe we should flip the front wheel instead of the rear?
But since the customer wants the logo to match the front wheel's orientation,
we ended up rebuilding the rear wheel.
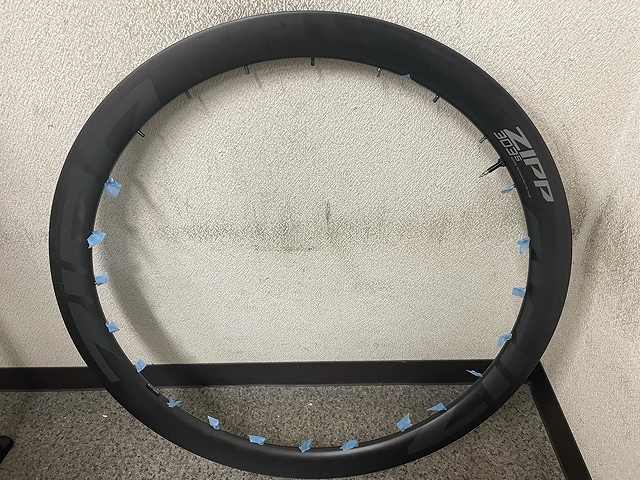
I disassembled the wheel.
I secured the nipples inside the rim with tape so they wouldn't fall,
because I wanted to change the rim's orientation without peeling off the tubeless tape.
The original nipples were brass, and I'm reusing them as-is.
The spokes were black CX Sprint with broken necks on both sides.
I'm rebuilding with those unchanged.
If I did happen to drop even one nipple inside the rim,
I wouldn't necessarily peel off the rim tape. With just a few,
I'd recover them through the valve hole using the Fulcrum method with a magnet.
I didn't mess up this time.
If I were replacing all of them with aluminum nipples, then I'd peel off the tape.

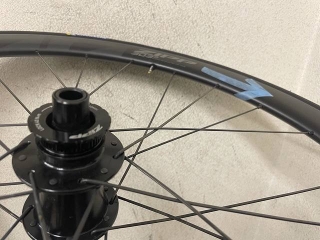
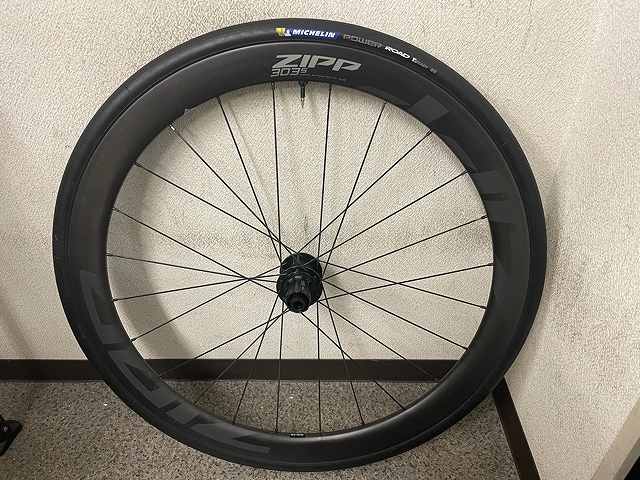
It's built up.
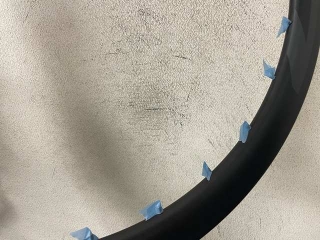
This is a shot from the freewheel side,
and the arrow aligns with the rotation direction now.

I put alignment tape on the spokes on both sides of the valve hole
to ensure the positional relationship between the rim and hub shell
doesn't change before and after rebuild.
When rebuilding the wheel,
I didn't remove the tubeless valve, but
when I spun the wheel off the truing stand for the first time,
there's a sound like water sloshing—similar to the initial spin of a washing machine drum.
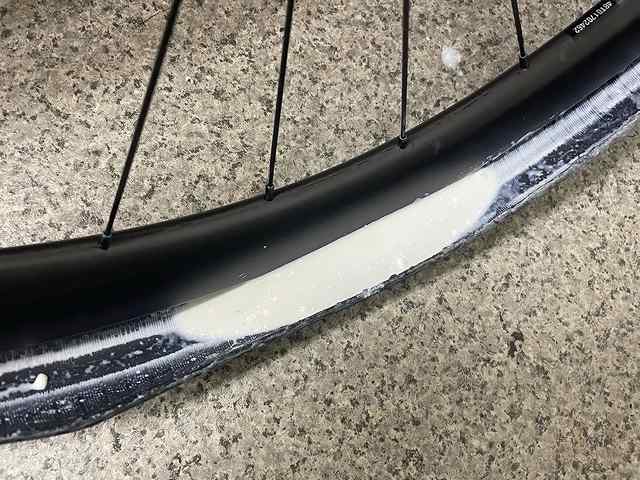
There's water inside the rim, and when I shake the wheel side-to-side,
it makes a sloshing sound.
With a tubeless tire that has sealant in it,
you might think it's the sealant noise, but
the sound is coming from inside the rim without the tire.
The rim side has no drainage holes.
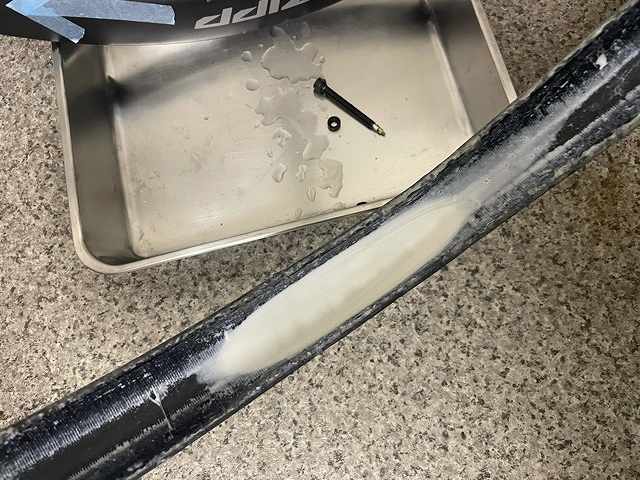
After loosening the valve nut, the tubeless valve wouldn't come out
by hand pressure, so I attached a Presta valve adapter,
tapped it lightly with a plastic hammer, and pulled it out.
This problem of tubeless valves getting stuck too tight—
if it won't come out when you get a flat on the road,
you're in for a nightmare situation.
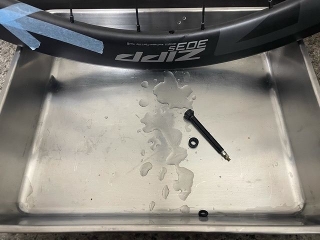
Quite a bit of water came out.
I would've liked to let the valve hole point straight down overnight, but

the sealant in the tire that was already mounted might go to waste,
and monitoring the air loss on the tubeless setup is a higher priority,
so I shook the wheel around to get most of the water out,
topped up the sealant a bit,
mounted the tire, and set the bead.
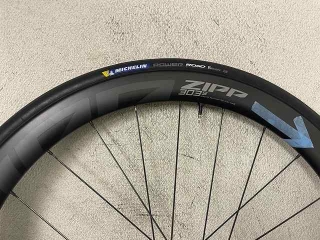
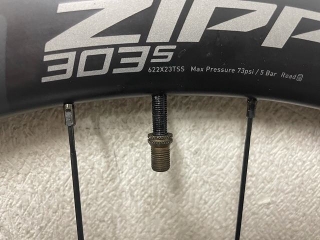
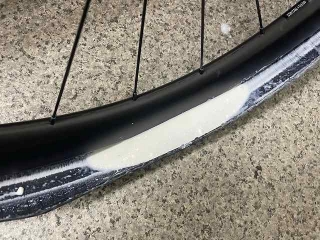
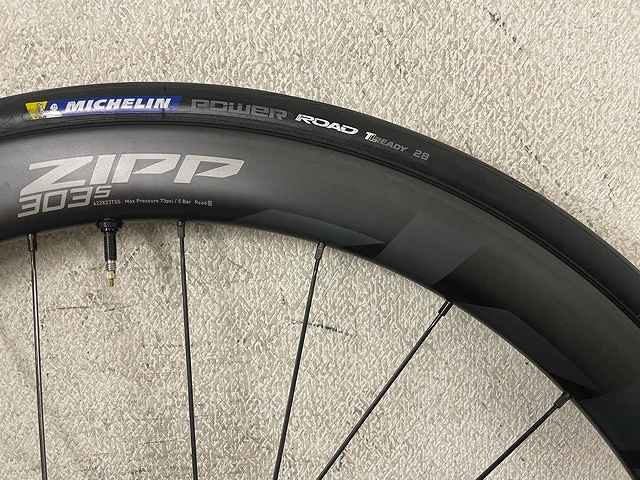
As I mentioned at the beginning, this rim's internal width is 23mm,
and next to the valve hole phase
there's a marking that says the maximum air pressure is 5 BAR.
so the images in this article and the next one were taken with my smartphone.
As long as I'm not doing macro shots at the spoke thread level,
there's no problem, but transferring the images to my PC is a hassle. Anyway...
Today it's wheels again (and so on).
A customer left me the rear wheel of a ZIPP 303S.
Unlike the 303S Firecrest, the rim side doesn't have dimple processing,
and the 303S has a rim height of 45mm and internal rim width of 23mm,
while the 303S Firecrest has a rim height of 40mm and internal rim width of 25mm—
so the rim specs are quite different.
From the angle of the image above, with the valve hole at the apex (12 o'clock position)
and viewing the wheel from the freewheel side,
the ZIPP logo appears in two locations: 12-3 o'clock and 6-9 o'clock phases.
This large ZIPP logo:
has the top half of ZIPP on one side of the rim,
and on the opposite side at the same phase is the bottom half of ZIPP—
it's printed that way.
So from the freewheel side, starting from the valve hole
and going clockwise, there's the ZIPP text right away,

but on the non-freewheel side

it's reversed
(the arrow tape I stuck on the rim
currently runs opposite to the rotation direction).
Because the logo phase relative to the valve hole differs between front and rear wheels,
the customer's request is to disassemble the rear wheel and swap the rim left-to-right.
The critical thing to watch out for is the spoke offset on the rim.
If there's no offset, or if the offset is the same alternating left-right,
there's no problem. But if it's not right-left-right-left...
but rather center-left-center-left... with offset only on the non-freewheel side
(this is common on 2:1 lacing rims),
then left-right reversal won't work.
According to the customer, after doing various research,
ZIPP's logo on this wheel is pretty sloppy—
sometimes the logo phase matches between front and rear,
and sometimes it doesn't.
There was a serial number sticker on one spot at the rim apex,
and it was oriented to read in the correct direction when viewing the wheel from the right side (freewheel side).
I told the customer that if we flip the rim left-to-right,
the serial number sticker would end up upside down. However,
on the front wheel, when viewed from the right side,
that sticker is already facing the reverse direction, so
it would actually make the orientation consistent front-to-rear.
I suggested maybe we should flip the front wheel instead of the rear?
But since the customer wants the logo to match the front wheel's orientation,
we ended up rebuilding the rear wheel.
I disassembled the wheel.

I secured the nipples inside the rim with tape so they wouldn't fall,

because I wanted to change the rim's orientation without peeling off the tubeless tape.
The original nipples were brass, and I'm reusing them as-is.
The spokes were black CX Sprint with broken necks on both sides.
I'm rebuilding with those unchanged.
If I did happen to drop even one nipple inside the rim,
I wouldn't necessarily peel off the rim tape. With just a few,
I'd recover them through the valve hole using the Fulcrum method with a magnet.
I didn't mess up this time.
If I were replacing all of them with aluminum nipples, then I'd peel off the tape.
It's built up.
This is a shot from the freewheel side,
and the arrow aligns with the rotation direction now.
I put alignment tape on the spokes on both sides of the valve hole
to ensure the positional relationship between the rim and hub shell
doesn't change before and after rebuild.
When rebuilding the wheel,
I didn't remove the tubeless valve, but
when I spun the wheel off the truing stand for the first time,
there's a sound like water sloshing—similar to the initial spin of a washing machine drum.
There's water inside the rim, and when I shake the wheel side-to-side,
it makes a sloshing sound.
With a tubeless tire that has sealant in it,
you might think it's the sealant noise, but
the sound is coming from inside the rim without the tire.
The rim side has no drainage holes.

After loosening the valve nut, the tubeless valve wouldn't come out
by hand pressure, so I attached a Presta valve adapter,
tapped it lightly with a plastic hammer, and pulled it out.
This problem of tubeless valves getting stuck too tight—
if it won't come out when you get a flat on the road,
you're in for a nightmare situation.

Quite a bit of water came out.
I would've liked to let the valve hole point straight down overnight, but
the sealant in the tire that was already mounted might go to waste,
and monitoring the air loss on the tubeless setup is a higher priority,
so I shook the wheel around to get most of the water out,
topped up the sealant a bit,
mounted the tire, and set the bead.
As I mentioned at the beginning, this rim's internal width is 23mm,
and next to the valve hole phase
there's a marking that says the maximum air pressure is 5 BAR.