I received a GIANT SLR1 complete wheelset from a customer.

It's a model that keeps getting minor revisions under the same name,
and the rim cosmetics change frequently too,
but judging from that, this appears to be from around 2019.
In addition to inspection, they wanted me to tension the spokes if possible,
and they also wanted tubeless tires installed.
Let's start with the rear wheel.
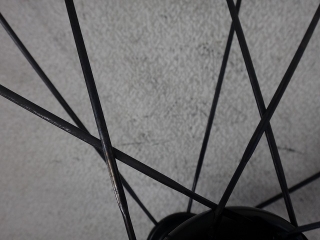
In terms of "2:1 lacing with a custom hub made by DT,"
it's the same as Roval,
but the crossing angle on the final cross of the tangent lacing on the freewheel side is much more obtuse, which is far better.
The hub bearing size is small like Roval though.
What bothered me wasn't that—it was that it wasn't DBL.
Correction addendum: This wheel was partially DBL spec. For details see (→here)
DBL has both spoke DBL and hub DBL,
and this SLR1 is not DBL in terms of spokes,
so I determined rebuilding wasn't necessary
and since the customer's request was just to tension the spokes,
I didn't make any spoke changes.
DBL, Dynamic Balanced Lacing, is based on the idea that
"the instant you stomp on the pedals,
only the spokes in the porcupine direction really exist,"
so the spoke weight ratio of the tangent-laced spokes in the porcupine direction
is made larger than spokes in the anti-porcupine direction.
On this point, I won't claim I thought of it first in the world
(it's more the kind of thing anyone would think of),
but I've laced several wheels before the nomunlab era,
and I understand what doesn't work about it.
Regarding GIANT's DBL rear wheels too, I've confirmed wheels with problems
that seem to stem from the structure itself.
I'll write an article about this eventually.
I've even taken photos for the article
(I just checked and it was April 13, 2021).
In the case of DBL with aero spokes,
the 3 spokes at the 2:1 lacing points on the rear wheel
are laced with 2 types of spokes.
In the case of round spokes, all are different spoke weights,
making 3 types total.
I thought this spoke might be a DT Aercomp equivalent to Sapim CX Sprint,
but it turned out to be a square aero profile
with the same thickness as Aercomp but wider.

If it had been used over time, there's no way certain areas wouldn't be dirty, yet they're clean,
and there's almost no sprocket mounting marks on the freehub body,
so it seems it basically wasn't used at all.


The temporary center was spot on.

This tubeless tape, I believe it's the same as what comes on Mavic complete wheels,
but regardless of adhesion to the rim,
the adhesion of the tape itself is weak,
so sealant is allowed to seep between the tape layers.
Mavic puts black tape on the end of the tubeless tape,
but aside from preventing tape peeling, it doesn't prevent sealant intrusion,
and it shrinks side-to-side, becoming all wrinkled.

This area too shows the color of the tape with sealant inside it,

Whether intrusion stops at the tubeless valve area,
the tape color changes before and after the valve.

↑ Peeling the tape back to the valve area looks like this
Either because the wheel's service period was short,
or because sealant intrusion is relatively mild in this case.

↑ Peeled tape

↑ Rim side of that
With this tape, sealant seeps between the tape layers,
but the adhesive residue on the rim is nasty,
making it virtually impossible to completely clean the rim.

A thin film layer often remains on the rim
and covers the rim holes too.
The reason I'm peeling back the tubeless tape is

because this rim has internal nipples.
So going forward, every time I do truing or similar work,
I'll need to wipe off sealant and replace the tape.


The rear wheel seemed tensionable, so I tensioned it.
After tightening only the freewheel side, the wheel center is off.
The anti-freewheel side has a larger lateral rim movement per nipple rotation than the freewheel side,
so the rim should return to its original position with about half the tightening amount on the anti-freewheel side.


I tightened the anti-freewheel side by half the amount I tightened the freewheel side.
It's still a bit off, but I've tightened quite a bit.


With further anti-freewheel side tightening, I achieved center.

I used Stans rim tape, which is also what the customer requested.

Next, the front wheel.


There's a center offset.
Unlike the rear wheel, this unit wasn't very tensionable to begin with—it was already on the tense side,
so I could only tension it to the degree of correcting this center offset with a tightening bias.


I got the center right and did the truing as well.

I installed tubeless tires too.
This rim isn't a narrow rim,
but compared to modern wide rims, it's on the narrower side.
2019 was right when rims this width were becoming mainstream.
Because of that, there are some areas where tire bead seating is slightly poor.

For sealant, I used Muc-Off Muc-Off Plus.
This is also what the customer requested.
With long-term observation included, 30ml might be doable if I push it,
but I went with 40ml (this is still pushing it).
As a result, after half a day only the front wheel had lost air,
so I added air only without adding more sealant and observed it,
and after more than a day, the air was barely lost,
so I judged it would be fine going forward.

It's a model that keeps getting minor revisions under the same name,
and the rim cosmetics change frequently too,
but judging from that, this appears to be from around 2019.
In addition to inspection, they wanted me to tension the spokes if possible,
and they also wanted tubeless tires installed.
Let's start with the rear wheel.
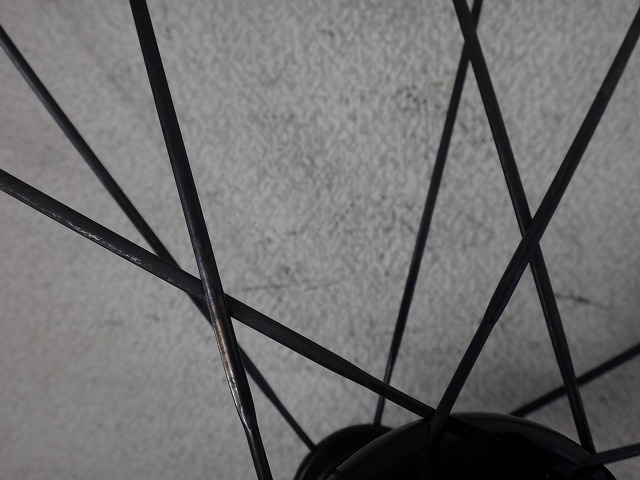
In terms of "2:1 lacing with a custom hub made by DT,"
it's the same as Roval,
but the crossing angle on the final cross of the tangent lacing on the freewheel side is much more obtuse, which is far better.
The hub bearing size is small like Roval though.
What bothered me wasn't that—it was that it wasn't DBL.
Correction addendum: This wheel was partially DBL spec. For details see (→here)
DBL has both spoke DBL and hub DBL,
and this SLR1 is not DBL in terms of spokes,
so I determined rebuilding wasn't necessary
and since the customer's request was just to tension the spokes,
I didn't make any spoke changes.
DBL, Dynamic Balanced Lacing, is based on the idea that
"the instant you stomp on the pedals,
only the spokes in the porcupine direction really exist,"
so the spoke weight ratio of the tangent-laced spokes in the porcupine direction
is made larger than spokes in the anti-porcupine direction.
On this point, I won't claim I thought of it first in the world
(it's more the kind of thing anyone would think of),
but I've laced several wheels before the nomunlab era,
and I understand what doesn't work about it.
Regarding GIANT's DBL rear wheels too, I've confirmed wheels with problems
that seem to stem from the structure itself.
I'll write an article about this eventually.
I've even taken photos for the article
(I just checked and it was April 13, 2021).
In the case of DBL with aero spokes,
the 3 spokes at the 2:1 lacing points on the rear wheel
are laced with 2 types of spokes.
In the case of round spokes, all are different spoke weights,
making 3 types total.
I thought this spoke might be a DT Aercomp equivalent to Sapim CX Sprint,
but it turned out to be a square aero profile
with the same thickness as Aercomp but wider.

If it had been used over time, there's no way certain areas wouldn't be dirty, yet they're clean,
and there's almost no sprocket mounting marks on the freehub body,
so it seems it basically wasn't used at all.


The temporary center was spot on.

This tubeless tape, I believe it's the same as what comes on Mavic complete wheels,
but regardless of adhesion to the rim,
the adhesion of the tape itself is weak,
so sealant is allowed to seep between the tape layers.
Mavic puts black tape on the end of the tubeless tape,
but aside from preventing tape peeling, it doesn't prevent sealant intrusion,
and it shrinks side-to-side, becoming all wrinkled.

This area too shows the color of the tape with sealant inside it,

Whether intrusion stops at the tubeless valve area,
the tape color changes before and after the valve.

↑ Peeling the tape back to the valve area looks like this
Either because the wheel's service period was short,
or because sealant intrusion is relatively mild in this case.

↑ Peeled tape

↑ Rim side of that
With this tape, sealant seeps between the tape layers,
but the adhesive residue on the rim is nasty,
making it virtually impossible to completely clean the rim.

A thin film layer often remains on the rim
and covers the rim holes too.
The reason I'm peeling back the tubeless tape is

because this rim has internal nipples.
So going forward, every time I do truing or similar work,
I'll need to wipe off sealant and replace the tape.


The rear wheel seemed tensionable, so I tensioned it.
After tightening only the freewheel side, the wheel center is off.
The anti-freewheel side has a larger lateral rim movement per nipple rotation than the freewheel side,
so the rim should return to its original position with about half the tightening amount on the anti-freewheel side.


I tightened the anti-freewheel side by half the amount I tightened the freewheel side.
It's still a bit off, but I've tightened quite a bit.


With further anti-freewheel side tightening, I achieved center.

I used Stans rim tape, which is also what the customer requested.

Next, the front wheel.


There's a center offset.
Unlike the rear wheel, this unit wasn't very tensionable to begin with—it was already on the tense side,
so I could only tension it to the degree of correcting this center offset with a tightening bias.


I got the center right and did the truing as well.

I installed tubeless tires too.
This rim isn't a narrow rim,
but compared to modern wide rims, it's on the narrower side.
2019 was right when rims this width were becoming mainstream.
Because of that, there are some areas where tire bead seating is slightly poor.

For sealant, I used Muc-Off Muc-Off Plus.
This is also what the customer requested.
With long-term observation included, 30ml might be doable if I push it,
but I went with 40ml (this is still pushing it).
As a result, after half a day only the front wheel had lost air,
so I added air only without adding more sealant and observed it,
and after more than a day, the air was barely lost,
so I judged it would be fine going forward.