I received front and rear wheels from a customer that were Shamal Ultra.
But actually they were Racing Zero! My apologies!
Thank you for pointing that out in the comments!
I've corrected the mistakes below.
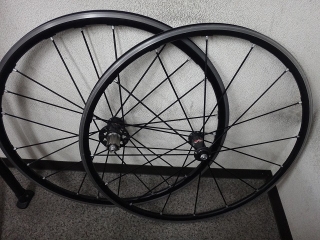
The customer wanted bearing CULT conversion and inspection.
The image above is after the work.
The rim sticker has been peeled off, but
since the rear wheel has a 2:1 lacing, you can tell it's not Fulcrum.
But actually it was a 2:1 lacing with staggered phase!
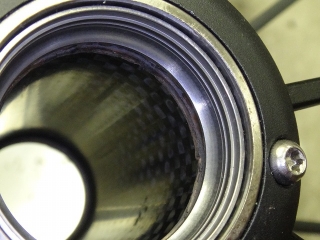
Since the hub shell is carbon, it's not Racing 1.
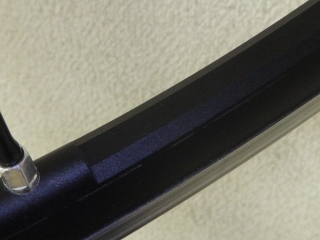
From the shape of the rim's outer edge and the fact that there's no valve bush in the valve hole,
I can tell this is a clincher-only WO rim,
not a 2WAY-FIT.
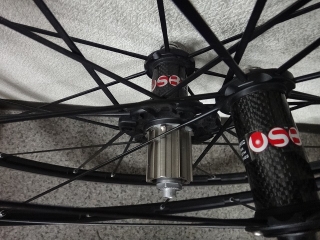
The sticker on the rear hub shell
was readable in the correct direction when viewed from the right side,
so I followed that orientation for the front wheel as well,
assembling the hub axle so the bearing adjustment nut was on the left side for both wheels.
If this hub shell didn't have a sticker,
you might not be able to tell the difference from a Shamal Ultra on the front wheel,
but
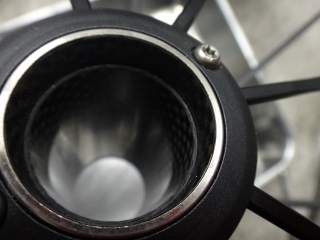
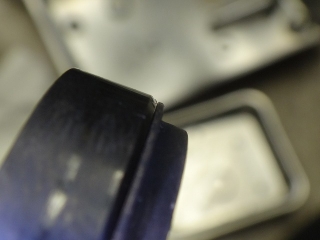
You can distinguish them by the inner rim edge shape:
Campagnolo has a rounded profile on both sides,
while Fulcrum has sharp chamfered edges.

It was from an era with a black bearing race.
Inside the race, a cage with a grease guard membrane
(like a scoopnet frame) was press-fitted together.
I removed the race and the cage.
The cage flange has significant thickness,
so this is also included in the hub dimensions.
With the limited edition Racing Zero of this same hub shell
that came pre-CULT,
a membrane-free cage is press-fitted together,
which confirms that.
CULT bearings don't need grease,
so the membrane isn't necessary, but the membrane adheres very strongly to the cage, so
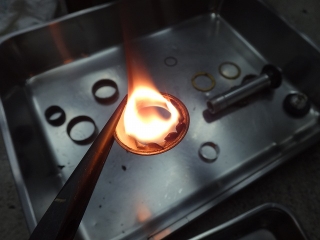
I set the membrane on fire.
This level of heat won't trigger the fire alarm,
but the black, smelly smoke is definitely bad for your body.
I had water standing by just in case.

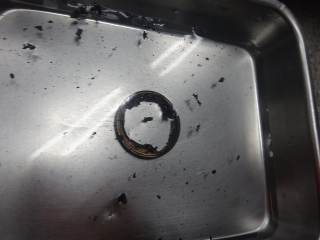
The part I initially grabbed with pliers didn't burn very well,
so I burned it again.
I press-fitted a CULT race together with the cage.
After that I assembled the hub with parts, but
I thought there seemed to be a larger gap than usual between the hub shell and dust cap,
so

I measured the hub's over-locknut dimension
and got about 100.1mm. That's within the normal range.
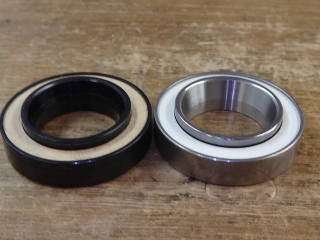
I also measured the thickness of the old black race and the CULT race,
and they're exactly the same.
So that apparent gap earlier was just my imagination.

The rim had a slight offset toward the left side (which I designated as the bearing adjustment nut side).
There were only faint runout marks in two spots,
so you could basically say there was almost none.
This center offset might be related to the CULT conversion
(the race press-fit could vary slightly before and after work).
If I wanted to investigate further, I should check the preliminary center,
but since I'm going to true it up properly anyway, I figured it's fine
and as usual I generally don't bother checking the preliminary center.
I did the runout truing and centering.

Next, the rear wheel.
For the work, I swapped out the 11-speed steel Shimano freebody
for a Campagnolo freebody,
since various parts on the original were damaged anyway,
this worked out nicely.
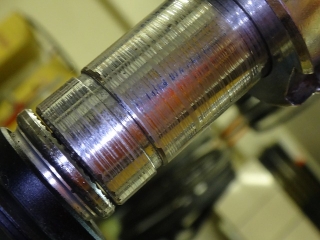
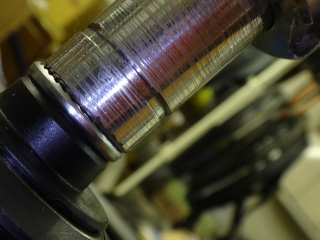
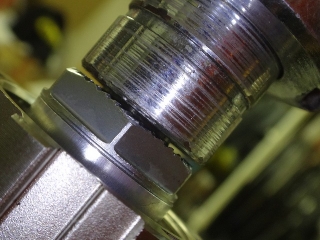
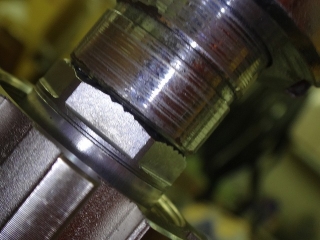
before

after
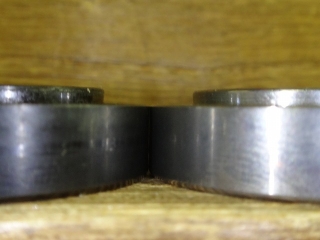
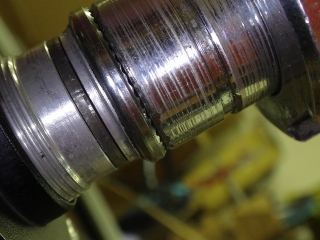
The timeline jumps around, but here's the race press-fit before and after work.
Of course both have the cage press-fitted as well.
If the race had only gone in by the thickness of the cage,
the relationship with the ratchet teeth should have changed much more dramatically.
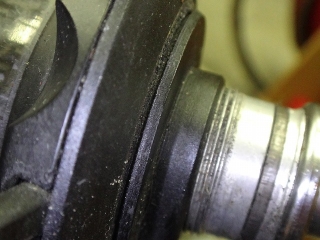
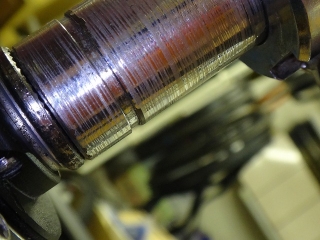
before
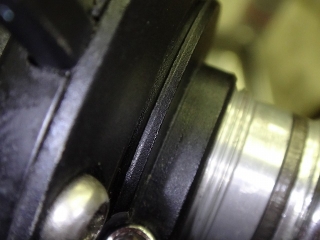
after
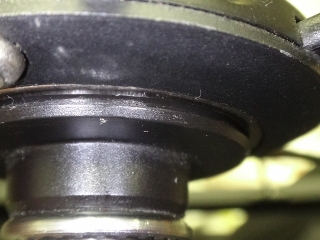
The relationship between the bearing adjustment nut and hub shell
doesn't appear to have changed before and after work.

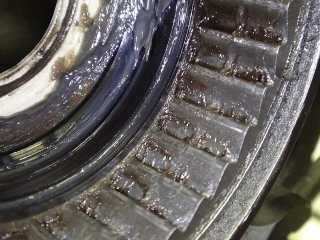
I also burned the membrane from the rear hub cage.

I positioned the cage flanges so they overlapped,
facing each other, and
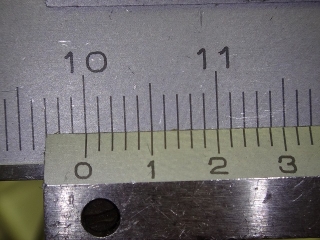
measured the flange thickness.
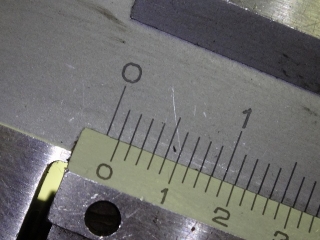
Both together measured about 1.1mm.
There was center offset,
most of which appears to be from long-term use.

I corrected it with increased tightening on the non-freewheel side.
But actually they were Racing Zero! My apologies!
Thank you for pointing that out in the comments!
I've corrected the mistakes below.

The customer wanted bearing CULT conversion and inspection.
The image above is after the work.
The rim sticker has been peeled off, but
since the rear wheel has a 2:1 lacing, you can tell it's not Fulcrum.
But actually it was a 2:1 lacing with staggered phase!
Since the hub shell is carbon, it's not Racing 1.
From the shape of the rim's outer edge and the fact that there's no valve bush in the valve hole,
I can tell this is a clincher-only WO rim,
not a 2WAY-FIT.

The sticker on the rear hub shell
was readable in the correct direction when viewed from the right side,
so I followed that orientation for the front wheel as well,
assembling the hub axle so the bearing adjustment nut was on the left side for both wheels.
If this hub shell didn't have a sticker,
you might not be able to tell the difference from a Shamal Ultra on the front wheel,
but

You can distinguish them by the inner rim edge shape:
Campagnolo has a rounded profile on both sides,
while Fulcrum has sharp chamfered edges.

It was from an era with a black bearing race.
Inside the race, a cage with a grease guard membrane
(like a scoopnet frame) was press-fitted together.

I removed the race and the cage.

The cage flange has significant thickness,
so this is also included in the hub dimensions.
With the limited edition Racing Zero of this same hub shell
that came pre-CULT,
a membrane-free cage is press-fitted together,
which confirms that.
CULT bearings don't need grease,
so the membrane isn't necessary, but the membrane adheres very strongly to the cage, so

I set the membrane on fire.
This level of heat won't trigger the fire alarm,
but the black, smelly smoke is definitely bad for your body.

I had water standing by just in case.

The part I initially grabbed with pliers didn't burn very well,
so I burned it again.

I press-fitted a CULT race together with the cage.

After that I assembled the hub with parts, but
I thought there seemed to be a larger gap than usual between the hub shell and dust cap,
so

I measured the hub's over-locknut dimension

and got about 100.1mm. That's within the normal range.

I also measured the thickness of the old black race and the CULT race,

and they're exactly the same.
So that apparent gap earlier was just my imagination.


The rim had a slight offset toward the left side (which I designated as the bearing adjustment nut side).
There were only faint runout marks in two spots,
so you could basically say there was almost none.
This center offset might be related to the CULT conversion
(the race press-fit could vary slightly before and after work).
If I wanted to investigate further, I should check the preliminary center,
but since I'm going to true it up properly anyway, I figured it's fine
and as usual I generally don't bother checking the preliminary center.


I did the runout truing and centering.

Next, the rear wheel.
For the work, I swapped out the 11-speed steel Shimano freebody
for a Campagnolo freebody,
since various parts on the original were damaged anyway,
this worked out nicely.

before

after
The timeline jumps around, but here's the race press-fit before and after work.
Of course both have the cage press-fitted as well.
If the race had only gone in by the thickness of the cage,
the relationship with the ratchet teeth should have changed much more dramatically.

before

after
The relationship between the bearing adjustment nut and hub shell
doesn't appear to have changed before and after work.

I also burned the membrane from the rear hub cage.

I positioned the cage flanges so they overlapped,
facing each other, and
measured the flange thickness.

Both together measured about 1.1mm.


There was center offset,
most of which appears to be from long-term use.


I corrected it with increased tightening on the non-freewheel side.