There is a British parts manufacturer called
USE that makes handlebar components, seatposts, and so on.

↑These characters
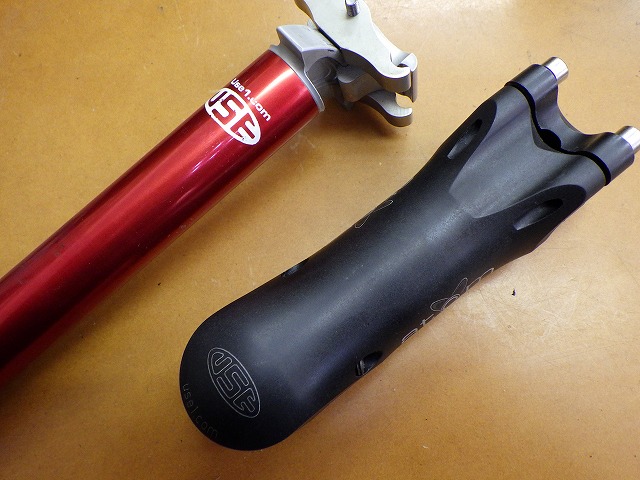
The image on the left is a seatpost called Alien,
and while the round pipe section comes in titanium or carbon versions,
this one is aluminum. To add, it's something I bought for an old LOOK bike
and it's 25.0mm in diameter. It's held with a single M4 bolt on a yagura
clamp, a lightweight design, and because that single bolt looks like an eye,
USE calls this the Cyclops (one-eyed giant) version.
Later they released a two-bolt yagura version,
and they sold the yagura as a spare part for existing Cyclops users,
which I have as well, but that's also a lightweight design with two M3 bolts.
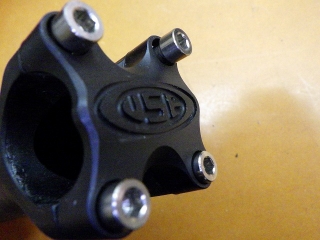
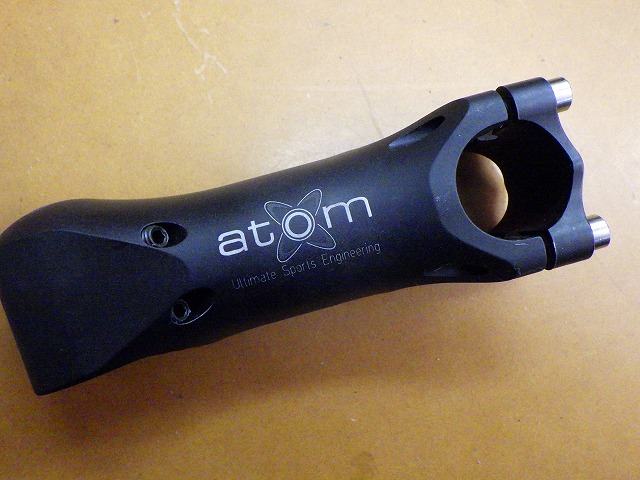
The image on the right is a stem called Atom,
and the top of the handlebar clamp side is closed off,
so it can only be mounted at the very top of the steering column,
though a later version became a standard stem.

Although not pictured, under the stem I use a USE part called the Apple Star,
which is a spacer-like piece that applies pressure to the steering column.
I really like the design,
but on my everyday bike the position doesn't work out,
so for now it's in storage.

Before 31.8mm diameter became standard, the clamp diameter was generally 26.0mm,
but this stem is for the old ITM and old 3T at 25.8mm diameter.
I had used this stem on a three-roller trainer bike thinking that
even if sweat got on the stem, salt damage wouldn't reach
the top cap area like on a standard stem,
but the handlebar clamp diameter was 26.0mm,
so when I was tightening the bolt one time, the bottom side of the stem
body cracked with a loud snap.
It seems they make it very precisely at 25.8mm diameter,
and the forging is so hard that conversely it becomes brittle.
The stem in the image is a replacement I purchased,
buying the very last one from a distributor's inventory of the same length.

USE is an acronym for Ultimate Sports Engineering,
and this mitochondria-like thing is the USE logo.
It says use1.com but that's an old domain;
currently it's been switched to exposure-use.com.
Exposure means being exposed to sunlight, wind, rain,
and other natural elements, or to be revealed,
and it also has photographic meaning as exposure.
Currently USE operates bike parts as the Ultimate brand,
and separately has Exposure for lighting products,
and also a brand called OLAS.
OLAS is an acronym for Overboard Location Alert System,
a wearable device brand that alerts with sound and light when someone
falls overboard from a small vessel (notifications also go to phones of people on board).
It seems to be intended for leisure on small cruisers
and sailing yacht sports,
and while Japanese bicycle distributors probably don't carry it,
the OLAS brand has a product called MOB Carbon—
a waterproof, water-floating cylindrical light
with 1000 lumens brightness and carbon body. I want it.

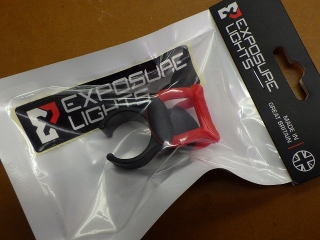
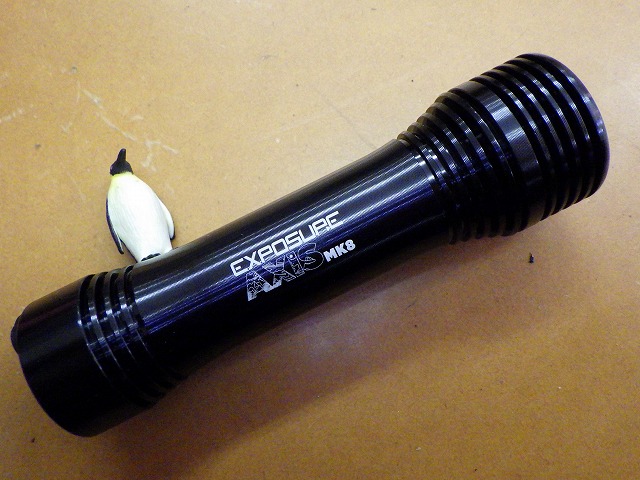
From that Exposure brand,
I bought a front light called the Axis.
Exposure categorizes their handlebar-mounting brackets
that bolt down securely by size and brightness as road or MTB use,
but lights like this Axis with silicone band-fixed handlebar brackets
are categorized as "helmet use."
It assumes helmet mounting as the default,
with handlebar mounting as an option you can also do.
Models similarly categorized as helmet use include
Diablo and Joystick,
and there's also a model called Sirius
that's roughly the same size as Joystick but categorized as road use.
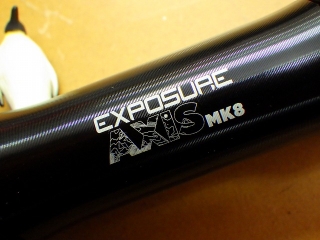
With Exposure,
light model names become a legacy name tradition,
and by having MK (mark) numbers after the model name,
you can clearly distinguish old from new.
The model in the image is, so to speak,
the eighth-generation Exposure Axis.
Exposure's light pricing is high,
and because they probably judge that in the Japanese market
dominated by the Cateye empire, these don't sell well,
USE's Japanese distributors
don't actively stock Exposure lights.
It's not that distribution agreements are broken,
but for the past 2-3 years they seem to only source by special order
rather than regular stock.
In fact, even this Axis was the last one,
so this article won't serve as promotion anyway.
I mentioned earlier that Exposure lights clearly show what generation they are,
but if I list them in order of Japanese distributor stock / current home site models,
it goes:
Sirius MK2 / MK10
Joystick MK15 / MK16
Axis MK8 / MK9
Diablo MK10 / MK13
The Axis MK8 in the photo above is black anodized,
but current models are all gun metal gray anodized,
making it immediately clear from external appearance that this isn't the latest.
I bought the Axis MK8 knowing this, partly because
it made sense to shop at the official distributor as a matter of principle,
and also because without a purchase history of USE lights,
I couldn't buy optional parts.

According to the Japanese distributor, the Axis MK8 is
maximum 1250 lumens,
but the box says 1300 lumens.
Since the Axis MK9 is also 1300 lumens,
perhaps the earlier Axis MK8 was 1250 lumens.
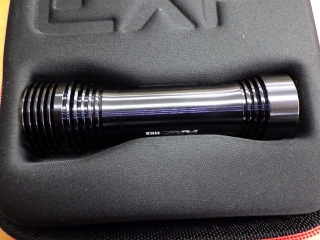
↑It comes in a case like this,
and there's space between the case and the bulb side (left in the image)
probably because they share the case with the Diablo,
whose bulb section is larger than the Axis.

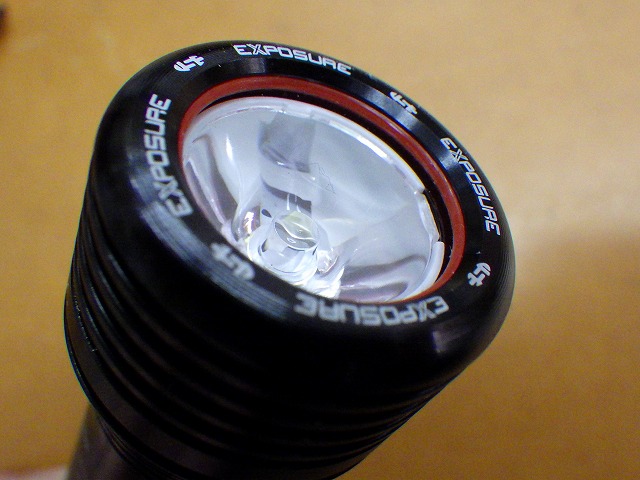
Exposure lights seem to hide the fact that they're a USE-related brand,
but on the light's bezel there is a logo after all.
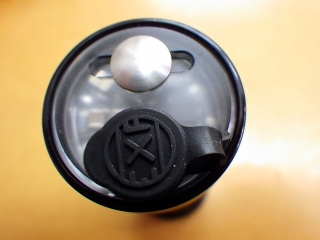
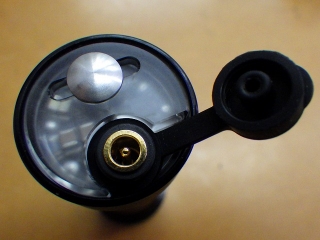
Images of the rear of the light.
The silvery metal section is the operation/setting button,
and the charging port is covered with a waterproof cap
with the grand name of Storm Cap.
When I looked it up, "Storm Cap" isn't actually a generic term.
It's the same kind of thing as when Stans calls the fibrous material
in their sealant "Crystal."
I didn't buy these this time, but optional accessories exist
like a wired remote switch that plugs into this charging port
and a red LED rear light for the rear.
Since this is a helmet-use-category product,
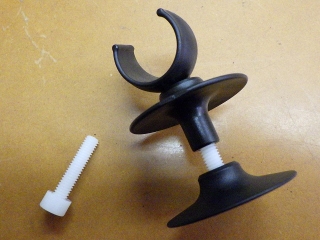
it comes with an adapter for helmet mounting.

The included plastic M6 bolts come in
two different lengths so that the upper and lower parts
won't interfere with each other
(leaving the bolt threads exposed between them).
The Axis has a feature where tapping (lightly striking) the body
changes the brightness mode, and the tap sensitivity can be adjusted
from sensitive to dull in three steps,
and you can turn off the tap feature entirely.
The manufacturer says to turn off the tap feature when using it as a handlebar light
(I actually did turn it off).
I initially thought the presence or absence of the tap feature
was what distinguished helmet lights from others,
but the Joystick, categorized as helmet use, also lacks
the tap feature, as does the Sirius, which is handlebar-categorized from the start.
As for the helmet mounting bracket, it has an odd number of holes
(with a hole in the middle), and helmets with holes
preferably near the crown seem best suited for mounting.
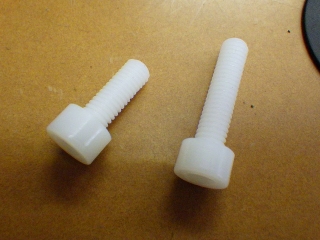
Looking at just the plastic M6 bolt,
I can't think of anything but bad uses.
Back in the day, XC MTBs with metal suspension fork steerers
would sometimes use a multi-pressure anchor and top cap
instead of a starfangled nut to remove headset play,
then remove both the anchor and cap for weight savings.
A state where you could see the front tire through the hollow column.
Of course loosening the stem would reintroduce play,
but interestingly sometimes it stays tight even just riding it.
Apparently the constant pressure is necessary.
So if you want to make your bike absurdly light,
you can use a metal bolt to take up headset play, fix the stem,
then replace the top cap bolt with plastic
and tighten it gently.
A similar example would be taking out a crank
on a square-taper BB with a steel bolt, then switching to an aluminum bolt.
Don't apply the clamping force with an aluminum bolt
(large-diameter hollow aluminum bolts like those on the 7700 Dura-Ace
or Rotor 3D cranks are a different story).
By the way, the top cap bolt on my sub-4kg bike
is made from what I call "moon rock"—a mysterious alloy.
I won't post an image, but for weight per unit length,
I've never seen anything lighter in the metal category.
It's surely heavier than plastic though.
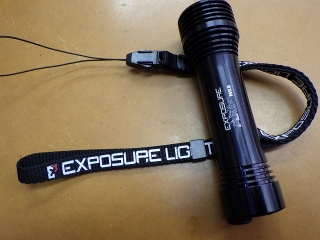
A safety strap is included to prevent accidental loss.
I won't use it, but now that they've included it,
losing it without using it is the user's responsibility I suppose.

Even as a helmet light, it comes with one silicone band
handlebar bracket.

Rubber grips for the handlebar contact surface are also included.
They don't come pre-attached.
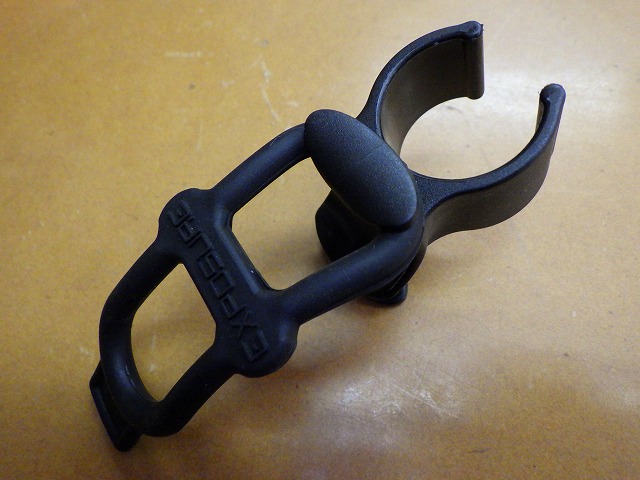
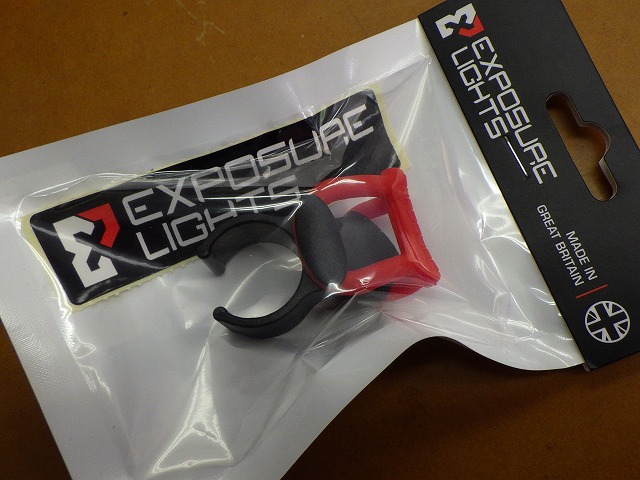
As an option, I also bought a spare bracket.
For the spare, the silicone band is red.
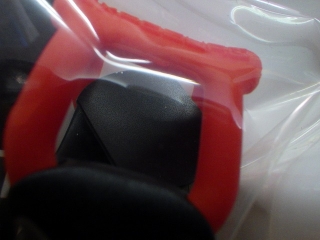
The grip rubber is included too.
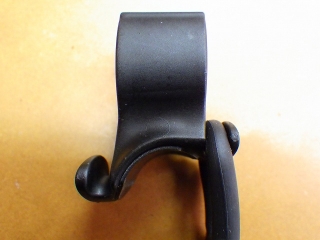
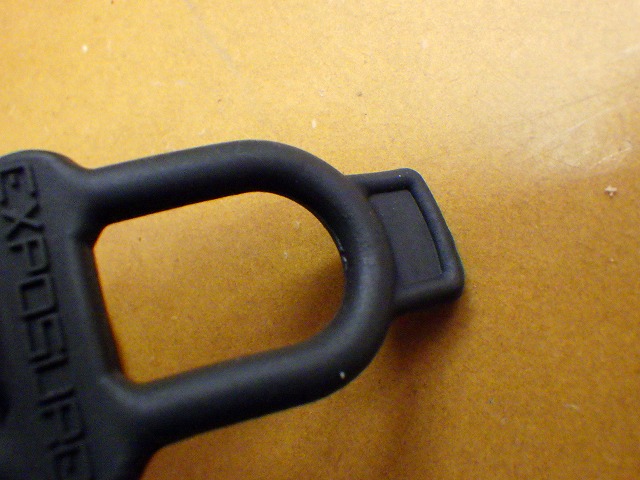
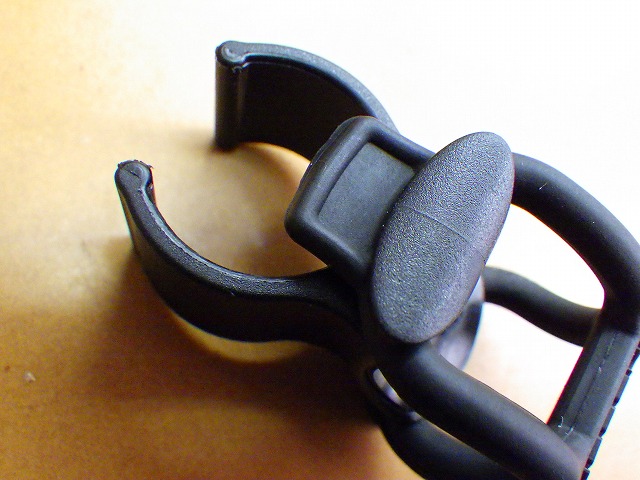
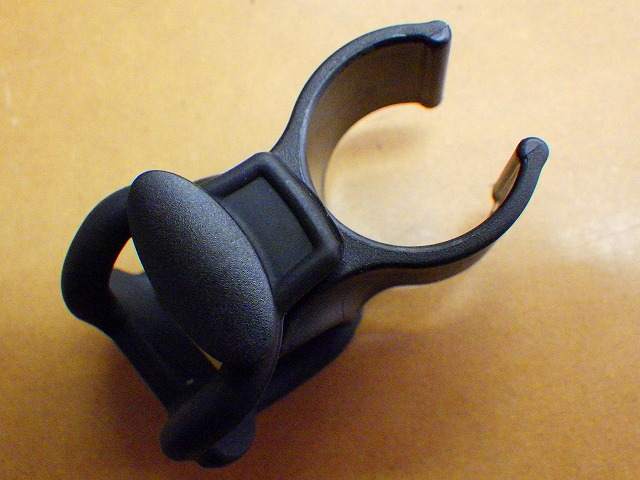
The bracket itself is asymmetrical front-to-back,
with the silicone band hook at different heights.
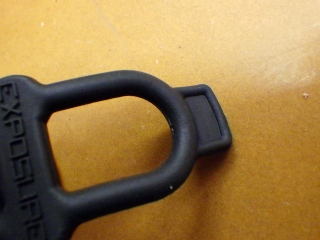
The silicone band has a tab on the side you grasp for removal,
making it easy to do so.
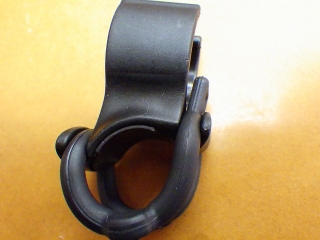
But if you hook the tab side to the higher mounting point,

the tab and light interfere with each other, so
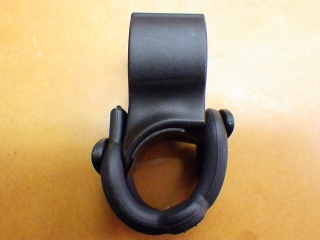

it's a silent message that the tab should go on the lower hook.
Road bike parts often have these kinds of silent messages,
with things like bolts of different lengths or diameters on the same part,
or mounting sections that won't align if installed wrong,
but I often see people ignore these and install incorrectly anyway.
It means their intelligence is below what the manufacturer expects.

In the manufacturer's website images, the lower hook mounting point
is on the rear, so I follow that.
Actually, the instructions also specified this orientation.
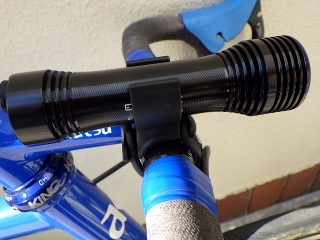
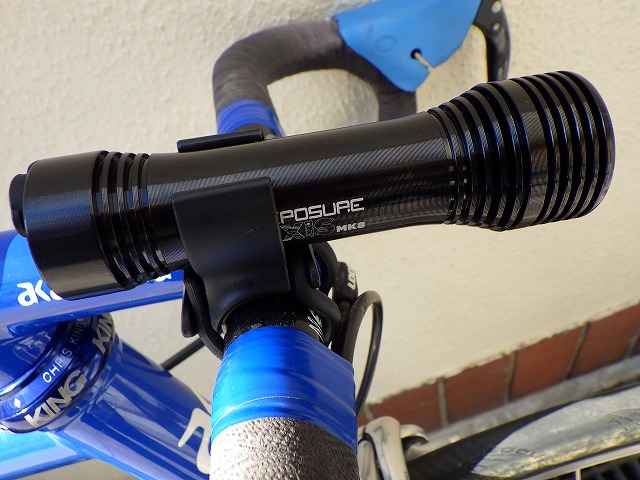
Mounted.
The bracket snaps onto the light's C-clip mount,
and while it moves slightly by hand,
↑the light position doesn't shift like this, and
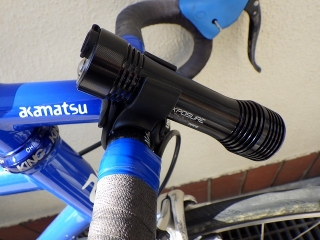
↑the light doesn't tilt forward like this
(I've verified this over decent riding time).
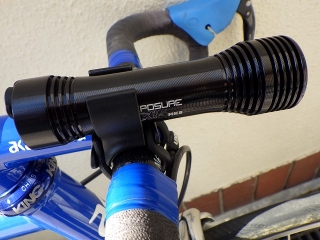
The light's front-to-back position slides easily by hand, so
when pressing the button at the rear to change brightness modes,
you do need to press the front bezel with your index finger
to stabilize it with your thumb.
As for tilting, since I have a 25.8mm handlebar
but most people now have 31.8mm bars,
the silicone band tension is higher on 31.8mm,
so I imagine it should be fine.
USE says not to use this bracket off-road,
but the stronger aftermarket band option
just has the handlebar clamp become bolt-mounted;
the C-clip section on the light side is the same.

The biggest reason I bought an Exposure light this time
is this.
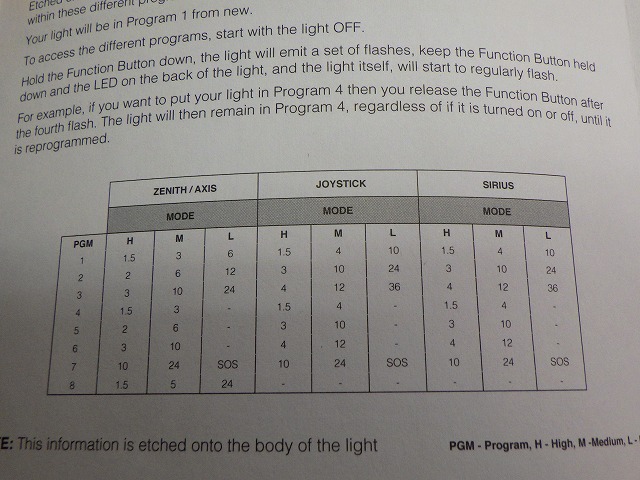
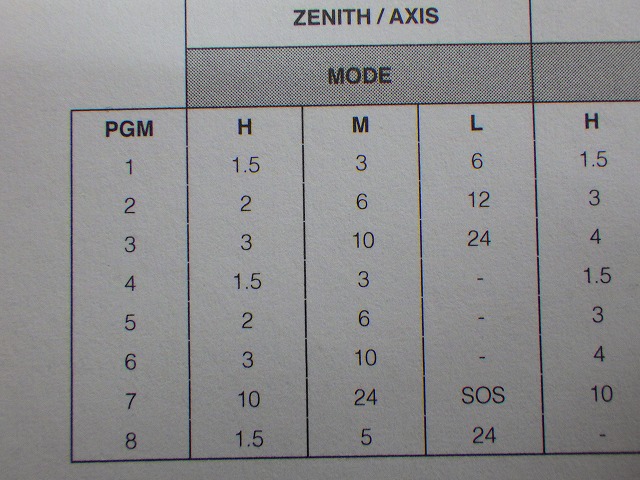
The table shows examples with Zenith/Axis, Joystick, and Sirius.
Zenith is currently the Zenith MK2 model—its bulb section is larger than
the current Axis with max 1300 lumens, as is the
Diablo MK13 with max 1900 lumens, and even larger,
up to 2100 lumens.
The feature of changing modes by tapping that I mentioned earlier
is on Zenith, Axis, and Diablo—three models.
Diablo also has a Diablo SYNC (currently MK4)
that connects via Bluetooth for light settings
and coordinating on/off between helmet and handlebar lights,
but SYNC doesn't have the tap feature.

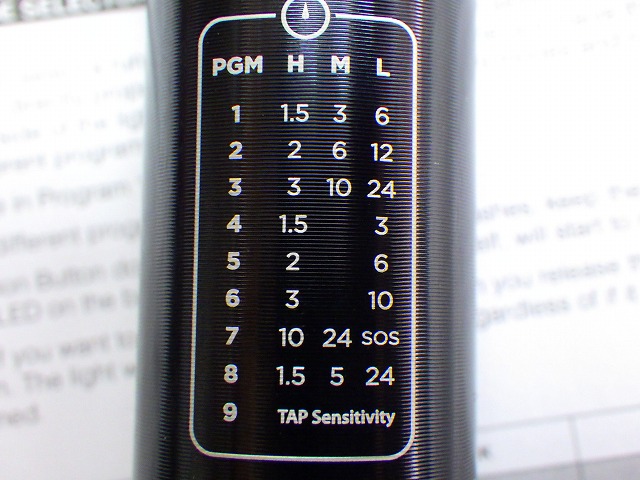
Exposure lights have eight modes consisting of
two or three different runtime durations from full charge (equal to brightness)
and you can select any of these modes.
The shortest runtime is 1.5 hours,
at which brightness is rated 1300 lumens
(the exact lumens for other runtimes aren't published).
I really hate Cateye's Hyper Constant
(now called Daytime Hyper Constant),
and when using the VOLT 800 trying to switch from low to high
you have to go through Hyper Constant first, which I find really annoying.
Cateye's cycle computers have a "Programmable Display" feature
that lets you hide (skip) display items arbitrarily,
and I've always thought they should do the same for lights.
It's possible this inability is due to a USE patent, though.
I selected PGM (Program) 5 from the table above.
A mode that switches between 2 hours and 6 hours brightness.
These are all steady modes; flashing can be toggled by double-clicking
but I won't use it.
The brightness change is crisp and immediate when getting brighter,
and when getting dimmer there's a slight delay after button operation,
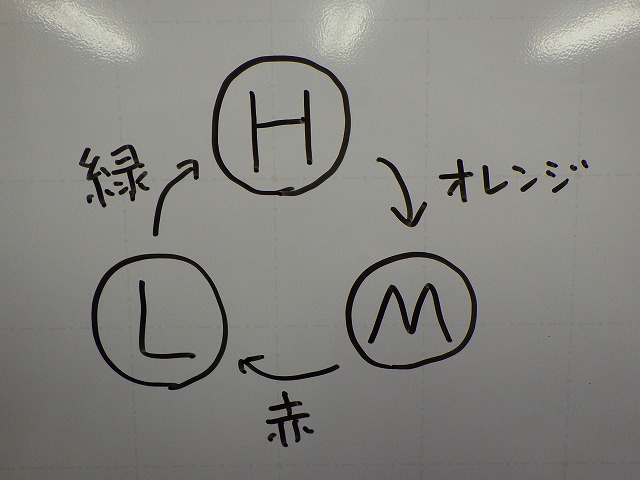
with a gradual, smooth dimming.
While lit, the rear indicator lights continuously green, amber, or red
depending on battery level
(strictly speaking: green lit→green flashing→amber lit→amber flashing→
red lit→red flashing, so flashing also occurs).
The power consumption of that indicator itself, though minimal, is a concern.
Amber is translated directly from the English term on the Japanese manual
that comes with official products from the Japanese distributor.
Visually it looks more orange than yellow, so
I'll call amber "orange" from now on.
The table shows runtime from full charge for High (H), Medium (M), and Low (L)
for each mode, and for two-runtime programs,
it says H and M are being switched.
But that's not strictly accurate.
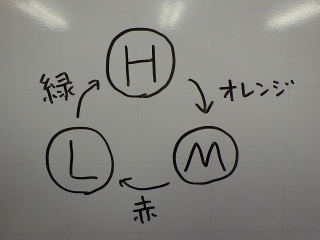
Apart from the battery-level indicator lighting at the rear,
when brightness is switched, the rear lights momentarily change color.
As shown in the figure, switching to H shows green, M shows orange,
and L shows red.
I mentioned choosing Program 5 with 2 and 6 hours earlier,
but with these two, certainly the 2-hour setting is brighter,
though the brightness difference doesn't seem to match
a 3x runtime difference.
The 2-hour and 6-hour settings are hard to distinguish in places
with some street lighting even though it's nighttime
(in pitch-black mountain roads the difference is obvious).
So this feature of the rear light clearly showing which mode
is very helpful.
When the selected program has three brightness levels,
it's as shown in the figure above, but

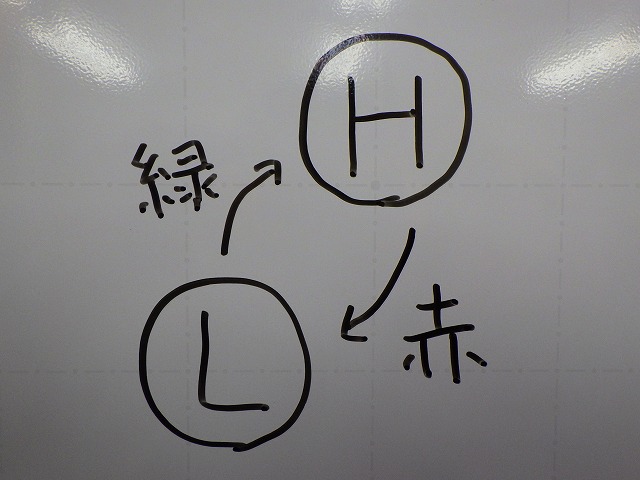
when a mode has only two brightness levels,
dimming lights red and brightening lights green.
What I'm getting at is: the manual says that with two brightness levels,
H and M switch, but the light's behavior shows H and L switching instead.

Looking at the light's body, Program 5's 2 and 6 hours are positioned
at H and L, contrary to the manual.
Incidentally Program 9 is the tap sensitivity setting.
This program switching can be done in about
the time of a traffic light wait, once you know how.
![RIMG1309amx15.jpg</div>
<aside class=]() Technical archive
Technical archive
USE that makes handlebar components, seatposts, and so on.
↑These characters
The image on the left is a seatpost called Alien,
and while the round pipe section comes in titanium or carbon versions,
this one is aluminum. To add, it's something I bought for an old LOOK bike
and it's 25.0mm in diameter. It's held with a single M4 bolt on a yagura
clamp, a lightweight design, and because that single bolt looks like an eye,
USE calls this the Cyclops (one-eyed giant) version.
Later they released a two-bolt yagura version,
and they sold the yagura as a spare part for existing Cyclops users,
which I have as well, but that's also a lightweight design with two M3 bolts.
The image on the right is a stem called Atom,
and the top of the handlebar clamp side is closed off,
so it can only be mounted at the very top of the steering column,
though a later version became a standard stem.
Although not pictured, under the stem I use a USE part called the Apple Star,
which is a spacer-like piece that applies pressure to the steering column.
I really like the design,
but on my everyday bike the position doesn't work out,
so for now it's in storage.


Before 31.8mm diameter became standard, the clamp diameter was generally 26.0mm,
but this stem is for the old ITM and old 3T at 25.8mm diameter.
I had used this stem on a three-roller trainer bike thinking that
even if sweat got on the stem, salt damage wouldn't reach
the top cap area like on a standard stem,
but the handlebar clamp diameter was 26.0mm,
so when I was tightening the bolt one time, the bottom side of the stem
body cracked with a loud snap.
It seems they make it very precisely at 25.8mm diameter,
and the forging is so hard that conversely it becomes brittle.
The stem in the image is a replacement I purchased,
buying the very last one from a distributor's inventory of the same length.

USE is an acronym for Ultimate Sports Engineering,
and this mitochondria-like thing is the USE logo.
It says use1.com but that's an old domain;
currently it's been switched to exposure-use.com.
Exposure means being exposed to sunlight, wind, rain,
and other natural elements, or to be revealed,
and it also has photographic meaning as exposure.
Currently USE operates bike parts as the Ultimate brand,
and separately has Exposure for lighting products,
and also a brand called OLAS.
OLAS is an acronym for Overboard Location Alert System,
a wearable device brand that alerts with sound and light when someone
falls overboard from a small vessel (notifications also go to phones of people on board).
It seems to be intended for leisure on small cruisers
and sailing yacht sports,
and while Japanese bicycle distributors probably don't carry it,
the OLAS brand has a product called MOB Carbon—
a waterproof, water-floating cylindrical light
with 1000 lumens brightness and carbon body. I want it.
From that Exposure brand,
I bought a front light called the Axis.
Exposure categorizes their handlebar-mounting brackets
that bolt down securely by size and brightness as road or MTB use,
but lights like this Axis with silicone band-fixed handlebar brackets
are categorized as "helmet use."
It assumes helmet mounting as the default,
with handlebar mounting as an option you can also do.
Models similarly categorized as helmet use include
Diablo and Joystick,
and there's also a model called Sirius
that's roughly the same size as Joystick but categorized as road use.

With Exposure,
light model names become a legacy name tradition,
and by having MK (mark) numbers after the model name,
you can clearly distinguish old from new.
The model in the image is, so to speak,
the eighth-generation Exposure Axis.
Exposure's light pricing is high,
and because they probably judge that in the Japanese market
dominated by the Cateye empire, these don't sell well,
USE's Japanese distributors
don't actively stock Exposure lights.
It's not that distribution agreements are broken,
but for the past 2-3 years they seem to only source by special order
rather than regular stock.
In fact, even this Axis was the last one,
so this article won't serve as promotion anyway.
I mentioned earlier that Exposure lights clearly show what generation they are,
but if I list them in order of Japanese distributor stock / current home site models,
it goes:
Sirius MK2 / MK10
Joystick MK15 / MK16
Axis MK8 / MK9
Diablo MK10 / MK13
The Axis MK8 in the photo above is black anodized,
but current models are all gun metal gray anodized,
making it immediately clear from external appearance that this isn't the latest.
I bought the Axis MK8 knowing this, partly because
it made sense to shop at the official distributor as a matter of principle,
and also because without a purchase history of USE lights,
I couldn't buy optional parts.

According to the Japanese distributor, the Axis MK8 is
maximum 1250 lumens,
but the box says 1300 lumens.
Since the Axis MK9 is also 1300 lumens,
perhaps the earlier Axis MK8 was 1250 lumens.

↑It comes in a case like this,
and there's space between the case and the bulb side (left in the image)
probably because they share the case with the Diablo,
whose bulb section is larger than the Axis.
Exposure lights seem to hide the fact that they're a USE-related brand,
but on the light's bezel there is a logo after all.


Images of the rear of the light.
The silvery metal section is the operation/setting button,
and the charging port is covered with a waterproof cap
with the grand name of Storm Cap.
When I looked it up, "Storm Cap" isn't actually a generic term.
It's the same kind of thing as when Stans calls the fibrous material
in their sealant "Crystal."
I didn't buy these this time, but optional accessories exist
like a wired remote switch that plugs into this charging port
and a red LED rear light for the rear.

Since this is a helmet-use-category product,
it comes with an adapter for helmet mounting.

The included plastic M6 bolts come in
two different lengths so that the upper and lower parts
won't interfere with each other
(leaving the bolt threads exposed between them).
The Axis has a feature where tapping (lightly striking) the body
changes the brightness mode, and the tap sensitivity can be adjusted
from sensitive to dull in three steps,
and you can turn off the tap feature entirely.
The manufacturer says to turn off the tap feature when using it as a handlebar light
(I actually did turn it off).
I initially thought the presence or absence of the tap feature
was what distinguished helmet lights from others,
but the Joystick, categorized as helmet use, also lacks
the tap feature, as does the Sirius, which is handlebar-categorized from the start.
As for the helmet mounting bracket, it has an odd number of holes
(with a hole in the middle), and helmets with holes
preferably near the crown seem best suited for mounting.

Looking at just the plastic M6 bolt,
I can't think of anything but bad uses.
Back in the day, XC MTBs with metal suspension fork steerers
would sometimes use a multi-pressure anchor and top cap
instead of a starfangled nut to remove headset play,
then remove both the anchor and cap for weight savings.
A state where you could see the front tire through the hollow column.
Of course loosening the stem would reintroduce play,
but interestingly sometimes it stays tight even just riding it.
Apparently the constant pressure is necessary.
So if you want to make your bike absurdly light,
you can use a metal bolt to take up headset play, fix the stem,
then replace the top cap bolt with plastic
and tighten it gently.
A similar example would be taking out a crank
on a square-taper BB with a steel bolt, then switching to an aluminum bolt.
Don't apply the clamping force with an aluminum bolt
(large-diameter hollow aluminum bolts like those on the 7700 Dura-Ace
or Rotor 3D cranks are a different story).
By the way, the top cap bolt on my sub-4kg bike
is made from what I call "moon rock"—a mysterious alloy.
I won't post an image, but for weight per unit length,
I've never seen anything lighter in the metal category.
It's surely heavier than plastic though.

A safety strap is included to prevent accidental loss.
I won't use it, but now that they've included it,
losing it without using it is the user's responsibility I suppose.
Even as a helmet light, it comes with one silicone band
handlebar bracket.

Rubber grips for the handlebar contact surface are also included.
They don't come pre-attached.
As an option, I also bought a spare bracket.
For the spare, the silicone band is red.

The grip rubber is included too.

The bracket itself is asymmetrical front-to-back,
with the silicone band hook at different heights.
The silicone band has a tab on the side you grasp for removal,
making it easy to do so.

But if you hook the tab side to the higher mounting point,
the tab and light interfere with each other, so

it's a silent message that the tab should go on the lower hook.
Road bike parts often have these kinds of silent messages,
with things like bolts of different lengths or diameters on the same part,
or mounting sections that won't align if installed wrong,
but I often see people ignore these and install incorrectly anyway.

In the manufacturer's website images, the lower hook mounting point
is on the rear, so I follow that.
Actually, the instructions also specified this orientation.

Mounted.
The bracket snaps onto the light's C-clip mount,
and while it moves slightly by hand,
↑the light position doesn't shift like this, and

↑the light doesn't tilt forward like this
(I've verified this over decent riding time).
The light's front-to-back position slides easily by hand, so
when pressing the button at the rear to change brightness modes,
you do need to press the front bezel with your index finger
to stabilize it with your thumb.
As for tilting, since I have a 25.8mm handlebar
but most people now have 31.8mm bars,
the silicone band tension is higher on 31.8mm,
so I imagine it should be fine.
USE says not to use this bracket off-road,
but the stronger aftermarket band option
just has the handlebar clamp become bolt-mounted;
the C-clip section on the light side is the same.
The biggest reason I bought an Exposure light this time
is this.
The table shows examples with Zenith/Axis, Joystick, and Sirius.
Zenith is currently the Zenith MK2 model—its bulb section is larger than
the current Axis with max 1300 lumens, as is the
Diablo MK13 with max 1900 lumens, and even larger,
up to 2100 lumens.
The feature of changing modes by tapping that I mentioned earlier
is on Zenith, Axis, and Diablo—three models.
Diablo also has a Diablo SYNC (currently MK4)
that connects via Bluetooth for light settings
and coordinating on/off between helmet and handlebar lights,
but SYNC doesn't have the tap feature.
Exposure lights have eight modes consisting of
two or three different runtime durations from full charge (equal to brightness)
and you can select any of these modes.
The shortest runtime is 1.5 hours,
at which brightness is rated 1300 lumens
(the exact lumens for other runtimes aren't published).
I really hate Cateye's Hyper Constant
(now called Daytime Hyper Constant),
and when using the VOLT 800 trying to switch from low to high
you have to go through Hyper Constant first, which I find really annoying.
Cateye's cycle computers have a "Programmable Display" feature
that lets you hide (skip) display items arbitrarily,
and I've always thought they should do the same for lights.
It's possible this inability is due to a USE patent, though.
I selected PGM (Program) 5 from the table above.
A mode that switches between 2 hours and 6 hours brightness.
These are all steady modes; flashing can be toggled by double-clicking
but I won't use it.
The brightness change is crisp and immediate when getting brighter,
and when getting dimmer there's a slight delay after button operation,
with a gradual, smooth dimming.
While lit, the rear indicator lights continuously green, amber, or red
depending on battery level
(strictly speaking: green lit→green flashing→amber lit→amber flashing→
red lit→red flashing, so flashing also occurs).
The power consumption of that indicator itself, though minimal, is a concern.
Amber is translated directly from the English term on the Japanese manual
that comes with official products from the Japanese distributor.
Visually it looks more orange than yellow, so
I'll call amber "orange" from now on.
The table shows runtime from full charge for High (H), Medium (M), and Low (L)
for each mode, and for two-runtime programs,
it says H and M are being switched.
But that's not strictly accurate.
Apart from the battery-level indicator lighting at the rear,
when brightness is switched, the rear lights momentarily change color.
As shown in the figure, switching to H shows green, M shows orange,
and L shows red.
I mentioned choosing Program 5 with 2 and 6 hours earlier,
but with these two, certainly the 2-hour setting is brighter,
though the brightness difference doesn't seem to match
a 3x runtime difference.
The 2-hour and 6-hour settings are hard to distinguish in places
with some street lighting even though it's nighttime
(in pitch-black mountain roads the difference is obvious).
So this feature of the rear light clearly showing which mode
is very helpful.
When the selected program has three brightness levels,
it's as shown in the figure above, but
when a mode has only two brightness levels,
dimming lights red and brightening lights green.
What I'm getting at is: the manual says that with two brightness levels,
H and M switch, but the light's behavior shows H and L switching instead.
Looking at the light's body, Program 5's 2 and 6 hours are positioned
at H and L, contrary to the manual.
Incidentally Program 9 is the tap sensitivity setting.
This program switching can be done in about
the time of a traffic light wait, once you know how.
 Technical archive
Products Mentioned in This Article
- 🛒 Exposure Axis bicycle front light helmet
- 🛒 USE Alien bicycle seatpost
- 🛒 USE Atom bicycle stem
- 🛒 OLAS MOB Carbon waterproof light
* Amazon affiliate links — prices may vary
Original Japanese post: のむラボ日記 #6525