"I installed a crankset with a smaller outer chainring on a direct-mount bottom bracket frame, and even with the front derailleur positioned all the way down, there's still too much gap between the chainring teeth and the derailleur cage."
So

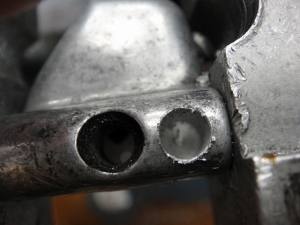
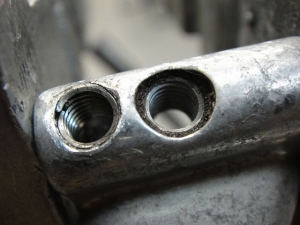
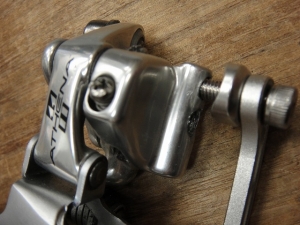
↑A customer brought this to me.
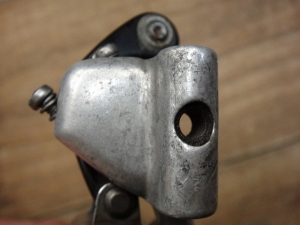
I'm going to add a mounting hole for the front derailleur,
but some frames allow this and some don't.
This one is one of the doable ones.
I can say that confidently because I've done this a few times in the past.

Pilot hole 1.5mm
Pilot hole 3.5mm
Pilot hole 4.8mm
If you were tapping a standard M5 hole (5mm × 0.8mm pitch)
this diameter would be fine, but (correction below), if you cut threads directly into bare aluminum,
the thread ridges will strip easily from repeated tightening and loosening,
so you need to install an iron threaded insert (helicoil).
Addendum: Someone pointed out that the pilot hole for M5 should be 4.2mm.
Thank you.
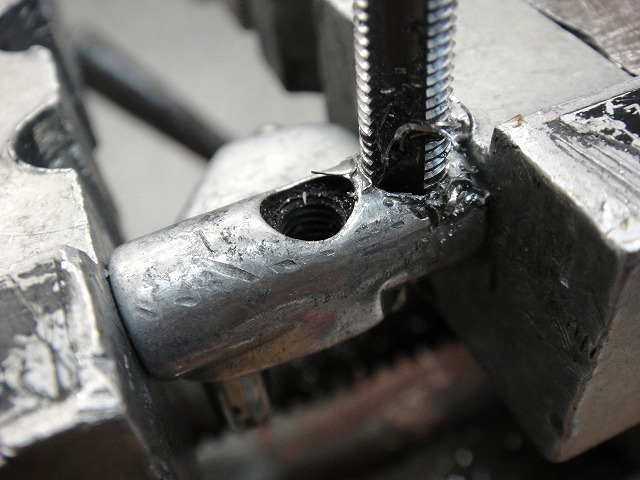
A through-hole would make the work a bit easier,
but I'm making it a blind hole due to structural constraints.
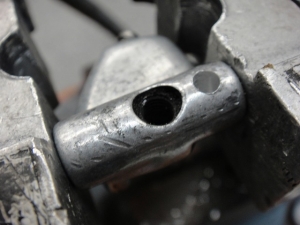
The helicoil hole diameter for M5 is 5.2mm, so I drilled a 5.2mm hole.

If you put an M5 bolt in at this stage, it'll slide in loosely.
The threads won't grip at all.

I tap with a special helicoil tap
to create the helicoil threads.
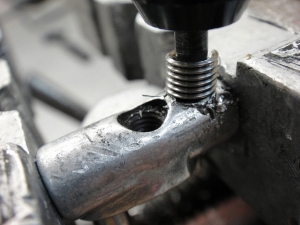
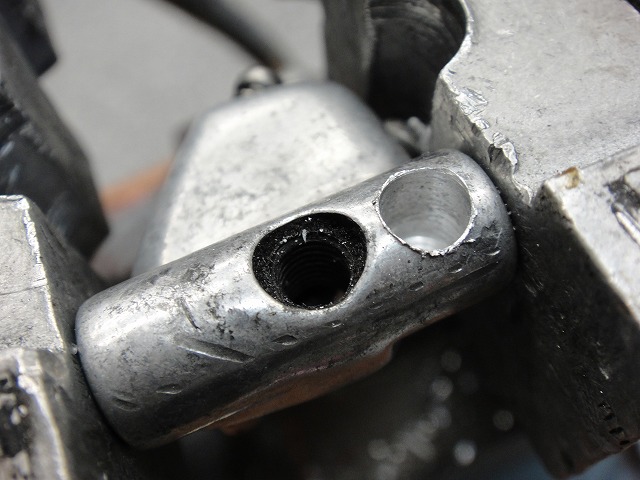
Then I install the helicoil
into the hole.
The inner diameter of this becomes the M5 bolt hole.

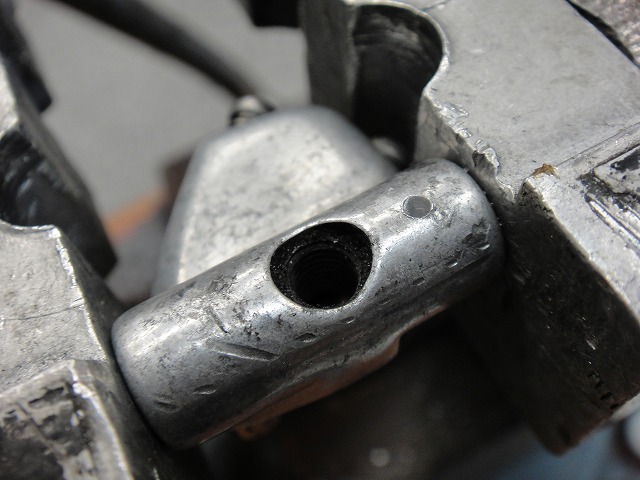
Finally, I run through with an M5 tap to finish the hole.
Actually, the original hole also has a helicoil installed in it.
When you cut threads into bare aluminum, they strip easily,
so parts that see repeated bolting and unbolting
normally have helicoils installed.
Budget models often use embedded hex nuts for this,
but that's also just a way to avoid cutting threads directly into aluminum.

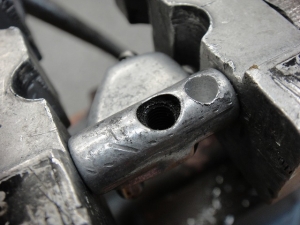
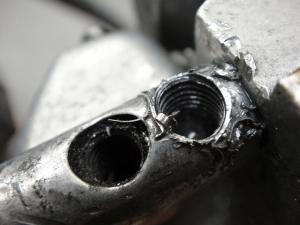
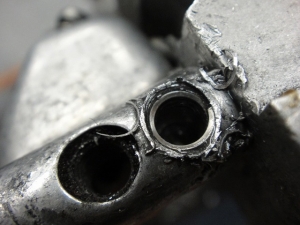
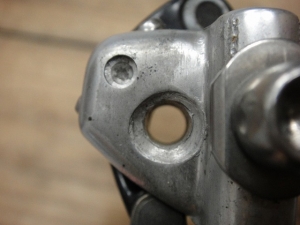
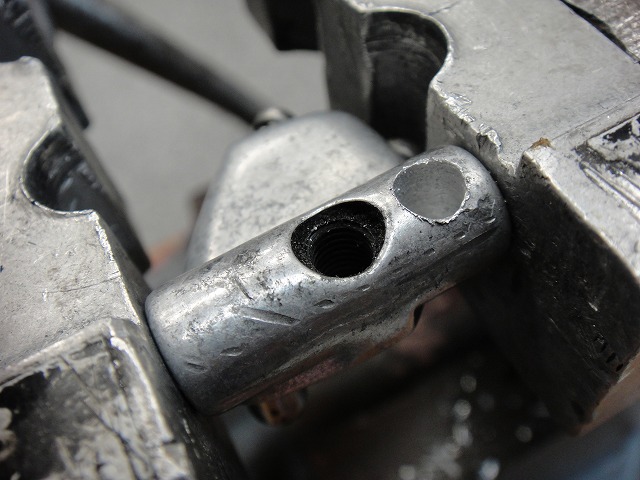
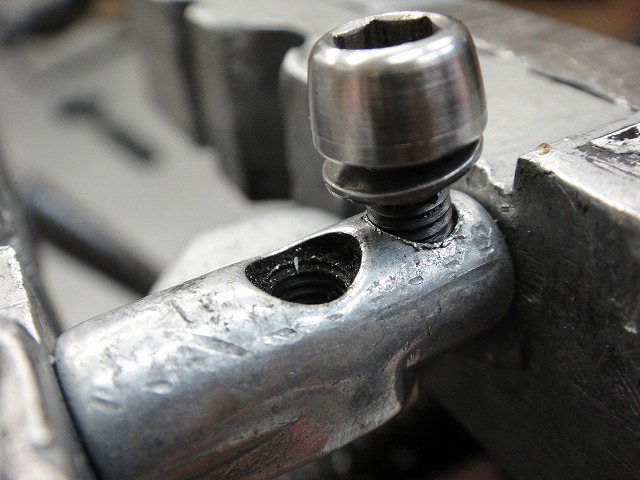
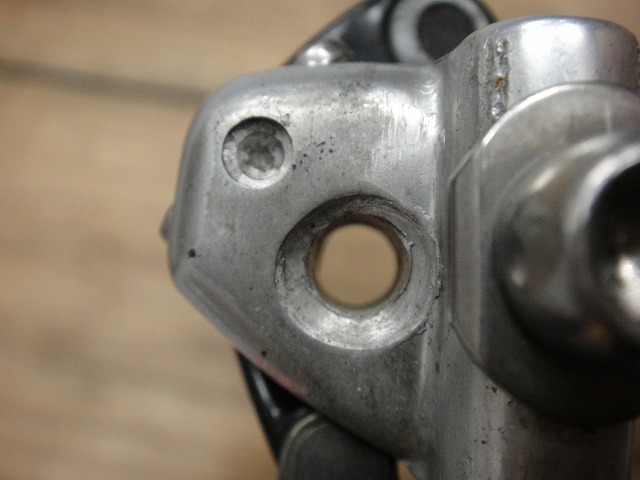
Done.
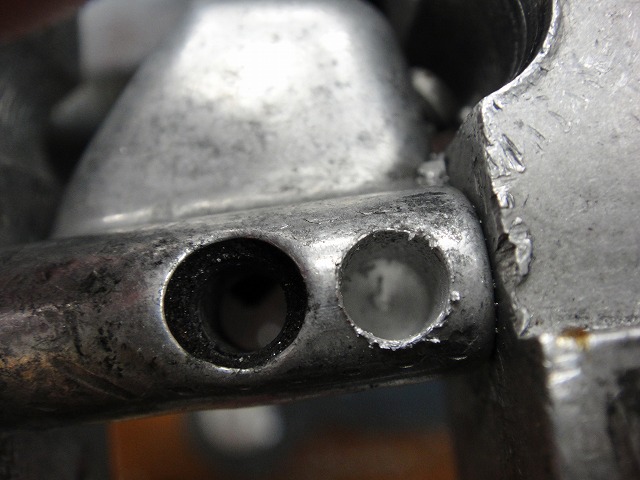
Even though it's a blind hole, I wanted to drill as deep as I could,
so I went right to the limit.
If you look closely, the back side is slightly bulged.

↑Top is an M5 tap, bottom is an M5 helicoil tap.

↑This is the helicoil I'm installing.
They come in various thread diameters and lengths.
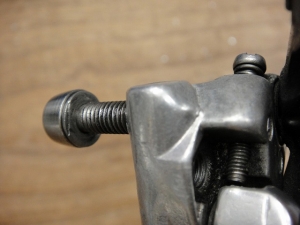
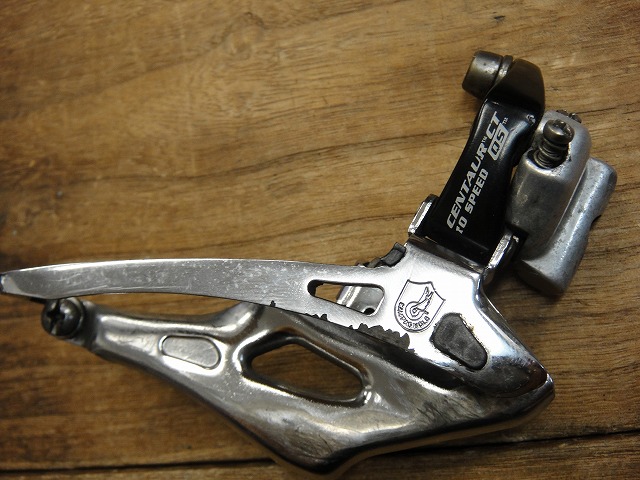
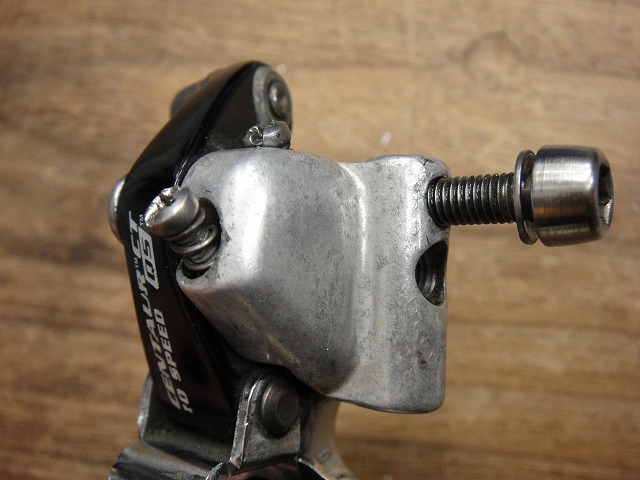
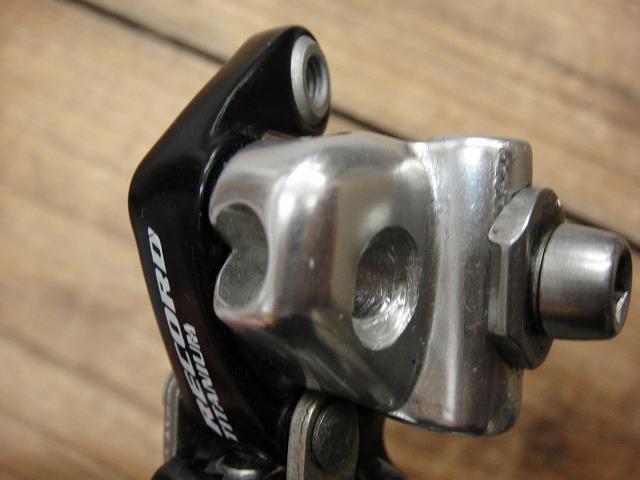
The previous generation Campagnolo front derailleur had a pantograph cage that could be disassembled,
so you could change the direct-mount and clamp specs,
but current models are crimped so you can't do that.
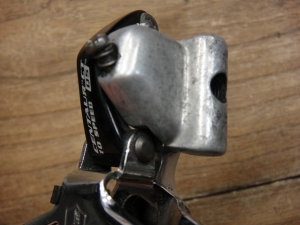
This one was an older model, so I disassembled it to drill the hole, but
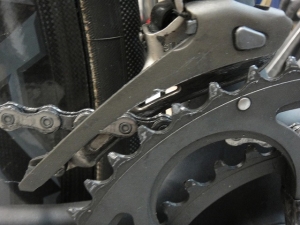
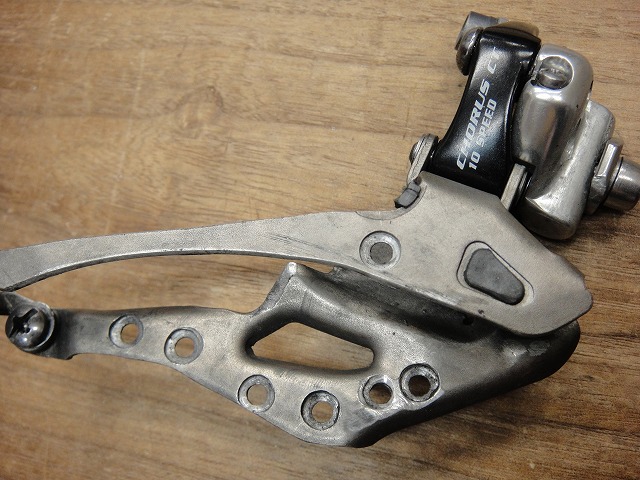
with current models I drill the hole while the derailleur is assembled.
(The image above shows an example with a current model)
Shimano front derailleurs up to the 7800 generation had clearance to drill a new hole,
but from the 7900 generation onward, the upper part of the mounting pad was cut away,
so this modification isn't possible.

With Campagnolo front derailleurs, I've got a pretty good sense of what I can and can't modify.
(Posting images like this shows I probably shouldn't.)

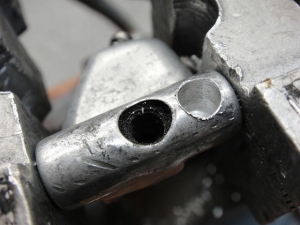
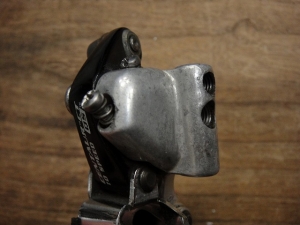
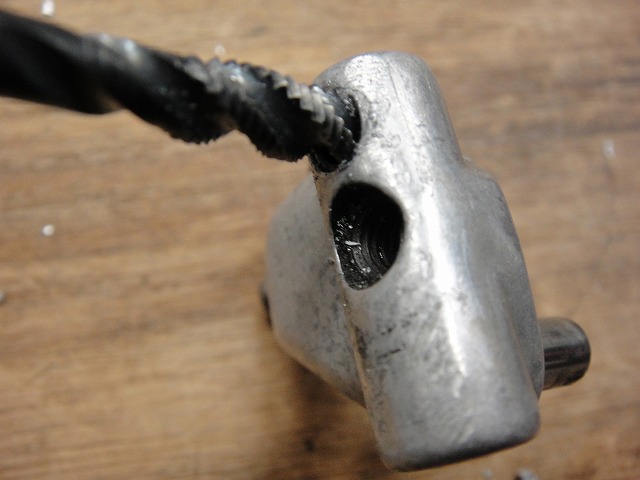
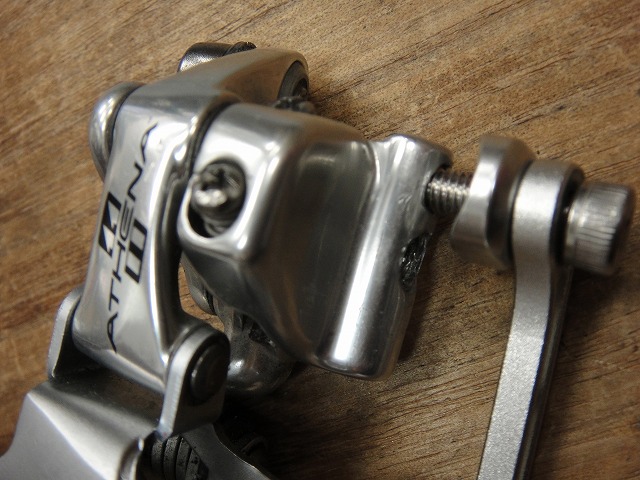
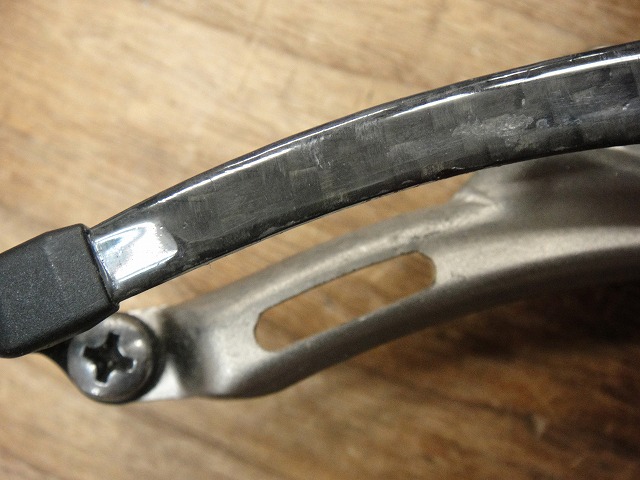
As for the through-hole in the main body,
I know exactly where to position it so it doesn't interfere with the two mounting bolts.


↑This one's a bit more aggressive.

Also, that slot was drilled after the fact.

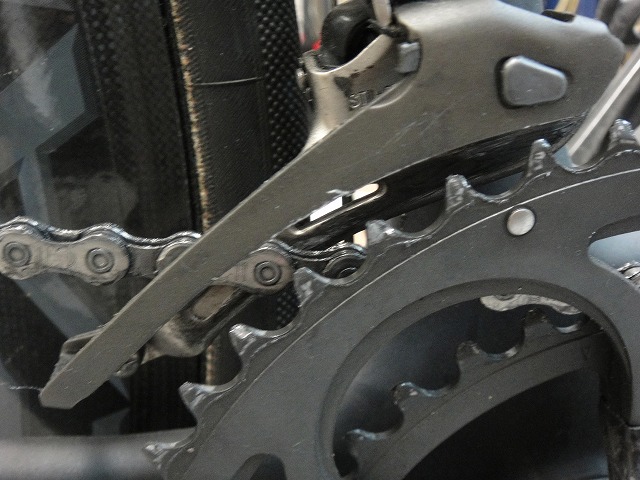
I found some unused photos while organizing my camera's memory card, so I'll throw these in too.
Tooth engagement correction.
So
↑A customer brought this to me.


I'm going to add a mounting hole for the front derailleur,
but some frames allow this and some don't.
This one is one of the doable ones.
I can say that confidently because I've done this a few times in the past.
Pilot hole 1.5mm

Pilot hole 3.5mm
Pilot hole 4.8mm
If you were tapping a standard M5 hole (5mm × 0.8mm pitch)
this diameter would be fine, but (correction below), if you cut threads directly into bare aluminum,
the thread ridges will strip easily from repeated tightening and loosening,
so you need to install an iron threaded insert (helicoil).
Addendum: Someone pointed out that the pilot hole for M5 should be 4.2mm.
Thank you.
A through-hole would make the work a bit easier,
but I'm making it a blind hole due to structural constraints.
The helicoil hole diameter for M5 is 5.2mm, so I drilled a 5.2mm hole.
If you put an M5 bolt in at this stage, it'll slide in loosely.
The threads won't grip at all.
I tap with a special helicoil tap

to create the helicoil threads.

Then I install the helicoil

into the hole.
The inner diameter of this becomes the M5 bolt hole.
Finally, I run through with an M5 tap to finish the hole.

Actually, the original hole also has a helicoil installed in it.
When you cut threads into bare aluminum, they strip easily,
so parts that see repeated bolting and unbolting
normally have helicoils installed.
Budget models often use embedded hex nuts for this,
but that's also just a way to avoid cutting threads directly into aluminum.

Done.

Even though it's a blind hole, I wanted to drill as deep as I could,
so I went right to the limit.
If you look closely, the back side is slightly bulged.
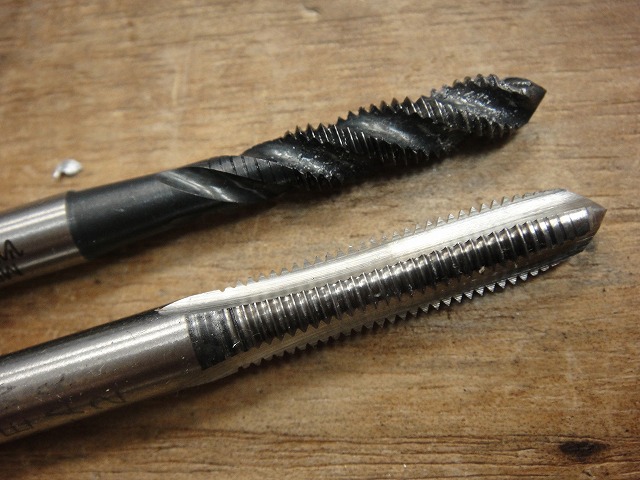
↑Top is an M5 tap, bottom is an M5 helicoil tap.
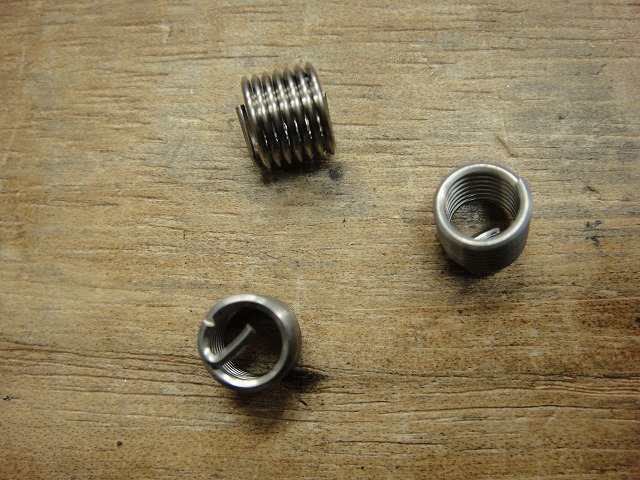
↑This is the helicoil I'm installing.
They come in various thread diameters and lengths.
The previous generation Campagnolo front derailleur had a pantograph cage that could be disassembled,
so you could change the direct-mount and clamp specs,
but current models are crimped so you can't do that.
This one was an older model, so I disassembled it to drill the hole, but
with current models I drill the hole while the derailleur is assembled.
(The image above shows an example with a current model)
Shimano front derailleurs up to the 7800 generation had clearance to drill a new hole,
but from the 7900 generation onward, the upper part of the mounting pad was cut away,
so this modification isn't possible.
With Campagnolo front derailleurs, I've got a pretty good sense of what I can and can't modify.
(Posting images like this shows I probably shouldn't.)

As for the through-hole in the main body,
I know exactly where to position it so it doesn't interfere with the two mounting bolts.

↑This one's a bit more aggressive.
Also, that slot was drilled after the fact.

I found some unused photos while organizing my camera's memory card, so I'll throw these in too.
Tooth engagement correction.