I write about wheels and such things here all the time,
and while I do slip in some pretty niche topics (like this post's title),
I'm really grateful that so many people look at this favorably.
But there are plenty of things I don't write about here, things I choose not to share.
My exclusive knowledge, you might say—my trade secrets.
I try never to touch on those subjects,
though unconsciously some might be leaking out.
Ah, the W freehub definitely crosses that line.
Ah well. Nobody's gonna copy it anyway.
Today I'm going to intentionally write about trade secrets for the first time.
Though after all this buildup, if people say "I already knew that" or "you can figure that out if you think about it,"
then I'm just going to be embarrassed.
The topic is 4-6 lacing.
When you first attempt 4-6 lacing, you'll probably fail.
If you could spot the trap in 4-6 lacing on your first try and handle it,
I'd honestly say that's pretty impressive.
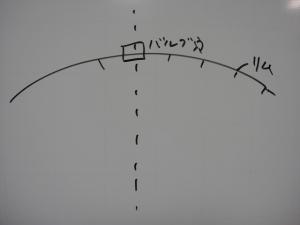
↑I can't decipher these scribbles now. Just skip over them.
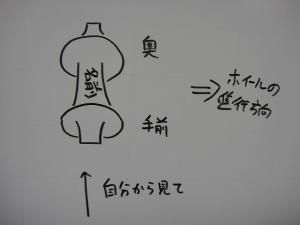
When a hub has the model name written on the hub shell, we typically lace it
—with a few exceptions like White Industries from the other day—
so the name reads correctly when facing the direction of travel.
In the diagram, if rightward is the direction of travel,
then the near flange as seen from my position corresponds to the right side from the direction of travel.
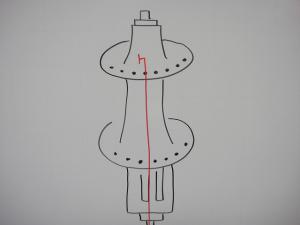
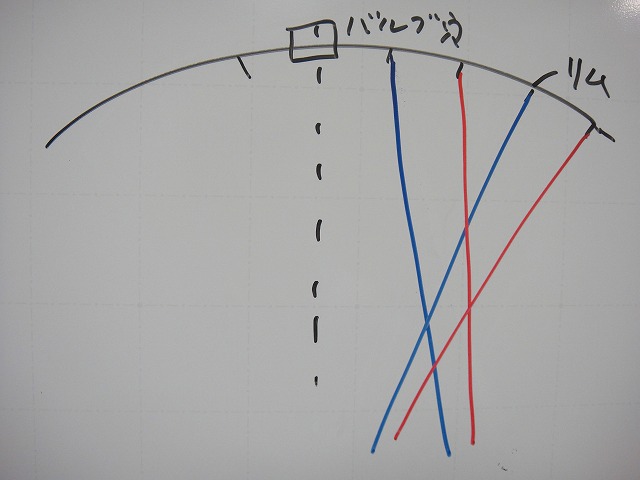
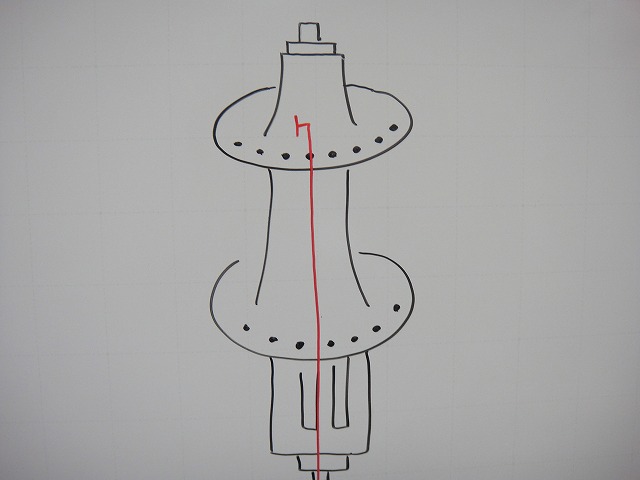
In the diagram above I've done inpoke, but that doesn't really matter.
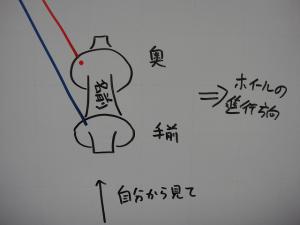
I'll mark spokes coming out of the near flange in blue,
and spokes coming out of the far flange in red.
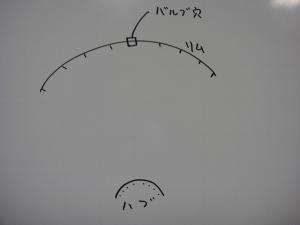
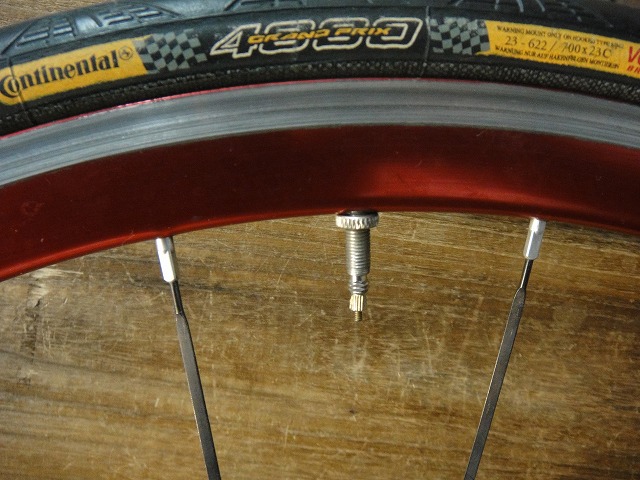
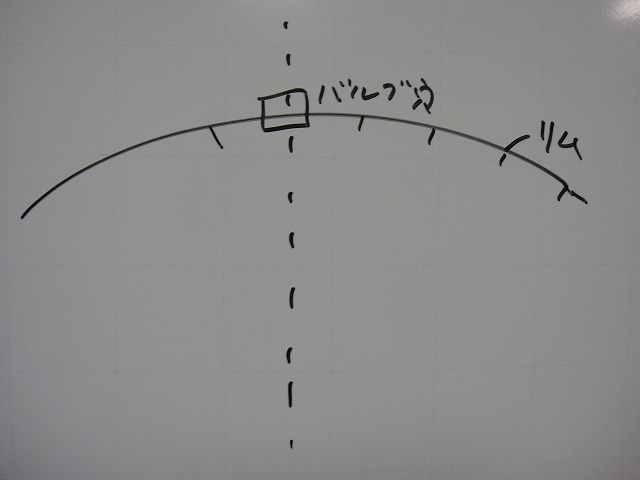
Consider the state with the valve hole at the top of the wheel.
Except on deep-section rims, the spoke holes on the rim are alternately offset left and right.
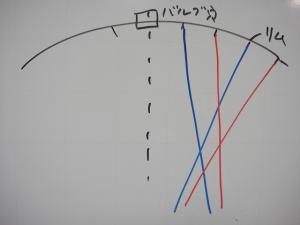
If you do inpoke radial lacing aligned with the rim's hole offset pattern, then...
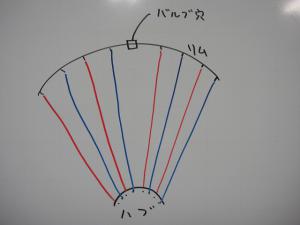
↑...you get this.
When the valve is at the top, the spoke one position to the right of the valve
comes from the far flange as seen from my position.
This relationship doesn't change even if you flip the wheel like a top while keeping the valve at the top
(or in other words, look at it from the opposite side).


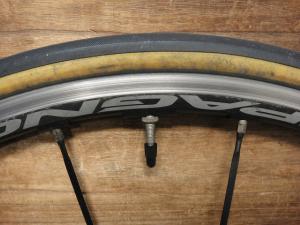
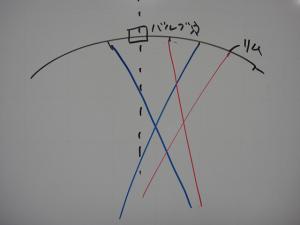
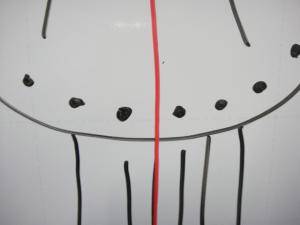
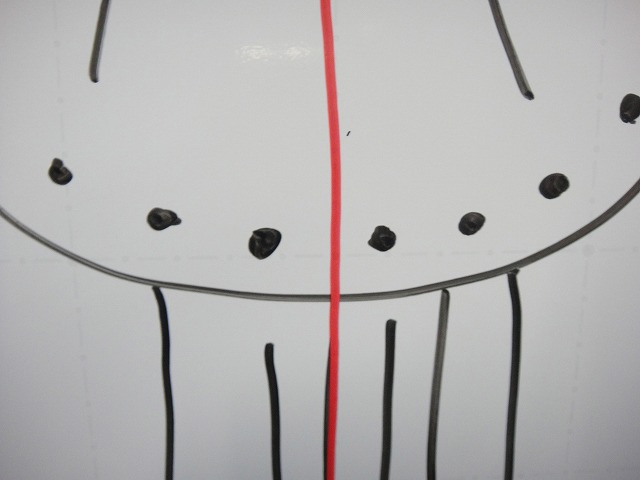
↑It's a bit hard to tell from the side angle, but
the spoke to the right of the valve comes from the far flange as seen from my position.
Most rims have this hole offset pattern,
so I'll call this rim pattern going forward: the "standard rim."
Nothing's inherently "correct" about it,
but almost all commercial hand-laced rims have this hole pattern.
I should mention the exceptions too. Pre-built wheels from Campagnolo, Fulcrum,
Mavic Cosmic Carbone Ultimate and many others actually have the opposite hole offset pattern.
In the image above, the spoke to the right of the valve comes from the near flange as seen from my position.
I'll call this type the "reverse rim."
With radial lacing, whether it's a standard rim or reverse rim,
there's nothing particularly difficult if you pay attention to the hole offset.
But with tangent lacing, it's not so simple.
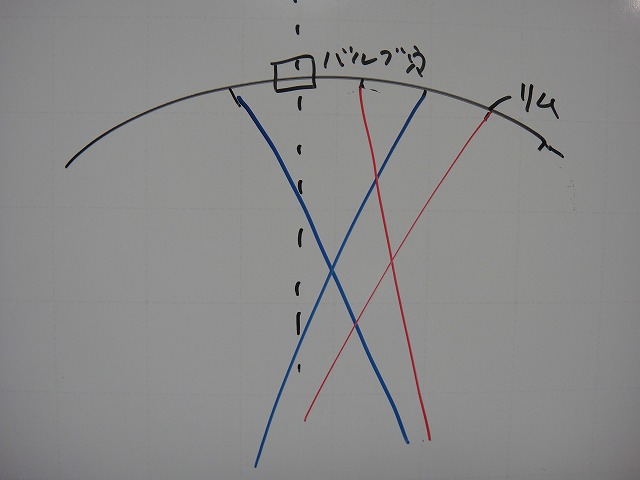
↑The 4 spokes shown in the image form one unit.
Tangent lacing is built on this repeating pattern: 5 units for 20H, 6 units for 24H, 7 units for 28H, and so on.
When this 4-spoke unit straddles the valve hole, it looks pretty ugly.
In diagram form...
↑This is fine,
↑but this is not.
So how do you lace so the 4-spoke unit doesn't straddle the valve hole,
while still doing Italian or JIS lacing?
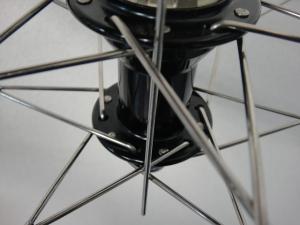
When building a wheel, you first thread spokes through the hub.
You thread one spoke from top to bottom.
When you hang the spoke parallel to the hub axle,
the spoke holes on the opposite flange are phase-offset.
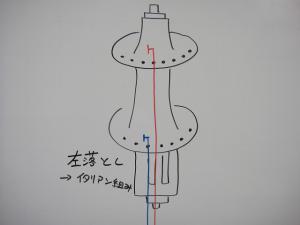
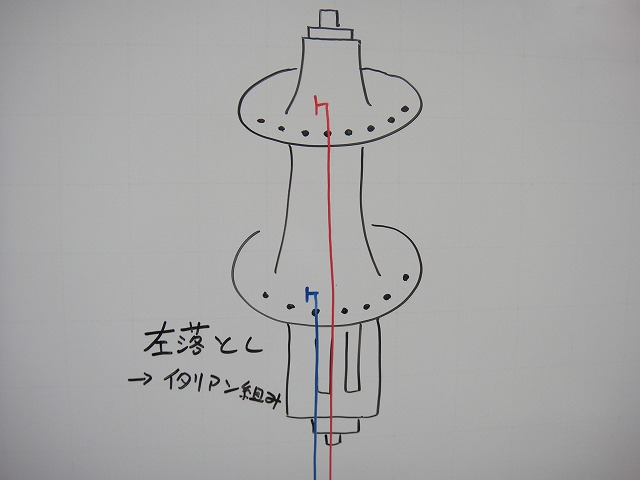
At this point, you drop the spoke to the left.
This is called a left drop.
Then you thread spokes alternately as inpoke and outpoke.
If you do Italian lacing this way, the 4-spoke unit won't straddle the valve hole.
Left drop is for Italian lacing—this is fundamental.
If you do JIS lacing with a left drop, you'll get a valve-straddling unit.
If you do JIS lacing with a right drop, the unit won't straddle.
If you do Italian lacing with a right drop, the unit will straddle.
Right drop is for JIS lacing.
And here's the critical part:
Left drop Italian and right drop JIS only work this way with standard rims.
Since most hand-laced rims are standard rims, many people don't realize this.
When doing tangent lacing on a reverse rim, the phase shifts by one, so
you get right drop Italian and left drop JIS instead.
Older Colima rims were reverse rims (though they're different now).
If you source a 24H rim and build it by hand without knowing this,
you'll fall into the trap.
From here it's trade secrets.
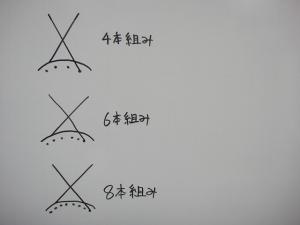
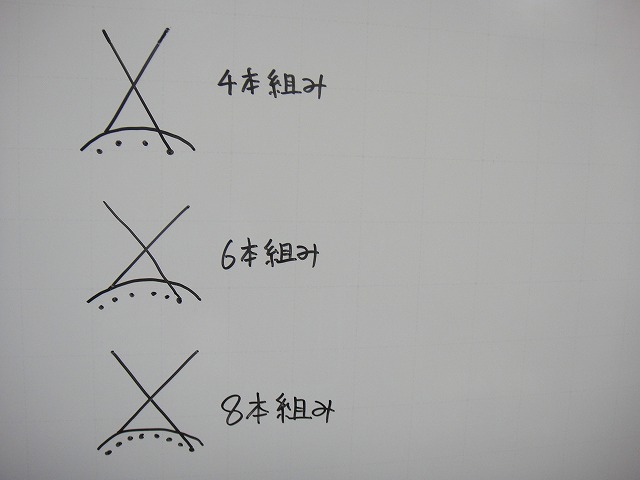
I've diagrammed 4-spoke, 6-spoke, and 8-spoke groupings.
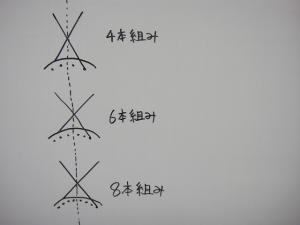
Draw a line through the spoke intersecting point and the hub axle to bisect the spoke holes.
That's the dotted line in the diagram.
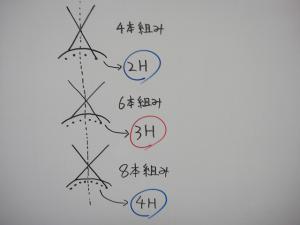
Write down the number of spoke holes on one side of the line.
4-spoke gives 2H, 6-spoke gives 3H, 8-spoke gives 4H.
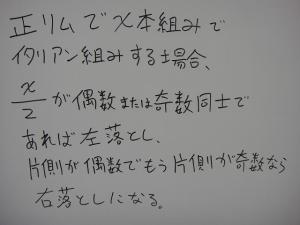
What matters is this:

Whether that number is even or odd.
When both are even or both are odd, you can lace Italian on a standard rim with a left drop.
4-4 lacing, 6-6 lacing, 8-8 lacing and other symmetrical patterns have no issues.
With 4-6 lacing or 6-8 lacing, you get a phase offset between the flange pairs' inpoke/outpoke sequence,
so on a standard rim you need a right drop Italian instead.
In other words, for Italian lacing with 4-6 lacing,
you must use a right drop.
Yeah, that's gonna be on the test.
Since this is a trade secret, I thought if shops or individuals saw this blog and tried 4-6 lacing,
they'd probably stumble here at some point. So I figured I'd write it out.
Since most people will never build a 4-6 laced wheel,
it's not particularly vital information, so I figured publishing it was okay.
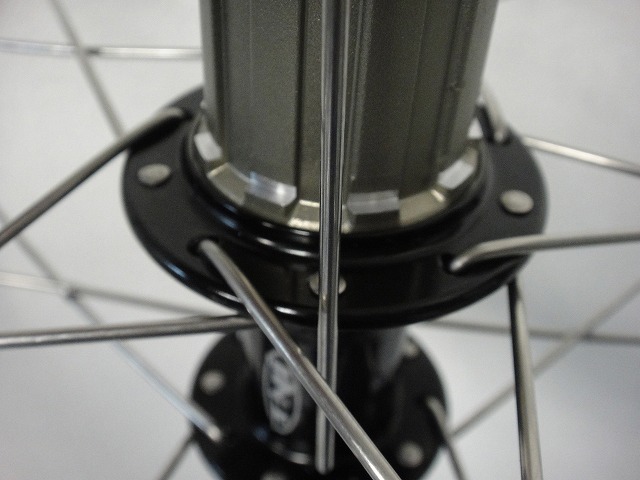
Let me give you a concrete example.
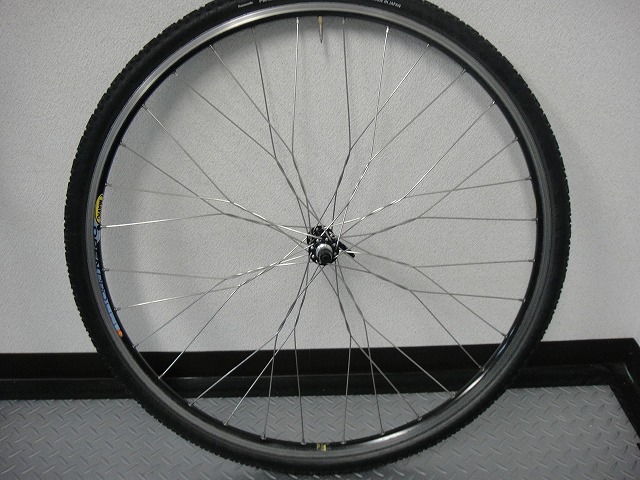
20H
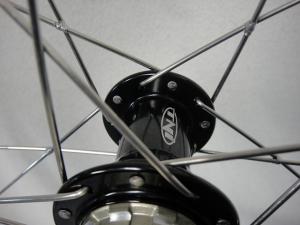
is laced 4-4. You can see the inpokes on both sides face backward in the wheel's upper half
(porcupine direction), so this is Italian lacing.
Along the spoke being dropped, if you hang one spoke
and check against the hub flange's hole offset, you're threading it...
↑...left drop. Left drop Italian.
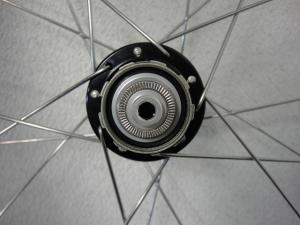
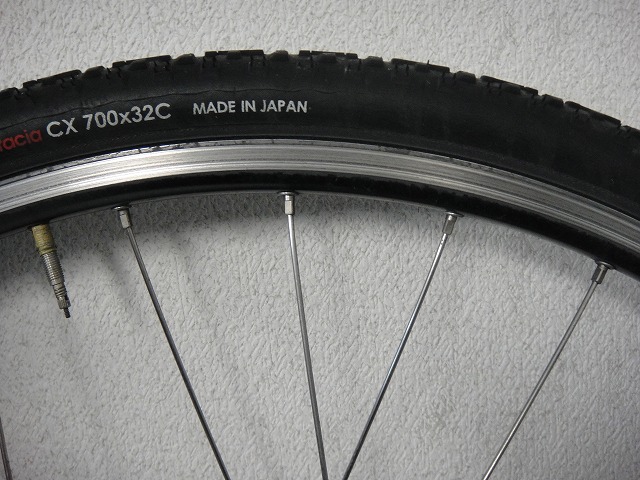
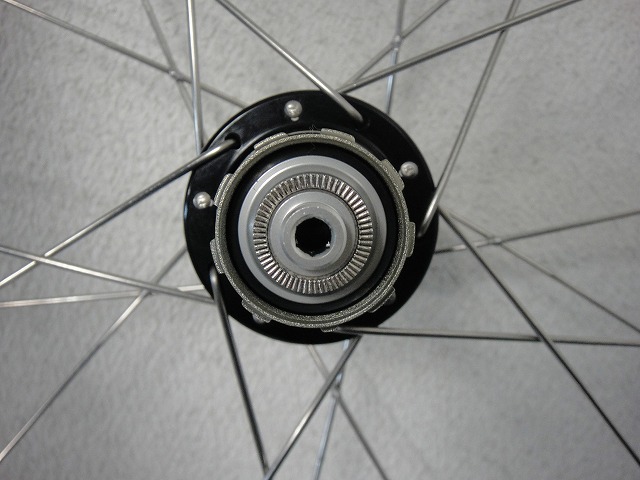
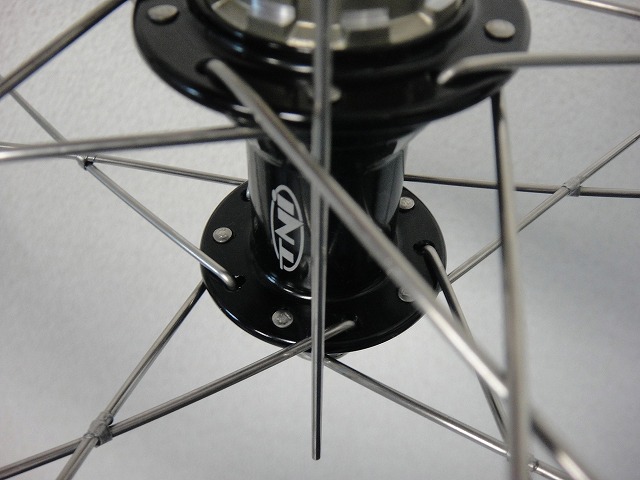
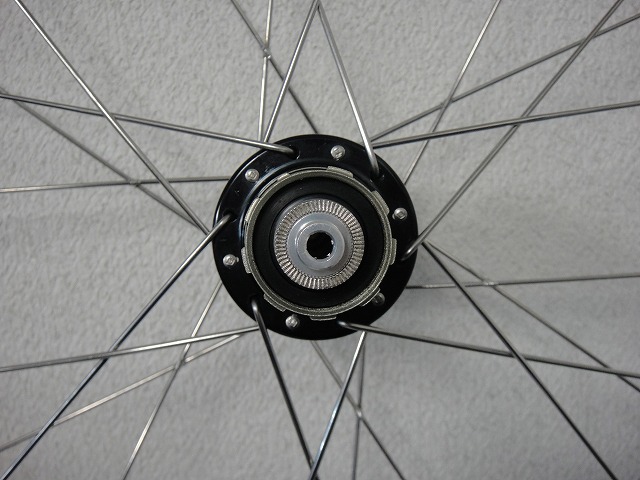
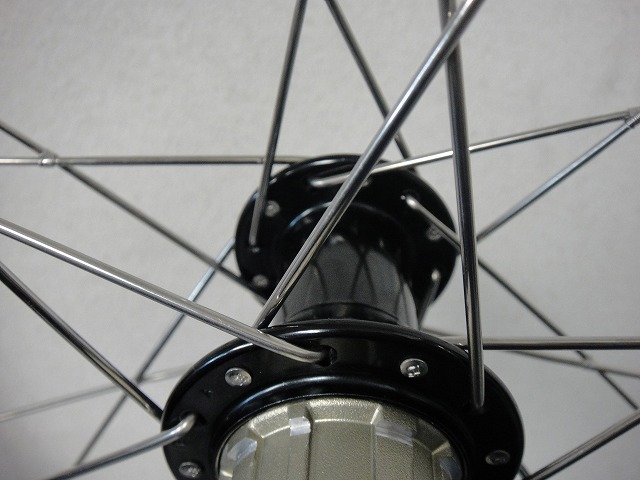
Next, 24H.
↑This is 4-6 Italian lacing, but
↑...it's a right drop.
4-6 lacing uses a right drop for Italian lacing.
So what if you do 4-6 on a reverse rim?
The opposite of the opposite is the same, so reverse rim Italian is left drop.
If you wanted the non-drive side to be 10-spoke Italian lacing at 40H total
with the drive side at 6-spoke, that would be left drop. At 4-spoke or 8-spoke on the drive side, it'd be right drop.
Are you starting to see the pattern?
↑So that's the scribble from the start.
If anyone reading this can decipher it and builds wheels,
please definitely try 4-6 lacing.
and while I do slip in some pretty niche topics (like this post's title),
I'm really grateful that so many people look at this favorably.
But there are plenty of things I don't write about here, things I choose not to share.
My exclusive knowledge, you might say—my trade secrets.
I try never to touch on those subjects,
though unconsciously some might be leaking out.
Ah, the W freehub definitely crosses that line.
Ah well. Nobody's gonna copy it anyway.
Today I'm going to intentionally write about trade secrets for the first time.
Though after all this buildup, if people say "I already knew that" or "you can figure that out if you think about it,"
then I'm just going to be embarrassed.
The topic is 4-6 lacing.
When you first attempt 4-6 lacing, you'll probably fail.
If you could spot the trap in 4-6 lacing on your first try and handle it,
I'd honestly say that's pretty impressive.

↑I can't decipher these scribbles now. Just skip over them.

When a hub has the model name written on the hub shell, we typically lace it
—with a few exceptions like White Industries from the other day—
so the name reads correctly when facing the direction of travel.
In the diagram, if rightward is the direction of travel,
then the near flange as seen from my position corresponds to the right side from the direction of travel.

In the diagram above I've done inpoke, but that doesn't really matter.
I'll mark spokes coming out of the near flange in blue,
and spokes coming out of the far flange in red.

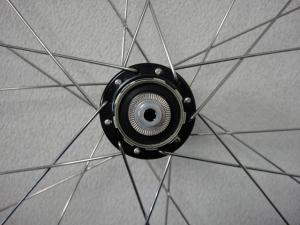
Consider the state with the valve hole at the top of the wheel.
Except on deep-section rims, the spoke holes on the rim are alternately offset left and right.
If you do inpoke radial lacing aligned with the rim's hole offset pattern, then...

↑...you get this.
When the valve is at the top, the spoke one position to the right of the valve
comes from the far flange as seen from my position.
This relationship doesn't change even if you flip the wheel like a top while keeping the valve at the top
(or in other words, look at it from the opposite side).


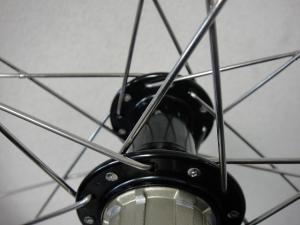
↑It's a bit hard to tell from the side angle, but
the spoke to the right of the valve comes from the far flange as seen from my position.
Most rims have this hole offset pattern,
so I'll call this rim pattern going forward: the "standard rim."
Nothing's inherently "correct" about it,
but almost all commercial hand-laced rims have this hole pattern.

I should mention the exceptions too. Pre-built wheels from Campagnolo, Fulcrum,
Mavic Cosmic Carbone Ultimate and many others actually have the opposite hole offset pattern.
In the image above, the spoke to the right of the valve comes from the near flange as seen from my position.
I'll call this type the "reverse rim."
With radial lacing, whether it's a standard rim or reverse rim,
there's nothing particularly difficult if you pay attention to the hole offset.
But with tangent lacing, it's not so simple.
↑The 4 spokes shown in the image form one unit.
Tangent lacing is built on this repeating pattern: 5 units for 20H, 6 units for 24H, 7 units for 28H, and so on.
When this 4-spoke unit straddles the valve hole, it looks pretty ugly.
In diagram form...
↑This is fine,
↑but this is not.
So how do you lace so the 4-spoke unit doesn't straddle the valve hole,
while still doing Italian or JIS lacing?
When building a wheel, you first thread spokes through the hub.
You thread one spoke from top to bottom.
When you hang the spoke parallel to the hub axle,
the spoke holes on the opposite flange are phase-offset.
At this point, you drop the spoke to the left.
This is called a left drop.
Then you thread spokes alternately as inpoke and outpoke.
If you do Italian lacing this way, the 4-spoke unit won't straddle the valve hole.
Left drop is for Italian lacing—this is fundamental.
If you do JIS lacing with a left drop, you'll get a valve-straddling unit.
If you do JIS lacing with a right drop, the unit won't straddle.
If you do Italian lacing with a right drop, the unit will straddle.
Right drop is for JIS lacing.
And here's the critical part:
Left drop Italian and right drop JIS only work this way with standard rims.
Since most hand-laced rims are standard rims, many people don't realize this.
When doing tangent lacing on a reverse rim, the phase shifts by one, so
you get right drop Italian and left drop JIS instead.
Older Colima rims were reverse rims (though they're different now).
If you source a 24H rim and build it by hand without knowing this,
you'll fall into the trap.
From here it's trade secrets.
I've diagrammed 4-spoke, 6-spoke, and 8-spoke groupings.
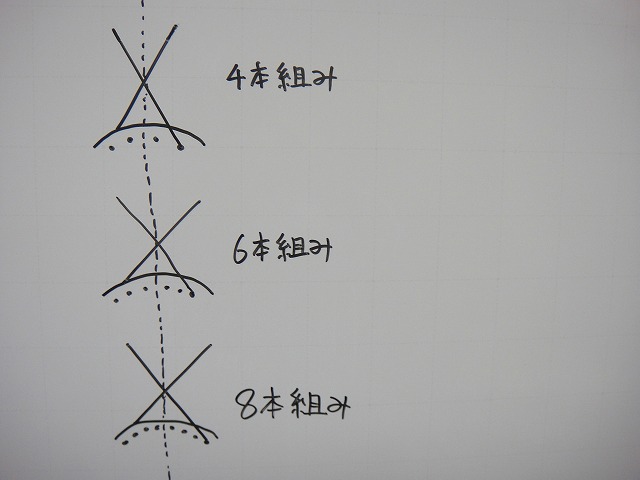
Draw a line through the spoke intersecting point and the hub axle to bisect the spoke holes.
That's the dotted line in the diagram.
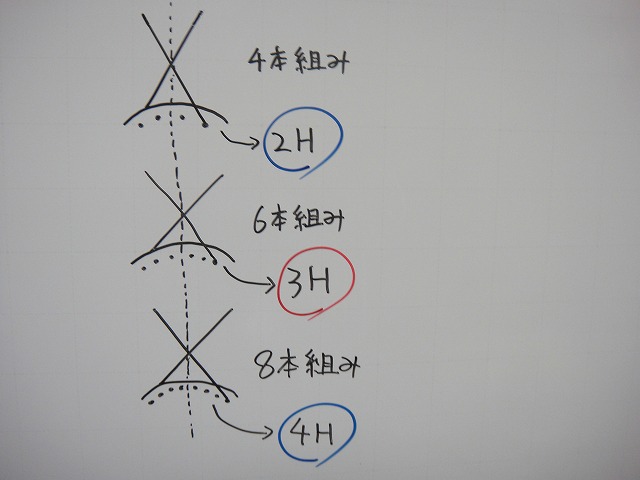
Write down the number of spoke holes on one side of the line.
4-spoke gives 2H, 6-spoke gives 3H, 8-spoke gives 4H.
What matters is this:

Whether that number is even or odd.
When both are even or both are odd, you can lace Italian on a standard rim with a left drop.
4-4 lacing, 6-6 lacing, 8-8 lacing and other symmetrical patterns have no issues.
With 4-6 lacing or 6-8 lacing, you get a phase offset between the flange pairs' inpoke/outpoke sequence,
so on a standard rim you need a right drop Italian instead.
In other words, for Italian lacing with 4-6 lacing,
you must use a right drop.
Yeah, that's gonna be on the test.
Since this is a trade secret, I thought if shops or individuals saw this blog and tried 4-6 lacing,
they'd probably stumble here at some point. So I figured I'd write it out.
Since most people will never build a 4-6 laced wheel,
it's not particularly vital information, so I figured publishing it was okay.
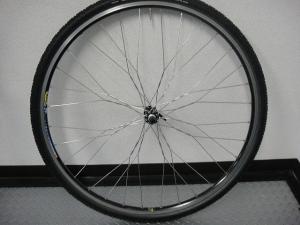
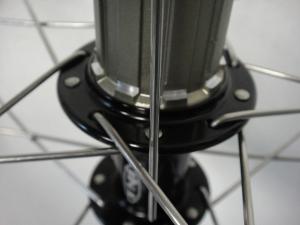
Let me give you a concrete example.
20H
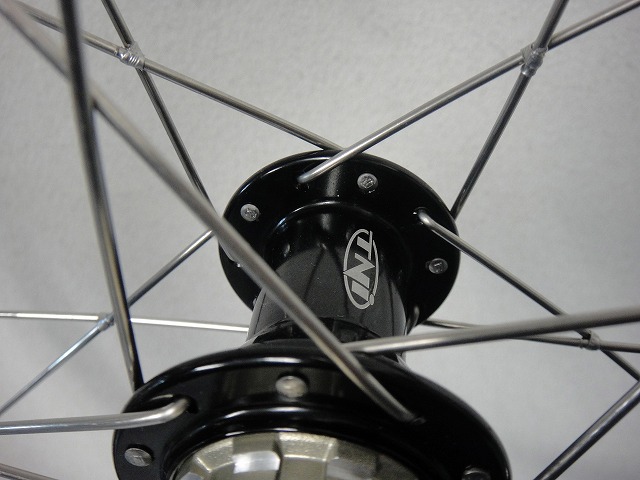
is laced 4-4. You can see the inpokes on both sides face backward in the wheel's upper half
(porcupine direction), so this is Italian lacing.
Along the spoke being dropped, if you hang one spoke
and check against the hub flange's hole offset, you're threading it...
↑...left drop. Left drop Italian.
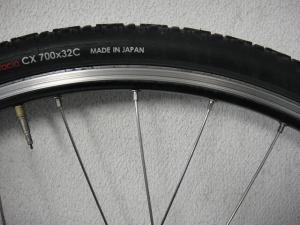
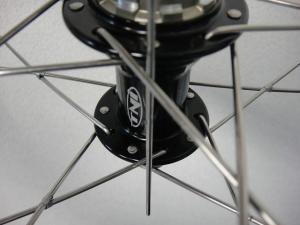
Next, 24H.
↑This is 4-6 Italian lacing, but

↑...it's a right drop.
4-6 lacing uses a right drop for Italian lacing.
So what if you do 4-6 on a reverse rim?
The opposite of the opposite is the same, so reverse rim Italian is left drop.
If you wanted the non-drive side to be 10-spoke Italian lacing at 40H total
with the drive side at 6-spoke, that would be left drop. At 4-spoke or 8-spoke on the drive side, it'd be right drop.
Are you starting to see the pattern?
↑So that's the scribble from the start.
If anyone reading this can decipher it and builds wheels,
please definitely try 4-6 lacing.