The drill is whining!

A customer dropped off a Scott CR-1 with me.
They said, "There's some custom work I'd like you to do."
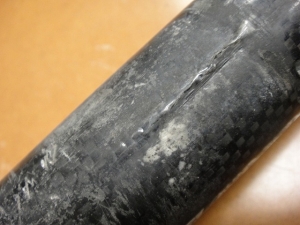
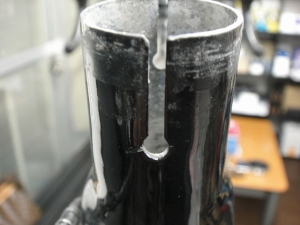
↑The seat clamp tightening is causing
wrinkles in the lightweight seatpost.
It's not that the seat clamp was overtightened,
but with long-term use of thin, lightweight parts, this kind of thing is unavoidable.
According to the customer, this itself isn't really a problem,
but they want to use a lightweight carbon seatpost again anyway,
and they're asking if I could create a slot on the front side of the seat tube too.
The theory is that the clamping stress would be distributed that way.
Just yesterday I wrote about doing irreversible modifications to frames,
but this time it's the customer's strong request. Seriously.
The CR-1 frame has a seat tube inner diameter (seatpost outer diameter) of 31.6mm,
but the seat clamp mounting section outer diameter is 34.4mm, not 34.9mm—
it's a special size.
If you try putting a 34.9mm seat clamp on it, it just slides right on.
So you can't use a two-stage seat clamp that clamps both the frame's 34.9mm and the seatpost's 31.6mm,
and you can't use seat clamps with better geometry either.
By "better geometry" I mean seat clamps with greater vertical width.
(The stock seat clamp already has that type of vertical dimension though...)
There are clamps that offset the slot on the clamp from the frame slot,
but that alone doesn't solve the problem.
The CR-1 was a super-lightweight frame that was all the rage back in the day,
so there are aftermarket seat clamps with 34.4mm inner diameter,
but the ones I know of are carbon and absurdly light—
the king of super-thin stuff—so they won't solve this problem.
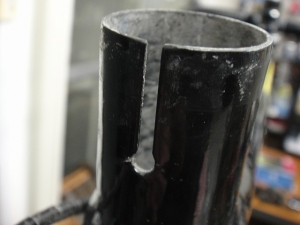
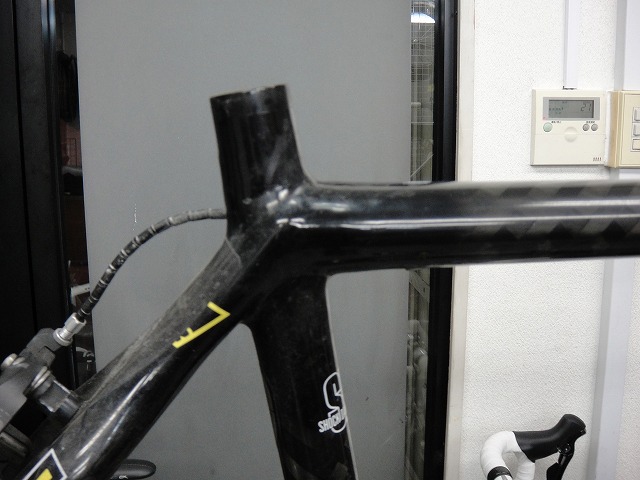
In the end, we decided to add a slot to the front as the customer requested.


The method for creating a new slot:
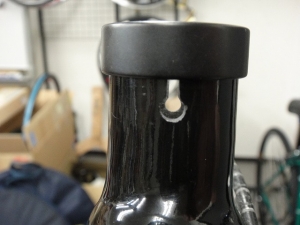
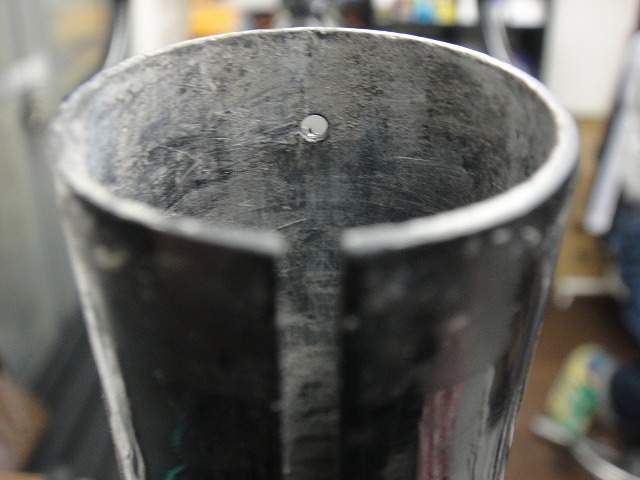
First, I drill a guide hole.
Then

I finish the rest in one go.
For more detailed instructions, search "how to draw an owl."
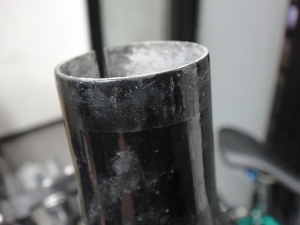
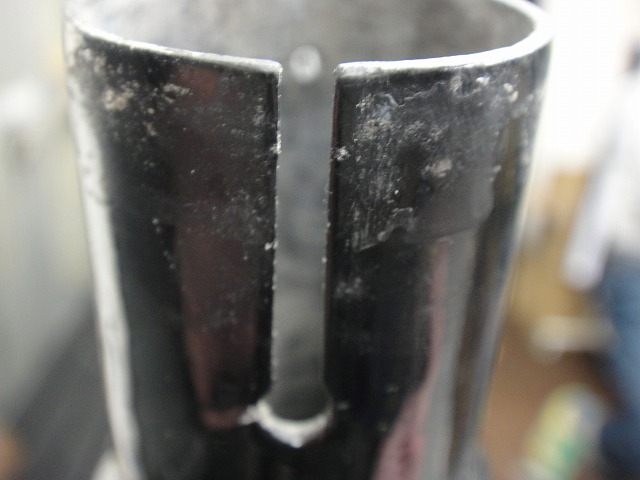
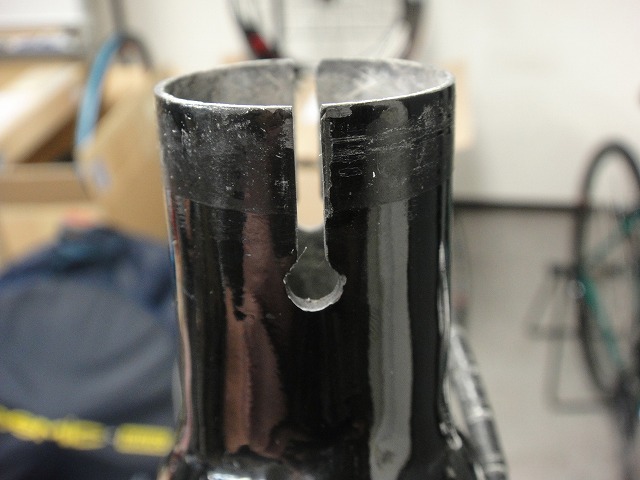
↑View from the back (the side with the original slot)

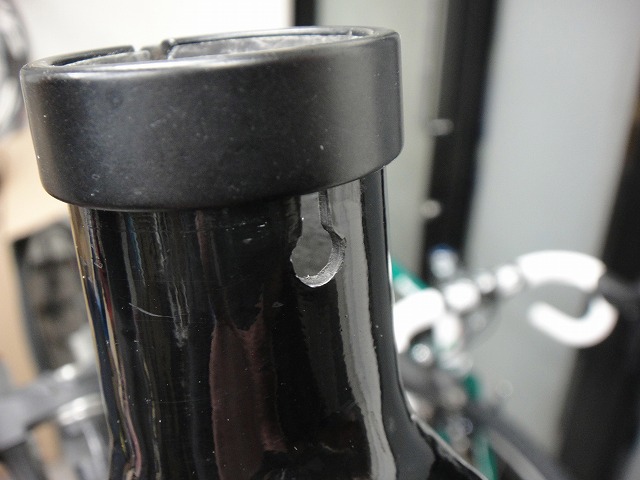
With the seat clamp attached,
it looks pretty good now.
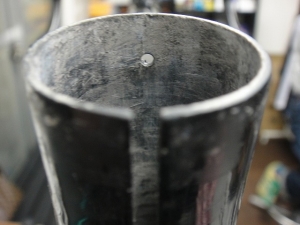
There's a method to line things up perfectly,
so the front and rear slots are positioned exactly right.
A customer dropped off a Scott CR-1 with me.
They said, "There's some custom work I'd like you to do."

↑The seat clamp tightening is causing
wrinkles in the lightweight seatpost.
It's not that the seat clamp was overtightened,
but with long-term use of thin, lightweight parts, this kind of thing is unavoidable.
According to the customer, this itself isn't really a problem,
but they want to use a lightweight carbon seatpost again anyway,
and they're asking if I could create a slot on the front side of the seat tube too.
The theory is that the clamping stress would be distributed that way.
Just yesterday I wrote about doing irreversible modifications to frames,
but this time it's the customer's strong request. Seriously.


The CR-1 frame has a seat tube inner diameter (seatpost outer diameter) of 31.6mm,
but the seat clamp mounting section outer diameter is 34.4mm, not 34.9mm—
it's a special size.
If you try putting a 34.9mm seat clamp on it, it just slides right on.
So you can't use a two-stage seat clamp that clamps both the frame's 34.9mm and the seatpost's 31.6mm,
and you can't use seat clamps with better geometry either.
By "better geometry" I mean seat clamps with greater vertical width.
(The stock seat clamp already has that type of vertical dimension though...)
There are clamps that offset the slot on the clamp from the frame slot,
but that alone doesn't solve the problem.
The CR-1 was a super-lightweight frame that was all the rage back in the day,
so there are aftermarket seat clamps with 34.4mm inner diameter,
but the ones I know of are carbon and absurdly light—
the king of super-thin stuff—so they won't solve this problem.
In the end, we decided to add a slot to the front as the customer requested.

The method for creating a new slot:
First, I drill a guide hole.
Then
I finish the rest in one go.
For more detailed instructions, search "how to draw an owl."

↑View from the back (the side with the original slot)
With the seat clamp attached,
it looks pretty good now.

There's a method to line things up perfectly,
so the front and rear slots are positioned exactly right.