The drill is screaming!

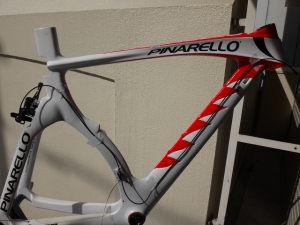
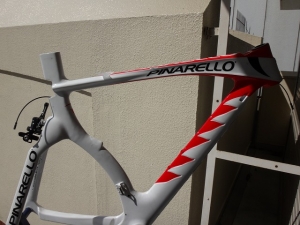
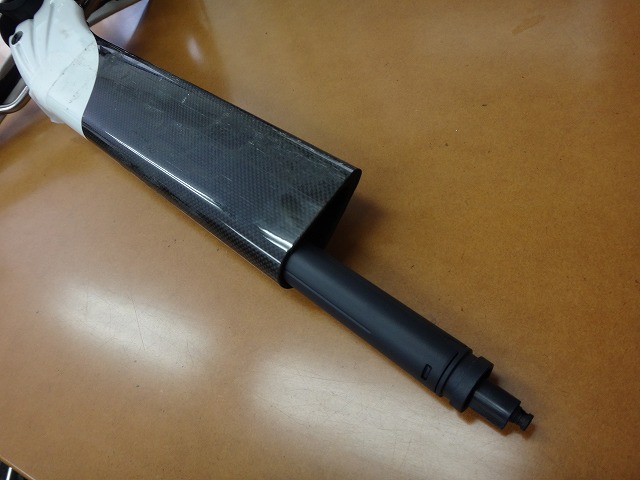
I received a complete Pinarello GRAAL time trial frame for rebuild.
It was originally built with a mechanical Super Record 11-speed drivetrain,
but the owner wants me to convert it to a Shimano electronic groupset
(internal battery and internal junction box configuration).
Just looking at it briefly, I could see there were going to be plenty of problems.
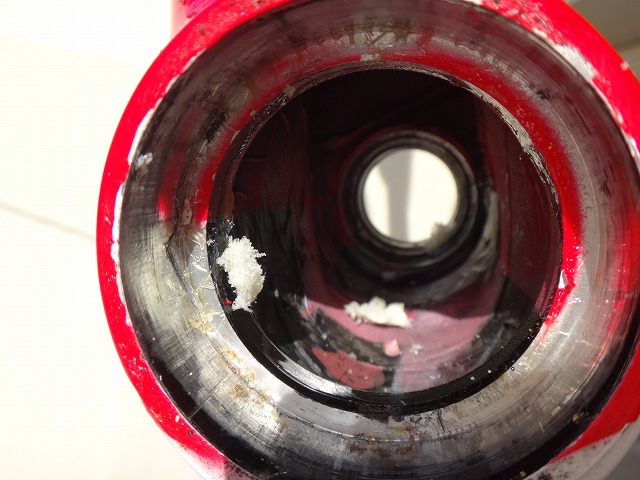
First, the bottom bracket shell is completely sealed.
Second, there's nowhere obvious to fit the internal battery.
It worked out in the end, but initially I was planning to route it through the downtube.
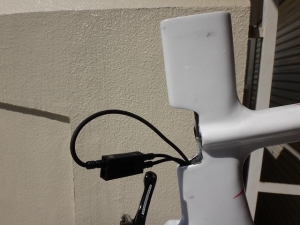
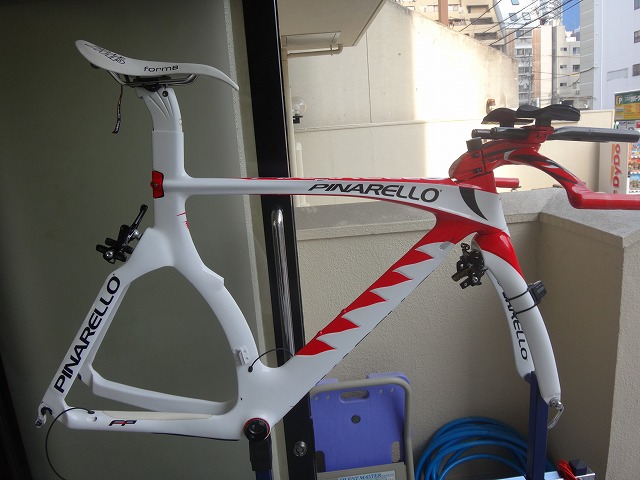
I forgot to photograph the frame before work started, so the image above is basically post-work.
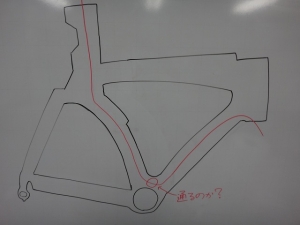
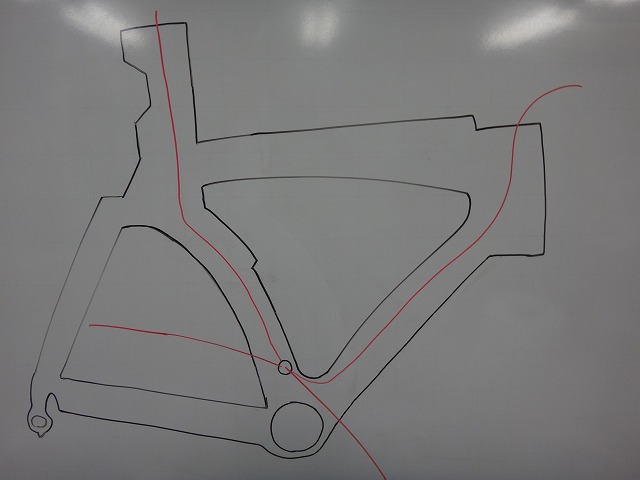
↑First I checked whether the seat tube and downtube are connected
(more precisely, whether there's enough gap for cables to pass through).
Without running a probe wire through, I confirmed by another method that there was definitely a path, but...

↑The probe wire got stuck around this section of the downtube.
(The magnet on the probe wire tip was reacting to something)
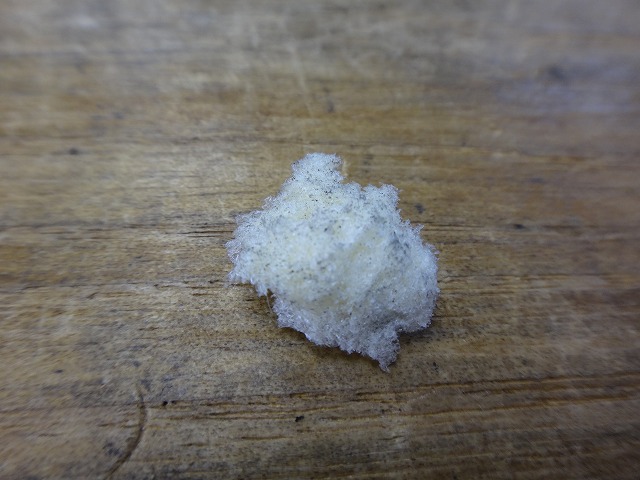
I found that a foam insert was blocking it.
Since it has nothing to do with frame rigidity, I scraped it out.

I modified the probe wire tip into a shape that breaks up the foam,
pushed it through repeatedly, then pointed the head tube downward and shook—
out came the foam.
↑This much
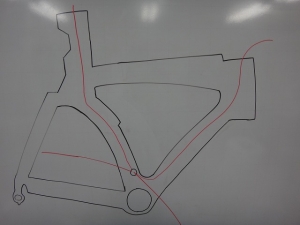
Now that I'd confirmed there's enough gap in the downtube and seat tube for cables,
the next step was to drill the front derailleur hole,
and test threading probe wires from both directions.
I threaded from the downtube side first.
The probe wire is a disposable tool I modified from a Shimano shift cable.
(I call it disposable, but it's not really one-time use)
The wire itself doesn't have magnets or anything—
as shown in the photo, I modify the wire end
so it moves through the frame smoothly and reliably.
It's a small thing, but it makes the workability so much better.

I also threaded from the seat tube side in the same way.
The wire end is shaped like this, same as before.
Oops, both of those photos got cut off.
Man, I wasn't careful. Sorry about that.
↑So it should pass through like this.
The cable length of 1200mm would be enough,
and if not I was planning to go up to the maximum 1400mm,
but it clearly looked sufficient so I went with 1200mm.
It passed through.

Going back in the timeline, I discovered that fitting the internal battery into the seat tube—
which I was pretty sure would be impossible—turned out to be a perfect fit.
With Pinarello's TT frame, the earlier GRAAL model "Montero" has a wider seat post
than the GRAAL, so I'm confident the battery would fit, but it would have some play
that needs shims and anti-rotation measures.
With the GRAAL though, it's nearly perfect fit,
so the anti-rotation and retention work was easy.
As for why I know the Montero's seat post inner diameter,
well that's because... (etc.)

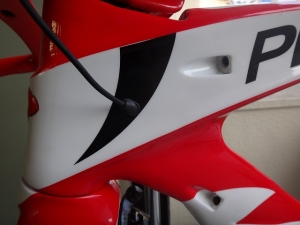
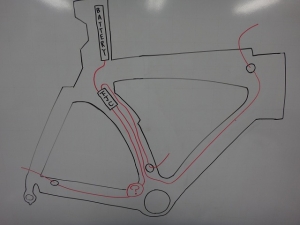
I routed the front derailleur cable.
I drilled the rear derailleur cable port here.
The mechanical groupset cable port goes in a complete tunnel from the head tube,
so I couldn't use it as a guide for the electronic version.
If there was absolutely no chance of ever going back to mechanical components,
I could have just enlarged the original hole, but to be safe I drilled a new one.
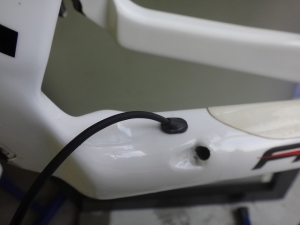
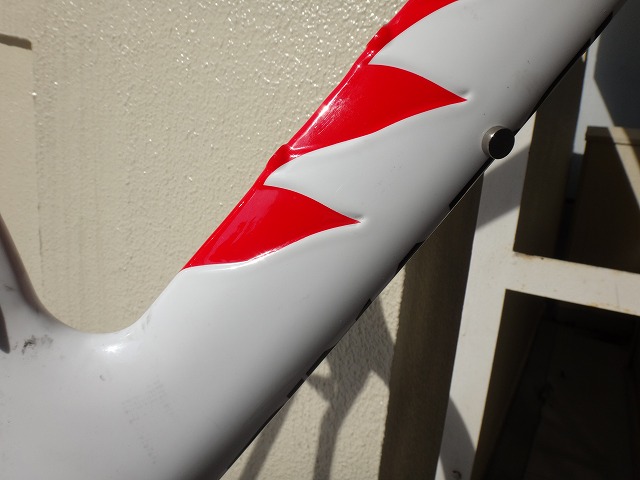
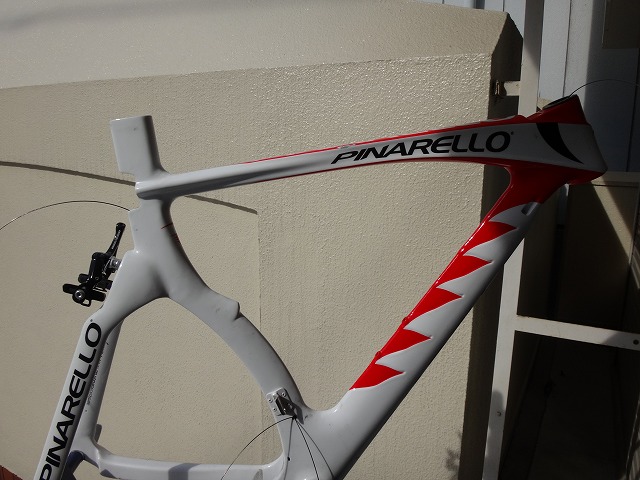
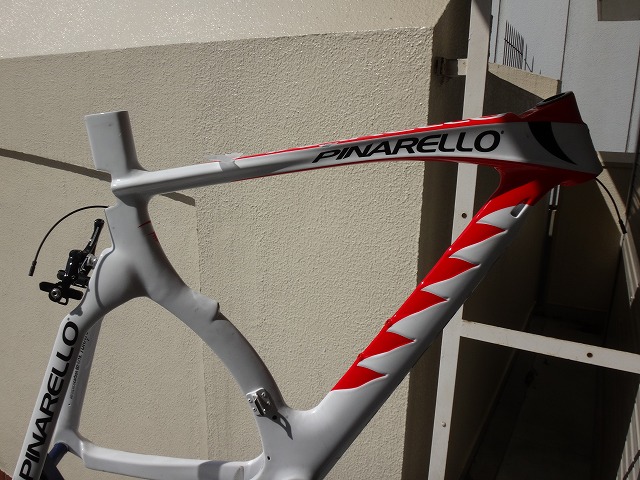
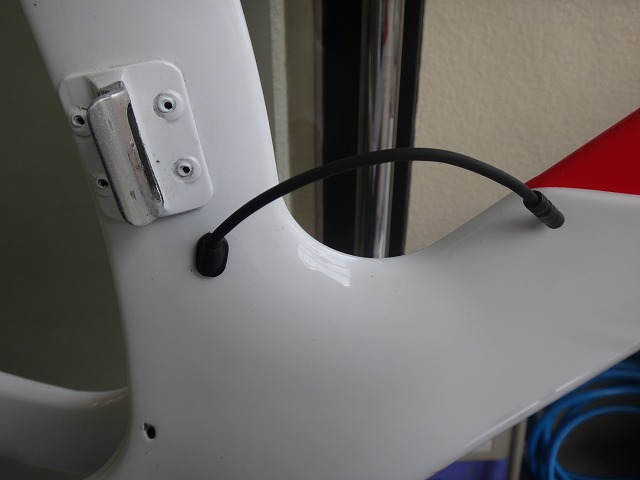
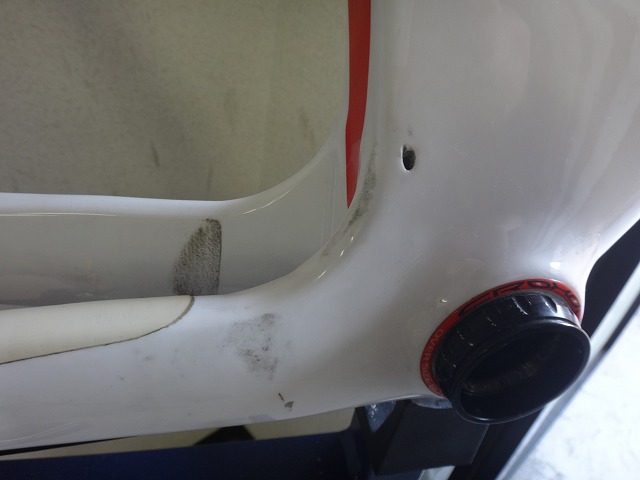
I drilled the upper junction port here.
Pretty much anywhere would work, but I chose this spot in the black paint area
so the grommet wouldn't be as visible.
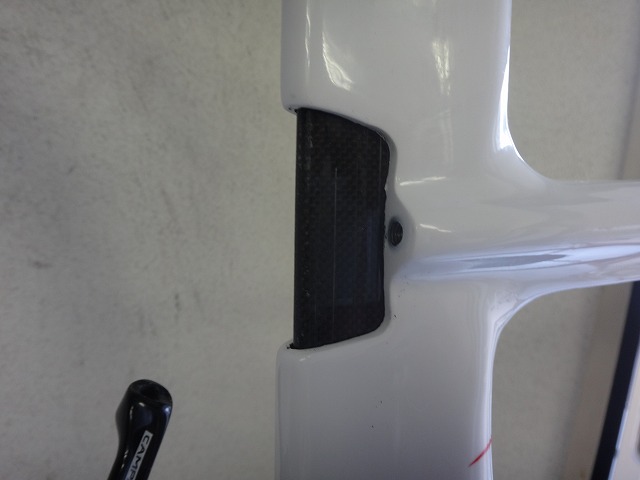
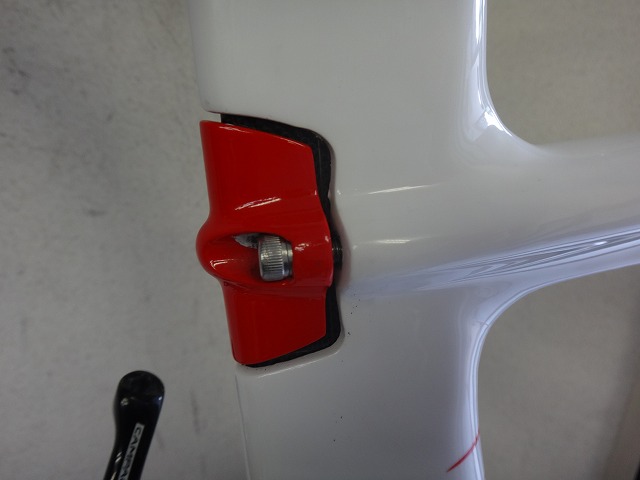
The lower junction goes here, recessed into the seat tube.

I wired up the internal battery. For clarity in the photo
I've routed it out here, but
in reality the wiring runs up from inside the seat tube.
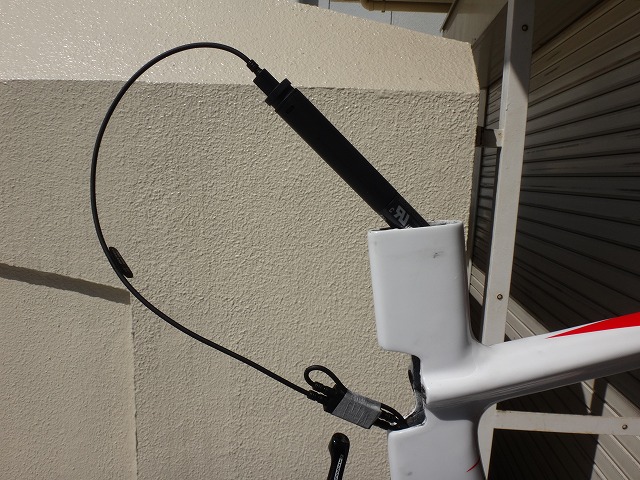
↑Here's what it ended up looking like.
I glossed over it quickly earlier, but the biggest challenge on this frame
was routing the rear derailleur cable.
I'm not going to explain how I did it.

Through the seat post

and secured with a dedicated clamp.
Another 20mm deeper and the seat post would interfere with the lower junction.
As long as the frame owner doesn't change,
even if the saddle is swapped for the thickest possible one, it should be fine.

Usually I clean the frame before work, but this time I did it after the wiring.
Not because I felt like it—there were practical reasons.

Unlike most TT frames, both GRAAL and Montero have regular road bike
reverse-dropouts rather than track ends.
With reverse-dropouts you'd expect tire rub to be unlikely, but
there are marks on the left chainstay where the tire scraped.
It could be that a low spoke-count wheel went out of true,
or a spoke broke, but I can rule that out—
I know the history of this frame.
Anyway, there's definitely some scuff marks
that won't come off with a finger.
But with the secret Y○○ auction technique, it came clean.
The wiring work is done.
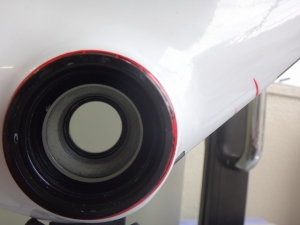
The important thing here is that the BB shell stayed completely sealed.
Why didn't I remove the Ultra-Torque BB cups? Because what comes next
involves combinations I can't write about here.
Since it's completely sealed, I can install the crankset without needing
Shimano's EPS BB protector.
The key difference between Shimano's electronic groupset and Campagnolo's EPS is that
when the front derailleur is in the outer chainring,
you can adjust the final position with a screw.
EPS also got this fine-tuning capability from V2 onward when shifted to outer,
but it's only meant as an emergency fix for roadside adjustment issues—
if you reset the derailleur and redo the adjustment from scratch,
the fine-tuned outer position gets lost too.
So if you want to build withROTOR or other third-party cranks,
Shimano's electronic groupset has better flexibility.
In other words, even Super Record cranks can work with proper adjustment.
And since sprocket tooth spacing is basically identical,
for this electronic conversion the BB, crank, chain, and sprocket
(and of course the freehub body) stay the same and just get reassembled.
Wait, who's that at this hour? A customer?
Whoa what are you d0iiing n0...
I received a complete Pinarello GRAAL time trial frame for rebuild.
It was originally built with a mechanical Super Record 11-speed drivetrain,
but the owner wants me to convert it to a Shimano electronic groupset
(internal battery and internal junction box configuration).
Just looking at it briefly, I could see there were going to be plenty of problems.
First, the bottom bracket shell is completely sealed.
Second, there's nowhere obvious to fit the internal battery.
It worked out in the end, but initially I was planning to route it through the downtube.
I forgot to photograph the frame before work started, so the image above is basically post-work.
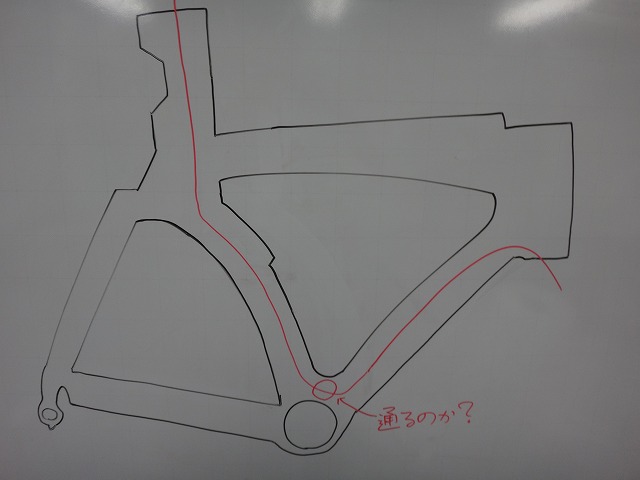
↑First I checked whether the seat tube and downtube are connected
(more precisely, whether there's enough gap for cables to pass through).
Without running a probe wire through, I confirmed by another method that there was definitely a path, but...
↑The probe wire got stuck around this section of the downtube.
(The magnet on the probe wire tip was reacting to something)
I found that a foam insert was blocking it.
Since it has nothing to do with frame rigidity, I scraped it out.
I modified the probe wire tip into a shape that breaks up the foam,
pushed it through repeatedly, then pointed the head tube downward and shook—
out came the foam.
↑This much
Now that I'd confirmed there's enough gap in the downtube and seat tube for cables,
the next step was to drill the front derailleur hole,
and test threading probe wires from both directions.

I threaded from the downtube side first.
The probe wire is a disposable tool I modified from a Shimano shift cable.
(I call it disposable, but it's not really one-time use)
The wire itself doesn't have magnets or anything—
as shown in the photo, I modify the wire end
so it moves through the frame smoothly and reliably.
It's a small thing, but it makes the workability so much better.
I also threaded from the seat tube side in the same way.
The wire end is shaped like this, same as before.
Oops, both of those photos got cut off.
Man, I wasn't careful. Sorry about that.

↑So it should pass through like this.
The cable length of 1200mm would be enough,
and if not I was planning to go up to the maximum 1400mm,
but it clearly looked sufficient so I went with 1200mm.
It passed through.
Going back in the timeline, I discovered that fitting the internal battery into the seat tube—
which I was pretty sure would be impossible—turned out to be a perfect fit.
With Pinarello's TT frame, the earlier GRAAL model "Montero" has a wider seat post
than the GRAAL, so I'm confident the battery would fit, but it would have some play
that needs shims and anti-rotation measures.
With the GRAAL though, it's nearly perfect fit,
so the anti-rotation and retention work was easy.
well that's because... (etc.)
I routed the front derailleur cable.

I drilled the rear derailleur cable port here.
The mechanical groupset cable port goes in a complete tunnel from the head tube,
so I couldn't use it as a guide for the electronic version.
If there was absolutely no chance of ever going back to mechanical components,
I could have just enlarged the original hole, but to be safe I drilled a new one.

I drilled the upper junction port here.
Pretty much anywhere would work, but I chose this spot in the black paint area
so the grommet wouldn't be as visible.

The lower junction goes here, recessed into the seat tube.
I wired up the internal battery. For clarity in the photo
I've routed it out here, but
in reality the wiring runs up from inside the seat tube.

↑Here's what it ended up looking like.
I glossed over it quickly earlier, but the biggest challenge on this frame
was routing the rear derailleur cable.
I'm not going to explain how I did it.
Through the seat post
and secured with a dedicated clamp.
Another 20mm deeper and the seat post would interfere with the lower junction.
As long as the frame owner doesn't change,
even if the saddle is swapped for the thickest possible one, it should be fine.
Usually I clean the frame before work, but this time I did it after the wiring.
Not because I felt like it—there were practical reasons.

Unlike most TT frames, both GRAAL and Montero have regular road bike
reverse-dropouts rather than track ends.
With reverse-dropouts you'd expect tire rub to be unlikely, but
there are marks on the left chainstay where the tire scraped.
It could be that a low spoke-count wheel went out of true,
or a spoke broke, but I can rule that out—
I know the history of this frame.
Anyway, there's definitely some scuff marks
that won't come off with a finger.

But with the secret Y○○ auction technique, it came clean.

The wiring work is done.
The important thing here is that the BB shell stayed completely sealed.
Why didn't I remove the Ultra-Torque BB cups? Because what comes next
involves combinations I can't write about here.
Since it's completely sealed, I can install the crankset without needing
Shimano's EPS BB protector.
The key difference between Shimano's electronic groupset and Campagnolo's EPS is that
when the front derailleur is in the outer chainring,
you can adjust the final position with a screw.
EPS also got this fine-tuning capability from V2 onward when shifted to outer,
but it's only meant as an emergency fix for roadside adjustment issues—
if you reset the derailleur and redo the adjustment from scratch,
the fine-tuned outer position gets lost too.
So if you want to build with
Shimano's electronic groupset has better flexibility.
In other words, even Super Record cranks can work with proper adjustment.
And since sprocket tooth spacing is basically identical,
for this electronic conversion the BB, crank, chain, and sprocket
(and of course the freehub body) stay the same and just get reassembled.
Wait, who's that at this hour? A customer?
Whoa what are you d0iiing n0...