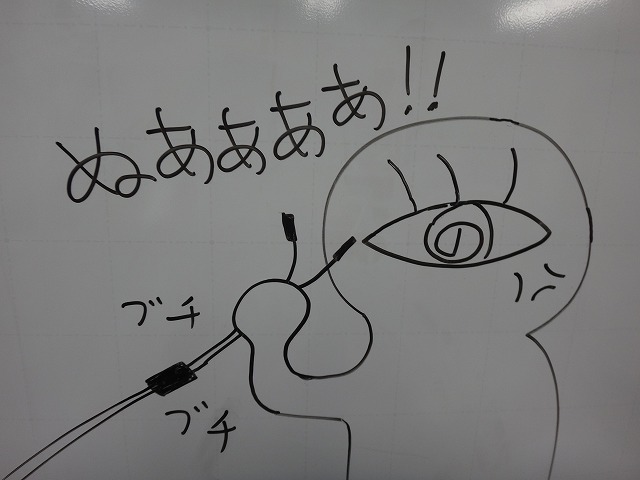
The drill is screaming!
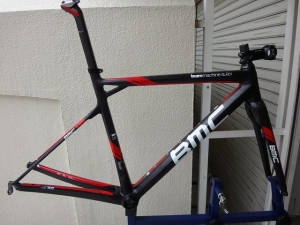
I received an SLR01 from a customer.
It's a Shimano electronic component-specific spec, and since it omits things like outer cable stops,
you can't assemble it with mechanical components.
The battery is meant to be mounted externally on the down tube using a short seat tube bracket,
and screw holes for this are already provided.
It would be possible to ignore this and go with an internal battery instead,
but the customer wanted the external setup.
Since they already own several complete bikes with external battery electric components,
they probably didn't want to buy a new charger just for this one bike.

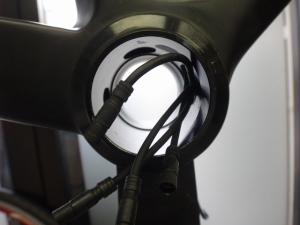
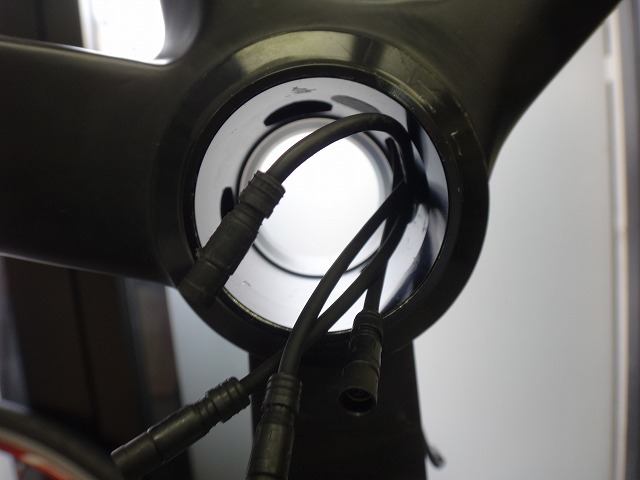
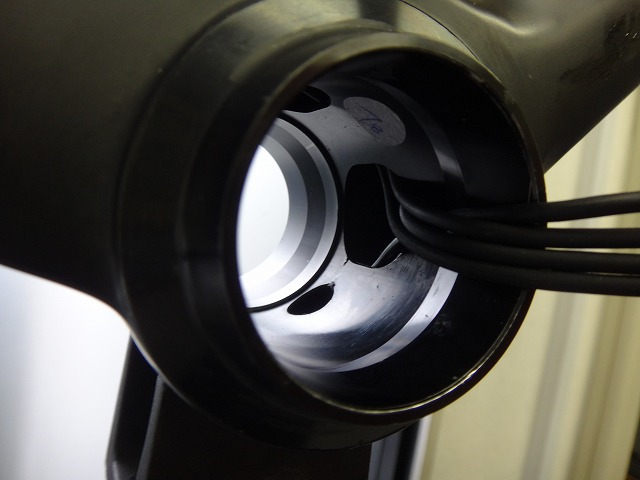
An aluminum sleeve is inserted into the bottom bracket shell.
Since it's done during frame manufacturing, it can't be removed.
It already has four holes drilled through it,
making wiring straightforward.
I threaded them through.
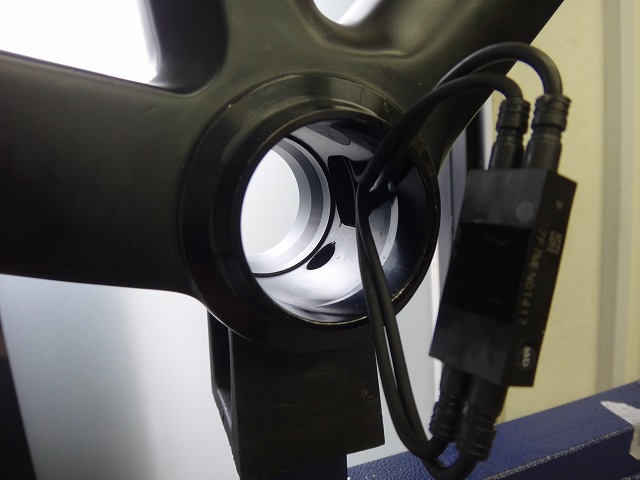
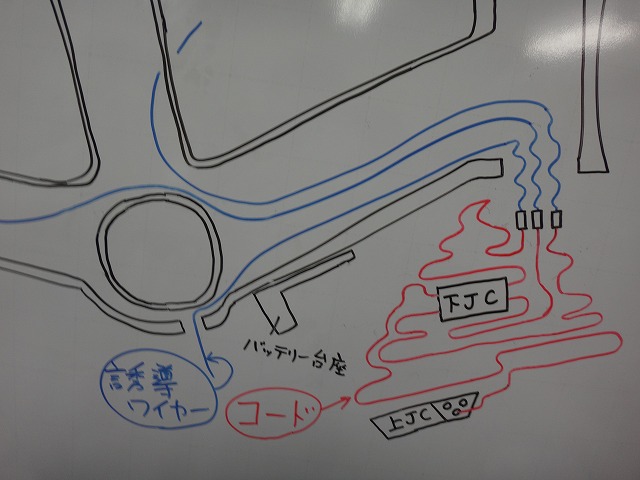
Clockwise from the top of the image: front derailleur, upper junction (hereinafter JC),
battery seat tube bracket, and rear derailleur each connect to their respective wires.
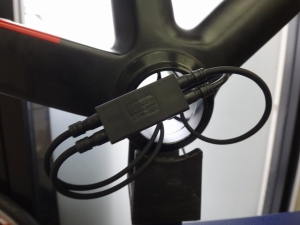
I connected these to the lower JC
and threw it into the down tube.
After that, I just need to route the cables appropriately while avoiding the bottom bracket area and it's done.
~The End~

I wasn't satisfied with it, so I'm doing it over.
Not that I pulled the cables out this roughly (just to be clear).

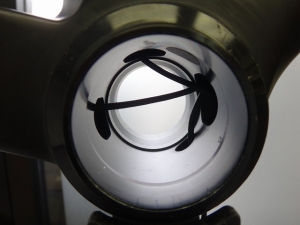
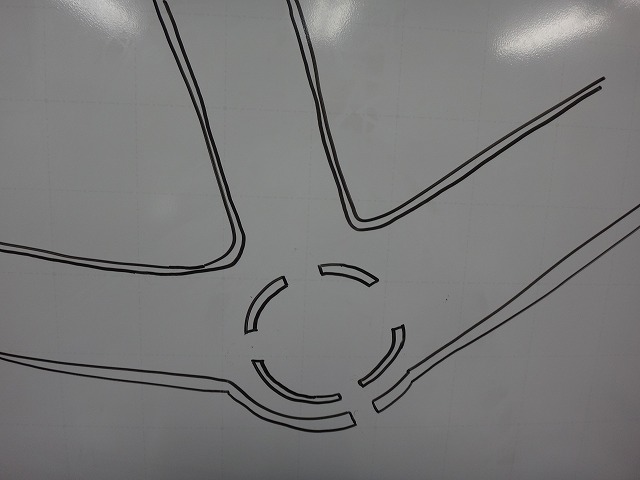
This time, the relationship between the frame and sleeve (bottom bracket shell) is like this.

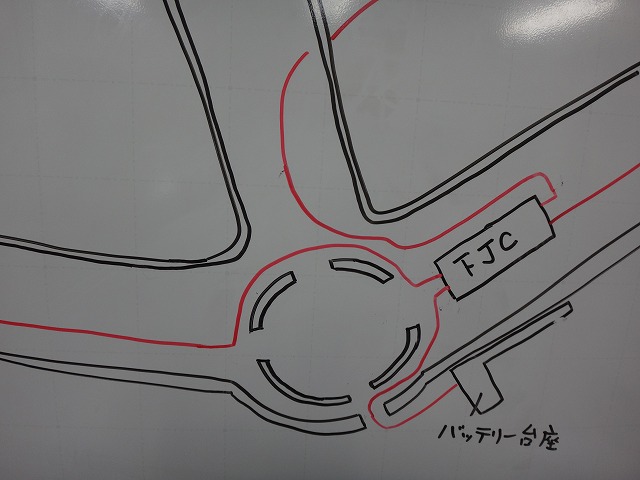
Until just now, I was wiring according to the setup instructions, like this,
↑but I thought, wouldn't it be possible to not thread any cables through the bottom bracket shell at all by doing it this way?
Of course, I verified this was feasible beforehand.
The battery seat tube bracket cable was really tight in this spot
so the drill whined for just a moment (the customer approved).
So the "drill is screaming!" at the beginning is technically accurate.
The wiring is done.

↑All four cables come out of the down tube hole.

I connected the cables to the lower JC.
When I tuck this into the down tube...
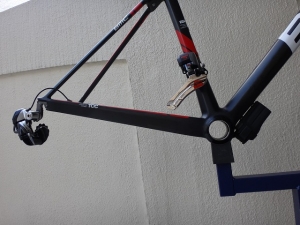
I achieve a wired configuration where the cables don't pass through the bottom bracket shell at all.
Much cleaner.
Since the bottom bracket shell isn't completely sealed for waterproofing purposes,
I'll still use a water seal equivalent component.
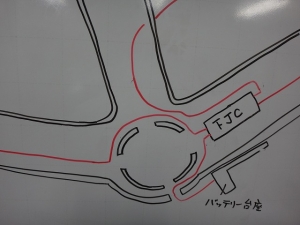
Next, about the holes already in the frame.
The hole from the right chainstay to the rear derailleur looks fine.
No particular issues there.
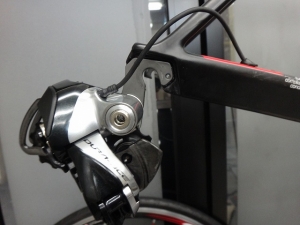
With the front derailleur hole, in most cases it's drilled slightly lower than the height of the seat tube bracket or band.
I usually do it that way too.
But on this frame, it was drilled at almost the same height.
The distance from the bracket rivet holes seems too close,
and the cable also sags a bit.
However, according to someone who saw this, one advantage is that since the wiring exits the grommet pointing downward, water is less likely to enter.
But looking at the treatment afterward, it seems they didn't think that far ahead...

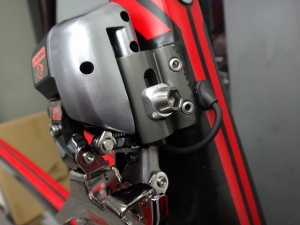
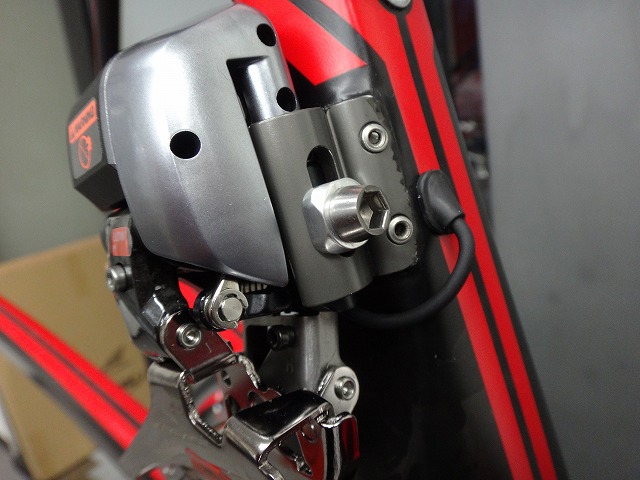
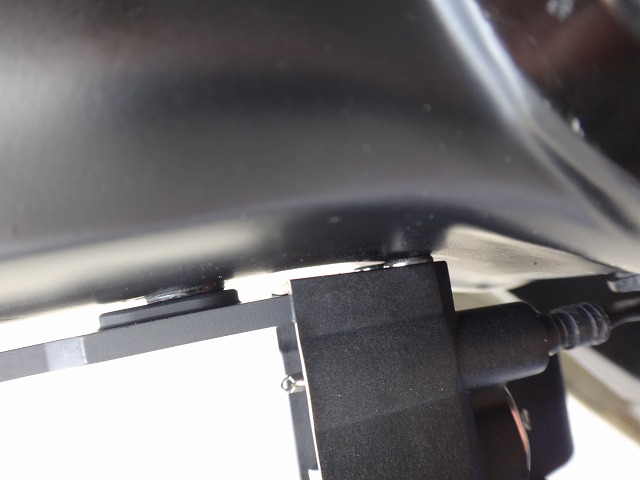
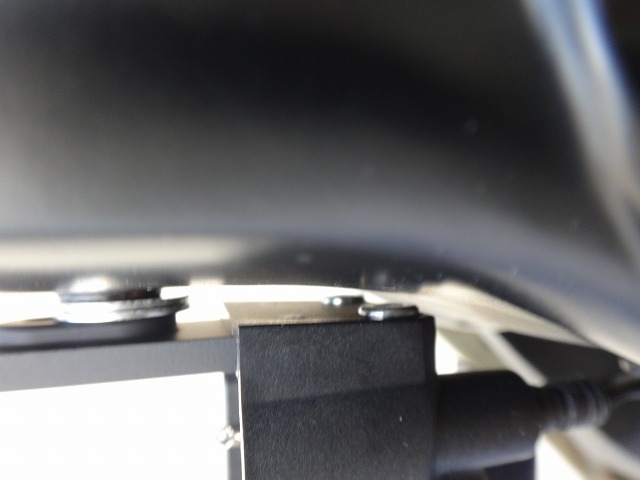
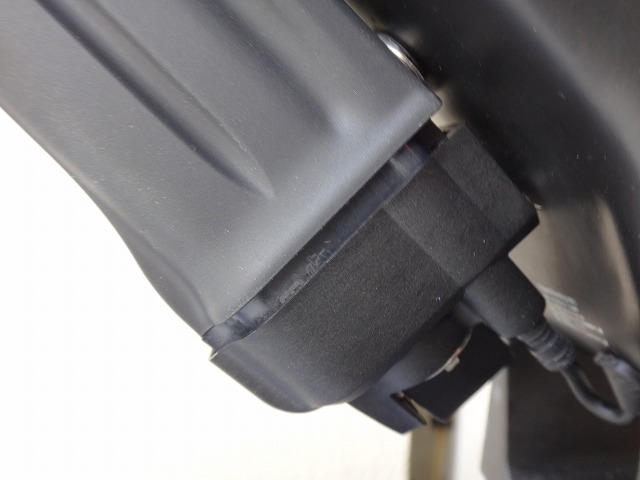
The screw holes for the short battery seat tube bracket and the cable hole also have issues.

First, the position of the bracket's screw holes isn't straight.
You can see it clearly by looking at the hex socket position of the screw.
Even I would drill it a bit straighter than this, come on

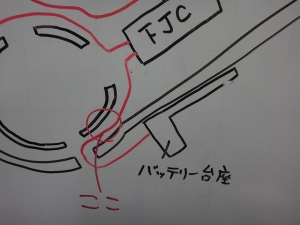
Furthermore, when wiring, the cable ends up like this.
If the bracket position were moved up a little or the hole positioned a bit further back,
the wiring would be much cleaner.
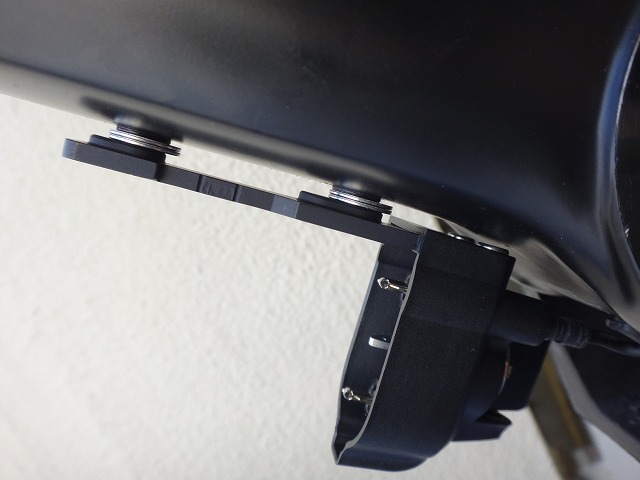
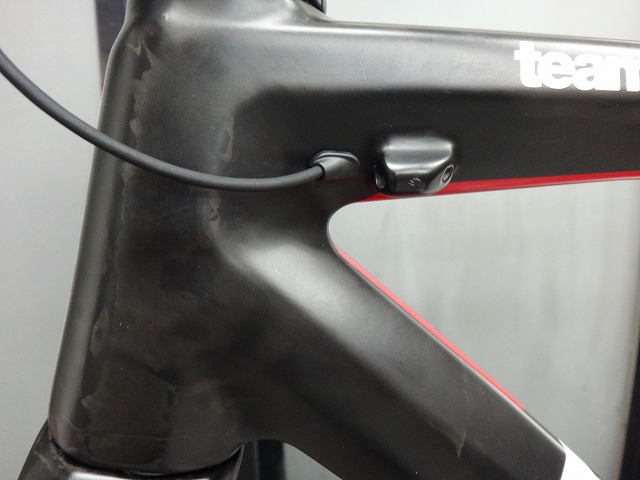
But as you can see from the previous image,
the bracket is positioned all the way up.
With this orientation, the battery lever opens toward the chainring side,
so I did wonder if mounting it upside down would be the right way,
but in that case the cable would just dangle, so this way is correct.
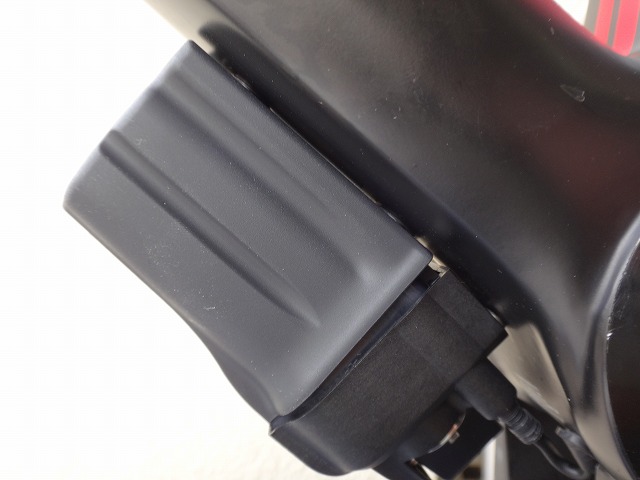
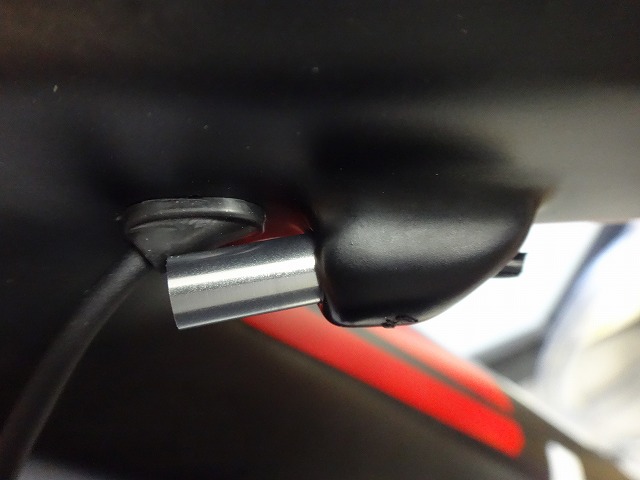
But that's still not quite right.
Even when mounted all the way up,

↑this part interfered with the frame.
This distorts the bracket, so
the battery won't insert straight.
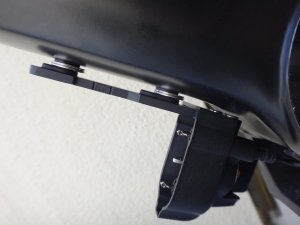
So I inserted a spacer between the bracket and frame.

↑Now there's proper clearance.

The battery now installs smoothly.

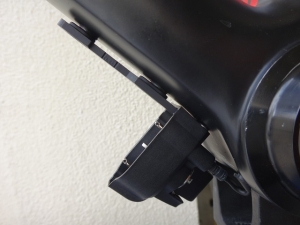
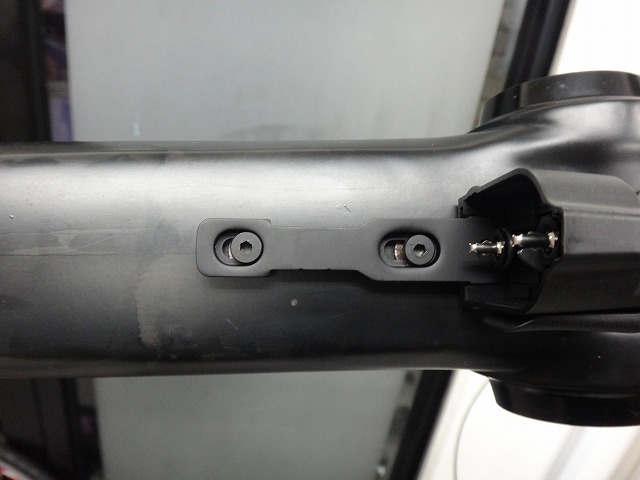
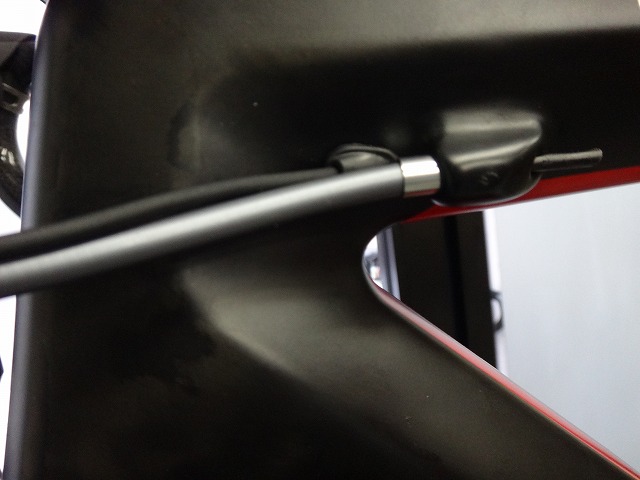
Next, the wiring to the upper JC.
After I initially installed the grommet as shown in the image and secured it...

the slightly long brake cable outer cap that comes with the 9070 lever
wouldn't fit into the cable stop no matter what I tried.
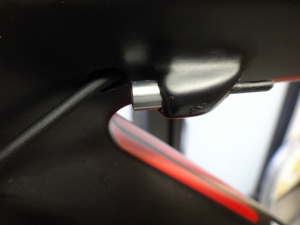
So I temporarily removed the grommet and threaded it through that way, but

when I then tried to install the grommet again, it was still tight.
Why is there even a hole here?
If I used a thinner non-Shimano grommet, the interference would be less, but
from a waterproofing standpoint this is better, so I've left it this way.
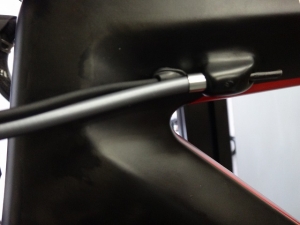
Even if I route the cable along the brake outer, I think
there would be a better position for this hole...

Finally. Even if this time the bottom bracket shell were completely sealed,
as long as the connections between frame tubes were clear,
I could have guided the lower JC with its three pre-wired cables
through the head tube using a wire and routed them that way.
Since that won't be possible on the next frame I'm working on,
this was a good learning experience.
Also, about that last image,
I'm proud of having walked the tightrope between pulling it off and total audacity.

I received an SLR01 from a customer.
It's a Shimano electronic component-specific spec, and since it omits things like outer cable stops,
you can't assemble it with mechanical components.
The battery is meant to be mounted externally on the down tube using a short seat tube bracket,
and screw holes for this are already provided.
It would be possible to ignore this and go with an internal battery instead,
but the customer wanted the external setup.
Since they already own several complete bikes with external battery electric components,
they probably didn't want to buy a new charger just for this one bike.
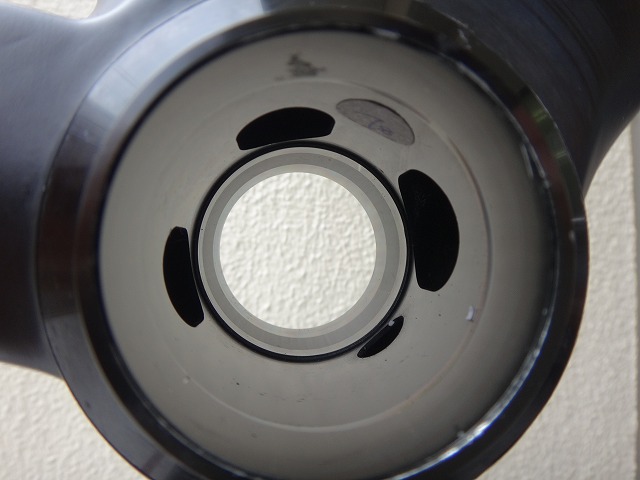
An aluminum sleeve is inserted into the bottom bracket shell.
Since it's done during frame manufacturing, it can't be removed.
It already has four holes drilled through it,
making wiring straightforward.

I threaded them through.
Clockwise from the top of the image: front derailleur, upper junction (hereinafter JC),
battery seat tube bracket, and rear derailleur each connect to their respective wires.

I connected these to the lower JC

and threw it into the down tube.
After that, I just need to route the cables appropriately while avoiding the bottom bracket area and it's done.
~The End~
I wasn't satisfied with it, so I'm doing it over.
Not that I pulled the cables out this roughly (just to be clear).
This time, the relationship between the frame and sleeve (bottom bracket shell) is like this.

Until just now, I was wiring according to the setup instructions, like this,
↑but I thought, wouldn't it be possible to not thread any cables through the bottom bracket shell at all by doing it this way?
Of course, I verified this was feasible beforehand.

The battery seat tube bracket cable was really tight in this spot
so the drill whined for just a moment (the customer approved).
So the "drill is screaming!" at the beginning is technically accurate.
The wiring is done.
↑All four cables come out of the down tube hole.
I connected the cables to the lower JC.
When I tuck this into the down tube...

I achieve a wired configuration where the cables don't pass through the bottom bracket shell at all.
Much cleaner.
Since the bottom bracket shell isn't completely sealed for waterproofing purposes,
I'll still use a water seal equivalent component.
Next, about the holes already in the frame.

The hole from the right chainstay to the rear derailleur looks fine.
No particular issues there.
With the front derailleur hole, in most cases it's drilled slightly lower than the height of the seat tube bracket or band.
I usually do it that way too.
But on this frame, it was drilled at almost the same height.
The distance from the bracket rivet holes seems too close,
and the cable also sags a bit.
However, according to someone who saw this, one advantage is that since the wiring exits the grommet pointing downward, water is less likely to enter.
But looking at the treatment afterward, it seems they didn't think that far ahead...

The screw holes for the short battery seat tube bracket and the cable hole also have issues.
First, the position of the bracket's screw holes isn't straight.
You can see it clearly by looking at the hex socket position of the screw.

Furthermore, when wiring, the cable ends up like this.
If the bracket position were moved up a little or the hole positioned a bit further back,
the wiring would be much cleaner.
But as you can see from the previous image,
the bracket is positioned all the way up.
With this orientation, the battery lever opens toward the chainring side,
so I did wonder if mounting it upside down would be the right way,
but in that case the cable would just dangle, so this way is correct.

But that's still not quite right.
Even when mounted all the way up,
↑this part interfered with the frame.
This distorts the bracket, so
the battery won't insert straight.
So I inserted a spacer between the bracket and frame.
↑Now there's proper clearance.
The battery now installs smoothly.
Next, the wiring to the upper JC.
After I initially installed the grommet as shown in the image and secured it...
the slightly long brake cable outer cap that comes with the 9070 lever
wouldn't fit into the cable stop no matter what I tried.

So I temporarily removed the grommet and threaded it through that way, but

when I then tried to install the grommet again, it was still tight.
Why is there even a hole here?
If I used a thinner non-Shimano grommet, the interference would be less, but
from a waterproofing standpoint this is better, so I've left it this way.
Even if I route the cable along the brake outer, I think
there would be a better position for this hole...
Finally. Even if this time the bottom bracket shell were completely sealed,
as long as the connections between frame tubes were clear,
I could have guided the lower JC with its three pre-wired cables
through the head tube using a wire and routed them that way.
Since that won't be possible on the next frame I'm working on,
this was a good learning experience.
Also, about that last image,
I'm proud of having walked the tightrope between pulling it off and total audacity.