The drill is whining!
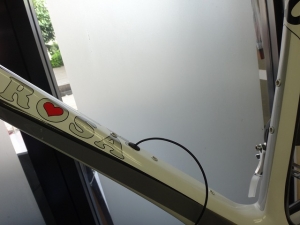
I received a De Rosa Super King R from a customer.
The frame is compatible with both electronic and mechanical groupsets,
but the battery cable hole is drilled roughly halfway between
the bottle cage holes on the down tube.
Right after the first electronic groupset, the 7970 Dura-Ace, came out,
electronic groupset-compatible frames often had holes drilled here.
But if the hole is in this location, you end up installing cable covers
and routing the wiring, which makes it look thicker visually and increases
the cable run length—something I'd prefer to avoid.
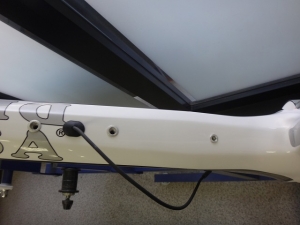
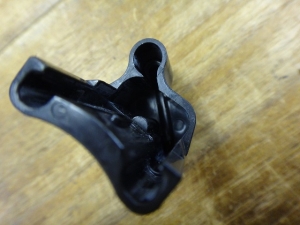
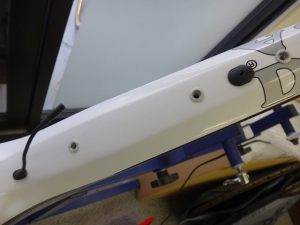
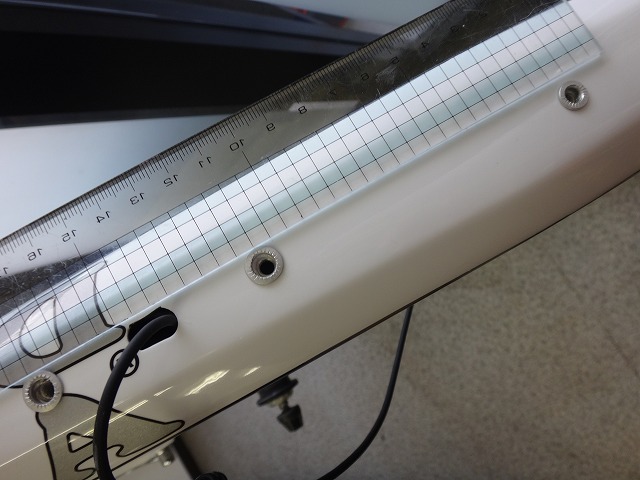
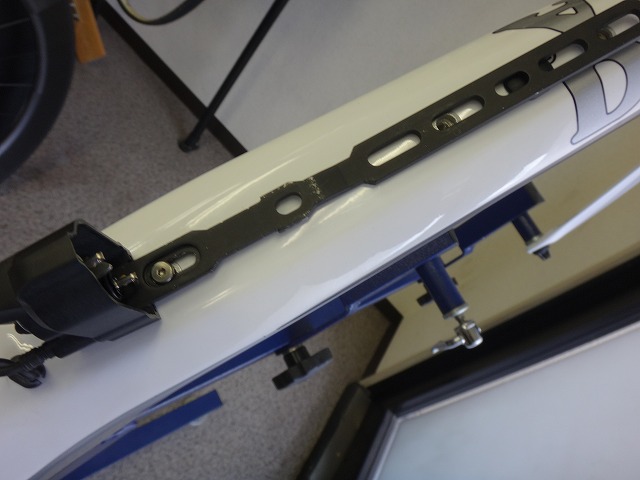
Separate from the bottle cage holes (M5), there's one M4 hole.
This corresponds to the threaded boss on the long battery holder.

↑This one

↑Right here.
Actually, the long battery holder has gone through a model change. In the early versions,
there was no M4 threaded boss, and the bottom stabilizer of the
battery holder only used cable ties to secure it to the frame.
In the current model, if the frame has a threaded hole, it uses an M4 screw;
if not, cable ties secure the long battery holder.
Actually, it doesn't move much even without securing it, so considering
the downside of cable ties—cutting into the paint and trapping dirt—
it might be better not to secure it at all.

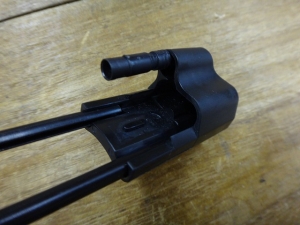
But this hole...


Let's drill it a bit more in a straight line.
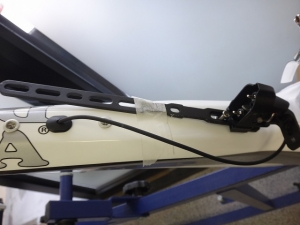
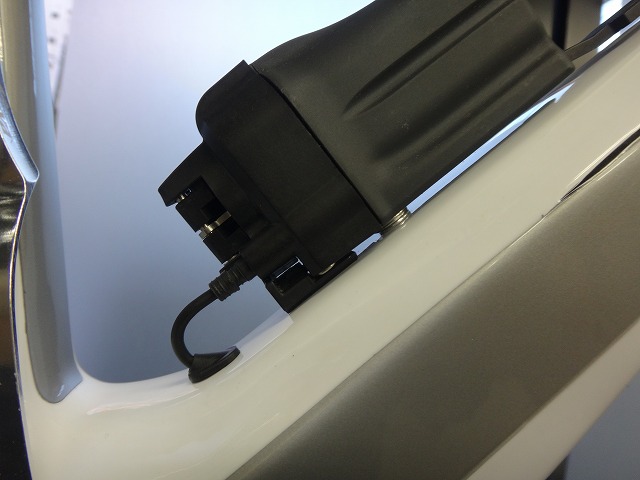
When actually installed, it looks like this.

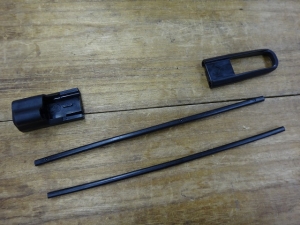
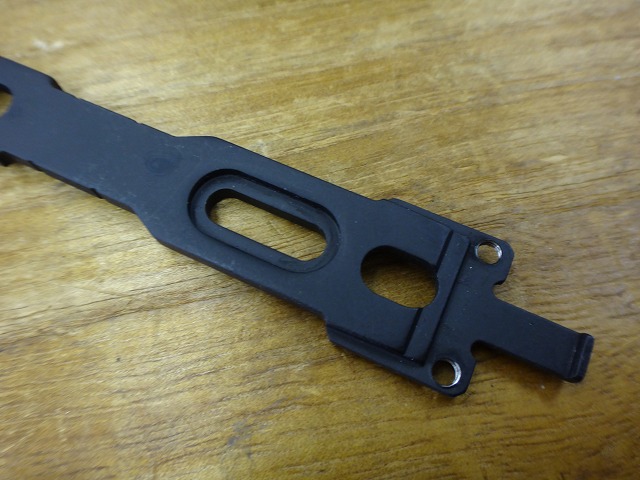
The low-head cap screw here has a somewhat unique shape.
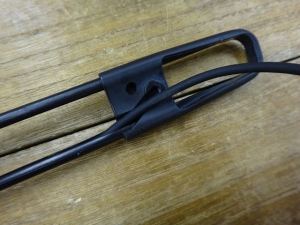
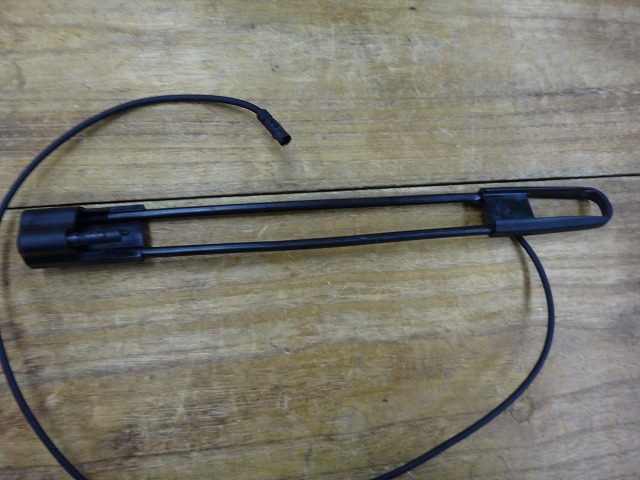
The "cable cover" I mentioned earlier—the one in the image above is for the older long battery holder,
while the current version is slightly different.

I assembled it, cable and all.
This part on the battery mount side differs from the current version.
The top end is configured like this.

This is the finished form, but
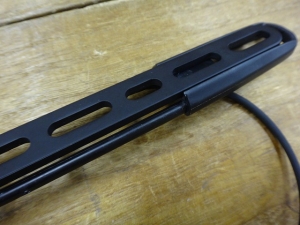
it sits away from the frame and creates a gap that's annoying to clean,
so I'd prefer not to use it if possible.
Even considering a Campagnolo EPS build,
drilling a hole between the bottle cage holes on the down tube is pointless,
so as a specification, this is an "old" approach.
So, with the customer's permission,
I drilled a hole here for the battery mount cable to run through.

The long battery mount no longer floats away from the frame.

The length of exposed cable outside the frame is minimized.
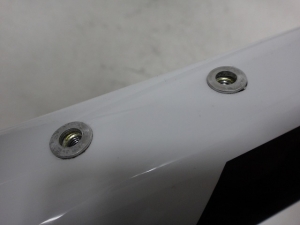
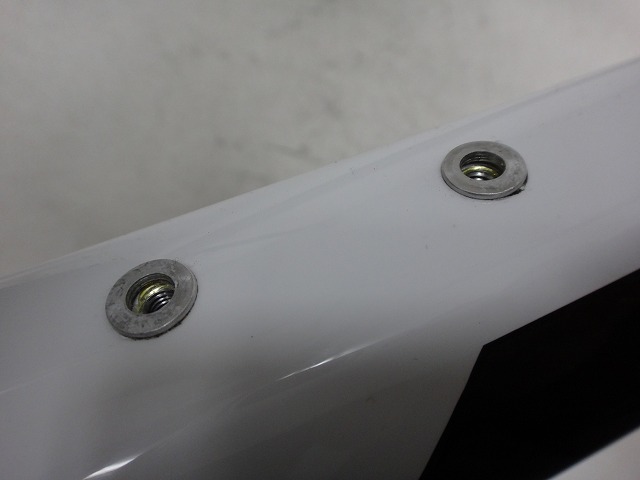
As a side note, when there are two M4 threaded bosses like this,

a short battery holder can be mounted with two low-head cap screws,
which looks even cleaner.
I could add to the original M4 boss by adding one above it to make two,
converting it to a short battery holder format, but that can be done later.
How the cable runs to the battery mount determines
the required cable length, so
I wanted to decide that first.
Until that's settled, I can't install the bottom bracket components,
and assembly can't proceed.
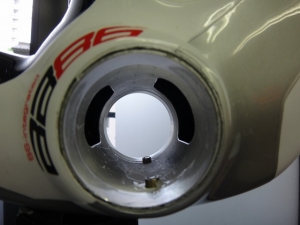
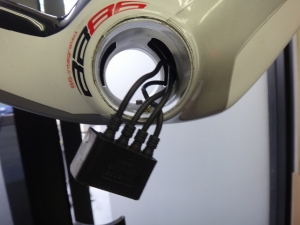
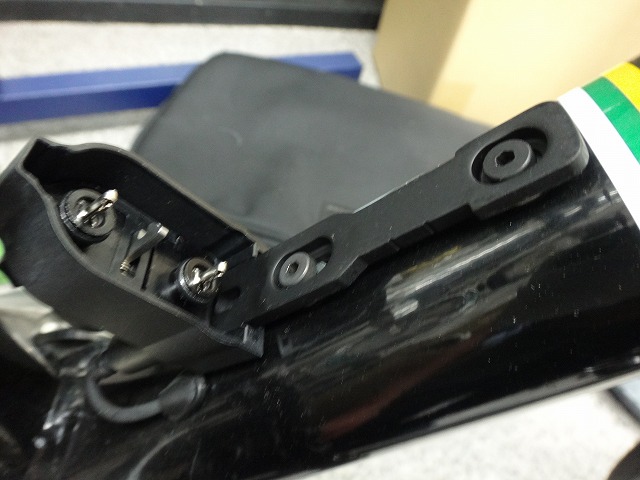
The frame had a hole that was large enough, so
I partially trimmed an external junction box to use it as an internal one.
This job was a component swap, but
since the original bike was assembled with external routing,
the junction is also external.
The Super King's seatpost is a very thin proprietary item,
so a seatpost battery can't be used.
Installing it inside the seat tube might be possible, but
the SM-BTR2 is originally designed for seatpost internal mounting,
so the frame isn't positioned for that hole location.
Also, since the original frame before the swap was external battery style,
considering wasted money on extra chargers and such,
there was no reason to switch to a seatpost battery.

I received a De Rosa Super King R from a customer.
The frame is compatible with both electronic and mechanical groupsets,
but the battery cable hole is drilled roughly halfway between
the bottle cage holes on the down tube.
Right after the first electronic groupset, the 7970 Dura-Ace, came out,
electronic groupset-compatible frames often had holes drilled here.
But if the hole is in this location, you end up installing cable covers
and routing the wiring, which makes it look thicker visually and increases
the cable run length—something I'd prefer to avoid.

Separate from the bottle cage holes (M5), there's one M4 hole.
This corresponds to the threaded boss on the long battery holder.

↑This one
↑Right here.
Actually, the long battery holder has gone through a model change. In the early versions,
there was no M4 threaded boss, and the bottom stabilizer of the
battery holder only used cable ties to secure it to the frame.
In the current model, if the frame has a threaded hole, it uses an M4 screw;
if not, cable ties secure the long battery holder.
Actually, it doesn't move much even without securing it, so considering
the downside of cable ties—cutting into the paint and trapping dirt—
it might be better not to secure it at all.
But this hole...
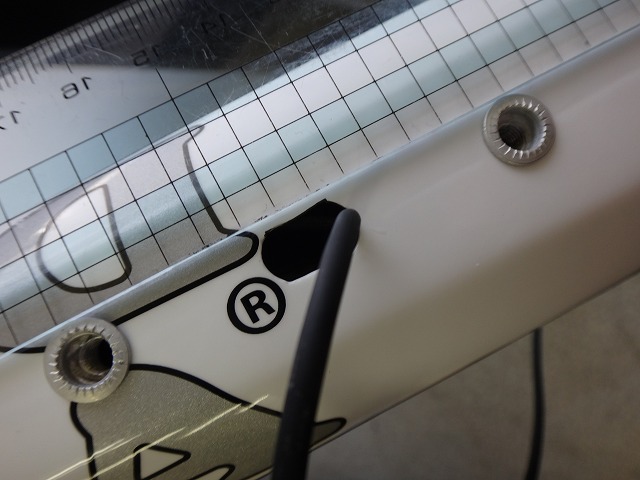
Let's drill it a bit more in a straight line.

When actually installed, it looks like this.

The low-head cap screw here has a somewhat unique shape.

The "cable cover" I mentioned earlier—the one in the image above is for the older long battery holder,
while the current version is slightly different.
I assembled it, cable and all.


This part on the battery mount side differs from the current version.

The top end is configured like this.

This is the finished form, but

it sits away from the frame and creates a gap that's annoying to clean,
so I'd prefer not to use it if possible.
Even considering a Campagnolo EPS build,
drilling a hole between the bottle cage holes on the down tube is pointless,
so as a specification, this is an "old" approach.

So, with the customer's permission,
I drilled a hole here for the battery mount cable to run through.
The long battery mount no longer floats away from the frame.
The length of exposed cable outside the frame is minimized.
As a side note, when there are two M4 threaded bosses like this,
a short battery holder can be mounted with two low-head cap screws,
which looks even cleaner.
I could add to the original M4 boss by adding one above it to make two,
converting it to a short battery holder format, but that can be done later.

How the cable runs to the battery mount determines
the required cable length, so
I wanted to decide that first.
Until that's settled, I can't install the bottom bracket components,
and assembly can't proceed.

The frame had a hole that was large enough, so
I partially trimmed an external junction box to use it as an internal one.
This job was a component swap, but
since the original bike was assembled with external routing,
the junction is also external.
The Super King's seatpost is a very thin proprietary item,
so a seatpost battery can't be used.
Installing it inside the seat tube might be possible, but
the SM-BTR2 is originally designed for seatpost internal mounting,
so the frame isn't positioned for that hole location.
Also, since the original frame before the swap was external battery style,
considering wasted money on extra chargers and such,
there was no reason to switch to a seatpost battery.