I'm grouping these together since they're all wheels from the same customer.
The drill's singing!
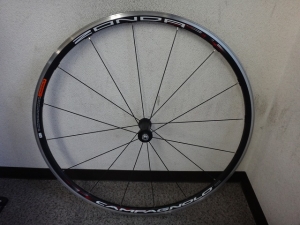
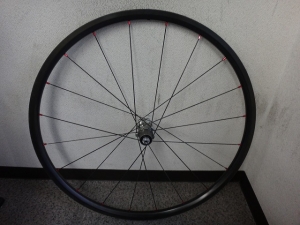
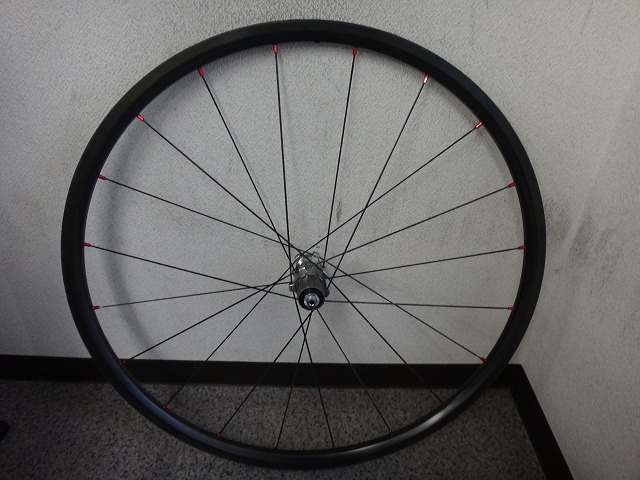
I received a Zonda from the customer.
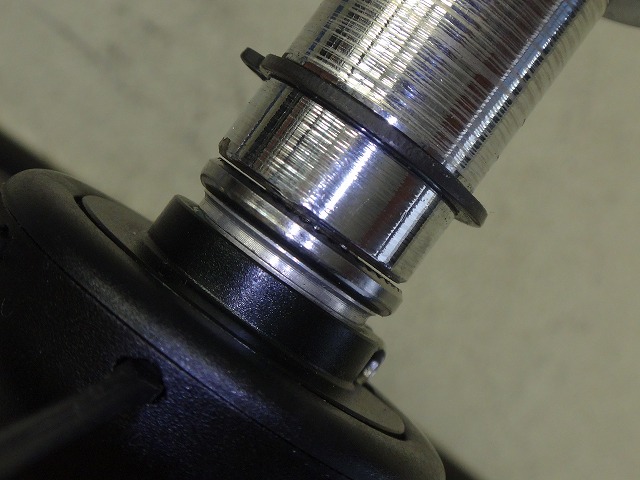
Using their own center gauge, which they modestly described as low precision,
there's apparently about 0.3–0.4mm of center deviation.
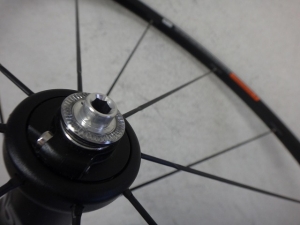
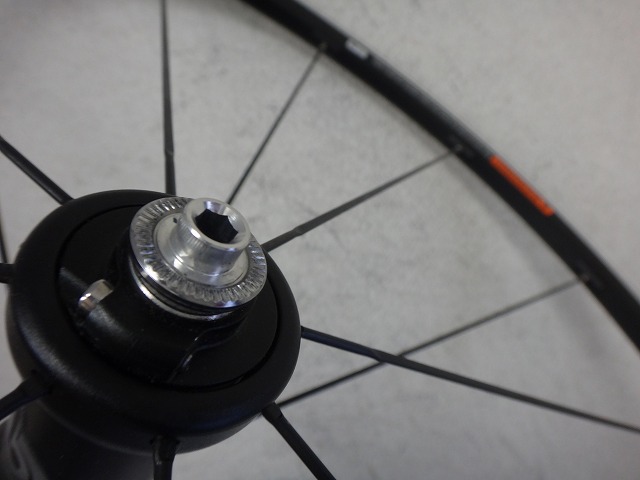
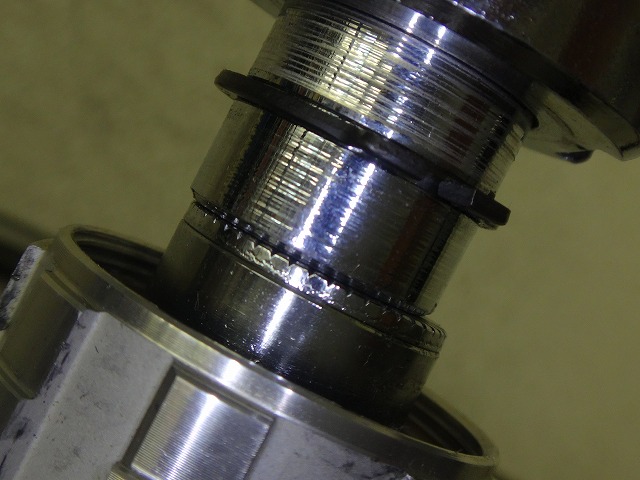
Also, on the bearing adjustment nut side
there's a "left warning condition" with a WARNING sticker, and if the hub needs to be disassembled,
they'd like me to remove the axle and flip it to right warning orientation.
The hub itself had no particular issues, but since that's what they requested,
I flipped it before starting work.
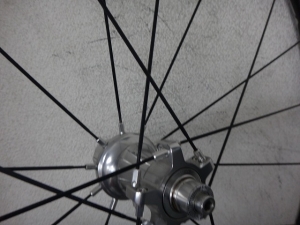
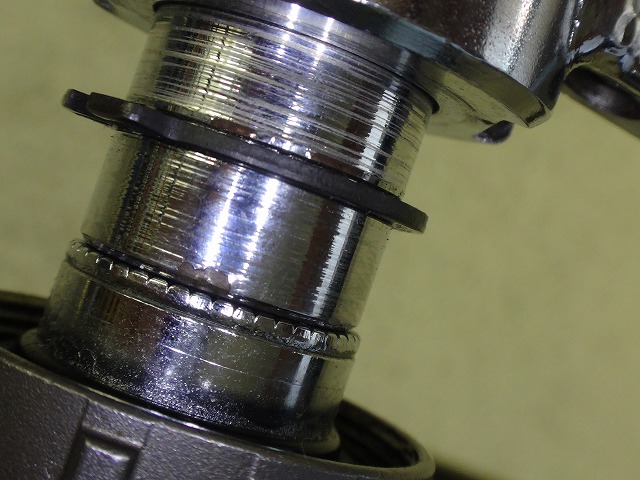
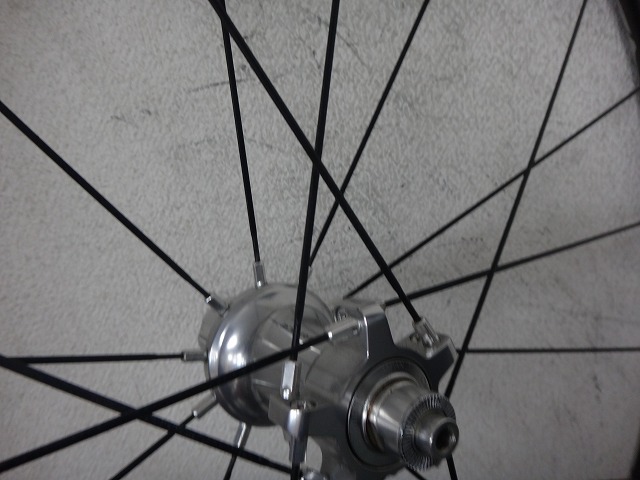
The opening image is actually after the work, so it's now in right warning orientation.
When I release the bite of the split washer that determines hub centering,
the wheel center can shift slightly, so
if I'm going to reverse the axle direction, it needs to be done before adjustment.
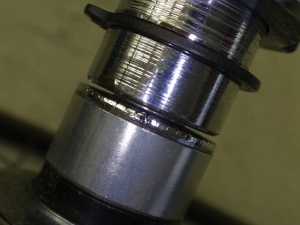
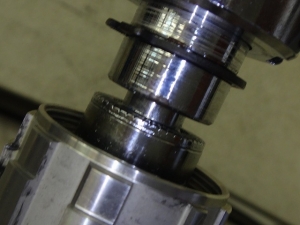
I applied the center gauge to the right side.
The orange color at the edge of the image is the WARNING sticker, so
at this point I have it in right warning and the bearing preload is set.

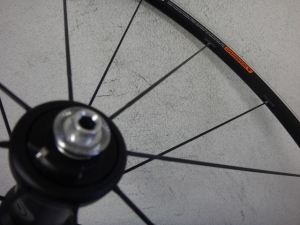
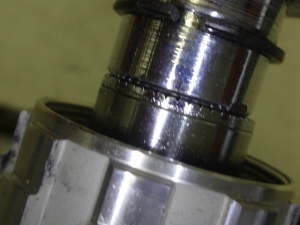
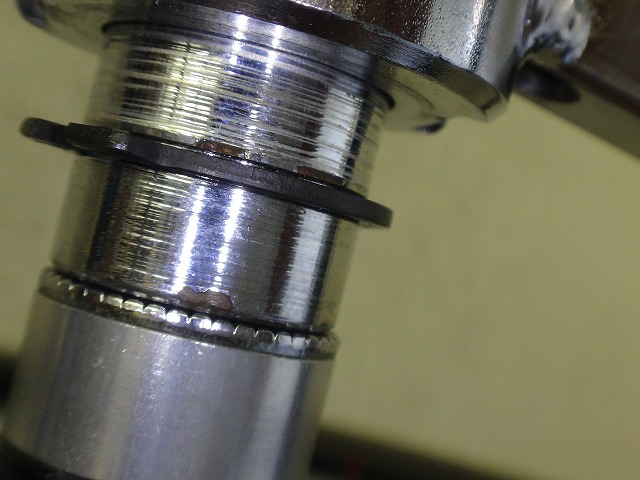
This is how much it deviated on the left side.
If you can detect this much deviation,
I'd say your center gauge is fine.
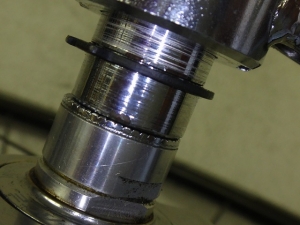
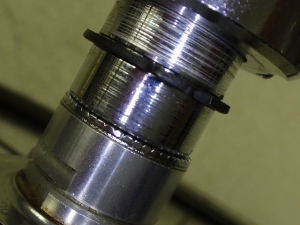
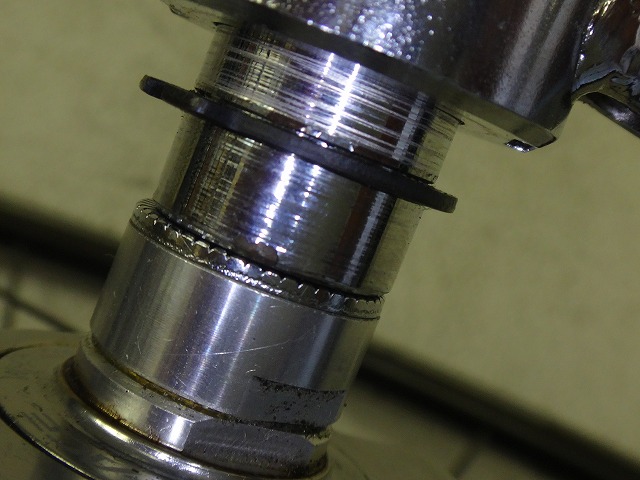
There was only the slightest bit of lateral runout in one spot, which
came out as part of the centering work.
Next is the 7850 carbon tubular.
This one's apparently off by just under 1mm.
↑Yeah, definitely.
Since it's deviated toward the non-freewheel side,
this didn't happen from age-related use.


Fixed.
The customer expressed concern about this wheel's rear hub not being upgradeable to 11-speed,
asking whether Shimano, as a major manufacturer, isn't ashamed of that.
But given the dimensions on the right side of this hub shell, there shouldn't be
dimensional issues with swapping to an 11-speed freehub body in theory (so they could do it if they wanted to).
But not only does Shimano fail to release 11-speed freehub bodies like most other manufacturers,
they're actually quite diligent in their efforts to prevent 11-speed conversion (→here).
(In the article at that link I praise Shimano wheels, but
please note the date is April 1st)

Next is the 7801 carbon tubular.
The customer said this one has no center deviation, but...
It checked out.
The customer said,
"I'm feeling some flex, possibly from loss of tension over time."
And they're right about that.
The spokes on the non-freewheel side flex around quite a bit.
So...
I tensioned the freewheel side as much as I could.
From here, I could pull the non-freewheel side until center comes back,
but since tensioning the non-freewheel side slightly increases freewheel side tension too,
I'm keeping it within the estimated limit of the freewheel side minus that amount.
To be more precise, I'm also leaving room for future true-up adjustments.
But it's made a huge difference.
You'll be pleased to see it. Hehehehe.

Pulled toward the non-freewheel side until center came back.
The customer wanted the tire that was on the 7801 removed and mounted on the 7850 with rim cement,
so that's what I did.
And while doing that, I noticed
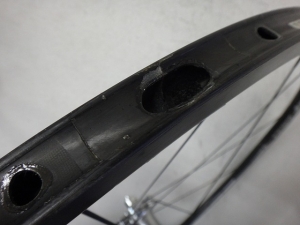
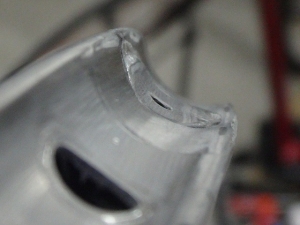
↑the cap that covers the balloon purge hole on the opposite side of the valve was missing.
(It wasn't stuck to the tire either.)
The cap material is aluminum on very early models, carbon on later ones.
↑The rim on the left is from an ENVE 1-25.
This one also has a missing cap, but
because buckling occurred right at the hole, the cap lifted up, and
because it used tubular tape instead of rim cement,
the cap came right off when the tire was removed during rim replacement.
(Even with similar buckling, if the rim cement bed were thicker,
the cap probably wouldn't have come off even if the adhesive lifted.)
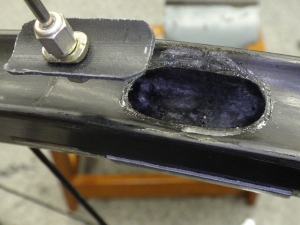
Compared to ENVE, the 7801's hole has no adhesive margin for the cap.
Plus the hole is large and elongated front-to-back, so using it as-is feels a bit risky.
I'm wondering what would happen if you stepped hard on something right at the hole.
So I decided to make a cap.

I stretched Chidanu (→here) taut across the 7801 rim.

The depth of the rim's tire bed depression with the Chidanu installed was
about 3.6mm.
If the curvatures are similar on a similar rim,
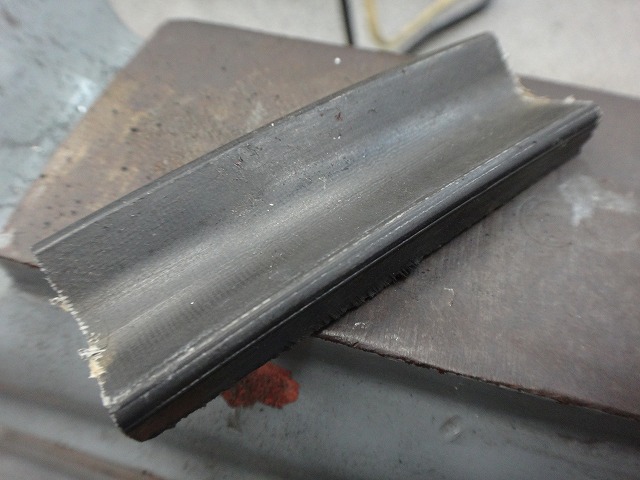
I looked for a scrap piece from the outer edge of a comparable rim—
tubular tire without a groove for seam relief—

and found one.
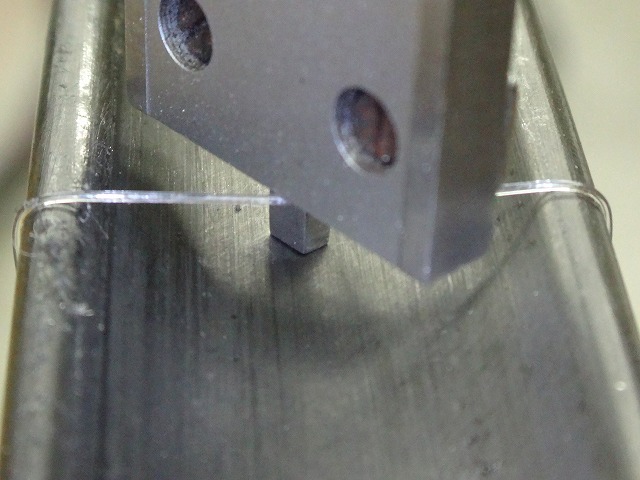
I drilled a small hole.
This is, incidentally, the only "drill singing" moment in this whole article.
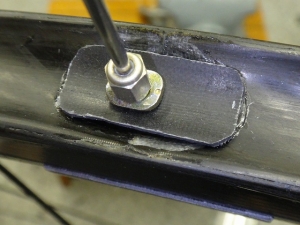
I made a "handle" using a spoke and an internal nipple.
I attached a diamond bit to my rotary tool
and did fit-to-part grinding, removing material bit by bit.

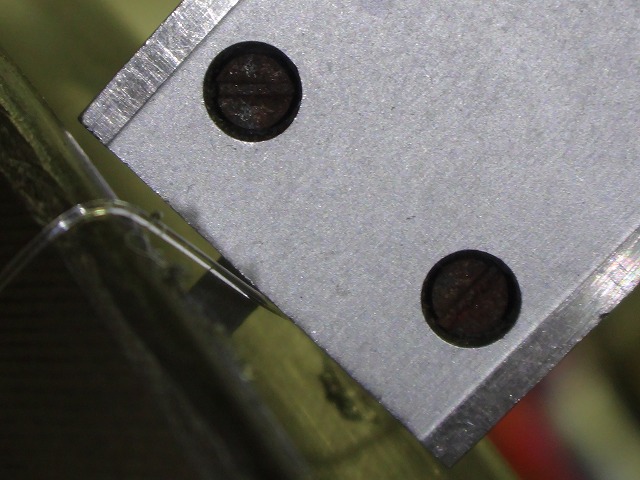
Good, one side is nearly perfect.
Since the rim hole isn't a perfect ellipse,
rotating the cap 180° won't fit at all.
Once I had the cap and rim hole overlapping flush and nearly perfectly aligned,
I fixed it with adhesive.
I made the handle partly for ease of rotary tool work, but mainly
to be able to lift and manipulate the cap while working the adhesive in,
guiding it to the flush position.
Done.
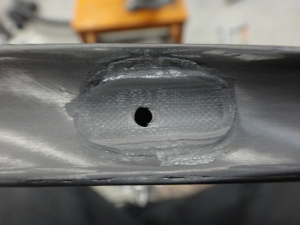
After the adhesive cured, I gave it a light sanding.
The curvature of the cap matched the rim almost perfectly.

Surprisingly—and I probably shouldn't say this—
the cap is bonded properly.
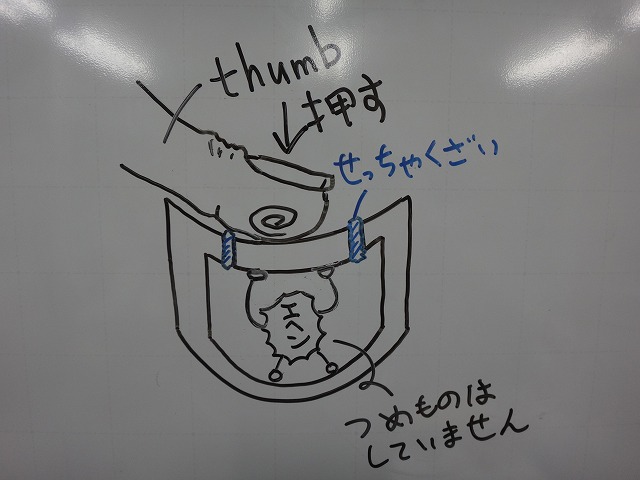
Even pushing hard with my thumb won't budge it.
Rather, if it did come loose under that much pressure,
I'd want it to come out (so I could redo it).
The adhesive must be performing well.
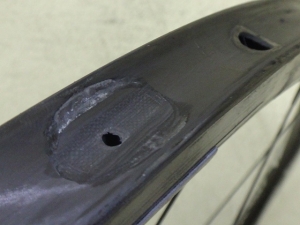
Of course, there's nothing packed inside the rim.
With rim tape, there's always a chance it gets peeled off with the tire, so
I'd recommend using it with rim cement if possible.
Finally, the rear wheel of Nomu Lab wheel #5 had
slight center deviation.
Since it was toward the freewheel side, I think it's from age-related use.
The customer says a local shop did a true-up twice (and did it well), but
that doesn't seem to be the cause.
Also, I greased the bearing on the left side of the hub shell.
The drill's singing!

I received a Zonda from the customer.
Using their own center gauge, which they modestly described as low precision,
there's apparently about 0.3–0.4mm of center deviation.
Also, on the bearing adjustment nut side

there's a "left warning condition" with a WARNING sticker, and if the hub needs to be disassembled,
they'd like me to remove the axle and flip it to right warning orientation.
The hub itself had no particular issues, but since that's what they requested,
I flipped it before starting work.
The opening image is actually after the work, so it's now in right warning orientation.
When I release the bite of the split washer that determines hub centering,
the wheel center can shift slightly, so
if I'm going to reverse the axle direction, it needs to be done before adjustment.

I applied the center gauge to the right side.
The orange color at the edge of the image is the WARNING sticker, so
at this point I have it in right warning and the bearing preload is set.
This is how much it deviated on the left side.
If you can detect this much deviation,
I'd say your center gauge is fine.
There was only the slightest bit of lateral runout in one spot, which
came out as part of the centering work.
Next is the 7850 carbon tubular.
This one's apparently off by just under 1mm.

↑Yeah, definitely.
Since it's deviated toward the non-freewheel side,
this didn't happen from age-related use.
Fixed.
The customer expressed concern about this wheel's rear hub not being upgradeable to 11-speed,
asking whether Shimano, as a major manufacturer, isn't ashamed of that.
But given the dimensions on the right side of this hub shell, there shouldn't be
dimensional issues with swapping to an 11-speed freehub body in theory (so they could do it if they wanted to).
But not only does Shimano fail to release 11-speed freehub bodies like most other manufacturers,
they're actually quite diligent in their efforts to prevent 11-speed conversion (→here).
please note the date is April 1st)
Next is the 7801 carbon tubular.
The customer said this one has no center deviation, but...

It checked out.
The customer said,
"I'm feeling some flex, possibly from loss of tension over time."
And they're right about that.
The spokes on the non-freewheel side flex around quite a bit.
So...

I tensioned the freewheel side as much as I could.
From here, I could pull the non-freewheel side until center comes back,
but since tensioning the non-freewheel side slightly increases freewheel side tension too,
I'm keeping it within the estimated limit of the freewheel side minus that amount.
To be more precise, I'm also leaving room for future true-up adjustments.
But it's made a huge difference.
You'll be pleased to see it. Hehehehe.

Pulled toward the non-freewheel side until center came back.
The customer wanted the tire that was on the 7801 removed and mounted on the 7850 with rim cement,
so that's what I did.
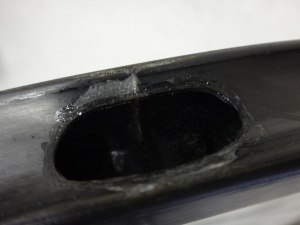
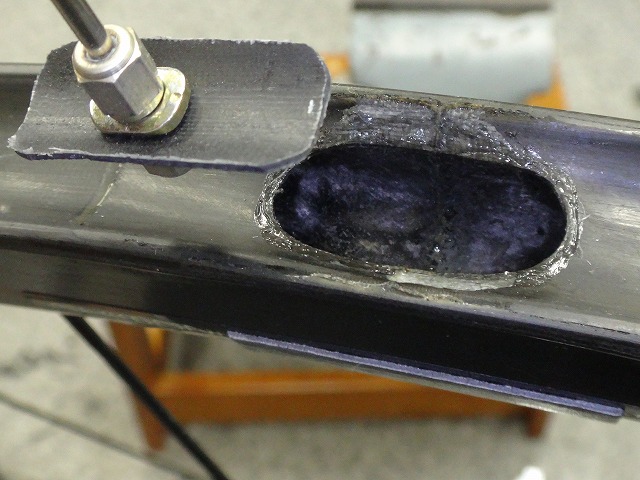
And while doing that, I noticed


↑the cap that covers the balloon purge hole on the opposite side of the valve was missing.
(It wasn't stuck to the tire either.)
The cap material is aluminum on very early models, carbon on later ones.

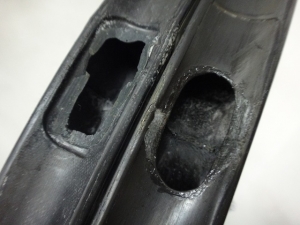
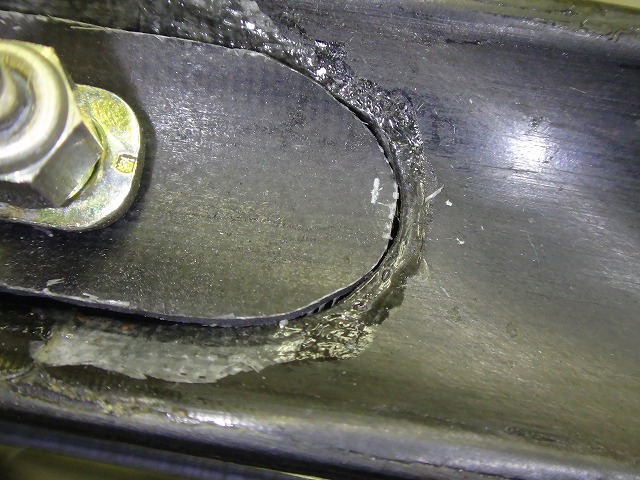
↑The rim on the left is from an ENVE 1-25.
This one also has a missing cap, but
because buckling occurred right at the hole, the cap lifted up, and
because it used tubular tape instead of rim cement,
the cap came right off when the tire was removed during rim replacement.
(Even with similar buckling, if the rim cement bed were thicker,
the cap probably wouldn't have come off even if the adhesive lifted.)
Compared to ENVE, the 7801's hole has no adhesive margin for the cap.
Plus the hole is large and elongated front-to-back, so using it as-is feels a bit risky.
I'm wondering what would happen if you stepped hard on something right at the hole.
So I decided to make a cap.
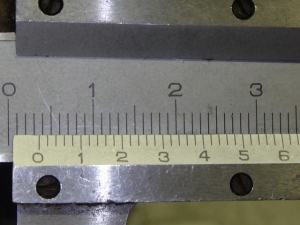
I stretched Chidanu (→here) taut across the 7801 rim.
The depth of the rim's tire bed depression with the Chidanu installed was

about 3.6mm.
If the curvatures are similar on a similar rim,
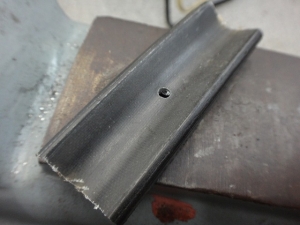
I looked for a scrap piece from the outer edge of a comparable rim—
tubular tire without a groove for seam relief—
and found one.

I drilled a small hole.
This is, incidentally, the only "drill singing" moment in this whole article.
I made a "handle" using a spoke and an internal nipple.

I attached a diamond bit to my rotary tool
and did fit-to-part grinding, removing material bit by bit.
Good, one side is nearly perfect.
Since the rim hole isn't a perfect ellipse,
rotating the cap 180° won't fit at all.
Once I had the cap and rim hole overlapping flush and nearly perfectly aligned,
I fixed it with adhesive.
I made the handle partly for ease of rotary tool work, but mainly
to be able to lift and manipulate the cap while working the adhesive in,
guiding it to the flush position.
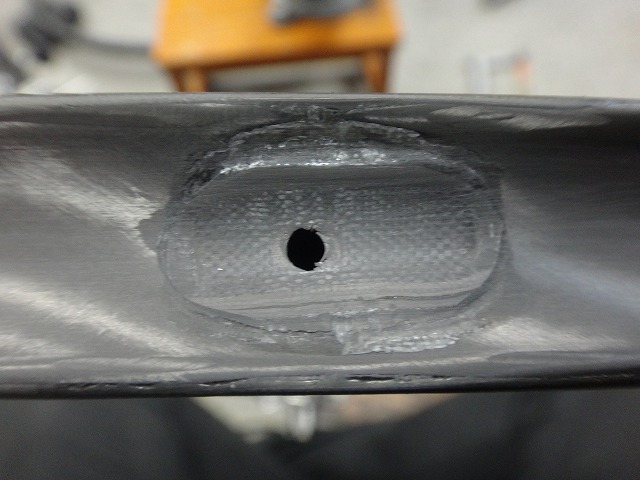

Done.
After the adhesive cured, I gave it a light sanding.

The curvature of the cap matched the rim almost perfectly.
Surprisingly—and I probably shouldn't say this—
the cap is bonded properly.
Even pushing hard with my thumb won't budge it.
Rather, if it did come loose under that much pressure,
I'd want it to come out (so I could redo it).
The adhesive must be performing well.
Of course, there's nothing packed inside the rim.
With rim tape, there's always a chance it gets peeled off with the tire, so
I'd recommend using it with rim cement if possible.
Finally, the rear wheel of Nomu Lab wheel #5 had
slight center deviation.
Since it was toward the freewheel side, I think it's from age-related use.
The customer says a local shop did a true-up twice (and did it well), but
that doesn't seem to be the cause.
Also, I greased the bearing on the left side of the hub shell.