I received a Time frame from a customer (sort of).

The cables running through the down tube don't have any cable ties to keep them in place,
so they rattle and make noise with vibration. They want me to fix that,
and also remove the external battery from under the down tube
and install an internal battery on the seatpost.
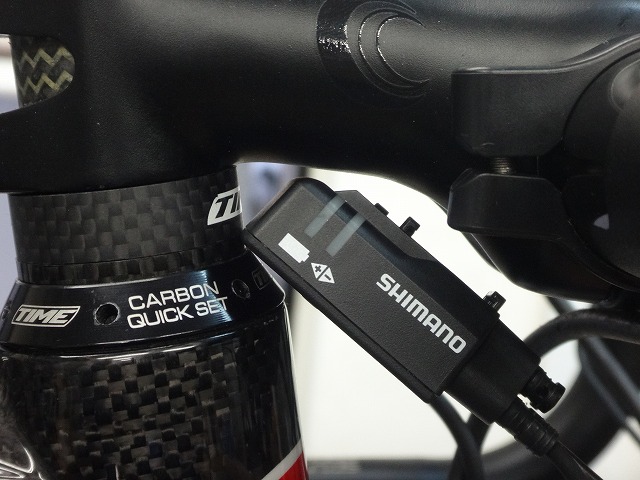
The original upper junction before work was an SM-EW67A-E,
which is what I unofficially call a "cockroach junction" (※),
and since it has no charging port, it won't work with an internal battery.
※Short for "cockroach junction"

I could swap the upper junction to an EW90,
but it doesn't look like it would fit right.
A headtube spacer-type adapter would solve it,
but Time frames complete headset pressure at the tall cap on the headset,
so the adapter can't be secured (→here).
This time, the Pioneer pedaling monitor SGX-CA500 had an adapter
on the handlebar, so I decided to add a junction bracket there.
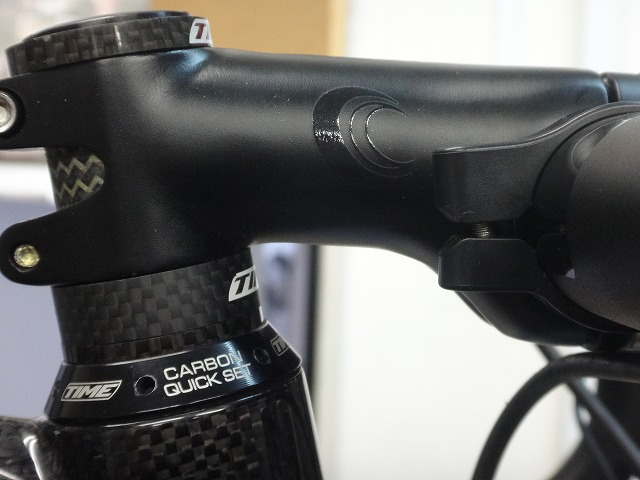
If I were to swap the stem on this Time frame, the stack height is so tall
that I'd need to remove almost all the spacers from the current fork column
(I'd only be able to fit about 2mm of them).
Some Time stems have holes for blind rivets on the back of the body
(→here),
but this frame's stem had no holes,
so I decided to mount the upper junction in a way independent of stem replacement.
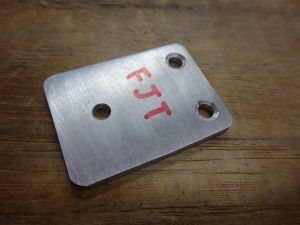
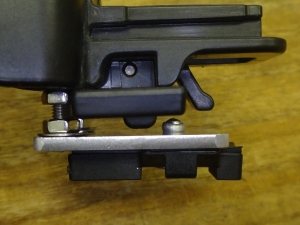
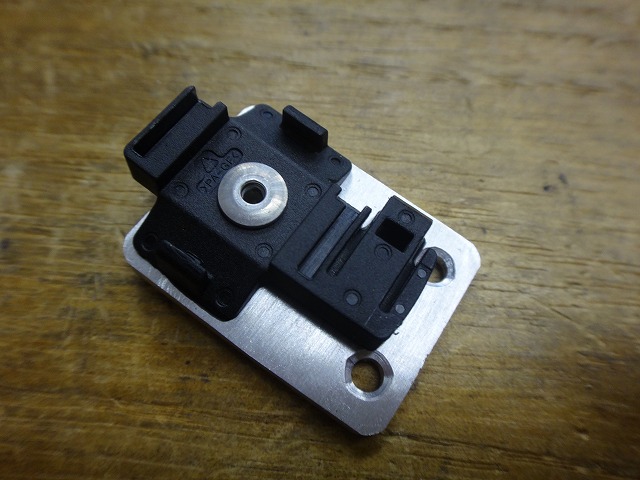
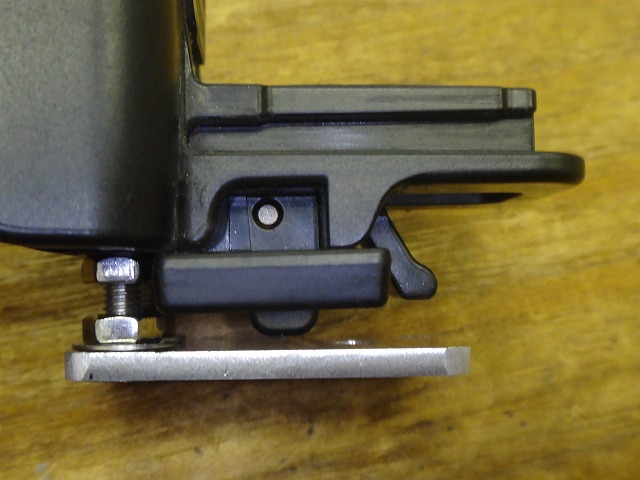
I made an aluminum plate like this.

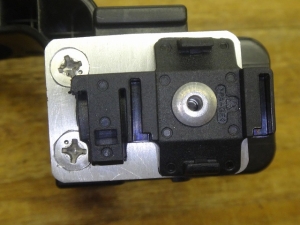
I installed blind rivets to secure the bracket.
There's rubber in between, so it won't move.
I only drove these rivets to verify that—I'll drill them out later.

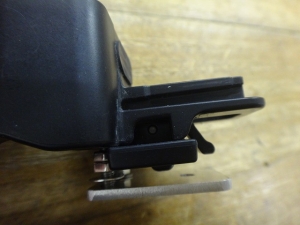
I installed long M3 countersunk screws into the two mysterious screw holes on the back of the pedaling monitor,
positioning them where needed and then locking them in place with nuts on both sides.
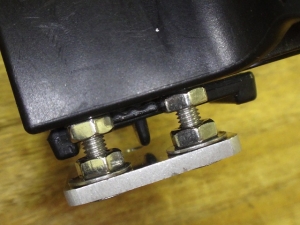

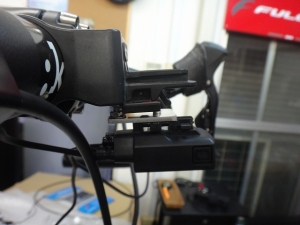
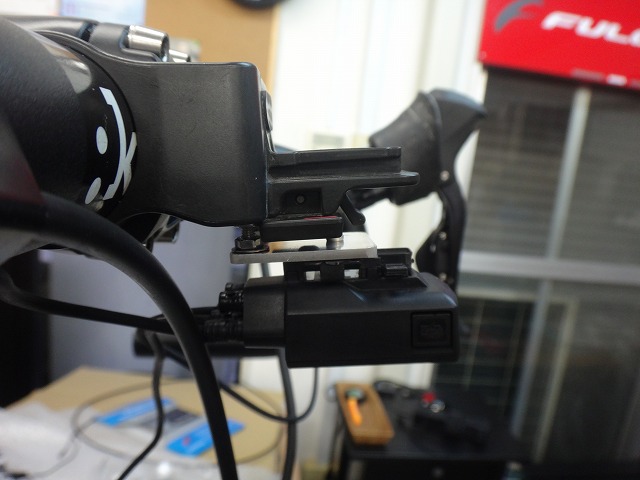
It's mounted. I shook it while holding it,
and it's quite solid.
The cycle computer itself attaches and detaches fine, and the lock works without issues.
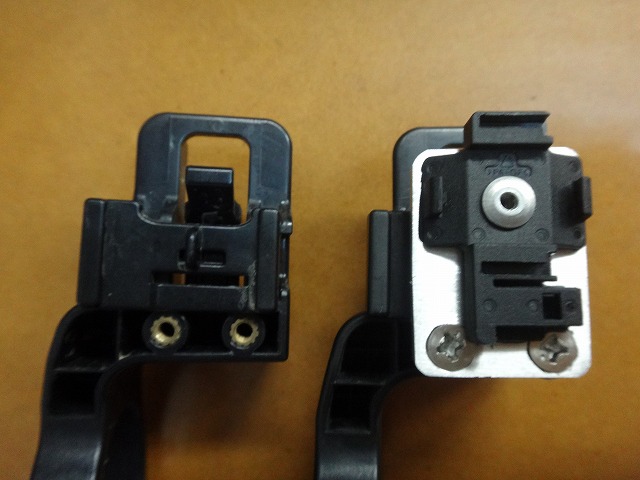
The upper junction bracket is installed.
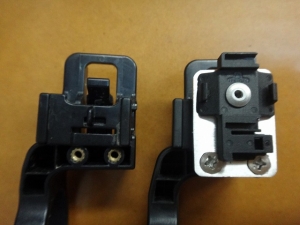
↑Before and after
I'd say there's a pretty good rate of Di2 among pedaling monitor users,
so Pioneer really should make an adapter for these mystery screw holes.
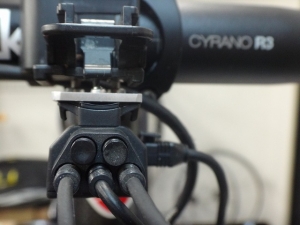
It was backwards.
It's not that this way doesn't work,
but for this build, it looks better with the cable exiting toward the rear.

I flipped the orientation.
↑Like this
Next time just buy a RAM mount
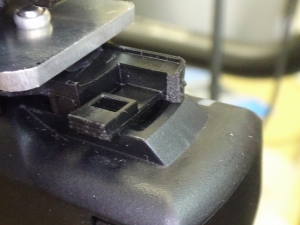
The end of the bracket is broken, but it came that way from the factory.
The snap-fit section is still intact, so there's no problem with the hold.
The cables running through the down tube don't have any cable ties to keep them in place,
so they rattle and make noise with vibration. They want me to fix that,
and also remove the external battery from under the down tube
and install an internal battery on the seatpost.
The original upper junction before work was an SM-EW67A-E,
which is what I unofficially call a "cockroach junction" (※),
and since it has no charging port, it won't work with an internal battery.
※Short for "cockroach junction"
I could swap the upper junction to an EW90,
but it doesn't look like it would fit right.
A headtube spacer-type adapter would solve it,
but Time frames complete headset pressure at the tall cap on the headset,
so the adapter can't be secured (→here).
This time, the Pioneer pedaling monitor SGX-CA500 had an adapter
on the handlebar, so I decided to add a junction bracket there.
If I were to swap the stem on this Time frame, the stack height is so tall
that I'd need to remove almost all the spacers from the current fork column
(I'd only be able to fit about 2mm of them).
Some Time stems have holes for blind rivets on the back of the body
(→here),
but this frame's stem had no holes,
so I decided to mount the upper junction in a way independent of stem replacement.

I made an aluminum plate like this.
I installed blind rivets to secure the bracket.
There's rubber in between, so it won't move.
I only drove these rivets to verify that—I'll drill them out later.


I installed long M3 countersunk screws into the two mysterious screw holes on the back of the pedaling monitor,
positioning them where needed and then locking them in place with nuts on both sides.

It's mounted. I shook it while holding it,
and it's quite solid.
The cycle computer itself attaches and detaches fine, and the lock works without issues.


The upper junction bracket is installed.
↑Before and after
I'd say there's a pretty good rate of Di2 among pedaling monitor users,
so Pioneer really should make an adapter for these mystery screw holes.

It was backwards.
It's not that this way doesn't work,
but for this build, it looks better with the cable exiting toward the rear.

I flipped the orientation.
↑Like this

The end of the bracket is broken, but it came that way from the factory.
The snap-fit section is still intact, so there's no problem with the hold.