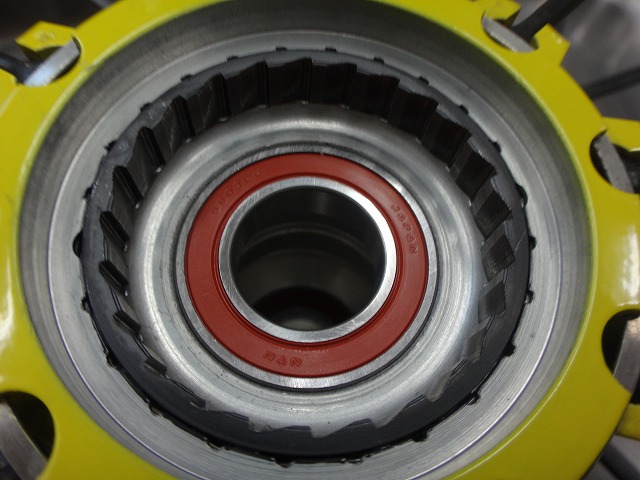
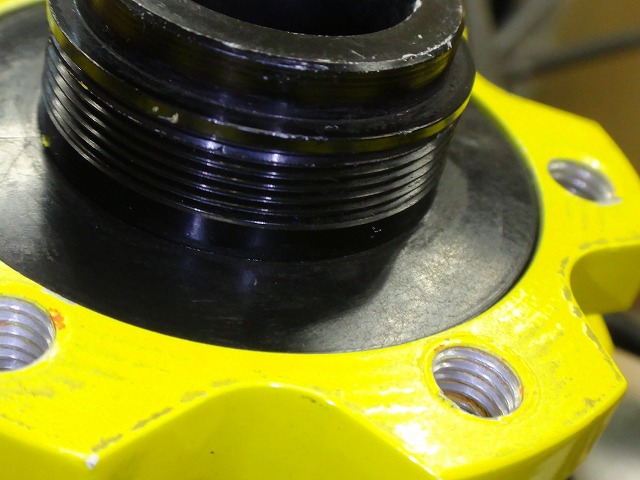
I received a Crossmax Enduro (Mavic enduro mountain bike wheel) from a customer.
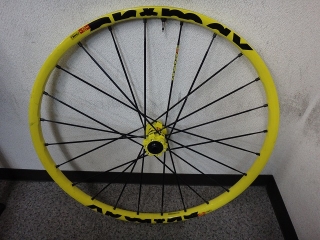
It's a model with a yellow hub and yellow rim that closely resembles
the company's DEEMAX downhill wheel.
I'm sure they intentionally made it similar, being aware of that performance orientation.
What the customer is particularly concerned about is
that the rear hub bearing preload adjustment keeps loosening,
but he also wants me to fix anything else that seems off.

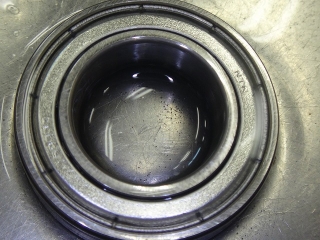
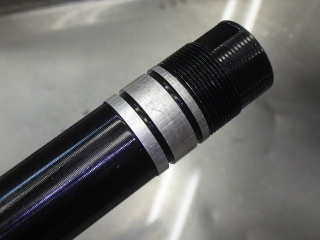
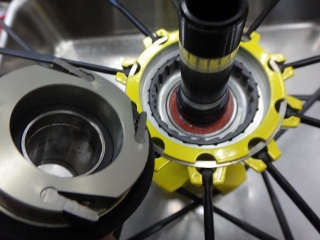
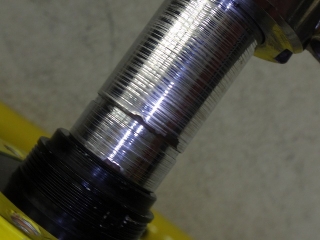
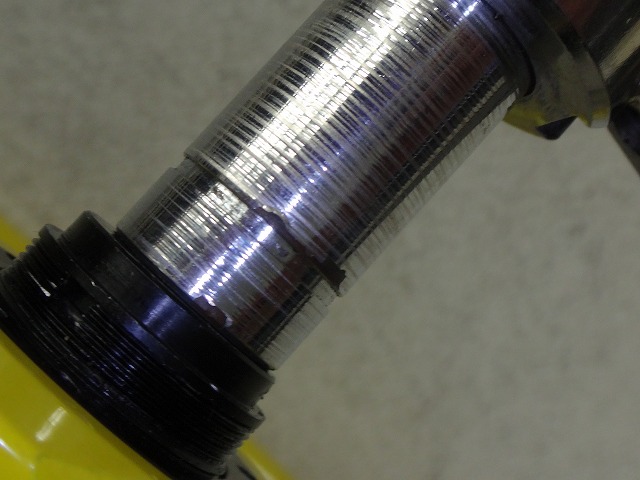
I removed the rear hub axle.
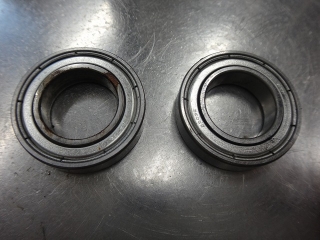
The bearing seals are metal rather than rubber.
Metal seals can't be made as contact-type seals, so
regarding water ingress, they're no better than open-type seals (no seal).
(They do provide some dust protection.)
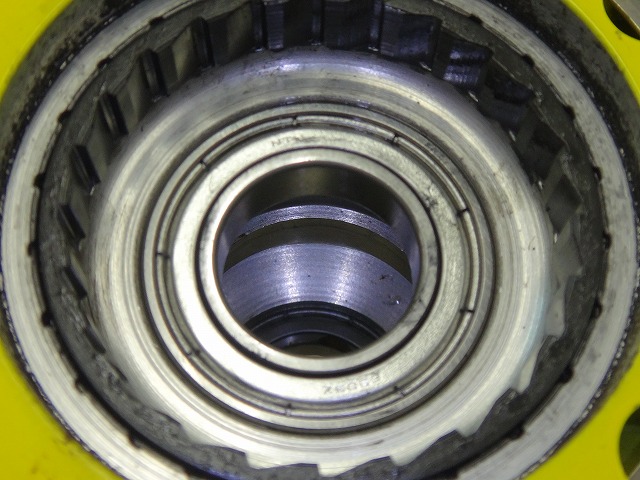
Mavic's genuine bearings come with
rubber seal on one side and metal seal on the other,
and the metal seal is normally pressed in facing toward the hub body or freebody interior.
But after checking, in this case
the orientation appears to be correct.
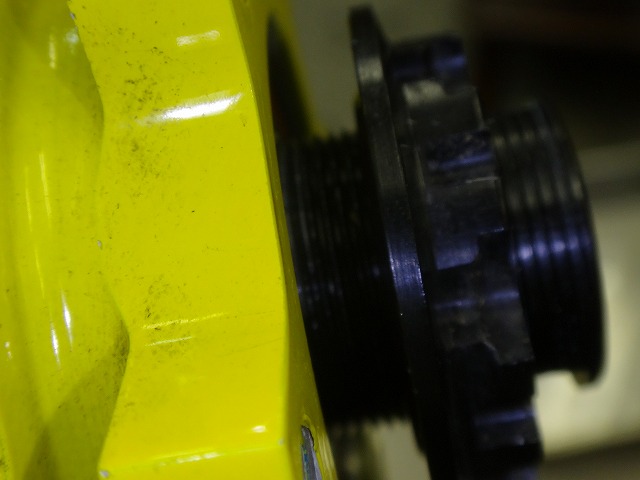
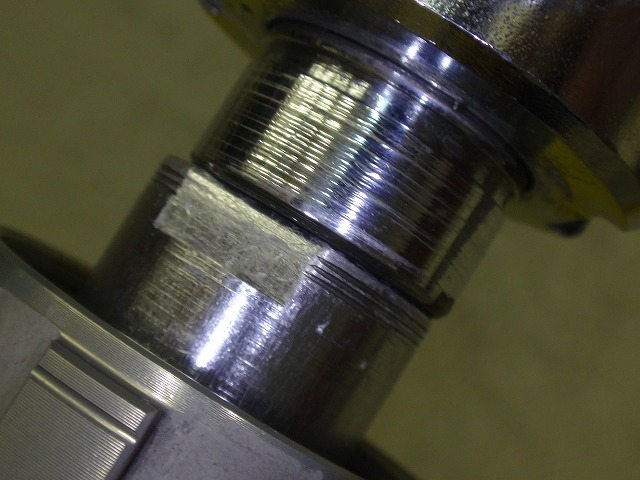
This uses an ITS-4 freebody with four-pawl engagement on the freebody side,
but similarly to the FTS-L freehub with two pawls on the hub body side,
an accordion-like rubber seal is pressed to create a sealed chamber, so
having the metal seal facing outward doesn't cause problems, apparently.
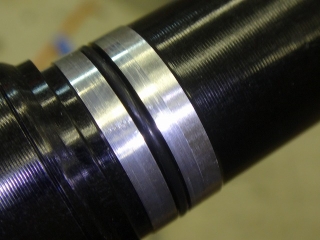
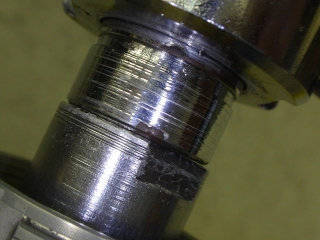
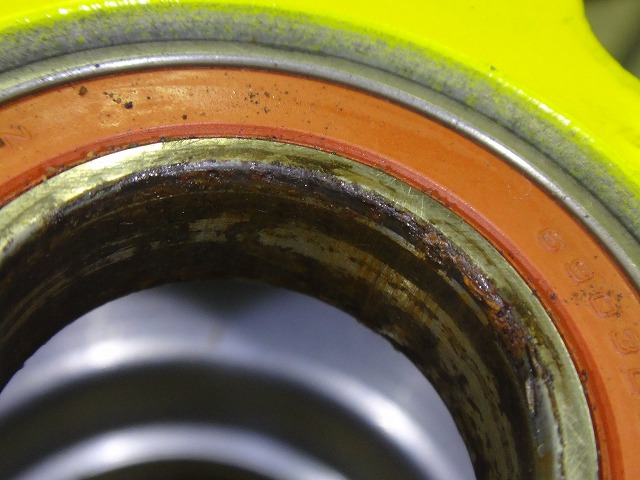
On the non-freebody side, the rubber seal faces outward, and

bearing internal rust has leaked outward, and

there's secondary rust on the hub axle as well.
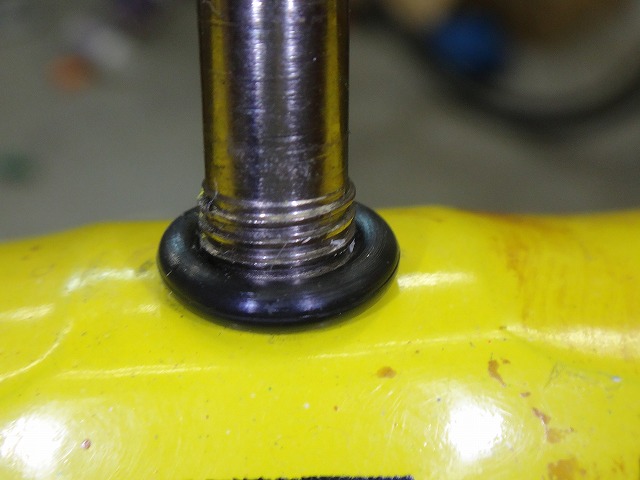
The subtle but tricky problem was the O-ring
that's supposed to be in the groove on the hub axle.
On the outside, it was destroyed by rust and crumbled completely,
and on the inside the O-ring in the groove had broken and fallen into the hub body.
After checking, O-rings alone aren't sold individually.
You have to buy the entire hub axle kit.

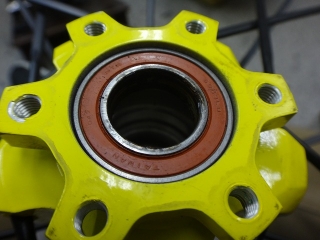
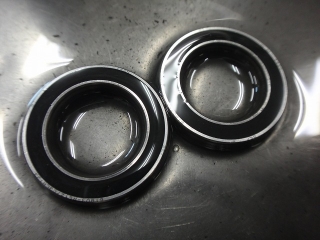
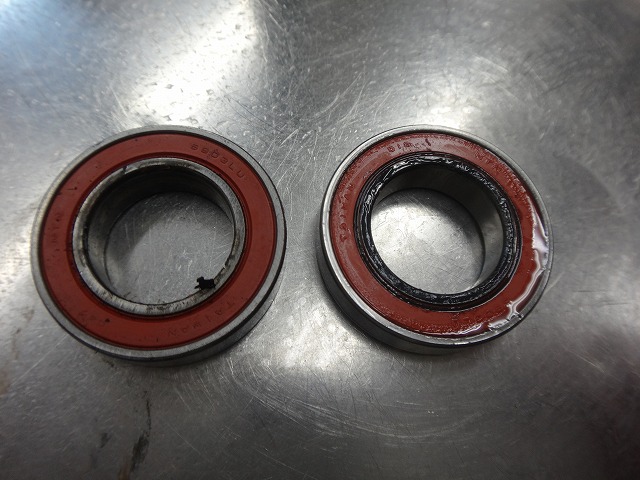
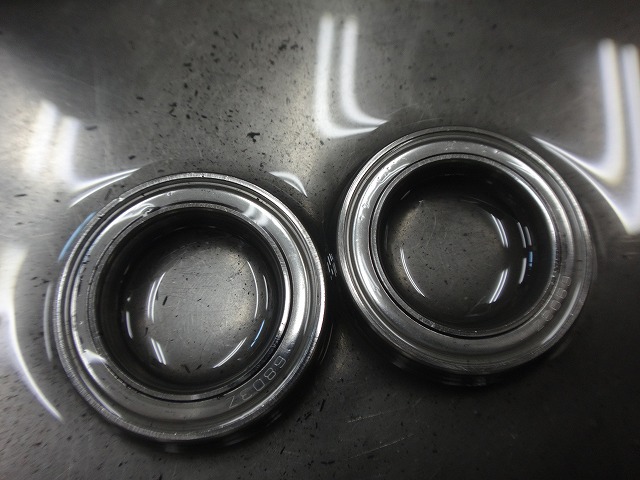
I removed the rear hub body bearing.
One side has a rubber seal (contact-type), and
the other side has a metal seal.
The rubber seal side is marked 6903LU.
6903 is a standard size with outer diameter / inner diameter / thickness of 30 / 17 / 7 mm respectively,
and LU or LLU denotes contact-type seals.
The metal seal side is marked 6903Z, where Z or ZZ denotes metal seals.
When I spray parts cleaner on the non-rusted side (freebody side),
nothing particular shows up, but

when sprayed on the rusted side, rust seeps out continuously.
For repairs, I decided to use generic dual contact-type rubber seal bearings.
As you can see from the gap between the rear hub left-side cover and hub body on R-SYS hubs,
Mavic relies on bearing seals for dust and water protection, so
right up to that point there's often effectively no real seal in the structure.

This overlaps with yesterday's discussion, but using long M5 bolts on a six-hole rotor mount
that contact the hub body can end up being irrecoverable, so be careful.

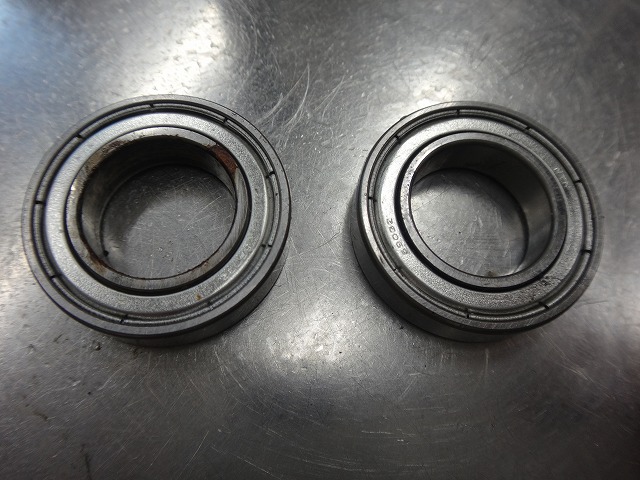
I pressed 6903LU bearings into both left and right hub bodies.
The freebody bearings are also generic size, but

have metal seals on one side.
The rubber seal side is marked 61803, but excluding the second digit 1,
it matches the size of standard bearing 6803 (26/17/5 mm).
The C3 in the part number string refers to C3 radial clearance,
a standard value for internal radial clearance, so
this rubber seal is non-contact type.
The metal seal side is marked 6803Z,
meaning 6803 size with metal seal.
The freebody bearing had much worse grittiness when rotating
compared to the hub bearing, so replacement was necessary.
I replaced it with non-contact 6803 bearings (6803LB) on both sides.
Unlike Campagnolo of old, Mavic doesn't sell
this bearing alone.
The official fix is to replace the freebody itself.
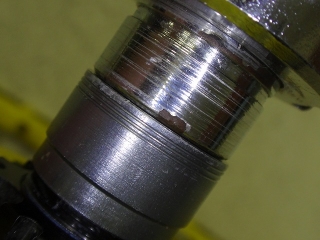
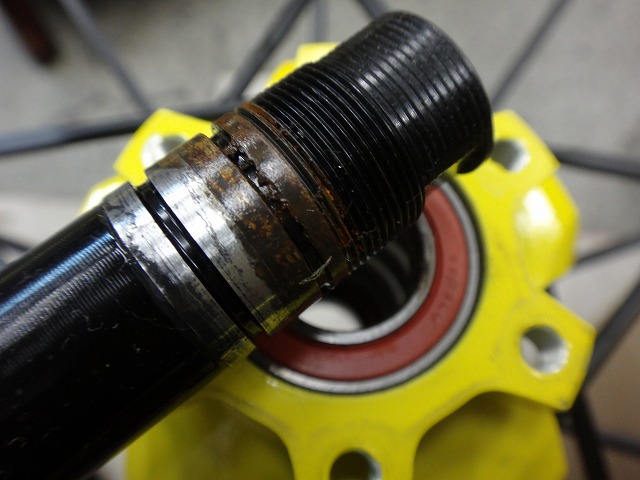
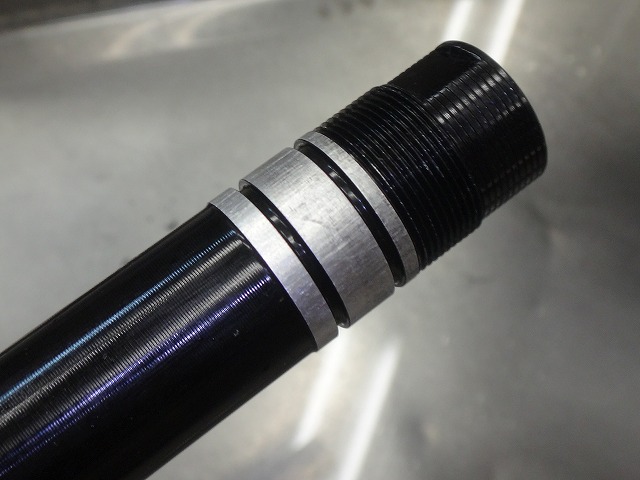
I cleaned off the rust on the axle.
Just below the bearing on the non-freebody side,
there are two O-rings to install, but
just below the bearing on the freebody side there's one.
I was lucky this one came through intact.
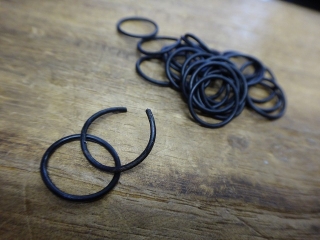
Here's the O-ring that came through intact, and the one that broke and fell into the hub body.
Since I could identify the size, I was able to order replacements.
I mean, come on—buying a whole new hub axle assembly for this? That's ridiculous.
Through this investigation I became an "O-ring doctor."
Bring it on.Sorry, actually please don't.
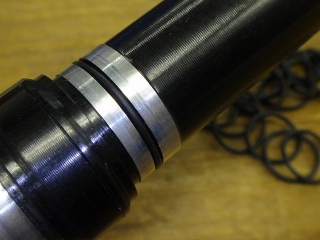

I replaced the O-rings—all three are new.
I didn't reuse the one that came through intact.
With silicone grease applied on top of this,
it shouldn't get trashed again anytime soon.


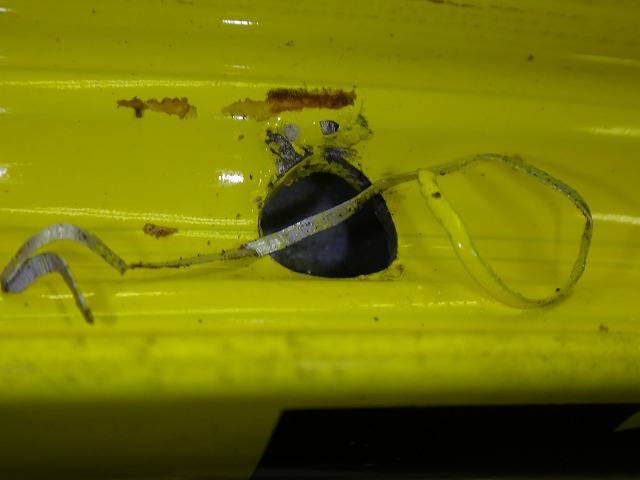
There was noise from debris inside the rear rim.
A lot of machining chips came out—longer than the valve hole diameter.
Since they have yellow paint on them, they're probably chips generated during post-paint processes.
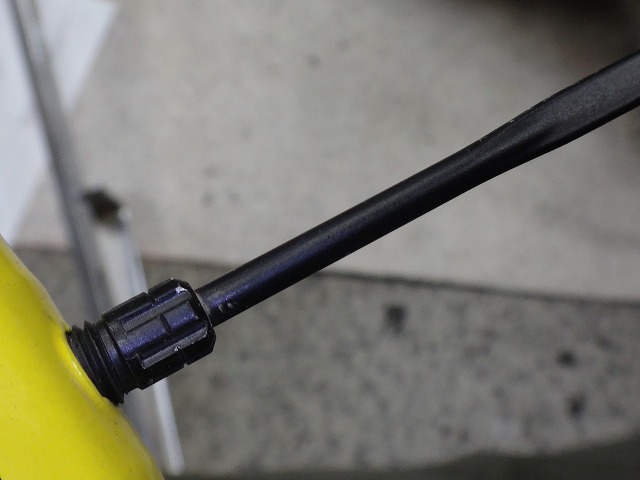
The only entry point is the valve hole, which is sealed with a tubeless valve,
so fine sand shouldn't get in at all. But the noise from rim debris was loud,
so I had a suspicion something was off.

The rubber ring that goes in the wrench flat for the tubeless valve locknut
showed no particular wear, but the customer requested it be replaced anyway.
I've identified the size and ensured stable supply of this part too.
I am the O-ring doctor, after all.
It's the same size as the original, but I suspect the original is slightly loose
at the tolerance level, or maybe bigger.
Though realistically it's probably just aged and sagged, not a tolerance issue.
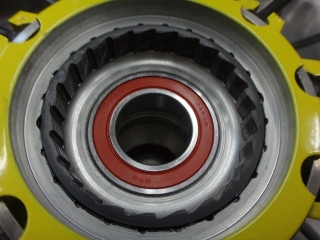
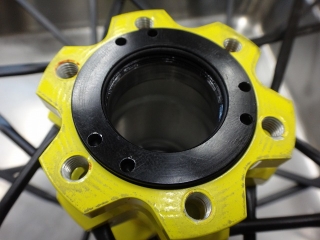
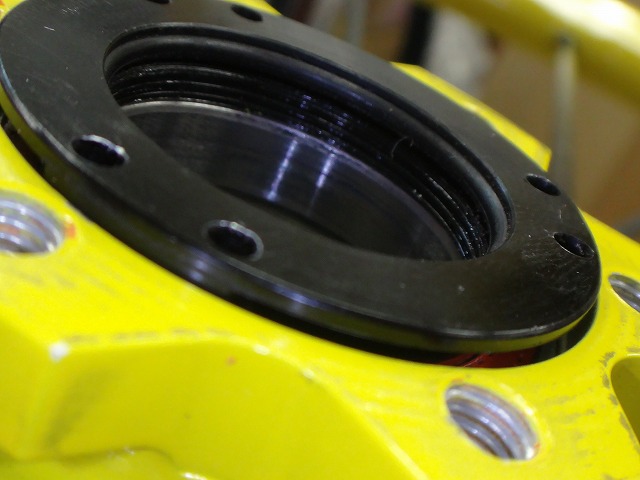
I also cleaned the area around the freebody pawls.
The accordion-like seal in front of the pawls
appears to interfere with the pawls in this state.
When actually pressed onto the hub body, it won't interfere, so there's no problem.
The seal has a direction: the flat side faces the freebody,
and the thin, angled side faces the hub body.

I applied the thread-locking compound I normally use for nipples to the hub axle threads.
It has the perfect locking effect: you can loosen and tighten it,
but it won't loosen on its own.
Since there's no more play from bearing wear,
this step might actually be unnecessary.


Finally, truing.
There was center offset, but spoke tension isn't slack, so
I just centered it by tightening one side more during truing.
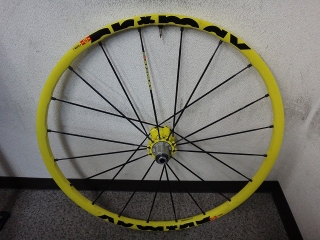
Next, the front wheel.
The front hub bearings had no play, no rust, no wear, so
I left them as-is.
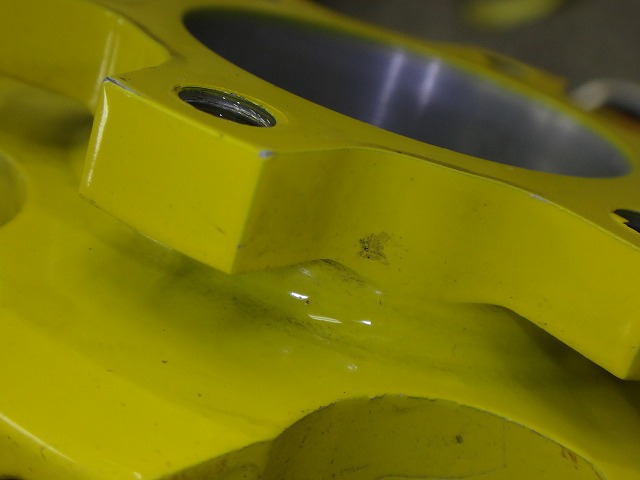
With this front hub, the adjusting cone slotted cap is normally on the left,
but to avoid rotor interference
it's positioned on the right with a slotted dust cap.
If you make the mistake shown in the image above,

it won't be flush, so you notice something's wrong
(probably by design).

This is the correct way.
With front hubs like Cosmic Carbone Ultime,
the bearing depth differs left to right by the thickness of the adjusting cap (→see here),
so similar issues can occur.

Provisional center: perfect, runout: nearly zero.
After truing, center was also perfect.
(The image above shows provisional center; the post-work result looked identical,
so I didn't take another photo.)

The Crossmax Enduro spokes were fourth-type on both sides of both wheels.
By spoke mass proportion, these are heavier than second-type spokes.
With yesterday's Crossmax SLR Disc,
front left and right were second-type, rear left and right were second/fourth-type,
choosing lighter spokes overall while making the rear different diameters left to right.
But with Crossmax Enduro,
they chose spoke rigidity itself over weight.
In this repair, the only thing Mavic supplies individually as standard
is the hub body bearing (strictly speaking it comes as a left-right set).
Making customers buy a whole hub axle kit just for an O-ring,
or a whole freebody just to replace a bearing alone, is...
wait, who's knocking at this hour? no wait, what are you do—


It's a model with a yellow hub and yellow rim that closely resembles
the company's DEEMAX downhill wheel.
I'm sure they intentionally made it similar, being aware of that performance orientation.
What the customer is particularly concerned about is
that the rear hub bearing preload adjustment keeps loosening,
but he also wants me to fix anything else that seems off.
I removed the rear hub axle.
The bearing seals are metal rather than rubber.
Metal seals can't be made as contact-type seals, so
regarding water ingress, they're no better than open-type seals (no seal).
(They do provide some dust protection.)
Mavic's genuine bearings come with
rubber seal on one side and metal seal on the other,
and the metal seal is normally pressed in facing toward the hub body or freebody interior.
But after checking, in this case
the orientation appears to be correct.
This uses an ITS-4 freebody with four-pawl engagement on the freebody side,
but similarly to the FTS-L freehub with two pawls on the hub body side,
an accordion-like rubber seal is pressed to create a sealed chamber, so
having the metal seal facing outward doesn't cause problems, apparently.

On the non-freebody side, the rubber seal faces outward, and
bearing internal rust has leaked outward, and
there's secondary rust on the hub axle as well.
The subtle but tricky problem was the O-ring
that's supposed to be in the groove on the hub axle.
On the outside, it was destroyed by rust and crumbled completely,
and on the inside the O-ring in the groove had broken and fallen into the hub body.
After checking, O-rings alone aren't sold individually.
You have to buy the entire hub axle kit.
I removed the rear hub body bearing.
One side has a rubber seal (contact-type), and
the other side has a metal seal.
The rubber seal side is marked 6903LU.
6903 is a standard size with outer diameter / inner diameter / thickness of 30 / 17 / 7 mm respectively,
and LU or LLU denotes contact-type seals.
The metal seal side is marked 6903Z, where Z or ZZ denotes metal seals.

When I spray parts cleaner on the non-rusted side (freebody side),
nothing particular shows up, but
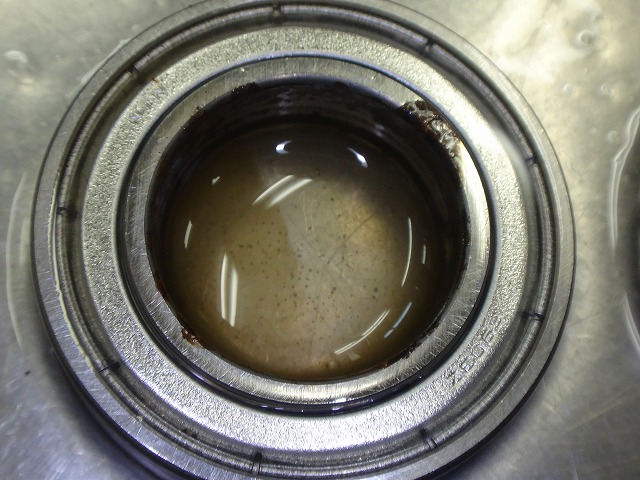
when sprayed on the rusted side, rust seeps out continuously.
For repairs, I decided to use generic dual contact-type rubber seal bearings.
As you can see from the gap between the rear hub left-side cover and hub body on R-SYS hubs,
Mavic relies on bearing seals for dust and water protection, so
right up to that point there's often effectively no real seal in the structure.
This overlaps with yesterday's discussion, but using long M5 bolts on a six-hole rotor mount
that contact the hub body can end up being irrecoverable, so be careful.

I pressed 6903LU bearings into both left and right hub bodies.

The freebody bearings are also generic size, but
have metal seals on one side.
The rubber seal side is marked 61803, but excluding the second digit 1,
it matches the size of standard bearing 6803 (26/17/5 mm).
The C3 in the part number string refers to C3 radial clearance,
a standard value for internal radial clearance, so
this rubber seal is non-contact type.
The metal seal side is marked 6803Z,
meaning 6803 size with metal seal.
The freebody bearing had much worse grittiness when rotating
compared to the hub bearing, so replacement was necessary.

I replaced it with non-contact 6803 bearings (6803LB) on both sides.
Unlike Campagnolo of old, Mavic doesn't sell
this bearing alone.
The official fix is to replace the freebody itself.
I cleaned off the rust on the axle.
Just below the bearing on the non-freebody side,
there are two O-rings to install, but

just below the bearing on the freebody side there's one.
I was lucky this one came through intact.

Here's the O-ring that came through intact, and the one that broke and fell into the hub body.
Since I could identify the size, I was able to order replacements.
I mean, come on—buying a whole new hub axle assembly for this? That's ridiculous.
Through this investigation I became an "O-ring doctor."
Bring it on.


I replaced the O-rings—all three are new.
I didn't reuse the one that came through intact.
With silicone grease applied on top of this,
it shouldn't get trashed again anytime soon.

There was noise from debris inside the rear rim.
A lot of machining chips came out—longer than the valve hole diameter.
Since they have yellow paint on them, they're probably chips generated during post-paint processes.
The only entry point is the valve hole, which is sealed with a tubeless valve,
so fine sand shouldn't get in at all. But the noise from rim debris was loud,
so I had a suspicion something was off.
The rubber ring that goes in the wrench flat for the tubeless valve locknut
showed no particular wear, but the customer requested it be replaced anyway.
I've identified the size and ensured stable supply of this part too.
I am the O-ring doctor, after all.
It's the same size as the original, but I suspect the original is slightly loose
at the tolerance level, or maybe bigger.
Though realistically it's probably just aged and sagged, not a tolerance issue.

I also cleaned the area around the freebody pawls.
The accordion-like seal in front of the pawls
appears to interfere with the pawls in this state.
When actually pressed onto the hub body, it won't interfere, so there's no problem.
The seal has a direction: the flat side faces the freebody,
and the thin, angled side faces the hub body.
I applied the thread-locking compound I normally use for nipples to the hub axle threads.
It has the perfect locking effect: you can loosen and tighten it,
but it won't loosen on its own.
Since there's no more play from bearing wear,
this step might actually be unnecessary.

Finally, truing.
There was center offset, but spoke tension isn't slack, so


I just centered it by tightening one side more during truing.

Next, the front wheel.
The front hub bearings had no play, no rust, no wear, so
I left them as-is.
With this front hub, the adjusting cone slotted cap is normally on the left,
but to avoid rotor interference
it's positioned on the right with a slotted dust cap.
If you make the mistake shown in the image above,
it won't be flush, so you notice something's wrong
(probably by design).
This is the correct way.
With front hubs like Cosmic Carbone Ultime,
the bearing depth differs left to right by the thickness of the adjusting cap (→see here),
so similar issues can occur.

Provisional center: perfect, runout: nearly zero.
After truing, center was also perfect.
(The image above shows provisional center; the post-work result looked identical,
so I didn't take another photo.)
The Crossmax Enduro spokes were fourth-type on both sides of both wheels.
By spoke mass proportion, these are heavier than second-type spokes.
With yesterday's Crossmax SLR Disc,
front left and right were second-type, rear left and right were second/fourth-type,
choosing lighter spokes overall while making the rear different diameters left to right.
But with Crossmax Enduro,
they chose spoke rigidity itself over weight.
In this repair, the only thing Mavic supplies individually as standard
is the hub body bearing (strictly speaking it comes as a left-right set).
Making customers buy a whole hub axle kit just for an O-ring,
or a whole freebody just to replace a bearing alone, is...
wait, who's knocking at this hour? no wait, what are you do—