Wheels again today (and so on).
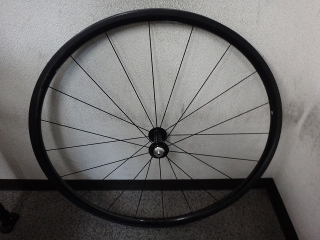

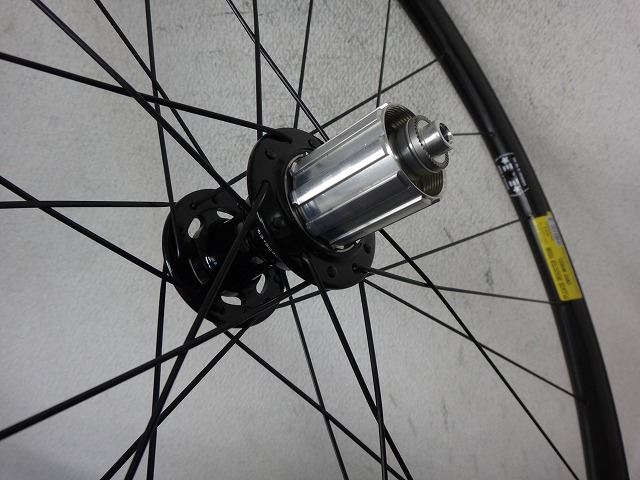
Built a wheel with front and rear rims from the Smart Envi System 2.2 and
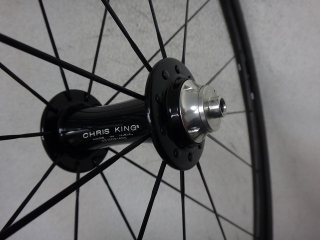
Chris King R45 hubs.
It looks like only the rear rim has a yellow sticker on it, but
when considering the valve hole sticker's "Handmade in USA" side as the right side
(the other side has the serial number marking),
the yellow sticker (which also has a serial number and gets peeled off before use)
ended up on the right side of the rear rim and the left side of the front rim. That's why.
Aside from "spokes in black," the specs were left to my discretion,
so the front wheel is an R45 hub 20H black CX-RAY outpoke radial lacing,

and the rear wheel is an R45 hub 24H black half-comp 4-cross lacing.
I'll handle the truing later.
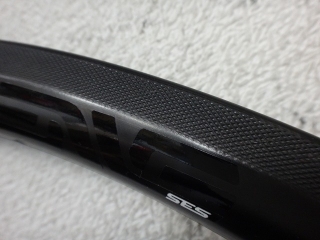
Since it's a very recent model, the brake zone is finished with
that file finish I mentioned before (→here).
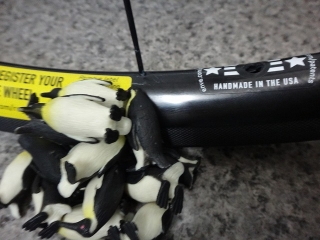
There's an issue with a popped nipple from the SES 4.5 build linked earlier,
but I kept missing the chance to write about it, so while unrelated to this job,
I'll include it now.

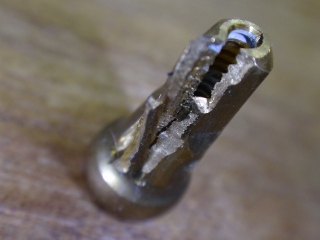
The nipples that come with current Smart Envi rims represent the fourth generation
of internal nipples counting back to the EDGE era,
and one location has a punch mark (it doesn't look like a drill mark).
As you hand-thread the spoke in, it changes to a harder feel right under the punch mark,
so it's certain that this slight deformation of the thread hole
creates a loosening-prevention effect.
After that point, you can turn the nipple with tools, but threading a spoke by hand is impossible.
And the nipple in the image above appears to be one where this process went wrong.
With just hand strength plus hand tools like pliers,
you can't crush a brass nipple like this,
so tremendous force was applied during manufacture.
The number of nipples that come with the rim matches the hole count exactly,
but our shop has a reasonable surplus supply, so we managed fine.
With the current Smart Envi, warranty coverage requires not only
"use of genuine brake shoes" but also
"use of the nipples included with the rim" as conditions,
sowhile I don't personally care for these nipples
we have to use them.
Back to this wheel—the customer asked me to
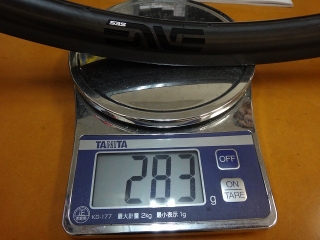
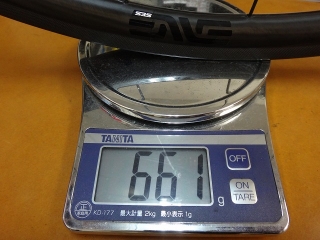
weigh the finished wheel and keep note of it.
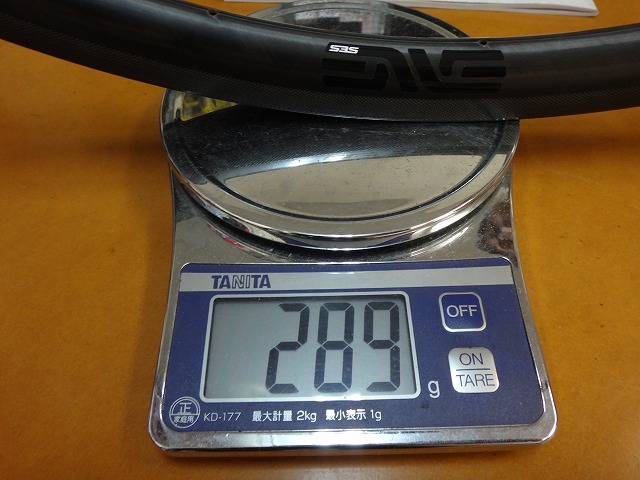
I'm weighing not just the complete wheel but also the rim alone, so here's that data too.

↑Front rim
↑Rear rim
I should mention—these are tubular rims.

↑Front wheel
↑Rear wheel


Built a wheel with front and rear rims from the Smart Envi System 2.2 and
Chris King R45 hubs.
It looks like only the rear rim has a yellow sticker on it, but

when considering the valve hole sticker's "Handmade in USA" side as the right side
(the other side has the serial number marking),
the yellow sticker (which also has a serial number and gets peeled off before use)
ended up on the right side of the rear rim and the left side of the front rim. That's why.

Aside from "spokes in black," the specs were left to my discretion,
so the front wheel is an R45 hub 20H black CX-RAY outpoke radial lacing,
and the rear wheel is an R45 hub 24H black half-comp 4-cross lacing.
I'll handle the truing later.

Since it's a very recent model, the brake zone is finished with
that file finish I mentioned before (→here).
There's an issue with a popped nipple from the SES 4.5 build linked earlier,
but I kept missing the chance to write about it, so while unrelated to this job,
I'll include it now.


The nipples that come with current Smart Envi rims represent the fourth generation
of internal nipples counting back to the EDGE era,
and one location has a punch mark (it doesn't look like a drill mark).
As you hand-thread the spoke in, it changes to a harder feel right under the punch mark,
so it's certain that this slight deformation of the thread hole
creates a loosening-prevention effect.
After that point, you can turn the nipple with tools, but threading a spoke by hand is impossible.
And the nipple in the image above appears to be one where this process went wrong.
With just hand strength plus hand tools like pliers,
you can't crush a brass nipple like this,
so tremendous force was applied during manufacture.
The number of nipples that come with the rim matches the hole count exactly,
but our shop has a reasonable surplus supply, so we managed fine.
With the current Smart Envi, warranty coverage requires not only
"use of genuine brake shoes" but also
"use of the nipples included with the rim" as conditions,
so
we have to use them.
Back to this wheel—the customer asked me to
weigh the finished wheel and keep note of it.
I'm weighing not just the complete wheel but also the rim alone, so here's that data too.
↑Front rim

↑Rear rim
I should mention—these are tubular rims.

↑Front wheel

↑Rear wheel