Another wheel build today (and so on).
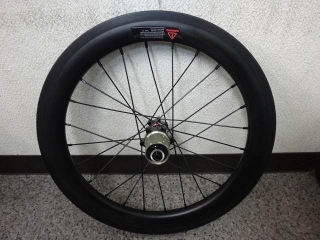
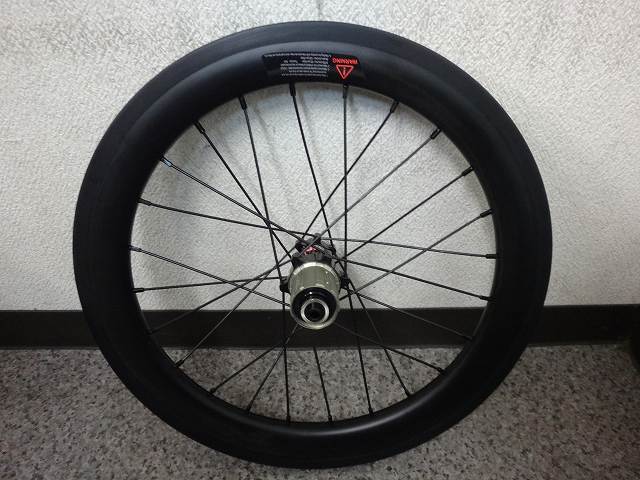
I built the rear wheel with a carbon WO rim for a Brompton.
Hub: Novatec FS522SB straight spoke specification
Left and right forced 2-cross lacing, straight rim hub, 24H,
Spokes: black Leader straight spokes, with both sides woven on the final crossing.
I thought I'd have time to build both wheels,
but I ran into unexpected difficulties and barely managed to complete the rear wheel.
You might notice the unfamiliar term "straight rim hub" above—
if you sensed something ominous about that, your instincts are sharp.
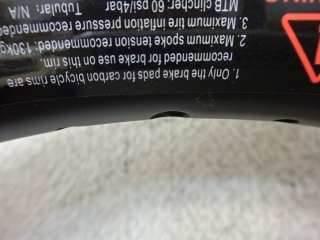
This rim is a 16-inch WO rim because it's for a Brompton.
By "WO rim" here, I mean in the strict sense of WO standard specification,
not the broad definition of "clincher rather than tubular."
You'll also find HE standard rims on 16-inch wheels.
I often write that Campagnolo's use of the term "clincher" to mean WO
is technically incorrect, but with 700C rims that's one thing—
for 20-inch and 16-inch wheels, whether a clincher rim is WO or HE
is extremely important.
Even with the same nominal diameter in inches, the tire and tube sizes differ completely.

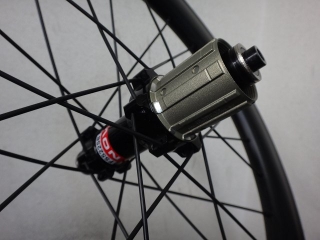
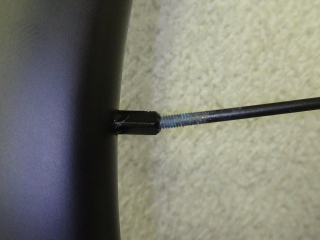
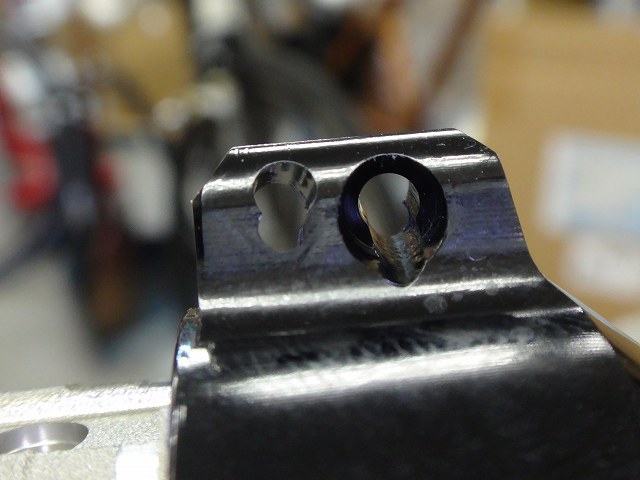
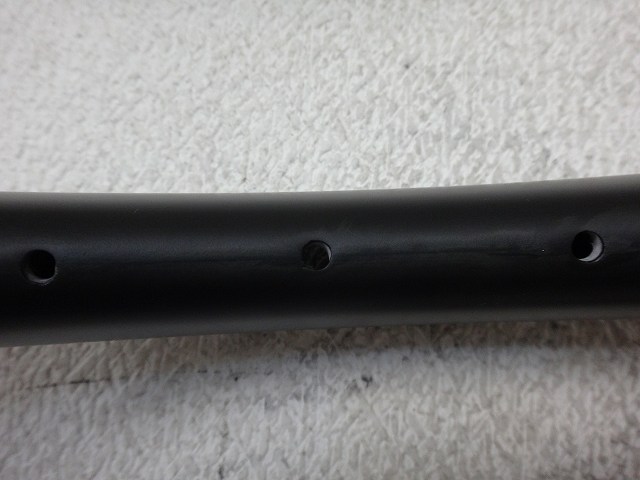
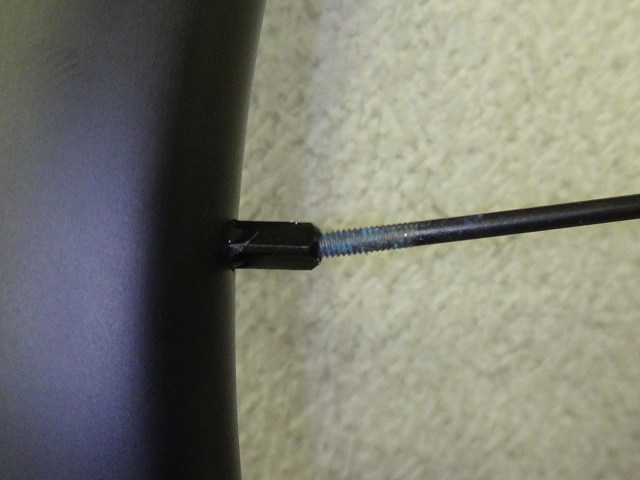
The rim holes are quite thick-walled,
but this rim has high friction between the nipple and rim,
so you need to apply silicone grease between the nipple and rim.

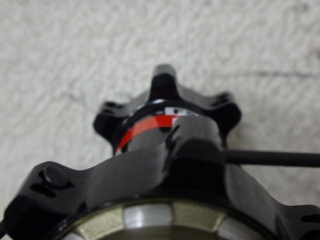
The hub flange has a slot that can accommodate
flat spokes 2.3mm or wider.
Though that's not relevant to this wheel build.
There's countersink machining that receives the spoke head in a round shape,
so the spoke directionality can conform to it to a certain degree (note: another ominous word)—
remember that point.
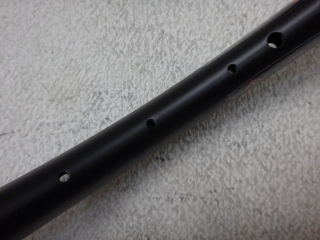
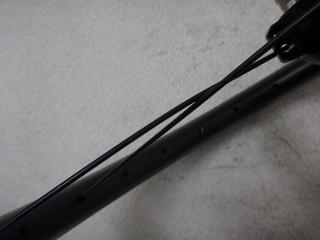
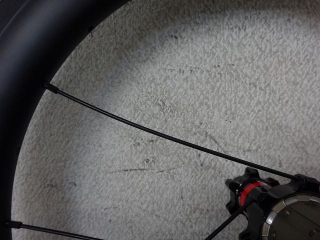
This is the front rim I received for work.
I can distinguish it by the fewer holes than the rear rim.
The rim holes appear to have no offset, but there's a faint left-right offset,
and relative to the valve hole it matches the hole offset of the vast majority of rims out there.
This is what I call a straight rim in this blog.
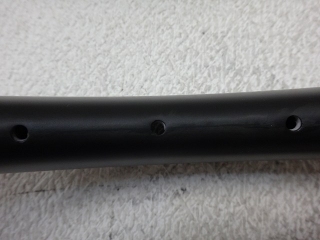
The rear rim has a more pronounced hole offset than the front rim,
and relative to the valve hole it has the opposite offset direction,
making it what I call a reverse rim in this blog.

It certainly doesn't look like the valve hole is positioned exactly midway between rim holes,
but you shouldn't worry about it.
It's definitely a reverse rim.
The inner circumference rim holes alternate side to side throughout the full circle,
not just at this phase.
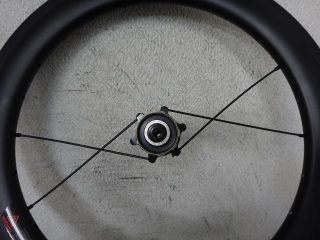
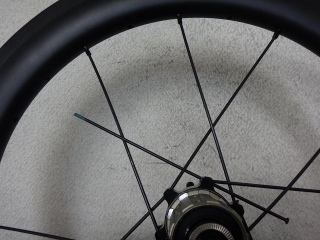
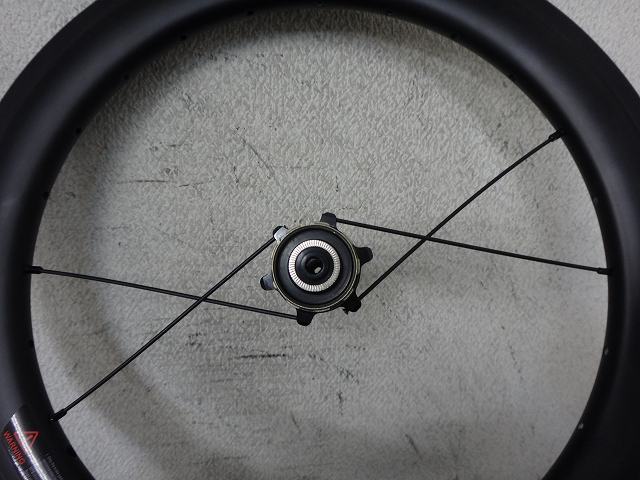
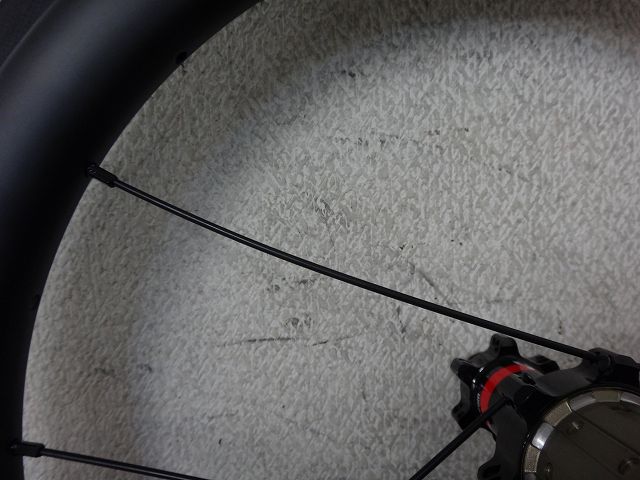
I wanted to be confident about whether the spoke length calculation was correct,
so I cut out just these 4 spokes first.
The spokes are Sapim black Leader straight spokes,
310mm plain (no threads) spokes,
which are plain spokes that can be cut to any length.
They're threadless because cutting is part of the plan.
I have a box of 72 of these spokes from the customer,
and we also stock the same spokes in our shop.
Japanese distributors sell Leader straight plain spokes one at a time,
so the customer may have purchased these via overseas mail order or similar.
If I mess up the spoke length calculation,
I'll make up for it at no cost from our inventory.
The customer's property shouldn't diminish because
the wheel builder was "such a screw-up about spoke length calculations."
Incidentally, I actually did mess up once,
so these 4 spokes in the image come from our inventory.
↑ Such a screw-up about spoke length calculations
If they're too long, I can just cut them further,
so I erred on the short side.
You could build the wheel with the original length,
but there are reasons to use a positive correction value,
so I made them slightly longer.
I won't explain the reason because that's proprietary knowledge.

For the final crossing, I tried not weaving one side
and weaving the other to see how it looked,
and since it seemed fine to weave,
I wove both sides in the actual wheel build.
This is a straight spoke hub,
but the flange section that houses the spoke heads
is offset counterclockwise from front to back.
That means it's a straight rim hub.
With a universal hub for bent spokes,
you could reverse the porcupine/anti-porcupine direction of spokes
in the opposite flange holes relative to the final crossing on one side
to accommodate both straight and reverse rims,
but this hub doesn't work that way.
So, adhering to the rim hole offset,
I can't avoid the configuration where the valve hole sits
within one set of 4 spokes in the left-right final crossing group.
I also tried setting spokes and nipples against the rim hole offset,
but due to the large friction and the spoke's left-right directionality,
it felt clearly difficult, so I decided to follow the hole offset.
Additionally, because this hub is a forced tangential straight spoke specification,
this combination deviated somewhat from the spokes' front-back directionality.
What I mean is:
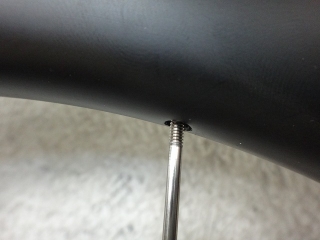
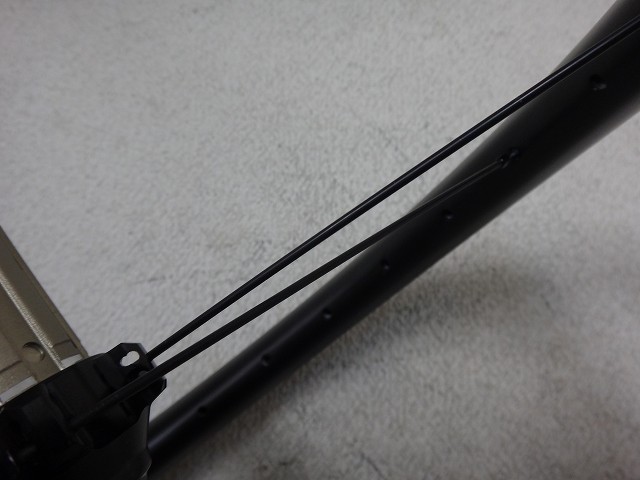
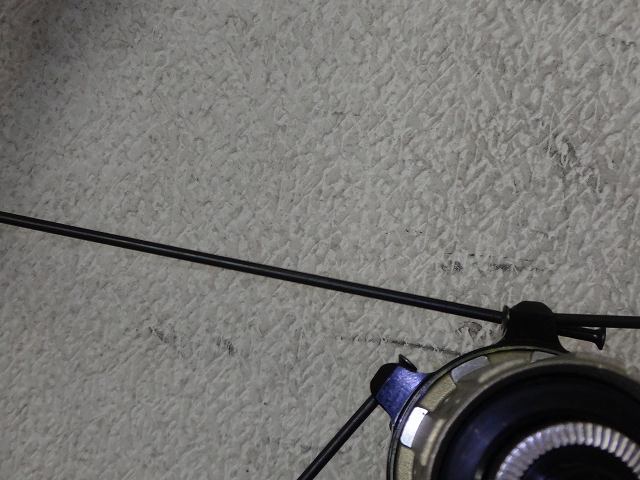
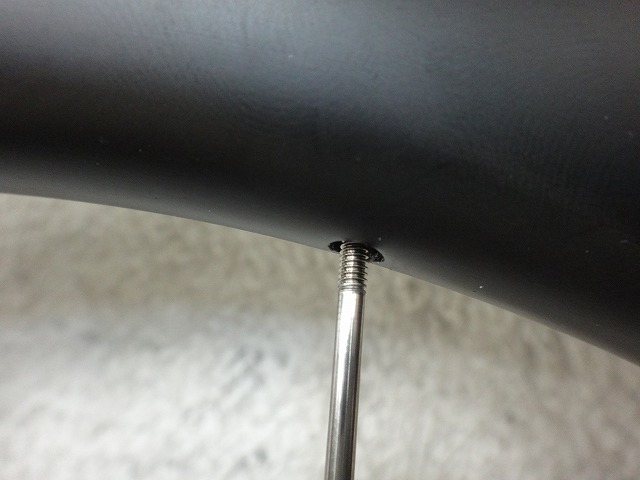
I added a 5th spoke in addition to the 4 spokes in the trial build.
On the 4 trial spokes, the nipple tightens just enough to hide the spoke threads.
On the 5th spoke, I stopped where the spoke tip barely entered
the nipple's thread grooves.
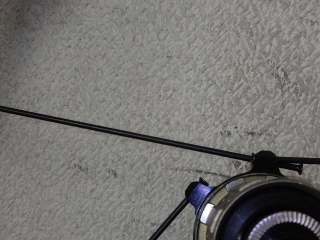
The spoke is straight.
Linear and unbent—straight in that sense.
The nipple is also straight, pointing radially.
These two "straight" lines aren't collinear.
So with the nipple's threads engaged but no tension applied,
the spoke becomes slightly bowed.
The hub flange's circular countersunk hole shape can accommodate
spoke front-back directionality margin whether the rim is
700C WO or 26-inch HE, or even 700C with 20mm rim height or 80mm height
(incidentally, a 700C 80mm height rim is about the same inner diameter
as a 24-inch low-height rim),
but with 16-inch plus deep rim conditions, it gets pretty tight.
This issue doesn't occur with universal hubs and bent spokes.
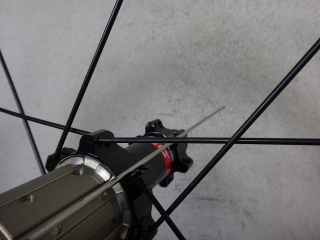
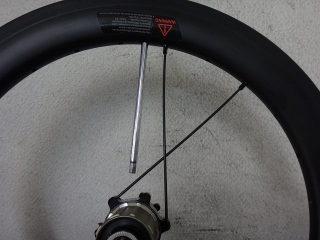
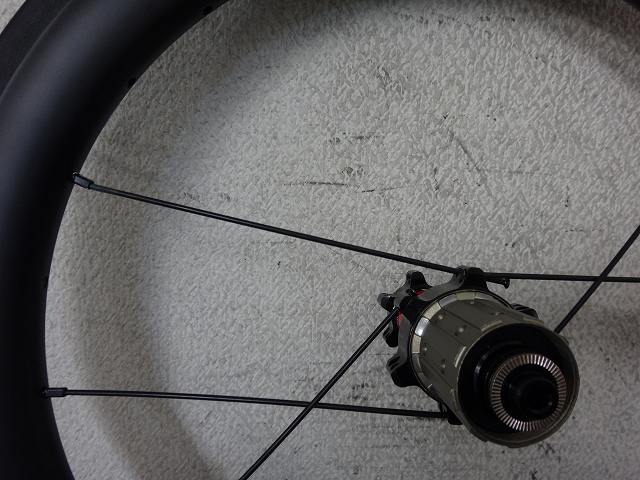
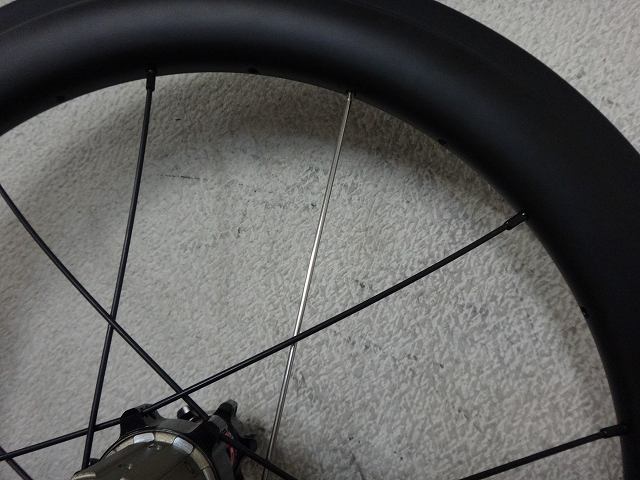
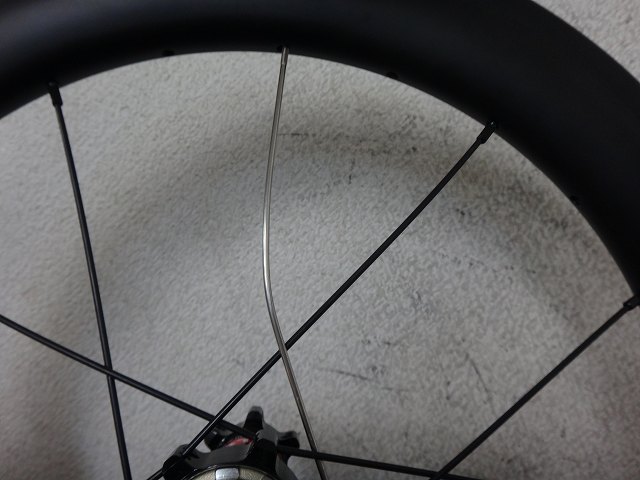
This time I wove the final crossing,
but depending on the wheel situation, not weaving might be better.
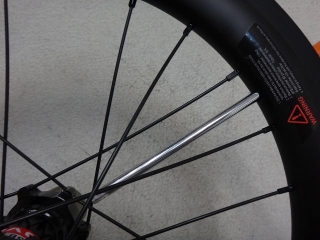
In the image above, I'm representing passing a silver spoke in the porcupine direction
through a universal flange,

and raising the spoke from here creates an unweoven final crossing.
The spoke length is around appropriate length,
but if I wanted to weave this,
I'd need to avoid scratching the rim with the spoke tip
while bending the opposing anti-porcupine spoke
within its elastic deformation range.

Small-diameter wheels make this difficult,
so spoke replacement in case of spoke breakage becomes difficult too.
I'll demonstrate a counter-example to this in the near future myself,
but that's for another day.
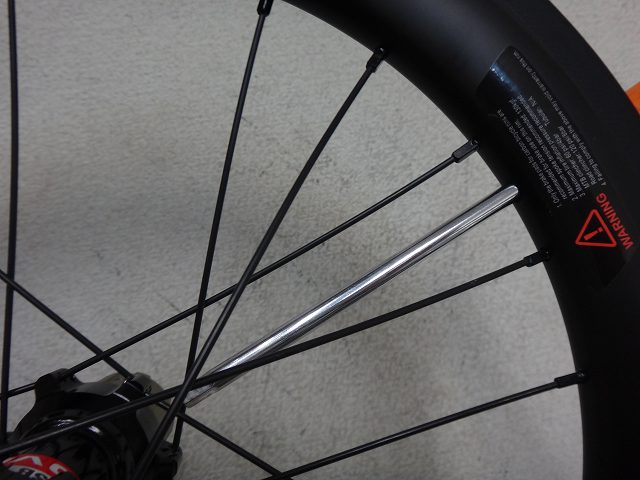
Due to photography convenience, the silver spoke is already
plastically deformed from the previous image.
Poor thing, but this spoke was bent for the sake of the article—
I guess it was born under that kind of star.
Speaking of "born under that star" (not that it matters),
once I was riding near somewhere in Nara Prefecture
and passed by a pig farm where the pigs were lined up
facing (from my view) their rear ends while oinking,
and I told the young person with me at the time:
"Those pigs are individually trained for keeping as personal pets,
or for raising in elementary school livestock pens,
or for truffle digging, or for performing tricks at the circus—
they're not for meat production,"
and they said "Oh, really?" in response,
but of course that was a lie. 100% meat production.
This is how delicious meat reaches us.
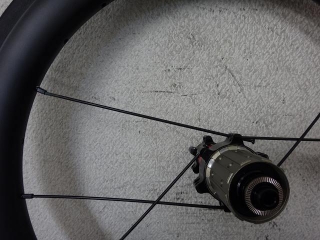
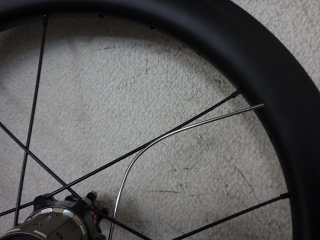
With a straight spoke hub,

the final crossing is already woven at this point,
so weaving isn't a hassle when replacing a single spoke
(though it does require some technique).
From the fact that I'm taking photos like this at the trial build stage,
you can tell I wasn't surprised that the valve ended up at this phase.
With the rear hub and rim I received, this was literally the only way to do it.
I built the rear wheel with a carbon WO rim for a Brompton.

Hub: Novatec FS522SB straight spoke specification
Left and right forced 2-cross lacing, straight rim hub, 24H,
Spokes: black Leader straight spokes, with both sides woven on the final crossing.
I thought I'd have time to build both wheels,
but I ran into unexpected difficulties and barely managed to complete the rear wheel.
You might notice the unfamiliar term "straight rim hub" above—
if you sensed something ominous about that, your instincts are sharp.
This rim is a 16-inch WO rim because it's for a Brompton.
By "WO rim" here, I mean in the strict sense of WO standard specification,
not the broad definition of "clincher rather than tubular."
You'll also find HE standard rims on 16-inch wheels.
I often write that Campagnolo's use of the term "clincher" to mean WO
is technically incorrect, but with 700C rims that's one thing—
for 20-inch and 16-inch wheels, whether a clincher rim is WO or HE
is extremely important.
Even with the same nominal diameter in inches, the tire and tube sizes differ completely.

The rim holes are quite thick-walled,
but this rim has high friction between the nipple and rim,
so you need to apply silicone grease between the nipple and rim.
The hub flange has a slot that can accommodate
flat spokes 2.3mm or wider.
Though that's not relevant to this wheel build.
There's countersink machining that receives the spoke head in a round shape,
so the spoke directionality can conform to it to a certain degree (note: another ominous word)—
remember that point.

This is the front rim I received for work.
I can distinguish it by the fewer holes than the rear rim.
The rim holes appear to have no offset, but there's a faint left-right offset,
and relative to the valve hole it matches the hole offset of the vast majority of rims out there.
This is what I call a straight rim in this blog.
The rear rim has a more pronounced hole offset than the front rim,
and relative to the valve hole it has the opposite offset direction,
making it what I call a reverse rim in this blog.

It certainly doesn't look like the valve hole is positioned exactly midway between rim holes,
but you shouldn't worry about it.

It's definitely a reverse rim.
The inner circumference rim holes alternate side to side throughout the full circle,
not just at this phase.
I wanted to be confident about whether the spoke length calculation was correct,
so I cut out just these 4 spokes first.
The spokes are Sapim black Leader straight spokes,
310mm plain (no threads) spokes,
which are plain spokes that can be cut to any length.
They're threadless because cutting is part of the plan.
I have a box of 72 of these spokes from the customer,
and we also stock the same spokes in our shop.
Japanese distributors sell Leader straight plain spokes one at a time,
so the customer may have purchased these via overseas mail order or similar.
If I mess up the spoke length calculation,
I'll make up for it at no cost from our inventory.
The customer's property shouldn't diminish because
the wheel builder was "such a screw-up about spoke length calculations."
Incidentally, I actually did mess up once,
so these 4 spokes in the image come from our inventory.
↑ Such a screw-up about spoke length calculations
If they're too long, I can just cut them further,
so I erred on the short side.
You could build the wheel with the original length,
but there are reasons to use a positive correction value,
so I made them slightly longer.
I won't explain the reason because that's proprietary knowledge.
For the final crossing, I tried not weaving one side

and weaving the other to see how it looked,
and since it seemed fine to weave,
I wove both sides in the actual wheel build.

This is a straight spoke hub,
but the flange section that houses the spoke heads
is offset counterclockwise from front to back.
That means it's a straight rim hub.
With a universal hub for bent spokes,
you could reverse the porcupine/anti-porcupine direction of spokes
in the opposite flange holes relative to the final crossing on one side
to accommodate both straight and reverse rims,
but this hub doesn't work that way.

So, adhering to the rim hole offset,
I can't avoid the configuration where the valve hole sits
within one set of 4 spokes in the left-right final crossing group.
I also tried setting spokes and nipples against the rim hole offset,
but due to the large friction and the spoke's left-right directionality,
it felt clearly difficult, so I decided to follow the hole offset.
Additionally, because this hub is a forced tangential straight spoke specification,
this combination deviated somewhat from the spokes' front-back directionality.
What I mean is:
I added a 5th spoke in addition to the 4 spokes in the trial build.
On the 4 trial spokes, the nipple tightens just enough to hide the spoke threads.
On the 5th spoke, I stopped where the spoke tip barely entered
the nipple's thread grooves.
The spoke is straight.
Linear and unbent—straight in that sense.
The nipple is also straight, pointing radially.
These two "straight" lines aren't collinear.
So with the nipple's threads engaged but no tension applied,
the spoke becomes slightly bowed.
The hub flange's circular countersunk hole shape can accommodate
spoke front-back directionality margin whether the rim is
700C WO or 26-inch HE, or even 700C with 20mm rim height or 80mm height
(incidentally, a 700C 80mm height rim is about the same inner diameter
as a 24-inch low-height rim),
but with 16-inch plus deep rim conditions, it gets pretty tight.
This issue doesn't occur with universal hubs and bent spokes.

This time I wove the final crossing,
but depending on the wheel situation, not weaving might be better.
In the image above, I'm representing passing a silver spoke in the porcupine direction
through a universal flange,
and raising the spoke from here creates an unweoven final crossing.
The spoke length is around appropriate length,
but if I wanted to weave this,

I'd need to avoid scratching the rim with the spoke tip
while bending the opposing anti-porcupine spoke
within its elastic deformation range.
Small-diameter wheels make this difficult,
so spoke replacement in case of spoke breakage becomes difficult too.
I'll demonstrate a counter-example to this in the near future myself,
but that's for another day.
Due to photography convenience, the silver spoke is already
plastically deformed from the previous image.
Poor thing, but this spoke was bent for the sake of the article—
I guess it was born under that kind of star.
Speaking of "born under that star" (not that it matters),
once I was riding near somewhere in Nara Prefecture
and passed by a pig farm where the pigs were lined up
facing (from my view) their rear ends while oinking,
and I told the young person with me at the time:
"Those pigs are individually trained for keeping as personal pets,
or for raising in elementary school livestock pens,
or for truffle digging, or for performing tricks at the circus—
they're not for meat production,"
and they said "Oh, really?" in response,
but of course that was a lie. 100% meat production.
This is how delicious meat reaches us.

With a straight spoke hub,

the final crossing is already woven at this point,
so weaving isn't a hassle when replacing a single spoke
(though it does require some technique).
From the fact that I'm taking photos like this at the trial build stage,
you can tell I wasn't surprised that the valve ended up at this phase.
With the rear hub and rim I received, this was literally the only way to do it.