The drill was screaming!
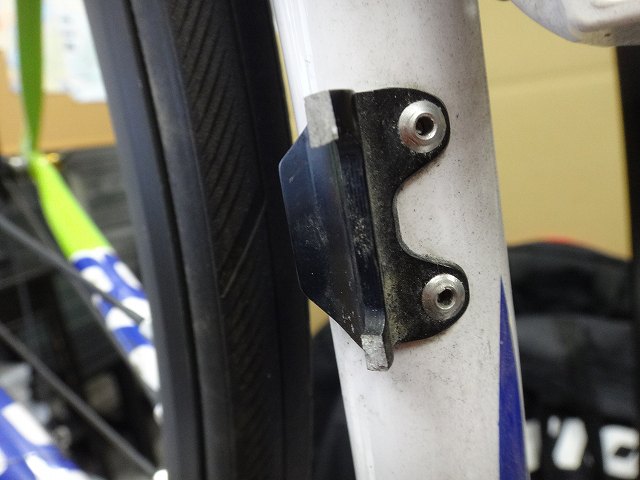
A customer asked me to replace the front derailleur mount on their Super 6 Evo.

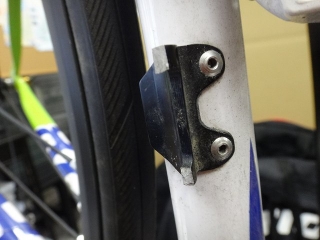
The slot where the front derailleur attaches is cracked.
Cannondale supplies replacement parts for this section, so replacement is possible.
Including work I haven't posted here, I've done this job about 5 or 6 times,
but the Cannondale dealers near my shop apparently don't have the ability to install
the parts they sell themselves, so usually customers end up bringing them to us.
The customer bought this front derailleur mount at a Cannondale specialty shop
(→here)(→here),
but they said installation would be outsourced, which meant some lead time,
but the price they quoted was over 40,000 yen. Yikes!
When I outsource work I can't do myself, I don't charge anything beyond actual costs like shipping,
but 40,000 yen means they're taking a substantial markup.
Maybe the labor includes disassembling the frame down to components and reassembling it later.
By the way, I did this job right on the spot when they brought it in.
Including epoxy adhesive curing time, it took about an hour.
My labor charge was exactly one-tenth of 40,000 yen.
And that includes adjusting the brakes that were off,
fixing the incorrect position of the brake shoe holder washer,
and addressing headset play too.
Speaking of headset play—after the work was done, I noticed the stem spacer and top cap below
the headtube could be spun by hand, so I fixed that.
Noticing this is kind of an occupational habit at this point.
When I inspect wheels on bikes customers ride in, I make a habit of checking for play
by touching them as I reinstall them after inspection.

Whirrrr!
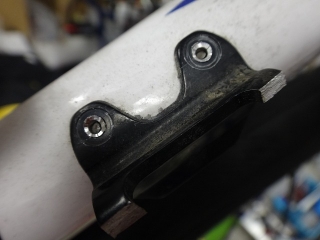
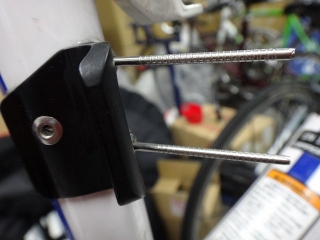
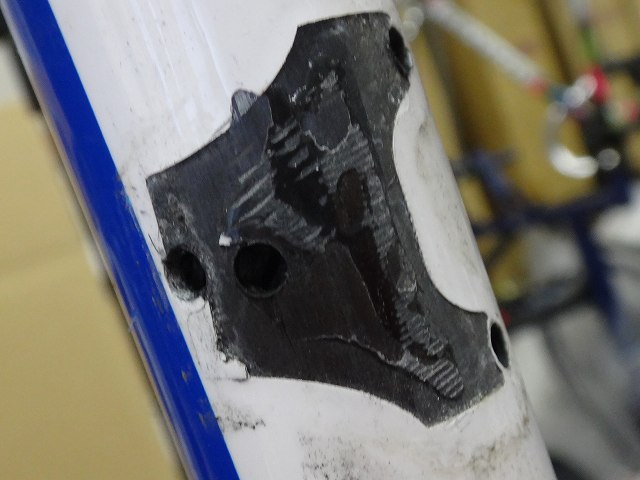
I ground off the head of the old blind rivet.
I've removed the seatpost and flipped the frame upside down, so
the images are inverted too.
I flip it to prevent rivet debris from falling into the bottom bracket area,
which would be extremely difficult to retrieve.
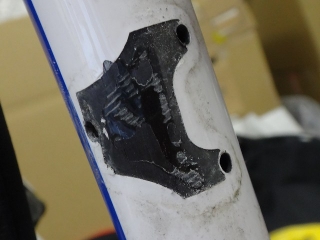
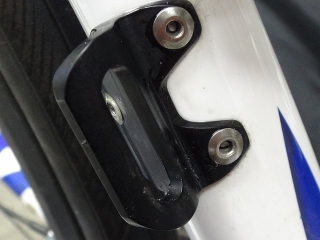
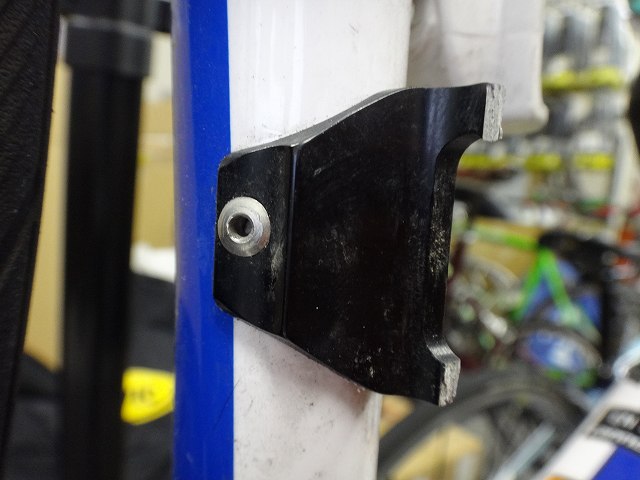
Removed the direct-mount front derailleur bracket.
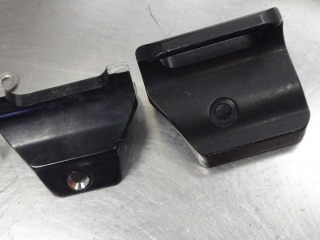
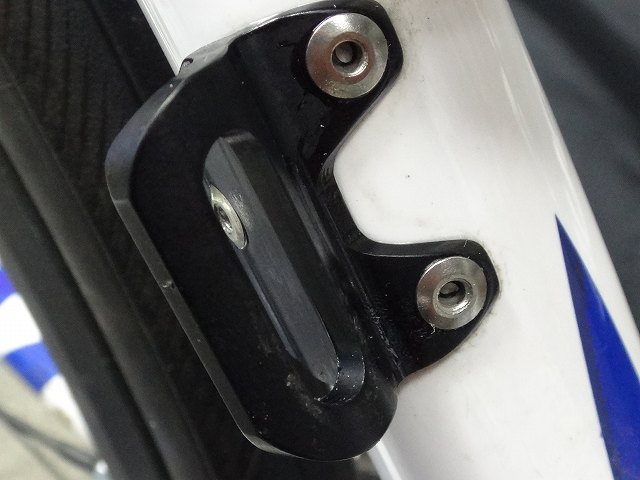
The new front derailleur bracket, however,
had a different shape with a larger contact area with the frame.
It fits the frame perfectly, so compatibility is definitely confirmed.
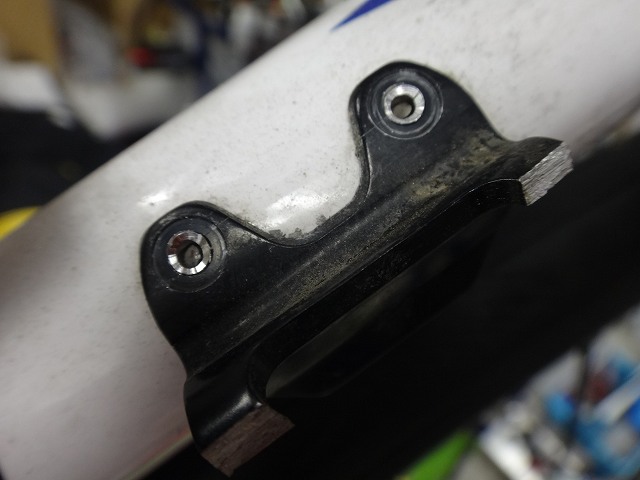
The positions of the two front rivet holes and the bracket outline are the same,
but the position of the rear rivet hole is different, so

I drilled a new hole.
The new bracket covers all the old bracket holes and
unpainted areas from the adhesive.
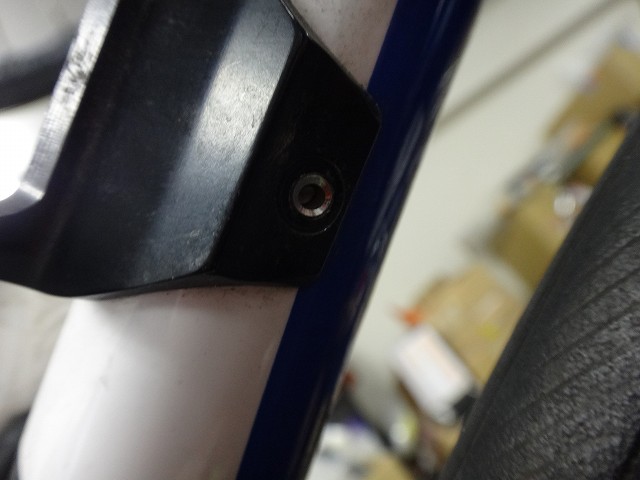
Installing blind rivets...
You can see some uncured adhesive oozing out on top of the bracket.
When I press the rivet, the crimping force squeezes it out a bit more,
but I wipe it away before it hardens.

Installed the new bracket.

I also installed the front derailleur and chain, then adjusted the shifting,
all within the labor charge I mentioned earlier.
Well, I sold the chain from our shop inventory
(the bike came in without a chain).
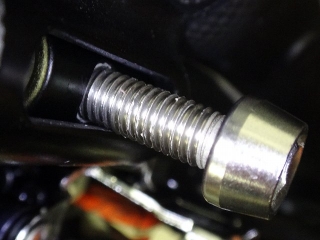
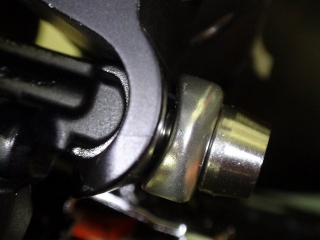
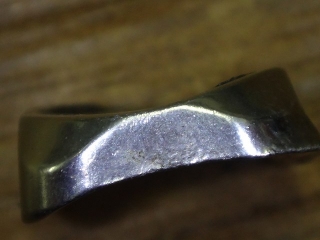
Since I'm on the subject, let me write about the washer for this Shimano OEM front derailleur bracket.
This is the one that comes stock, matched to the derailleur generation,
but from the 9000-series Dura-Ace era onward,
the front derailleur washers have changed to these pathetically thin ones
with vertical height roughly equal to their width.
It's not even much of a weight saving, and I think it's frankly
one of the worst design decisions in Shimano's component lineup...
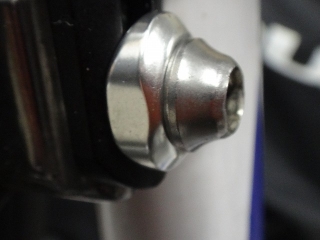
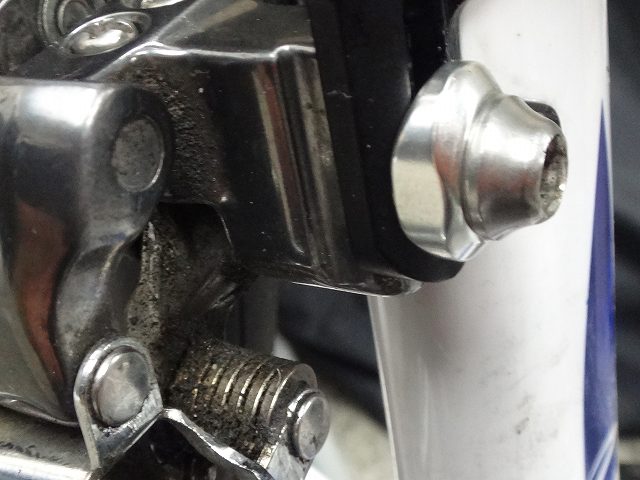
The slot width on recent front derailleur brackets is
way too wide for M5 bolts,
so contact area between washer and slot is minimal on many frames.
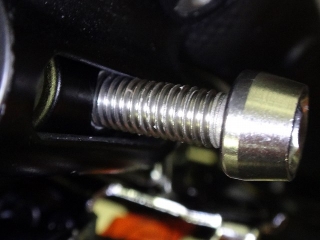
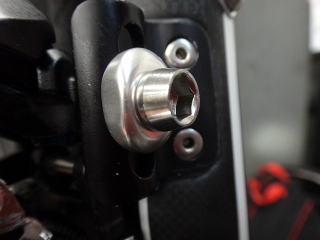
These are photos I took on a different frame for article reference.
The slot width is wider than the bolt, but
this is still on the acceptable side—normal range.
The top image shows the bolt position when the rear of the derailleur is swung inward.
Some frames have the derailleur rear end swinging outward excessively no matter how you mount it,
and even with OEM Shimano cranks, the outer derailleur cage can rub or actually does rub
against the inside of the crank arm.
In those cases, I enlarge the slot beyond its normal range by rounding just the portion
at the bolt position for the outer chainring tooth count,
turning the slot into a T-shape to allow more inward swing of the derailleur rear end.
This modification is traditionally common on Colnago frames (always with customer permission, of course),
but recently I've done it on a Merida frame (it was clearly necessary).
I didn't do that modification on the frame in the above images.
The problem was
the derailleur was a 9100 with one of those terrible washers, which I simply replaced.
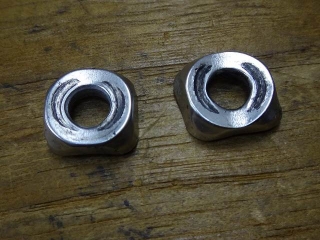
And here are those terrible washers I've had to replace in the past.
Neither one was installed by me.
The one on the right has deteriorated more severely.
The contact marks from bolt rotation aren't circular because
the center of the washer gets deformed inward under tightening.
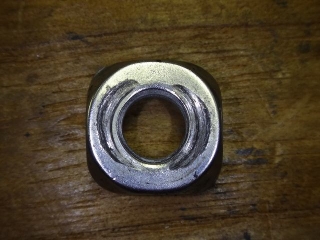
↑The relatively better one
↑The worse one
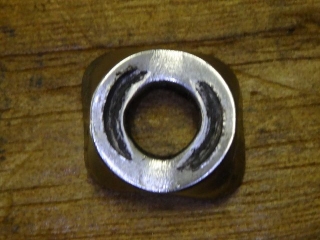
This one has the washer's outer shape deformed from square to diamond.

It's more obvious from the back side, isn't it?
↑Viewing the worse one from the top-bottom direction of installation
The outline at the top of the image should normally be straight.

Since I see these kinds of examples regularly,
we keep older-style washers in stock at our shop.
The two on the right of the image are the unused terrible washers.
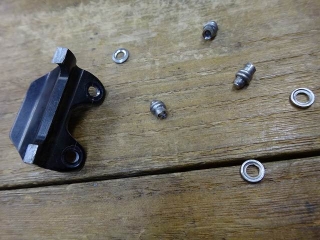
Getting back to the point—↑here are the parts I replaced this time.
A customer asked me to replace the front derailleur mount on their Super 6 Evo.
The slot where the front derailleur attaches is cracked.
Cannondale supplies replacement parts for this section, so replacement is possible.
Including work I haven't posted here, I've done this job about 5 or 6 times,
but the Cannondale dealers near my shop apparently don't have the ability to install
the parts they sell themselves, so usually customers end up bringing them to us.
The customer bought this front derailleur mount at a Cannondale specialty shop
(→here)(→here),
but they said installation would be outsourced, which meant some lead time,
but the price they quoted was over 40,000 yen. Yikes!
When I outsource work I can't do myself, I don't charge anything beyond actual costs like shipping,
but 40,000 yen means they're taking a substantial markup.
Maybe the labor includes disassembling the frame down to components and reassembling it later.
By the way, I did this job right on the spot when they brought it in.
Including epoxy adhesive curing time, it took about an hour.
My labor charge was exactly one-tenth of 40,000 yen.
And that includes adjusting the brakes that were off,
fixing the incorrect position of the brake shoe holder washer,
and addressing headset play too.
Speaking of headset play—after the work was done, I noticed the stem spacer and top cap below
the headtube could be spun by hand, so I fixed that.
Noticing this is kind of an occupational habit at this point.
When I inspect wheels on bikes customers ride in, I make a habit of checking for play
by touching them as I reinstall them after inspection.
Whirrrr!
I ground off the head of the old blind rivet.
I've removed the seatpost and flipped the frame upside down, so
the images are inverted too.
I flip it to prevent rivet debris from falling into the bottom bracket area,
which would be extremely difficult to retrieve.

Removed the direct-mount front derailleur bracket.

The new front derailleur bracket, however,
had a different shape with a larger contact area with the frame.
It fits the frame perfectly, so compatibility is definitely confirmed.
The positions of the two front rivet holes and the bracket outline are the same,
but the position of the rear rivet hole is different, so
I drilled a new hole.
The new bracket covers all the old bracket holes and
unpainted areas from the adhesive.

Installing blind rivets...
You can see some uncured adhesive oozing out on top of the bracket.
When I press the rivet, the crimping force squeezes it out a bit more,
but I wipe it away before it hardens.

Installed the new bracket.
I also installed the front derailleur and chain, then adjusted the shifting,
all within the labor charge I mentioned earlier.
Well, I sold the chain from our shop inventory
(the bike came in without a chain).

Since I'm on the subject, let me write about the washer for this Shimano OEM front derailleur bracket.
This is the one that comes stock, matched to the derailleur generation,
but from the 9000-series Dura-Ace era onward,
the front derailleur washers have changed to these pathetically thin ones
with vertical height roughly equal to their width.
It's not even much of a weight saving, and I think it's frankly
one of the worst design decisions in Shimano's component lineup...
The slot width on recent front derailleur brackets is
way too wide for M5 bolts,
so contact area between washer and slot is minimal on many frames.


These are photos I took on a different frame for article reference.
The slot width is wider than the bolt, but
this is still on the acceptable side—normal range.
The top image shows the bolt position when the rear of the derailleur is swung inward.
Some frames have the derailleur rear end swinging outward excessively no matter how you mount it,
and even with OEM Shimano cranks, the outer derailleur cage can rub or actually does rub
against the inside of the crank arm.
In those cases, I enlarge the slot beyond its normal range by rounding just the portion
at the bolt position for the outer chainring tooth count,
turning the slot into a T-shape to allow more inward swing of the derailleur rear end.
This modification is traditionally common on Colnago frames (always with customer permission, of course),
but recently I've done it on a Merida frame (it was clearly necessary).
I didn't do that modification on the frame in the above images.
The problem was


the derailleur was a 9100 with one of those terrible washers, which I simply replaced.
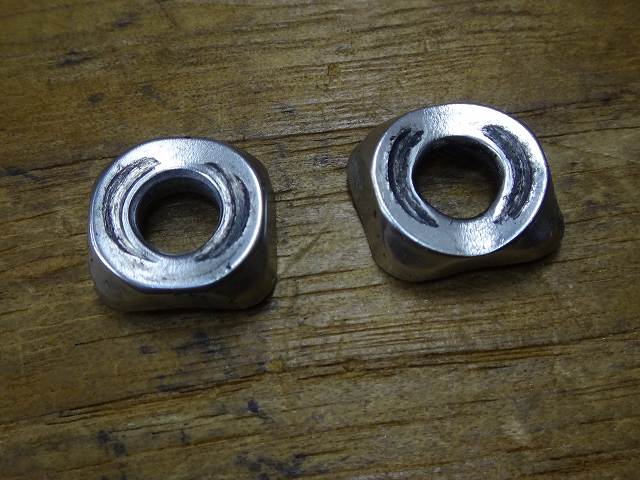
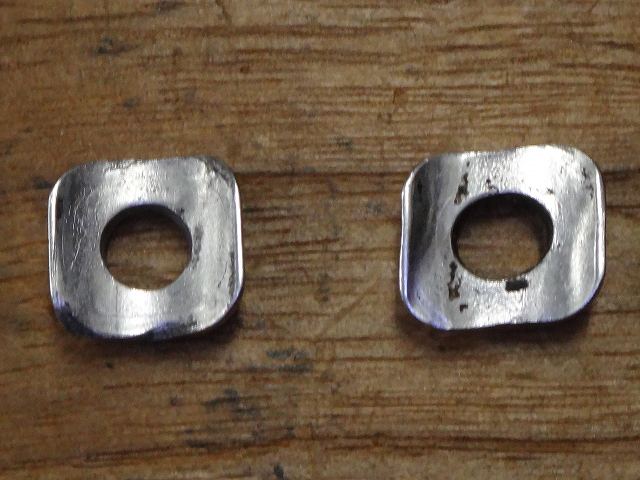
And here are those terrible washers I've had to replace in the past.
Neither one was installed by me.
The one on the right has deteriorated more severely.
The contact marks from bolt rotation aren't circular because
the center of the washer gets deformed inward under tightening.

↑The relatively better one

↑The worse one
This one has the washer's outer shape deformed from square to diamond.
It's more obvious from the back side, isn't it?

↑Viewing the worse one from the top-bottom direction of installation
The outline at the top of the image should normally be straight.

Since I see these kinds of examples regularly,
we keep older-style washers in stock at our shop.
The two on the right of the image are the unused terrible washers.

Getting back to the point—↑here are the parts I replaced this time.