Another wheel day today (and so on).
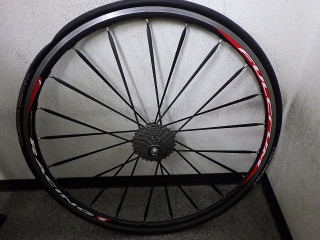
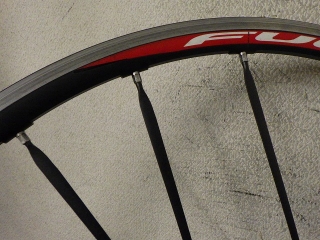
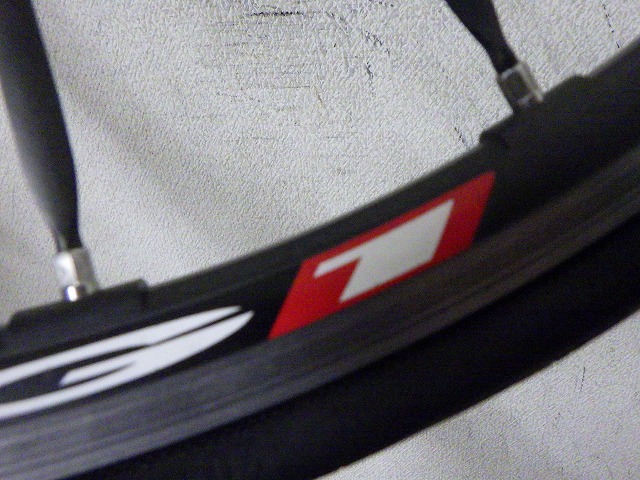
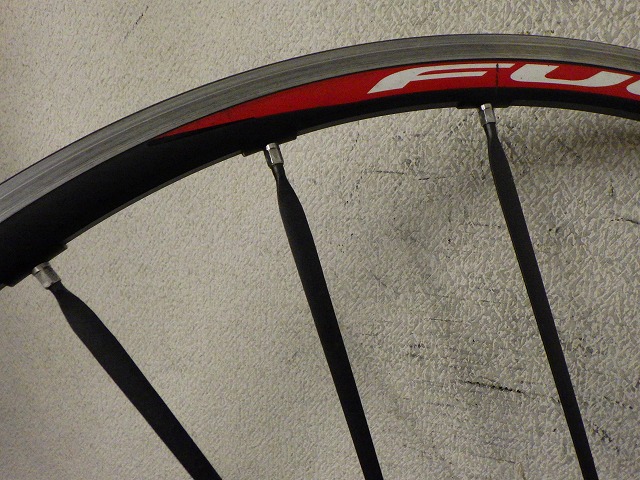
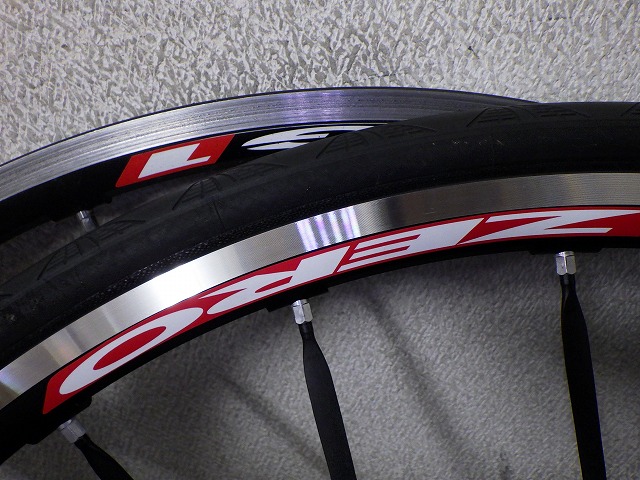
A customer dropped off a first-generation Racing 1 rear wheel with me.
They wanted the rim replaced.
The first-generation Racing 1, though,

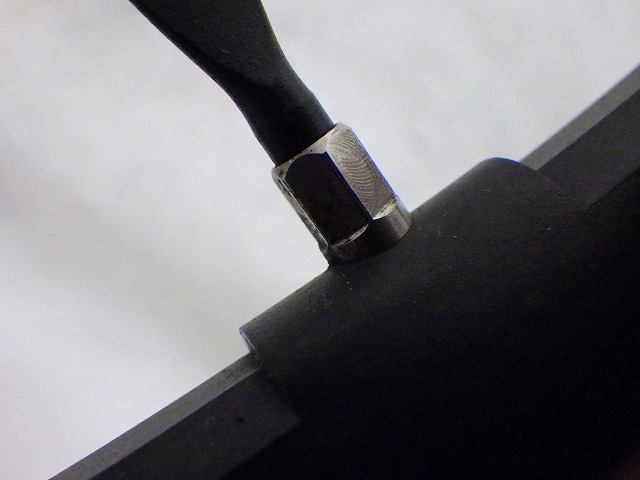
is assembled with brass nipples with a 5.5mm wrench-flat width.
At this point, the Racing 1 was the flagship model, but
the later Racing Zero switched to aluminum nipples with
a 6mm wrench-flat width,
and the hole diameter on the inner rim side is also subtly different.
So I ordered a Racing 1 rim, but
it turned out to be discontinued.
Thinking back to when Mavic Ksyrium ES and Shimano WH-7800,
which came out around the same time as this Racing 1,
couldn't get rims even ten years ago,
this is pretty good service.
So I was about to check inventory on a Racing Zero rim by replacing all the nipples
with aluminum nipples for the Racing Zero as a workaround,
when someone from a distributor who knows Campagnolo best in all of Japan
suggested to me instead:
"If it's a Rase-Zero rim, we still have them at the main factory,
so why not just have the nipples aluminum-ized and build it with those?"
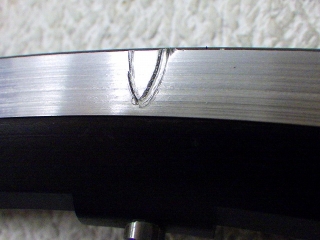
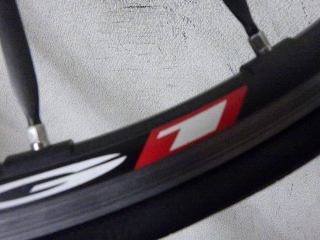
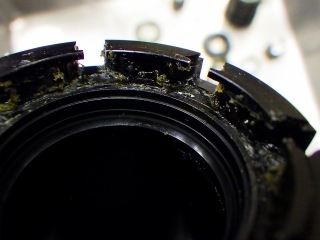
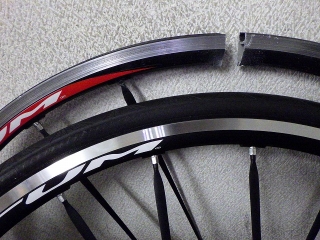
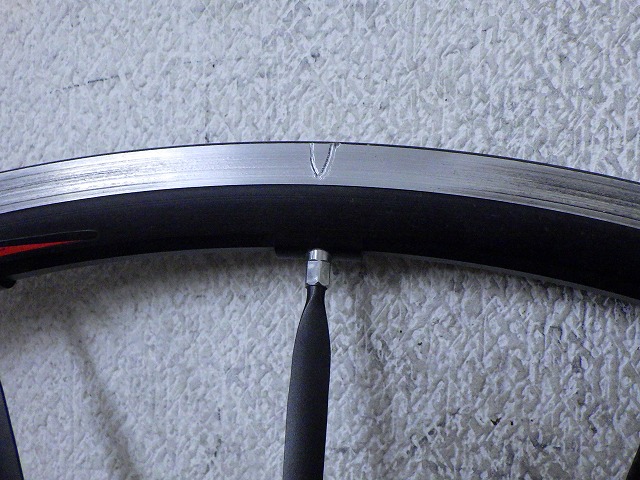
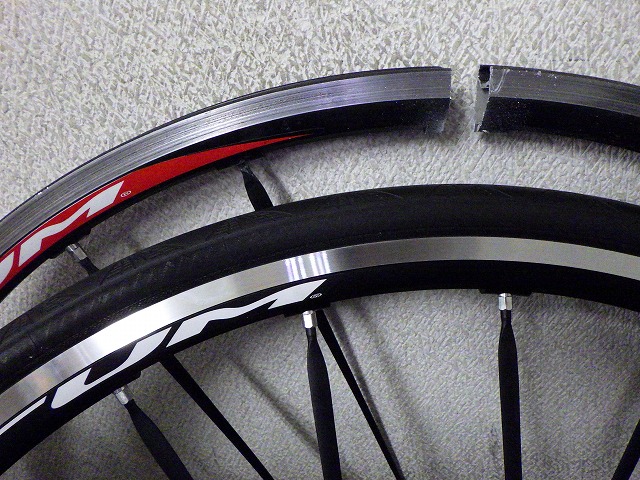
The reason for the rim replacement is that there's a deep scratch on the rim side—
whether it caught in a grate, rubbed against a curb,
or from a crash—
and the customer tried sanding before and after the scratch,
but it didn't work out.

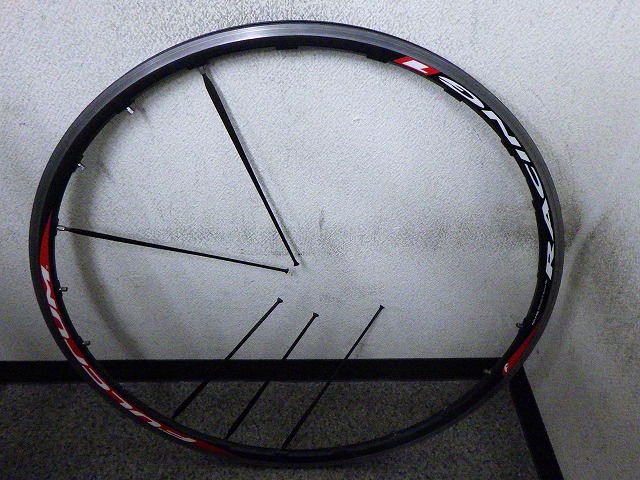
When I disassembled the wheel, though,
these five spokes were completely seized
and wouldn't budge at all.
I haven't twisted them to the point of failure,
but I'm confident that even if I did, the seizure wouldn't release.
As a precursor to complete seizure, there's a state where the nipple loosens to a certain point
but won't move any further, where it's possible to screw it back to where it was,
and the nipple only rotates within a certain range.

The Racing 1 spokes come in only two different lengths.
It goes without saying that the front wheel uses one length,
but for the rear wheel, the flange diameters on left and right were designed based on spoke length,
consciously reducing the number of spare parts needed.
Shimano's first complete wheel, the WH-7700, did the same thing,
but with the WH-7701 rear wheel, they made the wide-flange fraud (→here)
and changed the freewheel side to radial lacing,
so the rear wheel now has two different spoke lengths.

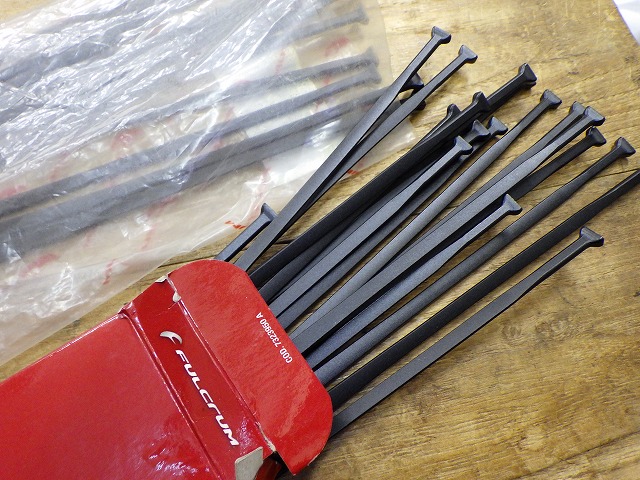
So I have a reasonable stock of spare spokes,
but these spokes are quite valuable,
so I wanted to avoid using them if possible.
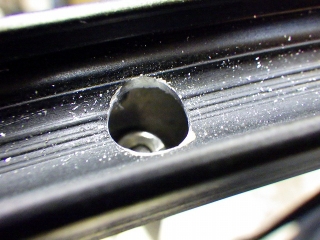
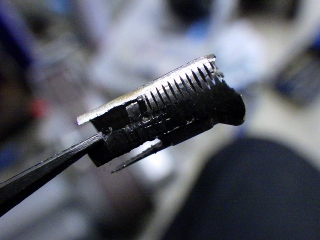
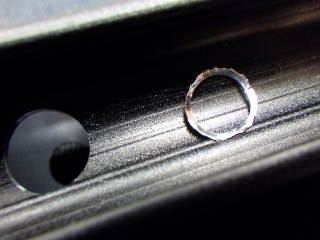
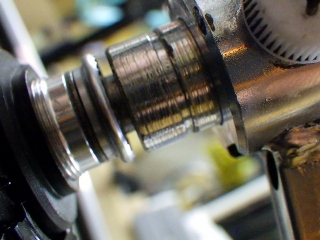
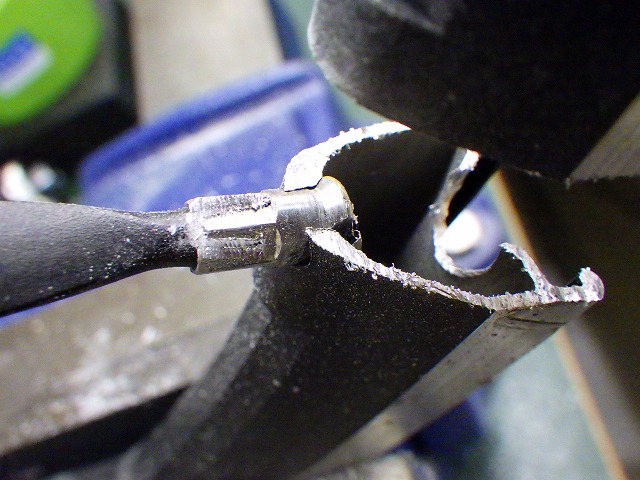
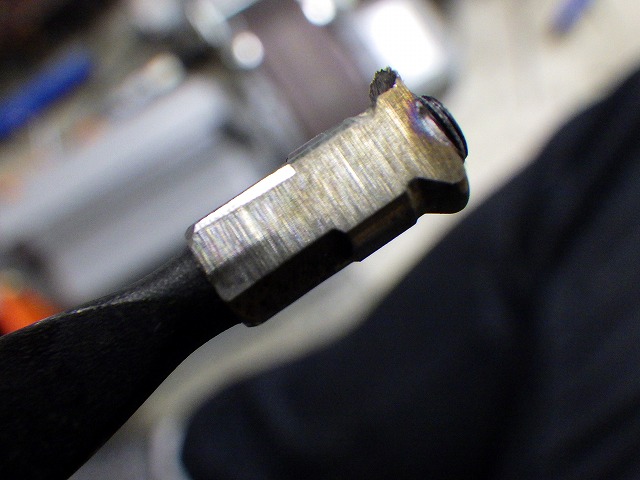
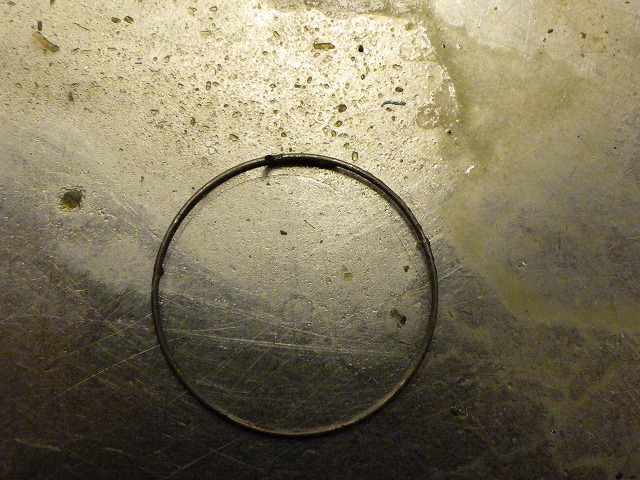
The widest part of the tie-in spoke measured about 8.5mm,
so I drilled a 9mm diameter hole in the outer perimeter of the spoke hole phase on the rim.
Oops, it's going to get stuck here anyway.

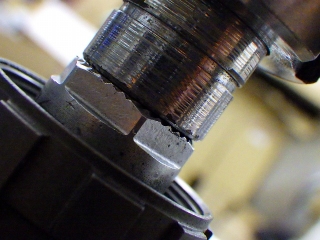
I had to cut away some of the nipple flange,
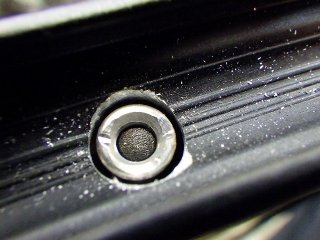
but I dropped the spoke into the rim,
cut the rim about halfway from the inside,
then pulled the spoke up from the inside
and cut the other half from the outside.
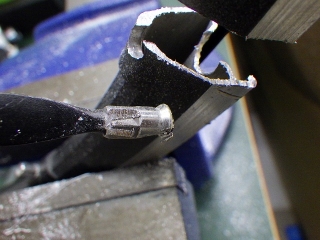
That way, I could get it off like this.
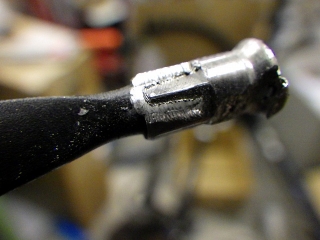
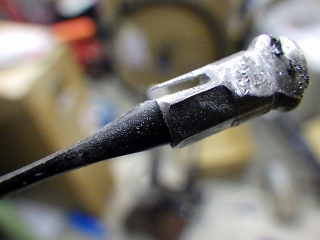
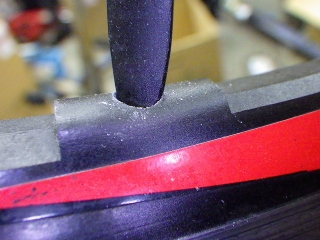
↑ The saw marks look like this
From here, I scrape away the brass on the nipple right down to the threads.
Once the contact pressure is relieved, the spoke should be able to rotate relative to the nipple.
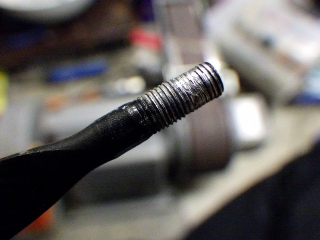
So I rotated the spoke and got the nipple off,
but the threads at the outer end were corroded and worn thin,
so I concluded that reuse wasn't possible.
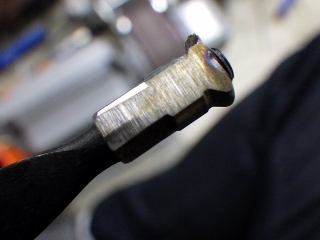
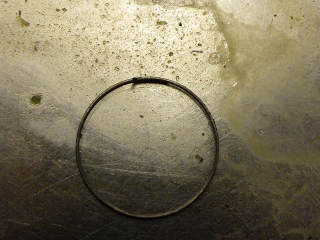
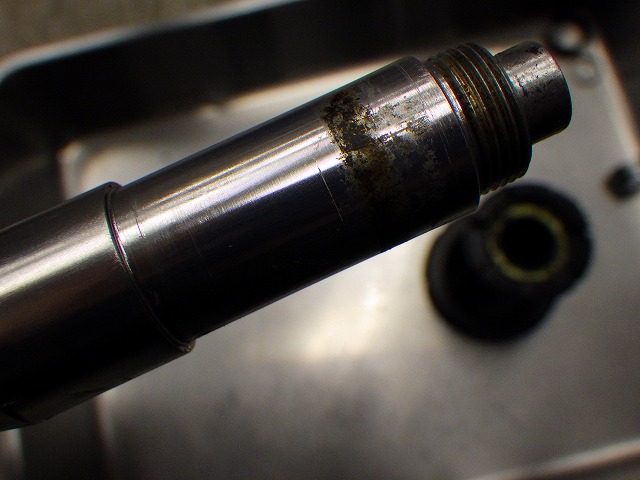
For reference, the nipple side looked like this
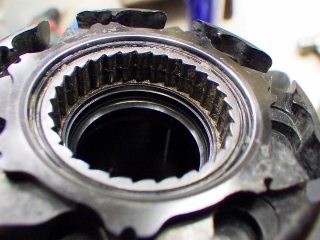
The customer asked me to take a look at the freewheel pawl spring,
and if it was bad, replace it. I also did a hub overhaul while I was at it.
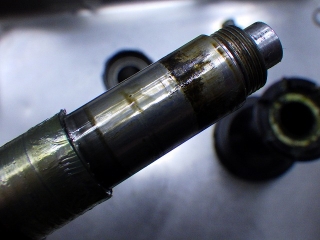
When I removed the freewheel body,
there was a rust ring on the hub axle from contact corrosion, but

the one just below the inner bearing came off when I wiped it.
I replaced the outer bearing of the freewheel body later.

On the hub flanges other than the rear right from this era,
something like Konishi Bond G17 is stuck on.
When I first saw this, I thought a user felt noise coming from here
and had applied G17,
but the culprit is clearly double-sided tape—
something that could only be applied during wheel building.
In later specifications, the hub flanges other than the rear right
fit together like jigsaw puzzle pieces,
but with this method, if a spoke breaks from spoke head failure,
thread start failure, or external causes like chain drop,
the broken spoke could contact and damage the hub axle.
It might seem like it's not doing much work, but
perhaps it's designed to prevent that.
The tape itself can be easily removed (if the hub is by itself),
but this nasty adhesive residue doesn't come off easily.
It can only be done when the hub is by itself,
but I used an adhesive remover that can clean off
the intense residue left after peeling the sticker on the No-Mulab Wheel 2 rim at shipping,
applying it to a brush,
and scrubbing got it off fairly easily.
I also cleaned the hub body itself.
There were cutting chips inside the rim.
I retrieved them.
I happened to spot them visually,
but even otherwise, I would have noticed from the noise anyway.
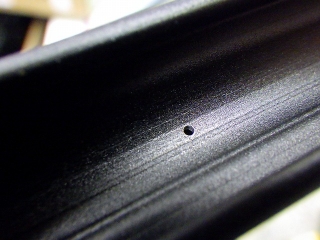
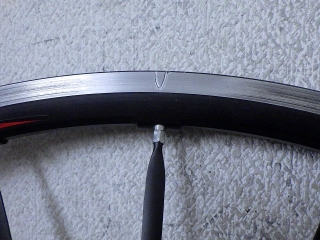
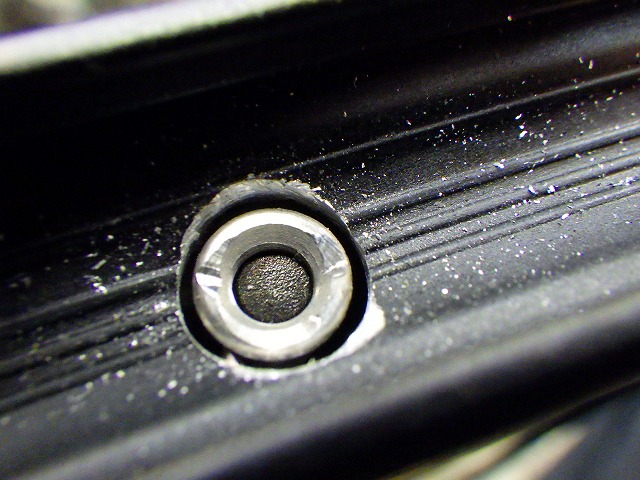
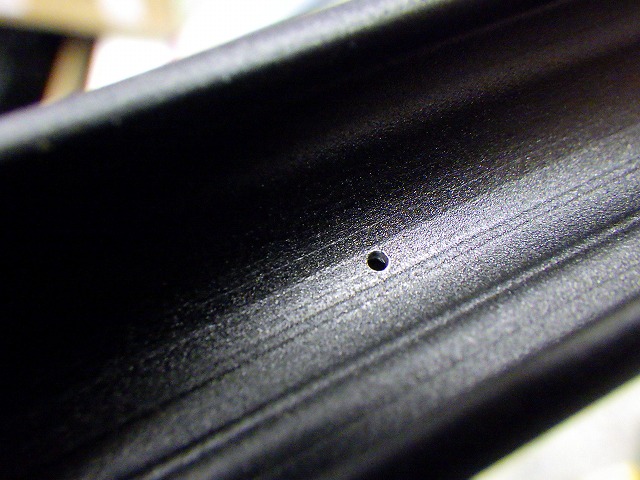
There's a small hole near the valve hole,
which I believe is necessary for manufacturing reasons.
On the 2WAY-FIT tubeless rim,
this hole is deliberately sealed afterward.

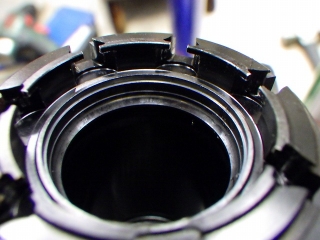
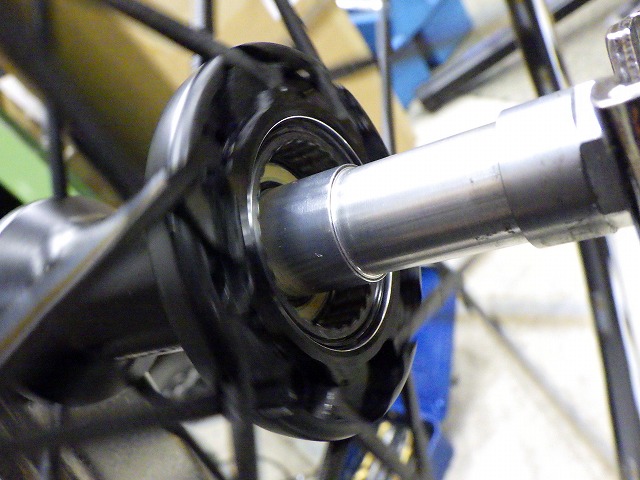
Without the freewheel body—in "front hub state"—
I roughly checked radial and lateral runout and raised the tension almost to completion.
I polished and removed as much of the contact rust on the hub axle as possible.
By the way, this hub axle is an older version without butting.
From around 2006, the shaft switched to a butted version,
so almost all models of Fulcrum Racing 3 and above, which started the brand in 2005,
have butted shafts with reasonable certainty,
but rarely, early-batch wheels bought in 2005
have units with non-butted shafts in Racing 1 and 3.
This rear wheel falls into that category.
If there are no accidents that bend the rim or anything like that from here on,
in a Ship of Theseus kind of way, it might become a "wheel that lasted 30 years."
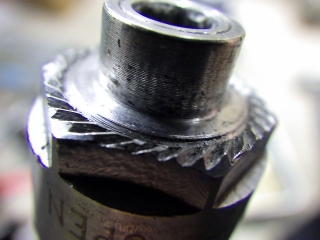
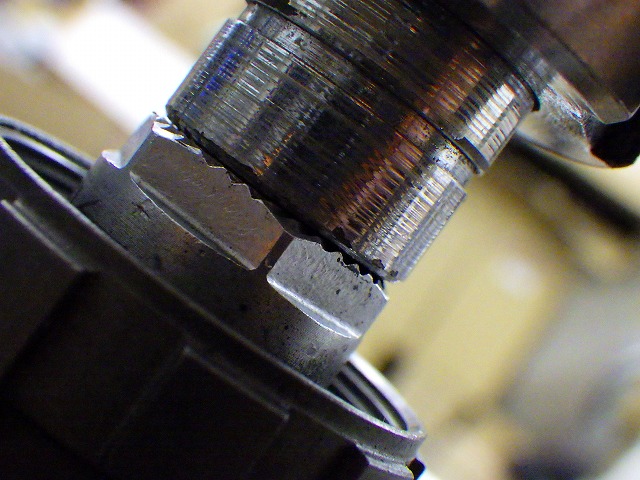
The right end sits further inside than when the freewheel body is present.
In the image above, too, the end face of the hub axle protrudes further out
than the serrations of the end.
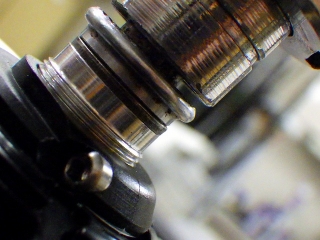
Temporary center at that point.
It's almost never the case normally,
but the rim is off to the left before completion of building.
When the freewheel body is installed,
the end moves outward, which means
the measuring probe on the center gauge retracts, so
the gap with the left end increases—in other words,
the centering error gets even bigger.
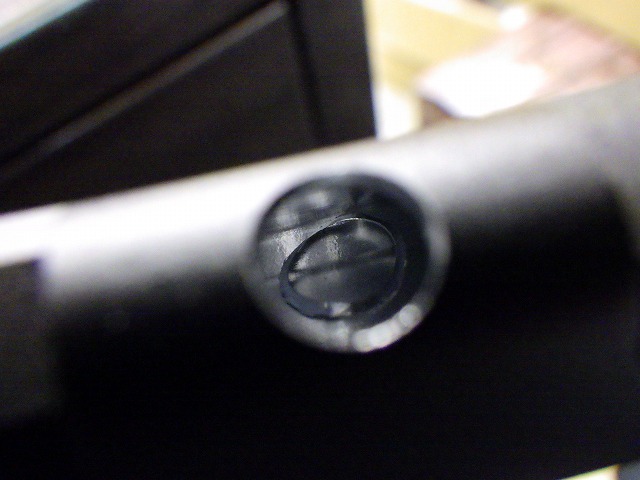
The freewheel pawl spring showed no signs of deformation,
so I reused it.
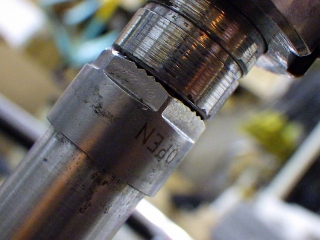
I installed the freewheel body and tightened the right end firmly.
The serrations of the end protrude further out than the hub axle end.
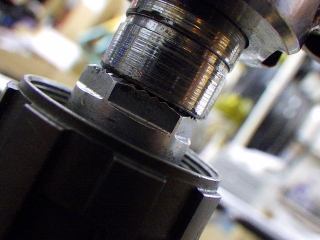
And sure enough, the centering error increased.

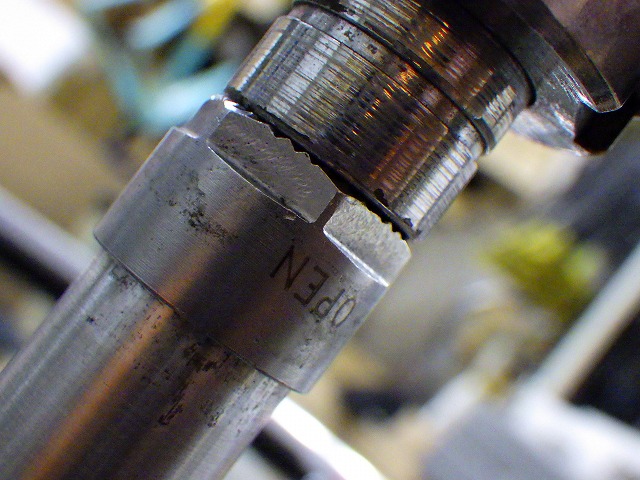
I used up all the additional tightening margin I'd left on the freewheel side
by the time building was complete, and the center came out just right.


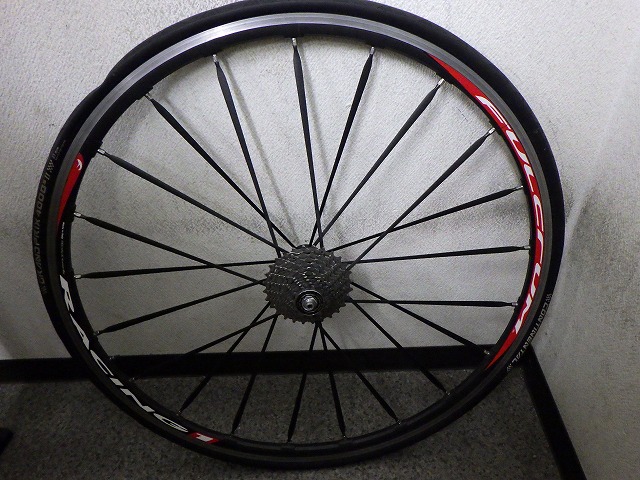
Done.
This rear wheel took quite a while from when I started work on it.
Looking at the image dates, the date on the first image was January 29th.
A customer dropped off a first-generation Racing 1 rear wheel with me.
They wanted the rim replaced.
The first-generation Racing 1, though,
is assembled with brass nipples with a 5.5mm wrench-flat width.
At this point, the Racing 1 was the flagship model, but
the later Racing Zero switched to aluminum nipples with
a 6mm wrench-flat width,
and the hole diameter on the inner rim side is also subtly different.
So I ordered a Racing 1 rim, but
it turned out to be discontinued.
Thinking back to when Mavic Ksyrium ES and Shimano WH-7800,
which came out around the same time as this Racing 1,
couldn't get rims even ten years ago,
this is pretty good service.
So I was about to check inventory on a Racing Zero rim by replacing all the nipples
with aluminum nipples for the Racing Zero as a workaround,
when someone from a distributor who knows Campagnolo best in all of Japan
suggested to me instead:
"If it's a Rase-Zero rim, we still have them at the main factory,
so why not just have the nipples aluminum-ized and build it with those?"

The reason for the rim replacement is that there's a deep scratch on the rim side—
whether it caught in a grate, rubbed against a curb,
or from a crash—
and the customer tried sanding before and after the scratch,
but it didn't work out.
When I disassembled the wheel, though,
these five spokes were completely seized
and wouldn't budge at all.
I haven't twisted them to the point of failure,
but I'm confident that even if I did, the seizure wouldn't release.
As a precursor to complete seizure, there's a state where the nipple loosens to a certain point
but won't move any further, where it's possible to screw it back to where it was,
and the nipple only rotates within a certain range.
The Racing 1 spokes come in only two different lengths.
It goes without saying that the front wheel uses one length,
but for the rear wheel, the flange diameters on left and right were designed based on spoke length,
consciously reducing the number of spare parts needed.
Shimano's first complete wheel, the WH-7700, did the same thing,
but with the WH-7701 rear wheel, they made the wide-flange fraud (→here)
and changed the freewheel side to radial lacing,
so the rear wheel now has two different spoke lengths.

So I have a reasonable stock of spare spokes,
but these spokes are quite valuable,
so I wanted to avoid using them if possible.

The widest part of the tie-in spoke measured about 8.5mm,
so I drilled a 9mm diameter hole in the outer perimeter of the spoke hole phase on the rim.

Oops, it's going to get stuck here anyway.
I had to cut away some of the nipple flange,
but I dropped the spoke into the rim,
cut the rim about halfway from the inside,
then pulled the spoke up from the inside
and cut the other half from the outside.

That way, I could get it off like this.


↑ The saw marks look like this
From here, I scrape away the brass on the nipple right down to the threads.
Once the contact pressure is relieved, the spoke should be able to rotate relative to the nipple.
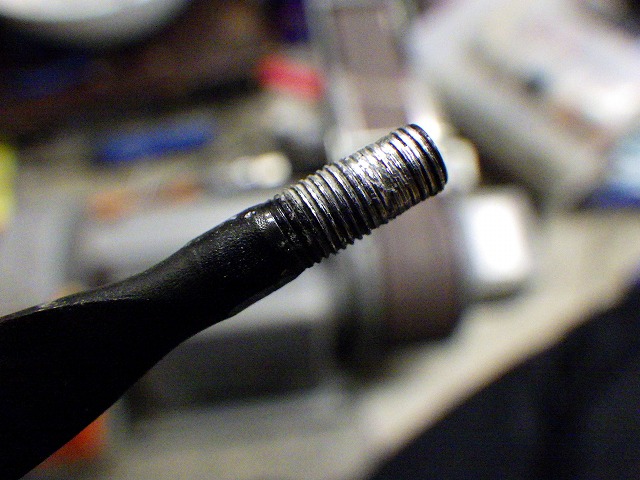
So I rotated the spoke and got the nipple off,
but the threads at the outer end were corroded and worn thin,
so I concluded that reuse wasn't possible.

For reference, the nipple side looked like this

The customer asked me to take a look at the freewheel pawl spring,
and if it was bad, replace it. I also did a hub overhaul while I was at it.
When I removed the freewheel body,
there was a rust ring on the hub axle from contact corrosion, but
the one just below the inner bearing came off when I wiped it.
I replaced the outer bearing of the freewheel body later.

On the hub flanges other than the rear right from this era,
something like Konishi Bond G17 is stuck on.
When I first saw this, I thought a user felt noise coming from here
and had applied G17,
but the culprit is clearly double-sided tape—
something that could only be applied during wheel building.
In later specifications, the hub flanges other than the rear right
fit together like jigsaw puzzle pieces,
but with this method, if a spoke breaks from spoke head failure,
thread start failure, or external causes like chain drop,
the broken spoke could contact and damage the hub axle.
It might seem like it's not doing much work, but
perhaps it's designed to prevent that.

The tape itself can be easily removed (if the hub is by itself),

but this nasty adhesive residue doesn't come off easily.
It can only be done when the hub is by itself,
but I used an adhesive remover that can clean off
the intense residue left after peeling the sticker on the No-Mulab Wheel 2 rim at shipping,
applying it to a brush,

and scrubbing got it off fairly easily.

I also cleaned the hub body itself.
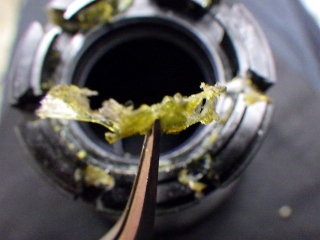
There were cutting chips inside the rim.

I retrieved them.
I happened to spot them visually,
but even otherwise, I would have noticed from the noise anyway.
There's a small hole near the valve hole,
which I believe is necessary for manufacturing reasons.
On the 2WAY-FIT tubeless rim,
this hole is deliberately sealed afterward.
Without the freewheel body—in "front hub state"—
I roughly checked radial and lateral runout and raised the tension almost to completion.
I polished and removed as much of the contact rust on the hub axle as possible.
By the way, this hub axle is an older version without butting.
From around 2006, the shaft switched to a butted version,
so almost all models of Fulcrum Racing 3 and above, which started the brand in 2005,
have butted shafts with reasonable certainty,
but rarely, early-batch wheels bought in 2005
have units with non-butted shafts in Racing 1 and 3.
This rear wheel falls into that category.
If there are no accidents that bend the rim or anything like that from here on,
in a Ship of Theseus kind of way, it might become a "wheel that lasted 30 years."
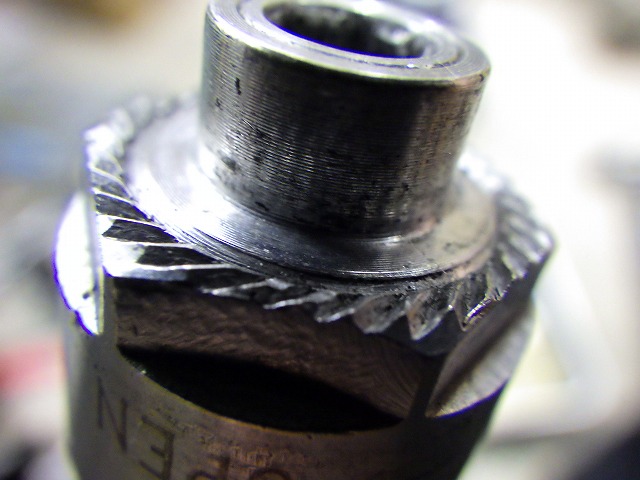
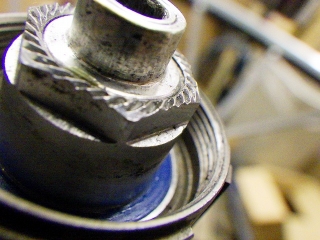
The right end sits further inside than when the freewheel body is present.
In the image above, too, the end face of the hub axle protrudes further out
than the serrations of the end.

Temporary center at that point.
It's almost never the case normally,
but the rim is off to the left before completion of building.
When the freewheel body is installed,
the end moves outward, which means
the measuring probe on the center gauge retracts, so
the gap with the left end increases—in other words,
the centering error gets even bigger.
The freewheel pawl spring showed no signs of deformation,
so I reused it.

I installed the freewheel body and tightened the right end firmly.
The serrations of the end protrude further out than the hub axle end.


And sure enough, the centering error increased.
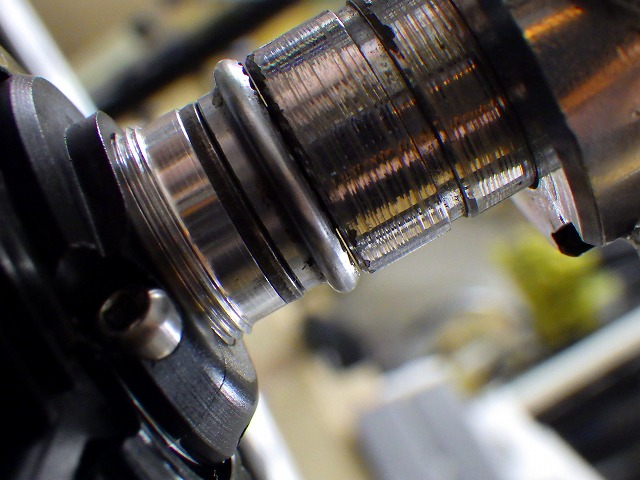
I used up all the additional tightening margin I'd left on the freewheel side
by the time building was complete, and the center came out just right.
Done.
This rear wheel took quite a while from when I started work on it.
Looking at the image dates, the date on the first image was January 29th.