A customer brought in the front and rear wheels from a Fulcrum Racing 700.
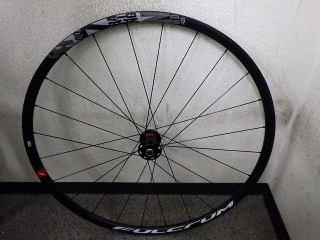
This is a model that's distributed as part of complete bikes—not normally sold through regular retail channels.
The customer bought it at auction thinking to install it on their commuter bike, but some end pieces related to the thru-axle were missing,
so they're asking for us to source those parts and do an inspection.
The necessary parts have arrived.
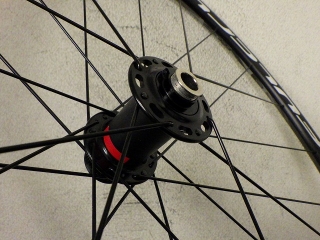
It's 8+16, so 24H total.
Whenever I see a hub designed for hooked spokes with holes different from universal designs,
my mind wanders into some nasty territory.
Like that stupid Carapache disc brake rear wheel,
the lower spoke count side is laced tangentially, so
the higher spoke count side shows more deformation
when I squeeze the final crossing point.
Since it's not the disc rotor side, I don't think we'd be scared into lacing it tangentially anyway...
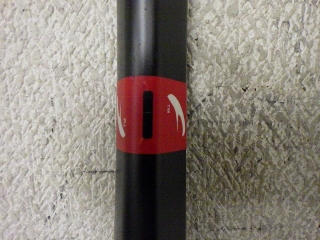
Both front and rear wheels use offset rims.

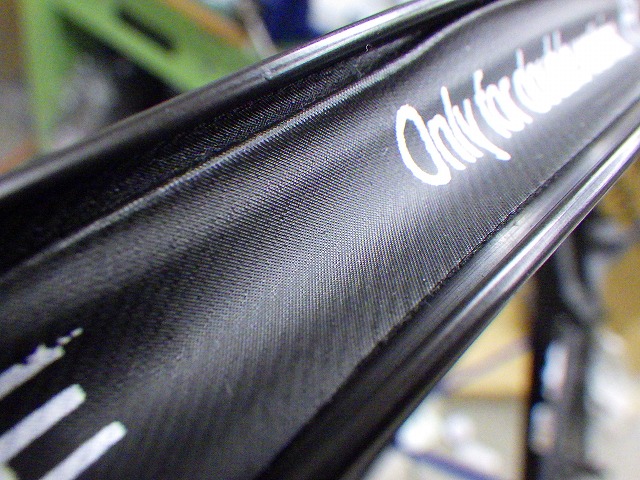
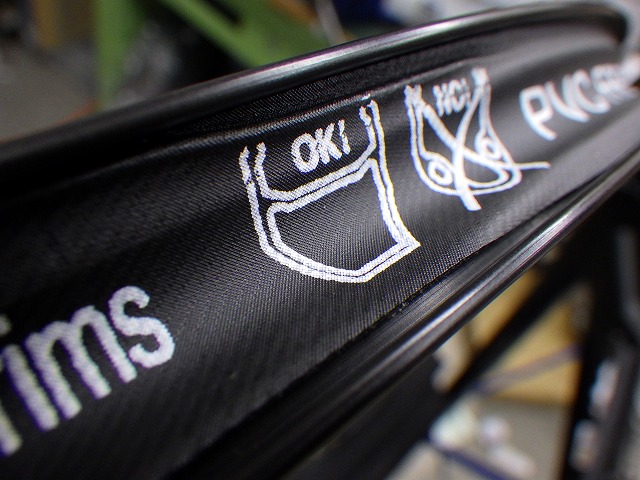
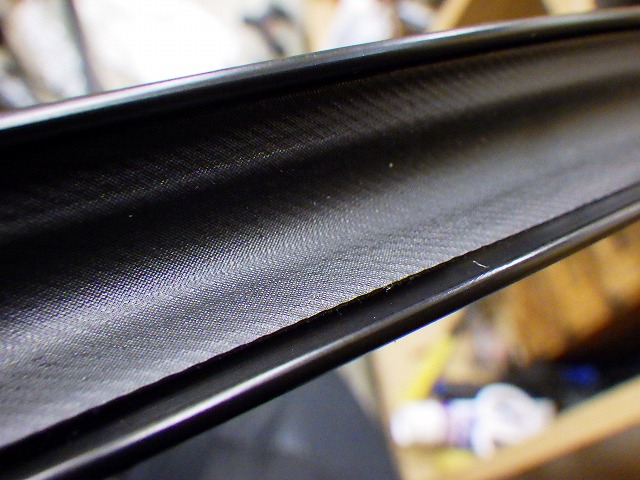
These are tubeless-ready rims with a pronounced hump, and they came from the factory with a stretch-band style rim tape.
Currently, at most angles, the tape appears to be stretched across the full width of the rim, but
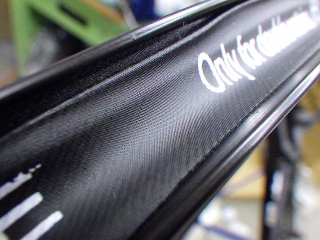
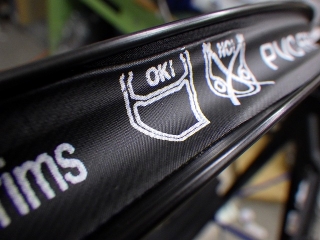
it got dragged into the depression and could no longer cover the full width of the rim, and creases had formed in the hump area, so
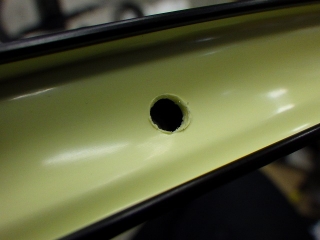
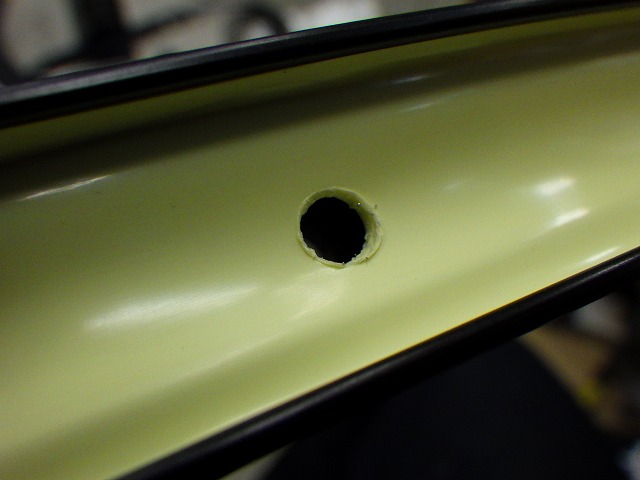
jumping ahead in the timeline, I switched to Stan's tape.
The rear wheel's rim tape showed similar problems, so I changed that to Stan's as well.
Going back a bit in the timeline,
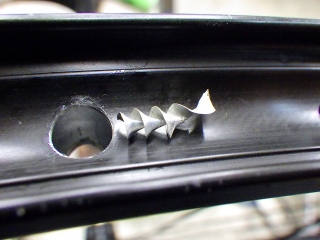
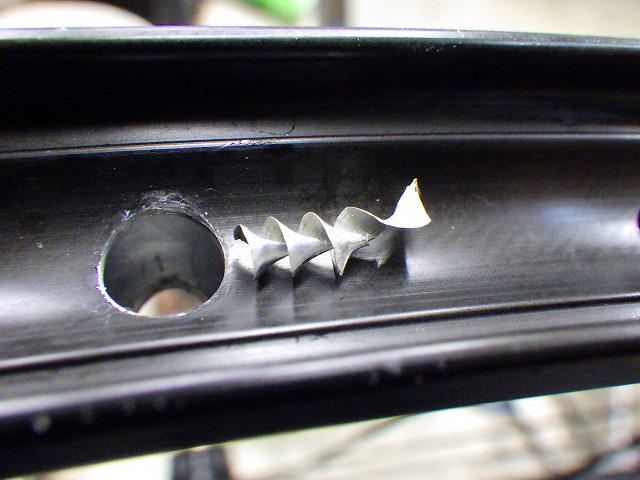
the front wheel's rim had a bunch of metal shavings left on it.
Since this wasn't a rim with only a valve hole and no other holes, they should've fallen out during wheel building,
but they remained inside the rim.
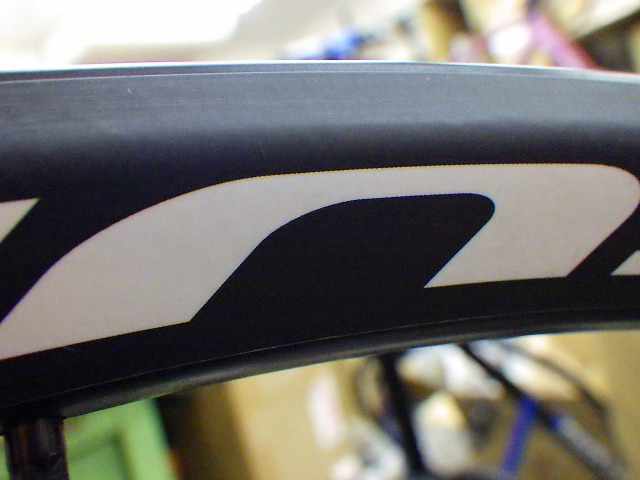
Also, the rim's hump looks like what's shown in the image above.
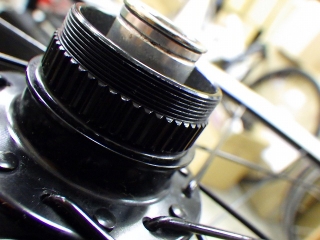
The disc rotor mounting is centerlock, and centerlock lockrings come in two types:
"INT/internal" compatible with cassette lockring tools, and
"EXT/external" compatible with the original Hollowtech II BB tools.
In either case, the lockring side has male threads (a hollow bolt)
and the rotor hub side has female threads.
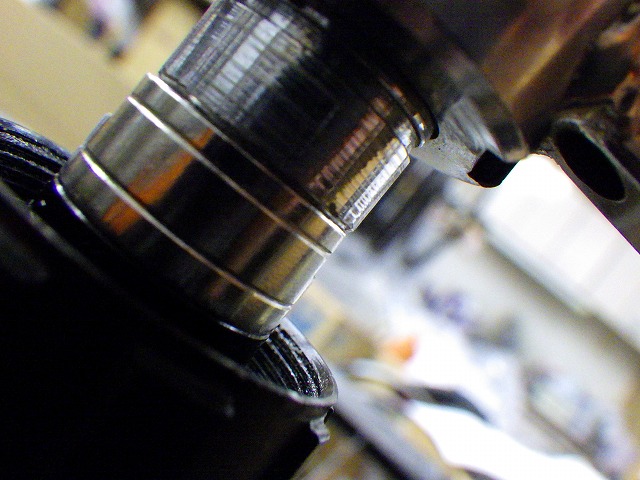
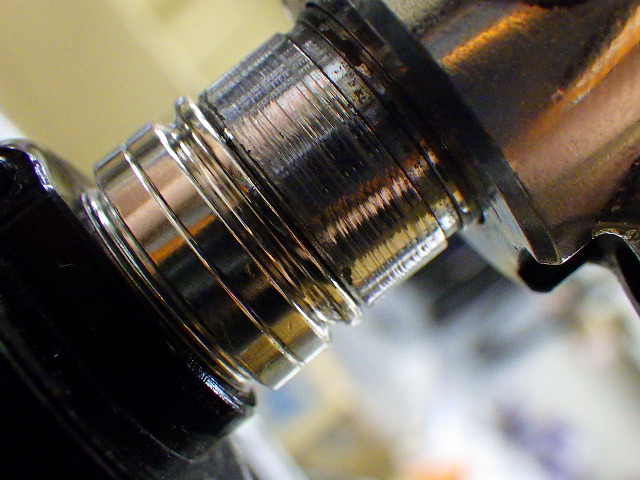
But Campagnolo/Fulcrum complete wheelsets use centerlock where the rotor hub side has male threads,
and the wheel comes with a dedicated lockring that has female threads (a nut).
The only compatible tool is the original Hollowtech II BB tool.
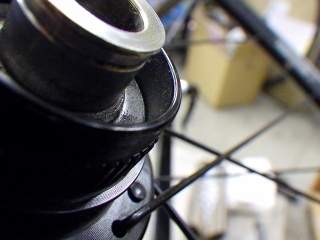
↑So there are no threads on the inside, and
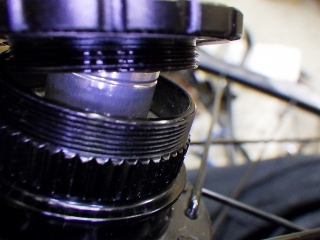
a standard lockring won't fit like this.
The problem here is that the customer probably hasn't actually used this wheel—
(they definitely couldn't have, since the end pieces were missing)—
yet they've asked me to "just slap some cheap rotor on it," which means they likely don't know the dedicated lockring wasn't included.
The lockring is obtainable and available immediately, but
it costs ¥2,700 before tax, per piece.
It's more expensive than a cheap rotor.
What do I do...
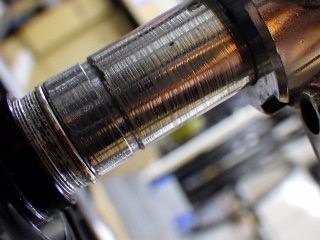
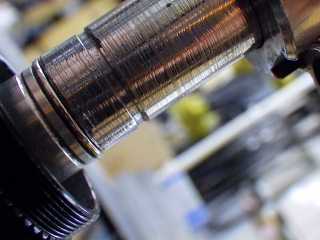
↑This is a provisional center check; after truing out the slight runout, there was no centering drift.
I didn't shoot a follow-up photo since it would look virtually identical.
The hub bearing wasn't loose—it was actually over-tightened, with a gritty feel to the rotation.
Loosening it slightly gave a crisp rotation with no play,
and I found that sweet spot right away.
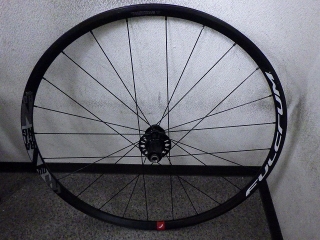
Now for the rear wheel.
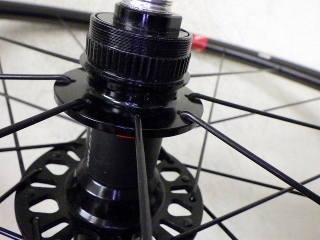
Why's the rear wheel radial on the rotor side? That's odd.
But I appreciate that they went with inpoke radial lacing.
If I absolutely had to do radial lacing, and confirmed the rotor doesn't interfere,
I'd do the same thing.
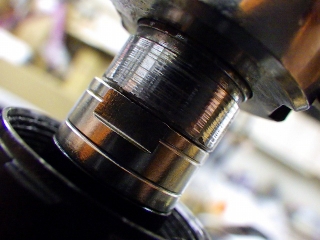
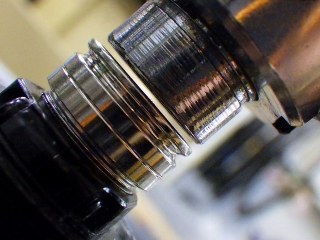
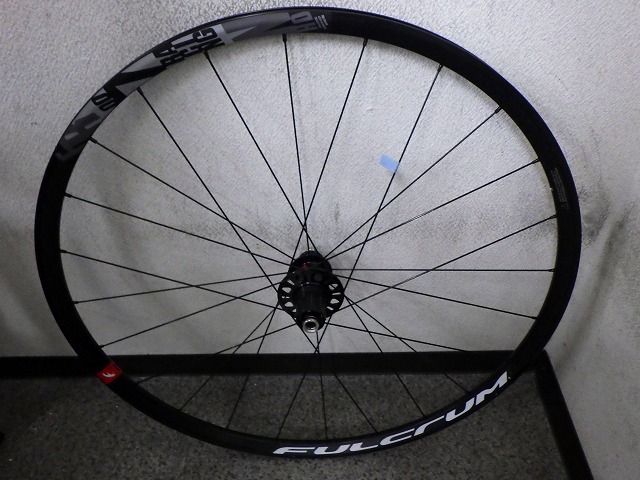
The provisional center check showed the rim drifted toward the freewheel side.
Both end pieces are shiny because they're fresh takeoffs I just sourced.
There was one spot with pronounced lateral runout, and that spoke had paint damage.
Thinking it was related, I relieved tension on that spoke, but
the spoke itself wasn't bent at all.
Still, it seemed too coincidental to be unrelated, so I carefully palpated the nearby spokes, but
none of them were bent either.
They were 14-gauge plain spokes, so I swapped them for DT black Champion 14s.
Then I did some very light truing by tightening the freewheel-side nipples 3–4 places, and
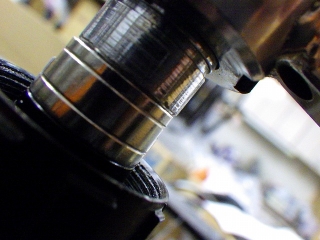
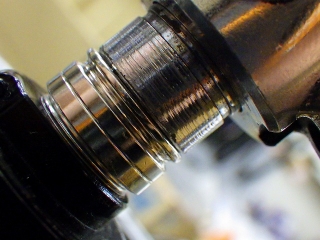
the center popped into place on its own as soon as I finished truing.
I hadn't tightened the freewheel side enough to fill in that drift,
and I hadn't tightened all 12 nipples on that side either.
It seems like coincidence, but the provisional center must've been checked right under the point of maximum runout.
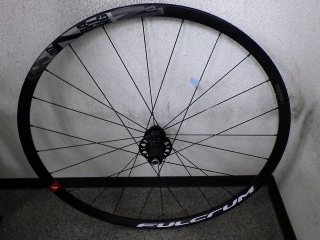
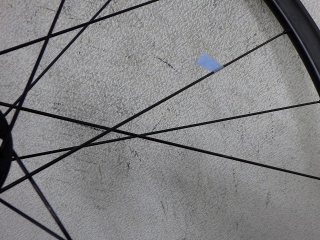
Fixed.
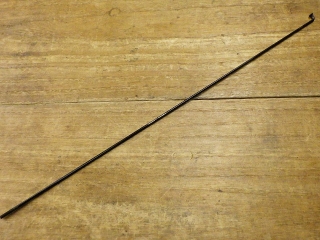
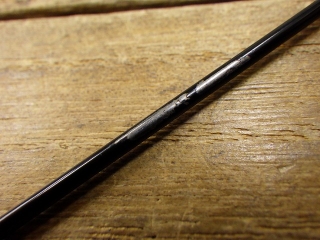
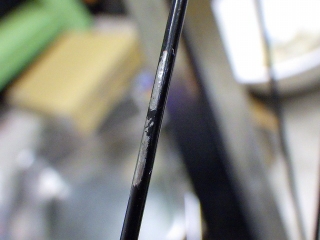
↑The spoke I replaced
As you can see, it wasn't bent at all.
Even new CX-RAY spokes come with more bow than this sometimes, depending on the manufacturing process.
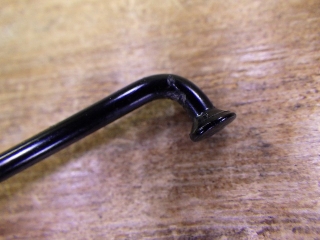
At the neck, there was a crack just big enough to catch a fingernail.
Maybe when spoke tension is applied, the crack spreads.
Actually, that has to be it—otherwise there's no way
such lateral runout would appear directly under the spoke position of an unbent spoke.
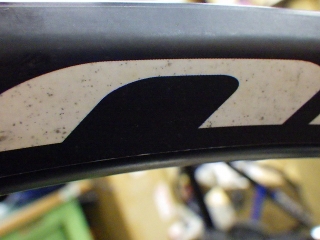
The rear wheel's rim, especially the freewheel side, had dirt that appeared to be chain lube,
but it still looked salvageable, so
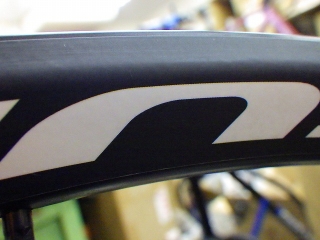
I managed to get it clean.
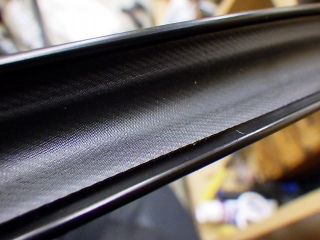
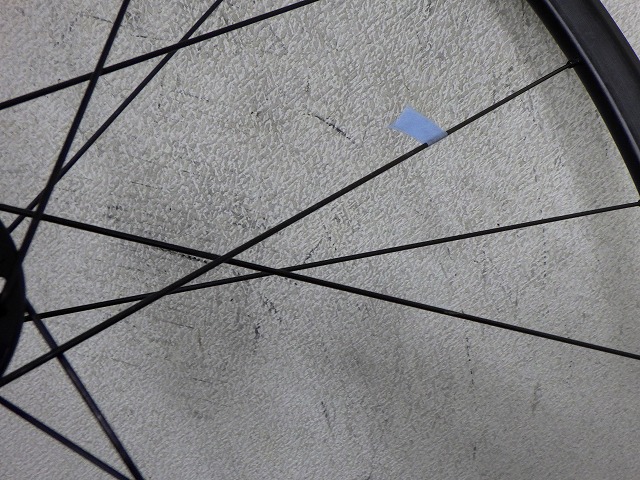
As I mentioned earlier, I've swapped the rear wheel's tape-type rim tape as well.
The image above shows where it was slipping.
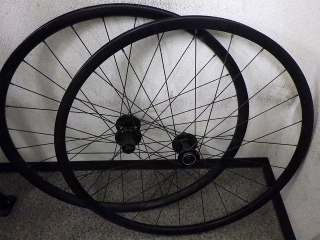

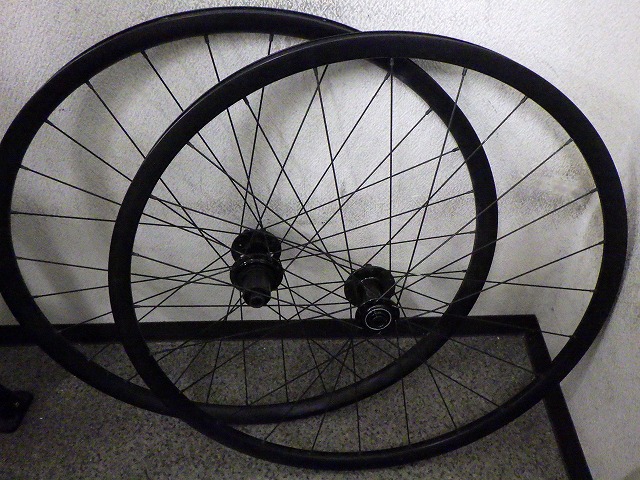
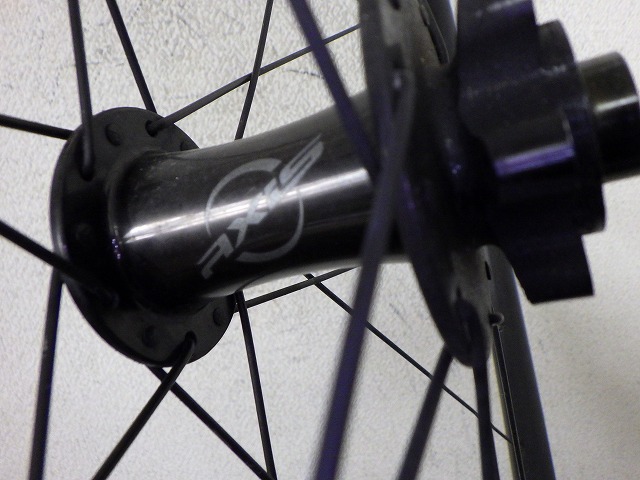
The same customer also brought in front and rear wheels from a Specialized complete bike, this time a set under the AXIS brand.
While waiting for the Racing 700's end pieces to arrive, they picked up these wheels at auction as a stopgap.
They want an inspection too, and they mentioned the hub rotation feels sluggish.
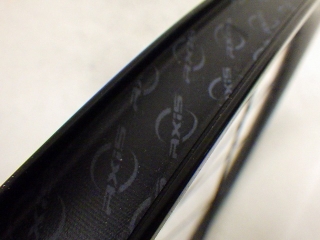
These also have tubeless-ready rims with stretch-band tape, but
since the rim has little to no hump, there's no permanent crease.
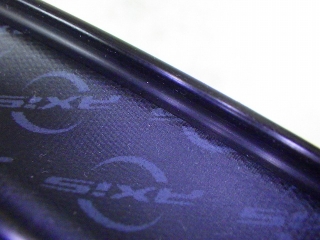
Though there are spots where it was dragged into the depression and doesn't cover the full rim width.
Setting that aside...
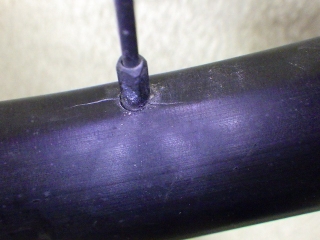
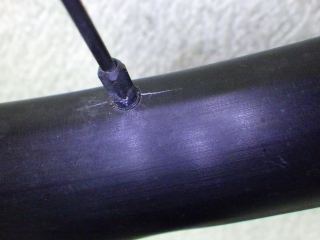
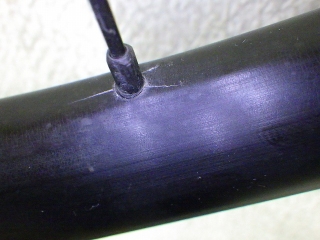
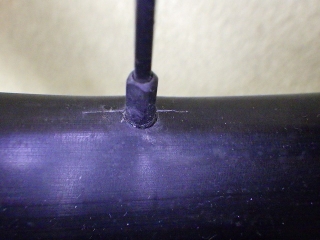
Almost every spoke hole on the freewheel side—the high-tension side of the rear wheel—had cracks.
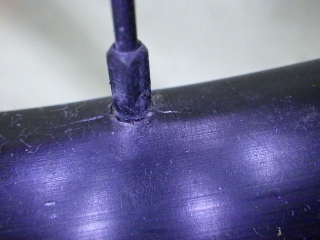
In the worst spots,
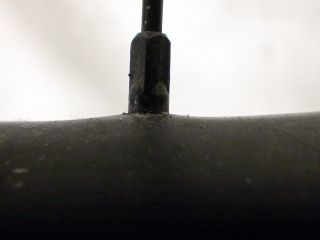
↑the rim is actually lifting.
Once I spotted this, I stopped and haven't proceeded with work.
If the customer is willing to spend the money on a rim replacement, I can do it. Otherwise, no.
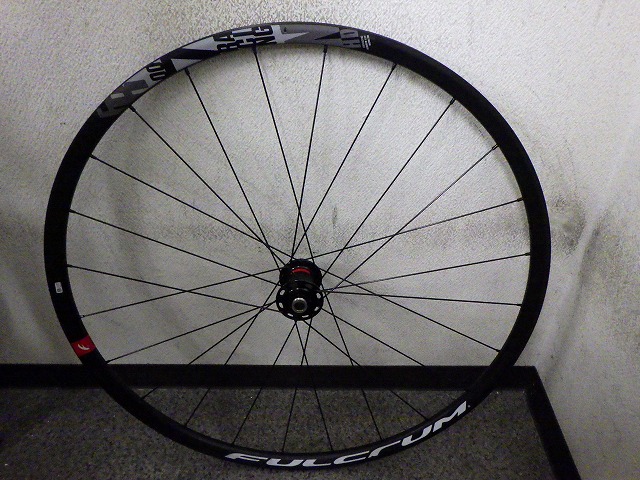
This is a model that's distributed as part of complete bikes—not normally sold through regular retail channels.
The customer bought it at auction thinking to install it on their commuter bike, but some end pieces related to the thru-axle were missing,
so they're asking for us to source those parts and do an inspection.
The necessary parts have arrived.
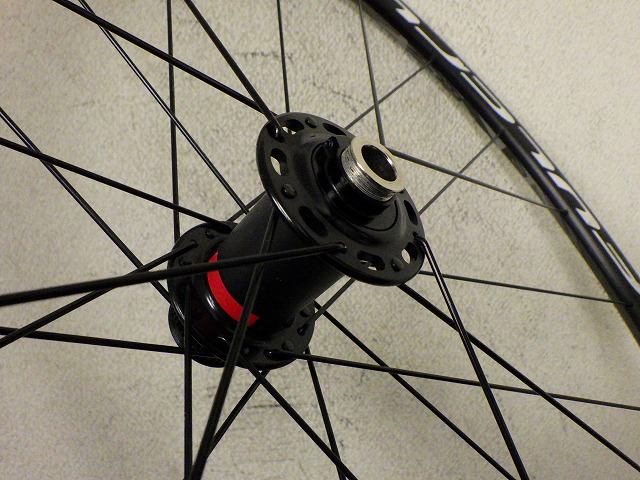
It's 8+16, so 24H total.
Whenever I see a hub designed for hooked spokes with holes different from universal designs,
my mind wanders into some nasty territory.
Like that stupid Carapache disc brake rear wheel,
the lower spoke count side is laced tangentially, so
the higher spoke count side shows more deformation
when I squeeze the final crossing point.
Since it's not the disc rotor side, I don't think we'd be scared into lacing it tangentially anyway...
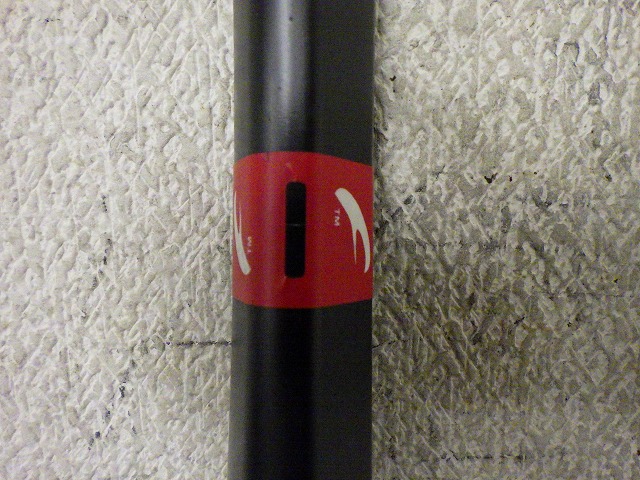
Both front and rear wheels use offset rims.
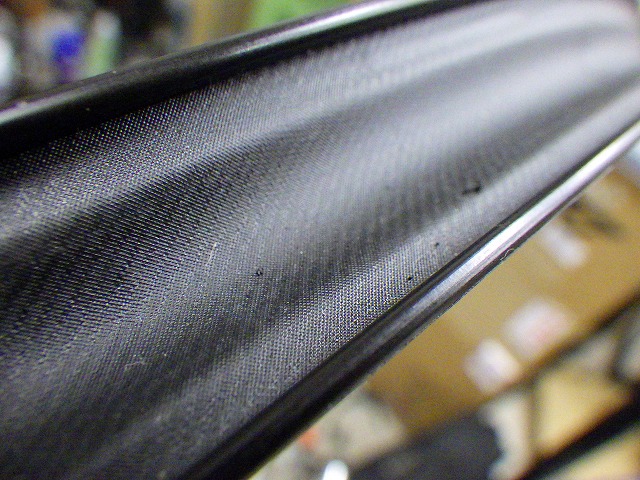
These are tubeless-ready rims with a pronounced hump, and they came from the factory with a stretch-band style rim tape.
Currently, at most angles, the tape appears to be stretched across the full width of the rim, but
it got dragged into the depression and could no longer cover the full width of the rim, and creases had formed in the hump area, so
jumping ahead in the timeline, I switched to Stan's tape.
The rear wheel's rim tape showed similar problems, so I changed that to Stan's as well.
Going back a bit in the timeline,
the front wheel's rim had a bunch of metal shavings left on it.
Since this wasn't a rim with only a valve hole and no other holes, they should've fallen out during wheel building,
but they remained inside the rim.
Also, the rim's hump looks like what's shown in the image above.
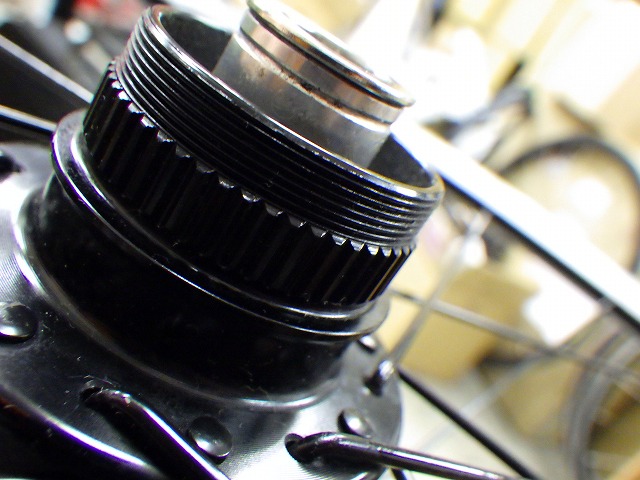
The disc rotor mounting is centerlock, and centerlock lockrings come in two types:
"INT/internal" compatible with cassette lockring tools, and
"EXT/external" compatible with the original Hollowtech II BB tools.
In either case, the lockring side has male threads (a hollow bolt)
and the rotor hub side has female threads.
But Campagnolo/Fulcrum complete wheelsets use centerlock where the rotor hub side has male threads,
and the wheel comes with a dedicated lockring that has female threads (a nut).
The only compatible tool is the original Hollowtech II BB tool.

↑So there are no threads on the inside, and
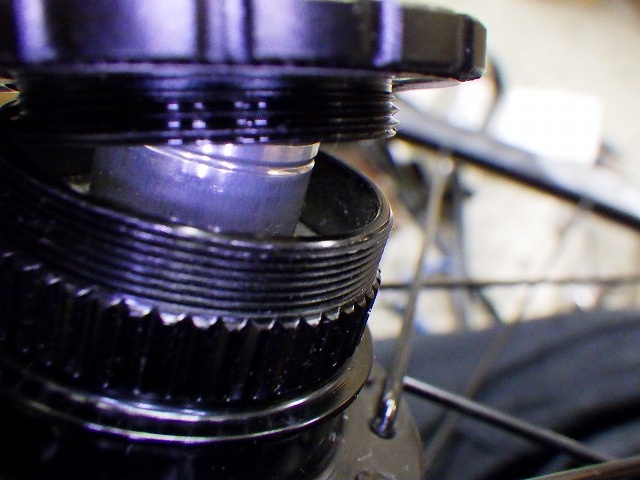
a standard lockring won't fit like this.
The problem here is that the customer probably hasn't actually used this wheel—
(they definitely couldn't have, since the end pieces were missing)—
yet they've asked me to "just slap some cheap rotor on it," which means they likely don't know the dedicated lockring wasn't included.
The lockring is obtainable and available immediately, but
it costs ¥2,700 before tax, per piece.
It's more expensive than a cheap rotor.
What do I do...
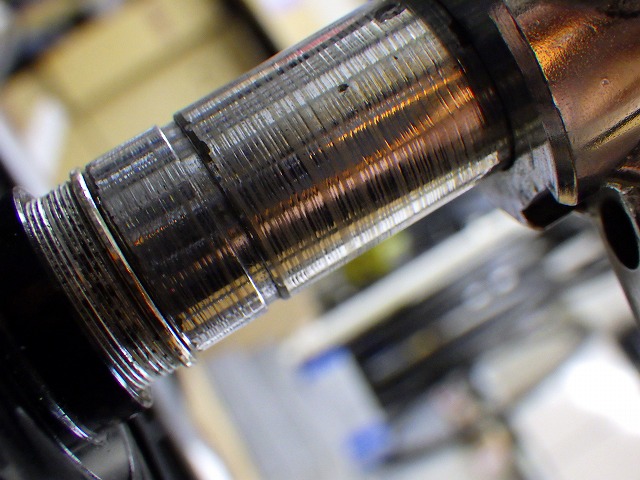
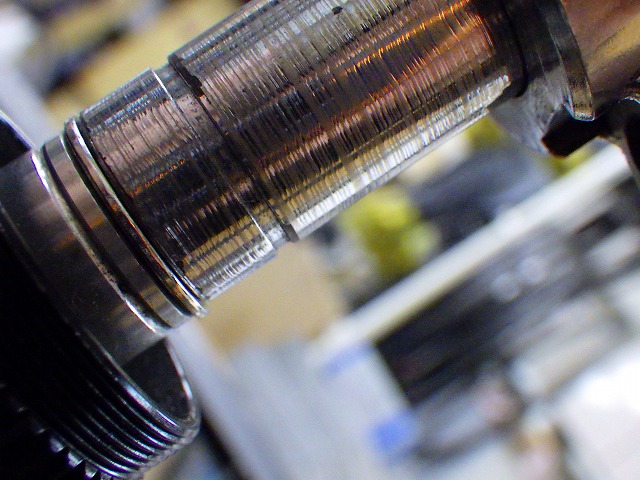
↑This is a provisional center check; after truing out the slight runout, there was no centering drift.
I didn't shoot a follow-up photo since it would look virtually identical.
The hub bearing wasn't loose—it was actually over-tightened, with a gritty feel to the rotation.
Loosening it slightly gave a crisp rotation with no play,
and I found that sweet spot right away.
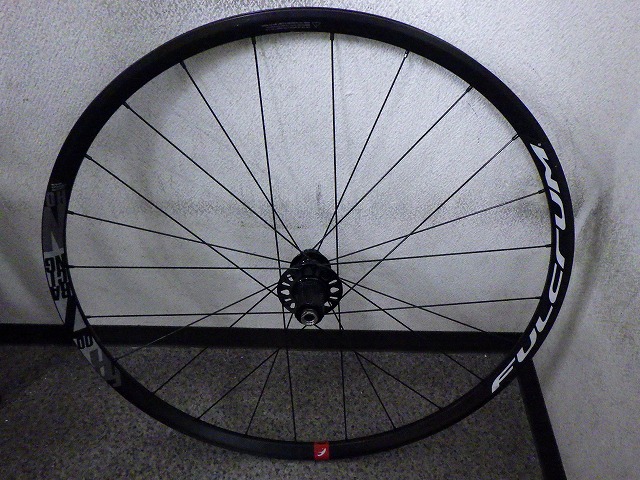
Now for the rear wheel.
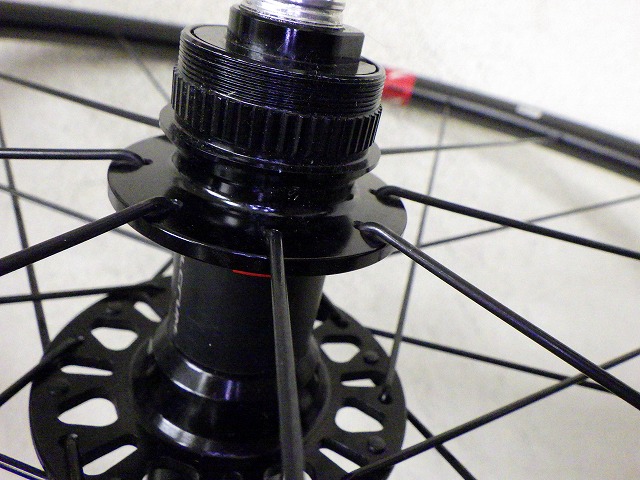
Why's the rear wheel radial on the rotor side? That's odd.
But I appreciate that they went with inpoke radial lacing.
If I absolutely had to do radial lacing, and confirmed the rotor doesn't interfere,
I'd do the same thing.
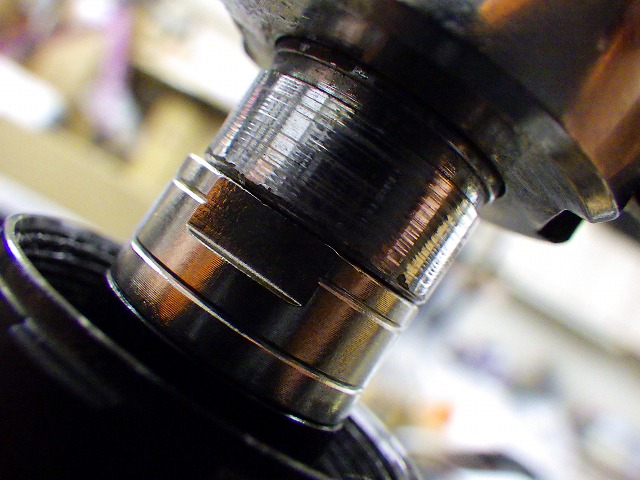

The provisional center check showed the rim drifted toward the freewheel side.
Both end pieces are shiny because they're fresh takeoffs I just sourced.
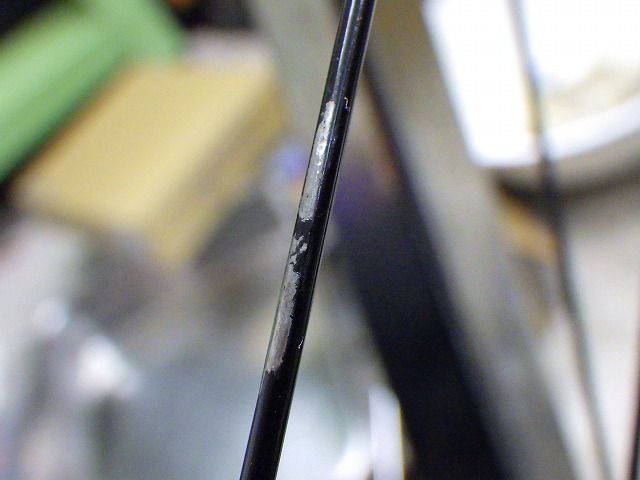
There was one spot with pronounced lateral runout, and that spoke had paint damage.
Thinking it was related, I relieved tension on that spoke, but
the spoke itself wasn't bent at all.
Still, it seemed too coincidental to be unrelated, so I carefully palpated the nearby spokes, but
none of them were bent either.
They were 14-gauge plain spokes, so I swapped them for DT black Champion 14s.
Then I did some very light truing by tightening the freewheel-side nipples 3–4 places, and
the center popped into place on its own as soon as I finished truing.
I hadn't tightened the freewheel side enough to fill in that drift,
and I hadn't tightened all 12 nipples on that side either.
It seems like coincidence, but the provisional center must've been checked right under the point of maximum runout.
Fixed.
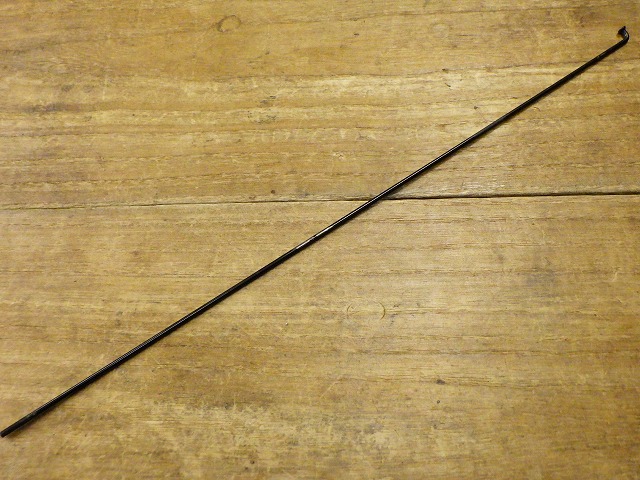
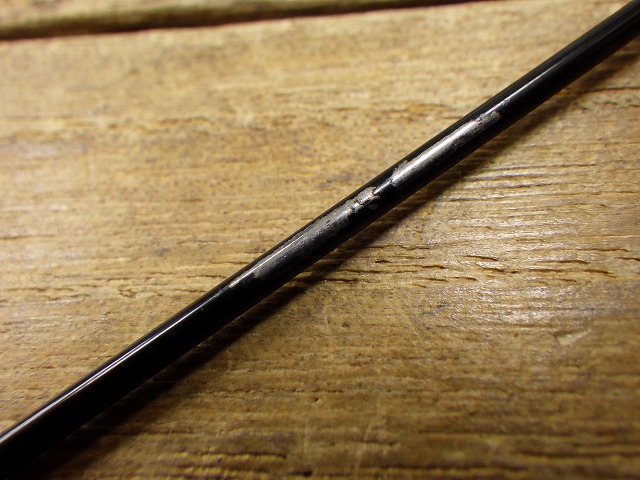
↑The spoke I replaced
As you can see, it wasn't bent at all.
Even new CX-RAY spokes come with more bow than this sometimes, depending on the manufacturing process.
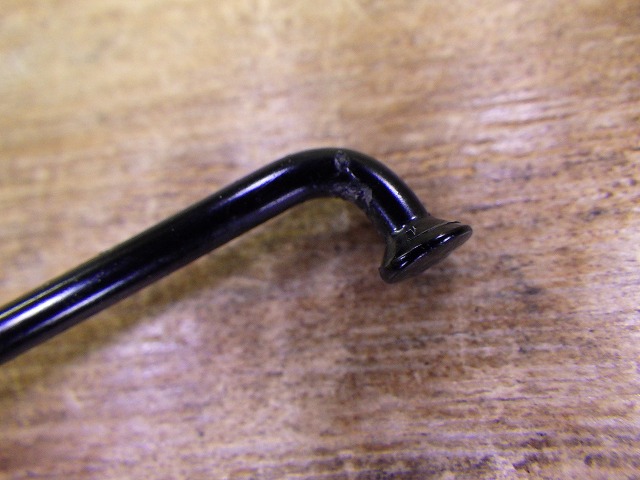
At the neck, there was a crack just big enough to catch a fingernail.
Maybe when spoke tension is applied, the crack spreads.
Actually, that has to be it—otherwise there's no way
such lateral runout would appear directly under the spoke position of an unbent spoke.
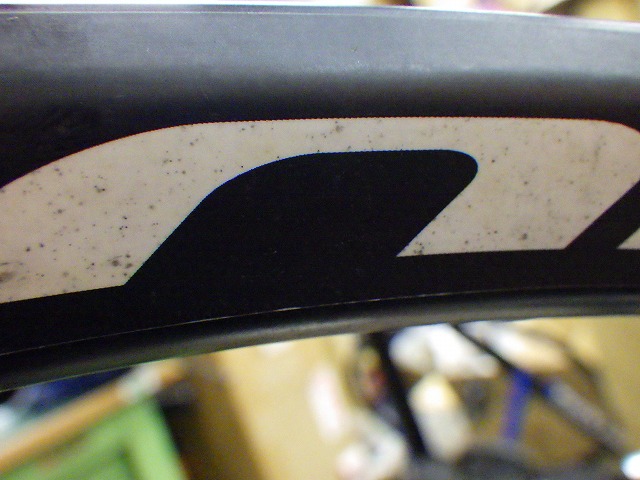
The rear wheel's rim, especially the freewheel side, had dirt that appeared to be chain lube,
but it still looked salvageable, so
I managed to get it clean.
As I mentioned earlier, I've swapped the rear wheel's tape-type rim tape as well.
The image above shows where it was slipping.
The same customer also brought in front and rear wheels from a Specialized complete bike, this time a set under the AXIS brand.
While waiting for the Racing 700's end pieces to arrive, they picked up these wheels at auction as a stopgap.
They want an inspection too, and they mentioned the hub rotation feels sluggish.
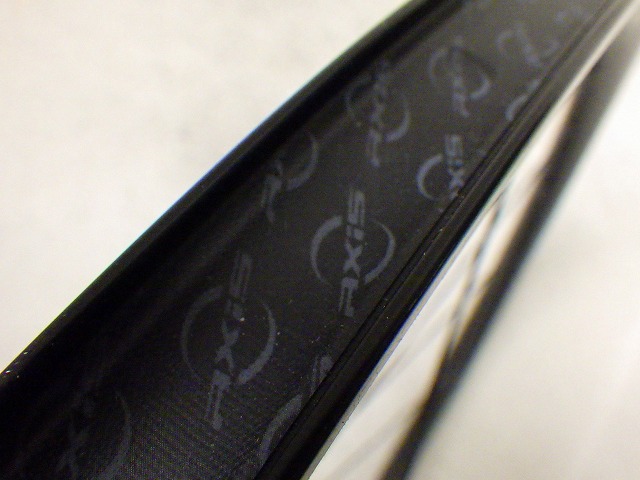
These also have tubeless-ready rims with stretch-band tape, but
since the rim has little to no hump, there's no permanent crease.
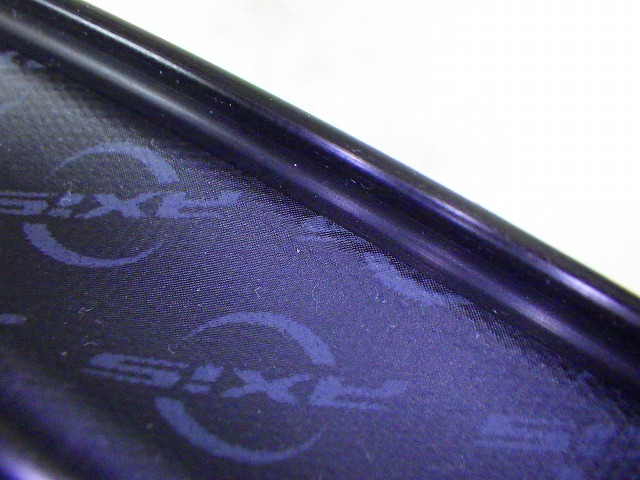
Though there are spots where it was dragged into the depression and doesn't cover the full rim width.
Setting that aside...
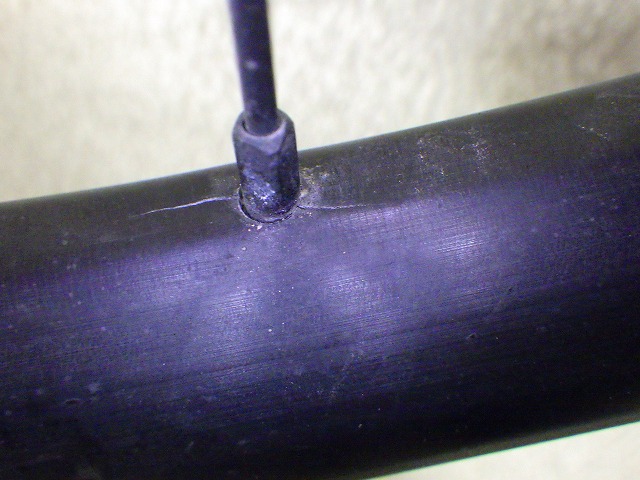
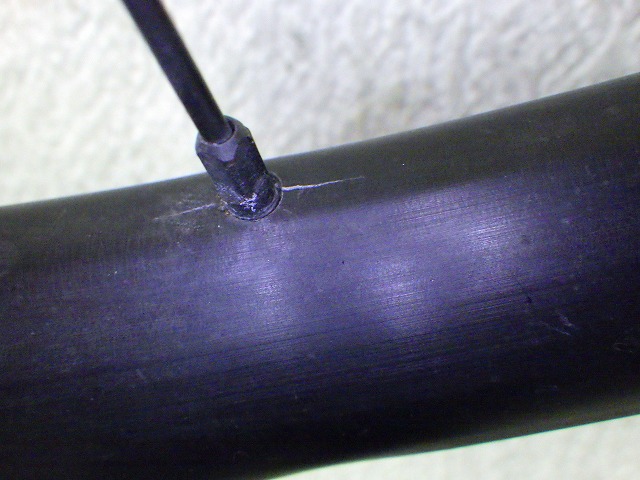
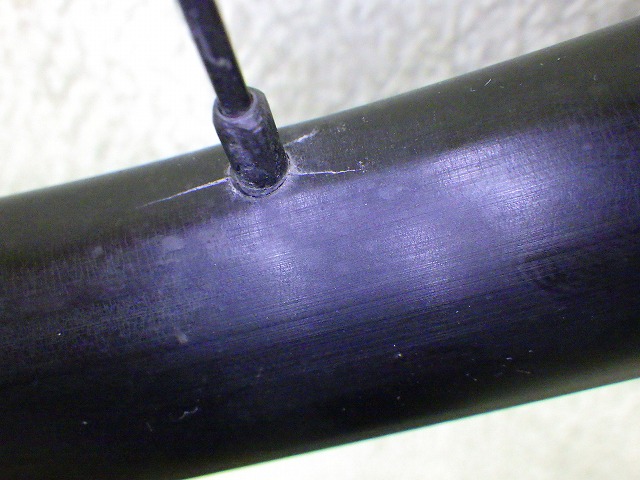
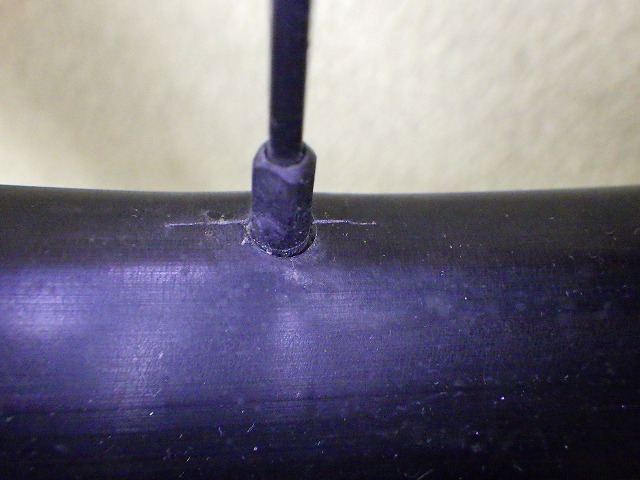
Almost every spoke hole on the freewheel side—the high-tension side of the rear wheel—had cracks.
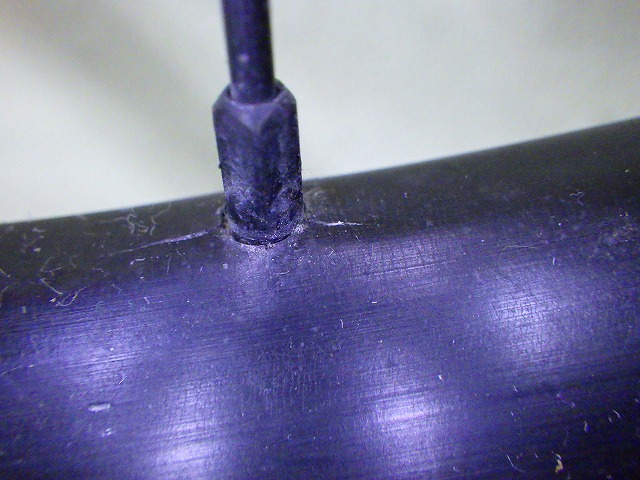
In the worst spots,

↑the rim is actually lifting.
Once I spotted this, I stopped and haven't proceeded with work.
If the customer is willing to spend the money on a rim replacement, I can do it. Otherwise, no.