A customer brought in the front and rear wheels from a Cannondale
Hologram 35 Carbon wheelset for service.
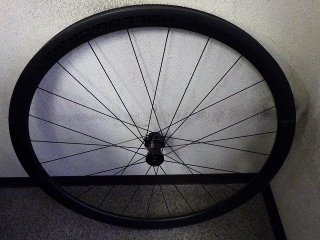
The front wheel bearings were rough and needed replacement,
plus a general inspection was requested,
but both wheels turned out to be in pretty bad shape.
Let me start with the front wheel.
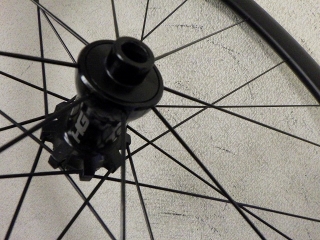
As I mentioned before, the front wheel is a 2:1 laced build,
with the front being 24H and rear being 28H.
That's fine, but this front wheel was laced in XI pattern.
So other manufacturers besides Roval use this too, apparently.
It's not my first time seeing a Hologram wheel,
but I hadn't paid close attention before.
When I grip the spokes on both sides,
the side with more spokes clearly deforms more.
In fact, the front wheel of the asymmetric left-right diameter, same spoke count nom Lab wheel #8 that I built today
(in its unlaced state) shows less difference in spoke deformation between sides.
That said, even with nom Lab wheel #8's front wheel,
I can tell the side where the spoke angle is shallower
deforms more.
That one will get lacing later.
With Speed 25's front wheel, if you grip the spokes without looking at the wheel,
the deformation differences are so similar you can't tell left from right.
With a 2:1 laced 24H setup, you could take a 32H hub, skip holes for a 2:1 lace,
and get right-right-left right-right-left right-right-left right-right-left,
which is repeating XI pattern.
To convert that to Ж-pattern repetition
right right-left-right right-left-right right-left-right right-left,
where the last crossing angle on the multi-spoke side becomes obtuse,
it's technically possible to rebuild this way. But you'd end up with a 2:1 lace on a J-bend spoke hub,
and the valve hole phase ends up inside a Ж rather than between two Жs,
which looks bad aesthetically.
I'm not going to get that deep into it this time, though.
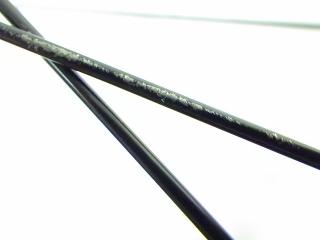
The customer mentioned there were spoke rub marks,
but said that unless I judged replacement necessary,
they could stay as-is.
When it comes to the rear wheel,
I didn't replace it "because of rub marks."
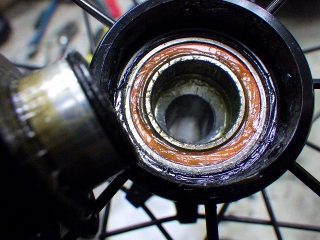
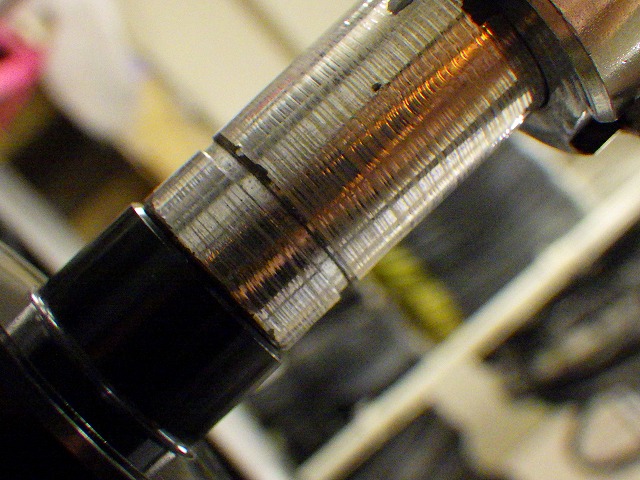
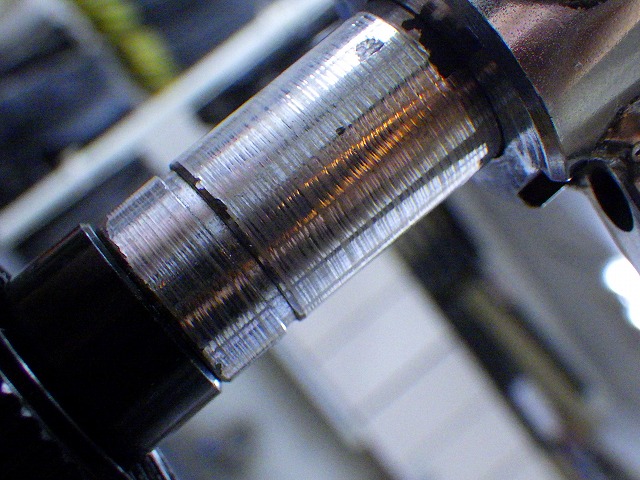
The right side's quick-release end came out easily by hand,
so I removed that one first.
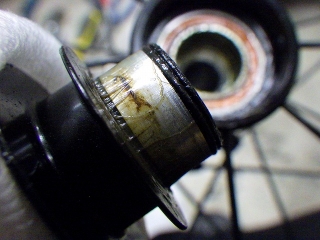
There's corrosion bloom where the bearing inner race contacts.

The contact surface between the bearing's inner side and the hub body
looks like a bearing puller won't grip it, but that's just because
the sleeve supporting the bearing inner race from inside
is butted, creating this shape.
With a regular sleeve, you could insert a rod into the hub
and apply slightly angled force to shift the sleeve within the hub body,
but this sleeve-like part also supports the bearing inner diameter on the other side,
so it has hub axle characteristics too.
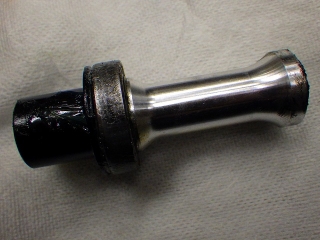
I left the right bearing from the previous image as-is
and tapped out the left bearing-with-sleeve assembly toward the left side.

The right side's quick-release end, unlike the left, has part of it
sunk into the sleeve.
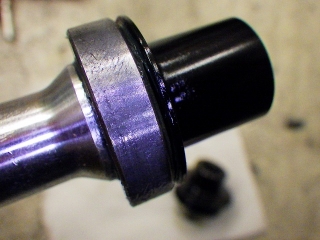
It seems to have seized a bit too—I can't rotate
the black quick-release end with one hand
while holding the silver sleeve fixed with the other.
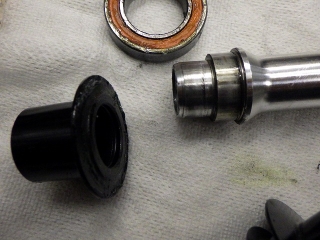
I managed to pull the quick-release end out.
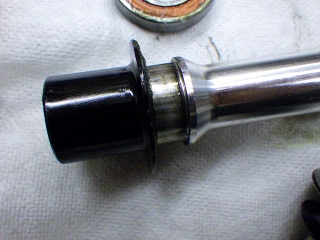
↑The left side shows how deeply the end is inserted into the sleeve (hub axle).
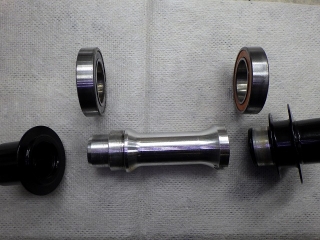
By the time of the previous image, I'd also removed the right bearing from the hub body.
It's an unusual structure: directly under the right bearing is just a quick-release end,
but directly under the left bearing is a sleeve.

The Hologram wheels are made by XERO,
and the bearing seals also carry the XERO mark.
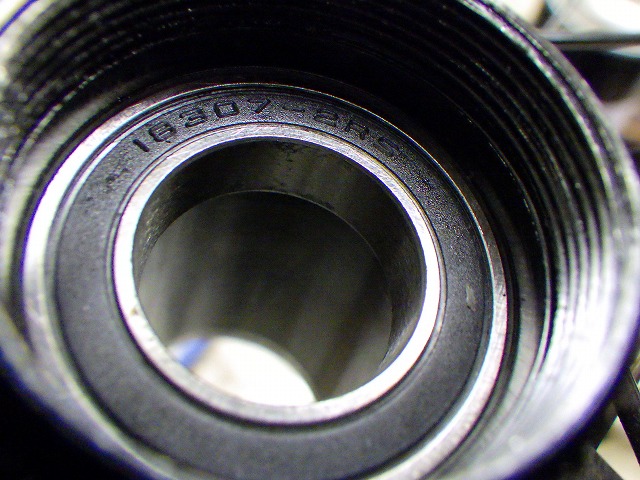
A through-axle shaft with 12mm outer diameter fits through
a 12mm inner diameter hub axle, with a 17mm outer diameter being possible.
In that case, the standard size bearing 6903—
with 17mm inner / 30mm outer / 7mm thickness—
is commonly used.
However, when you want the hub axle outer diameter to be 18mm,
and you modify just the inner diameter of the 6903 to 18mm,
creating a non-standard size bearing called 18307,
both front wheel bearings in this case were that size.
The name 18307 is just the numbers 18/30/7mm strung together.
A similar example: the standard bearing 6902 is 15/28/7mm, and when you change only the outer diameter to 26mm,
you get the 15267 bearing, which is also commonly used.
Putting a 6902 into an HG freebody means
the thickness of the non-tooth portions of the spline gets quite thin, so 26mm outer diameter
is more convenient than 28mm, which is why it was adopted.
(For example, Tni's EVO hub uses 6902, but the EVO Lite hub uses 15267.)
When it comes time to source 15267 bearings,
the cost is apparently better than 6902,
so examples of adoption in hub bodies have increased.
As for 18307, I've seen it in the rear hub of Mavic's InstantDrive 360,
but that's an extremely water-prone hub, and you often find
it's turned into a rusty 18307 inside, continuously oozing brown liquid once you realize there's corrosion.
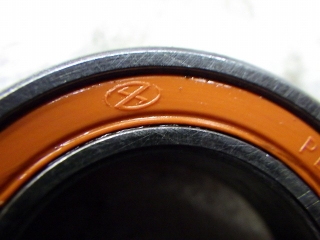
The XERO logo is also built into the seal.
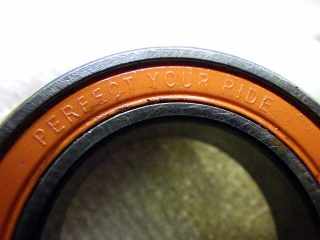
They've even put in a nice message.
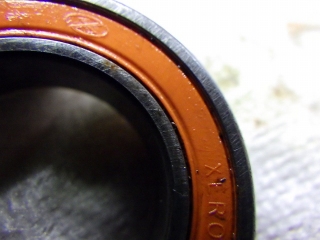
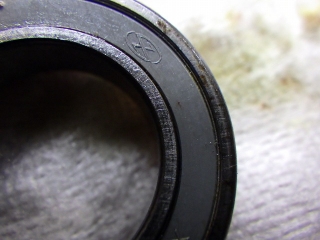
DT does the same thing with their hub bearings:
the XERO bearing side facing outward is a contact seal,
and the side facing into the hub body is a non-contact seal.
Looking closely, the seal on the orange version has fins between it and the inner race,
while the gray one does not.
Getting bearings with this spec isn't impossible,
but with DT, regardless of size, a steel-ball bearing costs
a flat ¥2,700 pre-tax / ¥2,970 including tax at list price—pretty expensive.
By the way, DT doesn't offer an 18307 ceramic bearing version,
but ceramic bearings are also a flat
¥12,200 pre-tax / ¥13,420 including tax at list price, regardless of size.
For DT steel-ball bearings, the outside is orange seal and inside is black seal,
while ceramic bearings have yellow seal outside and black seal inside.
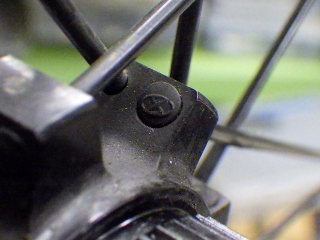
The XERO-made wheels even have the XERO logo on the spoke heads.
They don't manufacture the bearings or spokes in-house—
they just order them from manufacturers.

The right-side bearing, whose inner race was in contact with the non-anodized aluminum end,
shows rub marks from corrosion.
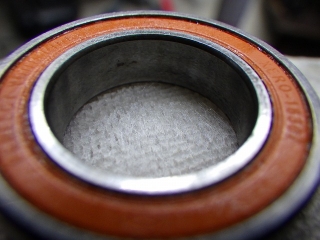
The left-side bearing, whose inner race was in contact with the non-anodized aluminum sleeve,
is comparatively clean.
However, the left bearing was the one rotating grittier.
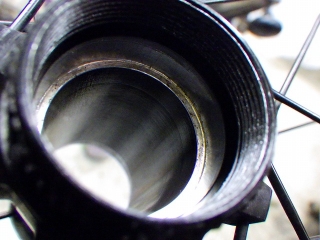
The hub body with both bearings removed.
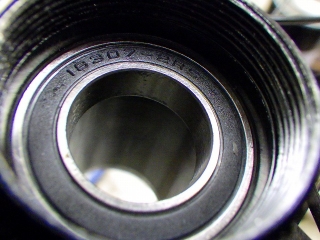
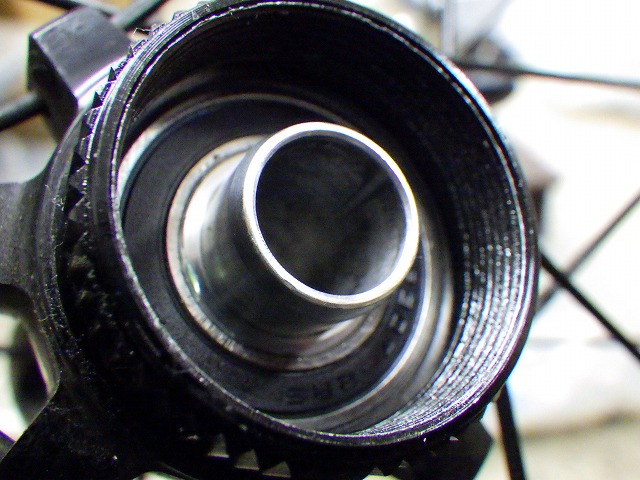
I pressed in the left bearing first.
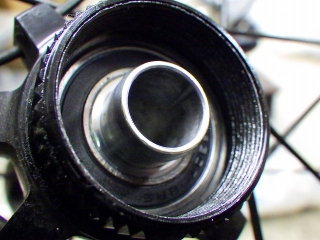
Then I inserted the sleeve—or hub axle—from the right side.

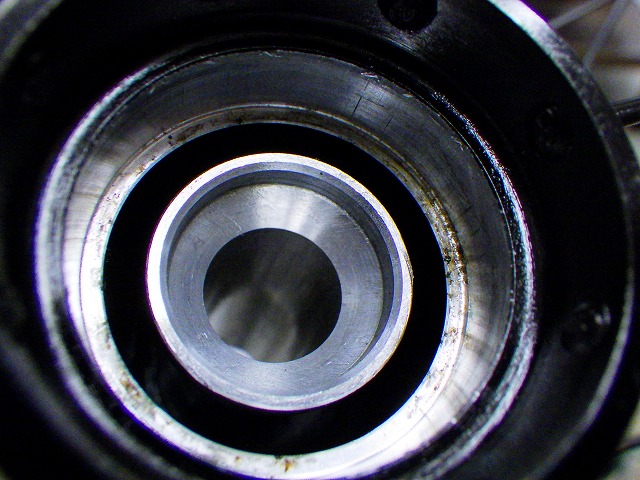
↑The hub body right side at that point looks like this.
If I'd pressed in the right bearing first,
I'd have to press in the left bearing with the protruding sleeve attached,
which is possible but tedious.
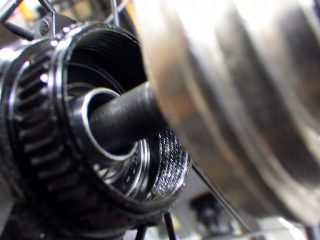
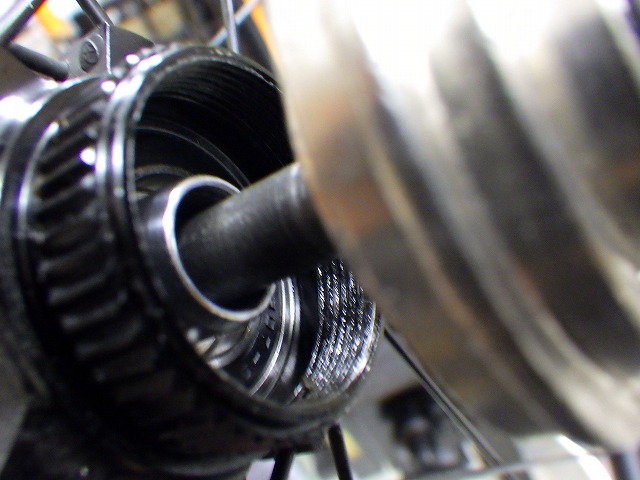
This fixture...
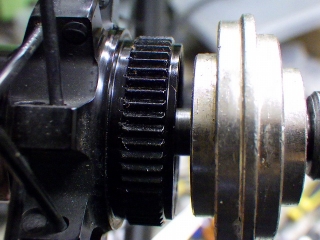
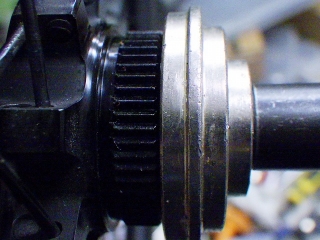
...doesn't contact the sleeve's protruding part,
and the center guide function is maintained at just slightly tight tolerance.
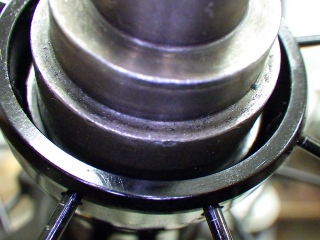
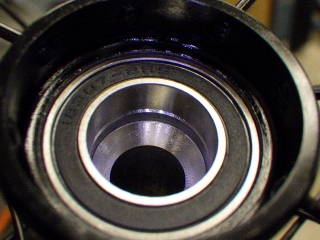
I pressed in the right bearing.
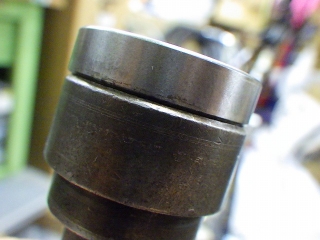
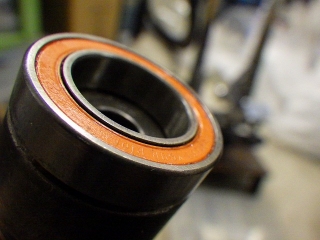
I'm showing the original bearing removed, but the fixture is just the right size
to press the outer race.
This is speculation, but the fact that both 18307-sized bearings
were shot is probably due to over-tightening of the through-axle.
However, these wheels are probably mounted on a Cannondale frameset.
Cannondale framesets should have the Mavic Speed Release standard
two-thread screw holes,
and Speed Release has a mechanism that, in a way the user doesn't consciously register,
prevents you from really cranking it down.
So given the bearing size and the Cannondale spec,
I don't think over-tightening is that likely...
The X-12 standard through-axle that Specialized uses, as proposed by Syntace,
can still be tightened about another ¼ turn after the wheel is perfectly secure,
but doing that causes abnormal bearing wear.
Plus, Roval's front wheel uses standard 6802 bearings—or
15245 in the 18307-style notation—which are small diameter, and
that's one reason why gritty Roval front wheels are commonly seen.
I don't know what frameset your wheels are mounted on,
but through-axle tightening only needs to be tight enough
to eliminate hub side-to-side play.
(Grab the rim with the tire from above and shake it
side-to-side—if there's no play, you're good.)
Try installing with a "loose as possible while maintaining zero play" approach.
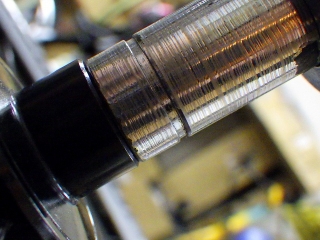
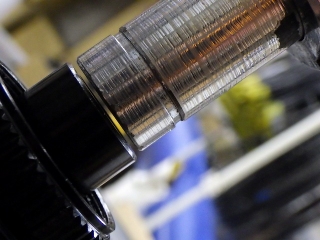
Finally at a temporary center.
The rim is shifted toward the left side (the disc side, multi-spoke side)...
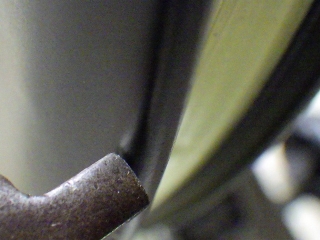
At the phase with the most radial runout, it barely touches the gauge on the truing stand.
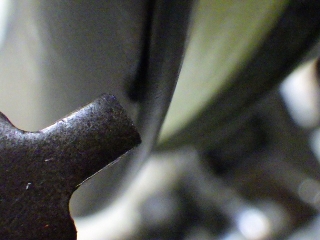
At most other phases, there's this much clearance.
And the runout isn't just at one spot—there are about three areas that are pretty badly out.
Plus, there was axial runout so bad
I'd say it wouldn't pass factory QC.
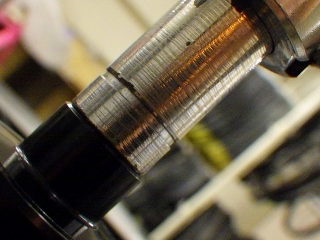
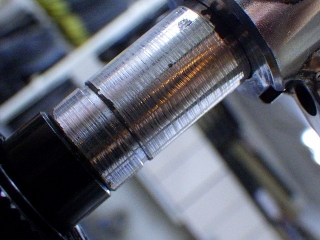
Maybe it's because it's XI-laced, but I felt it more pronounced,
and the multi-spoke side was loose, so
knowing it would initially increase center misalignment,
I focused on tightening the multi-spoke side
to fix both radial and axial runout, then
used additional tightening on the single-spoke side (lesser spoke side)
to bring the rim back to center.
In other words, there isn't a single nipple that I loosened from the original state.
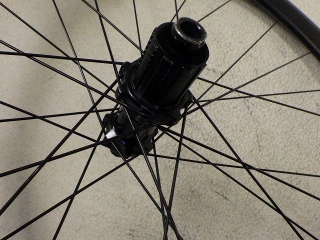
Now for the rear wheel.
It's 28H with symmetrical left-right lacing.
Both front and rear spokes are complete-equivalent (all-comp)
round-butted spokes.
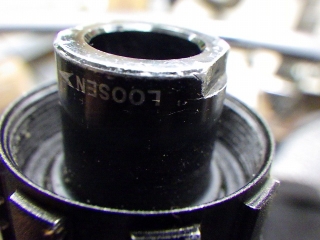
Of all four ends (front/rear, left/right), only the rear right is threaded
rather than quick-release.
When there's a caution note about which direction to loosen, it's usually
reverse-threaded like this one.
To loosen and tighten it, there's a method to prevent rotation:
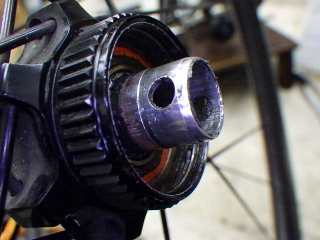
...inserting a 4mm Allen key into the hub axle after removing the left quick-release end.
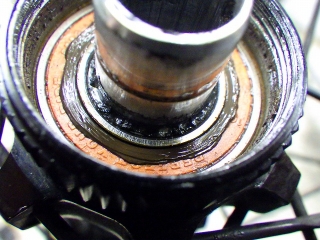
But the problem is, contaminated grease has leaked from the bearing
through the contact seal.
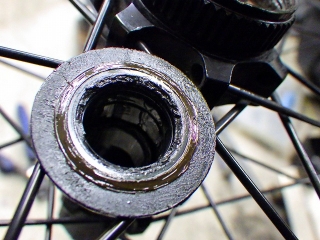
The area around the bearing step that presses the inner race
was also contaminated.
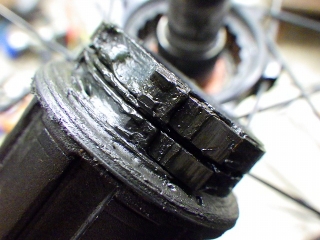
The freebody claw area is also gunked up with contaminated grease, but
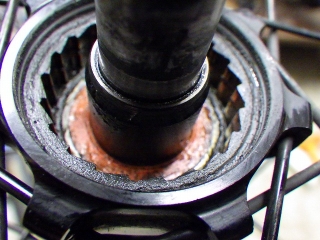
the right-side bearing of the hub body seems okay.
The hub rotation wasn't as rough as the front wheel,
perhaps because it wasn't as bad,
and the customer didn't propose replacement at that level,
but the rear wheel still rotated pretty grittily.
Based on a judgment that the drive-side bearing was less damaged,
I tapped out the left bearing with the hub axle,
then
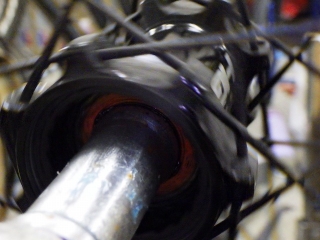
inserted the left end of the hub axle into the right side of the hub,
and rotated the wheel.
In the image above, the wheel is spinning.
Since the rotation of only the hub body's right-side bearing
was nearly clean,
I decided to reuse that one.
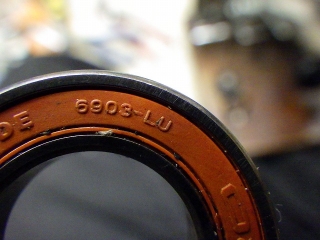
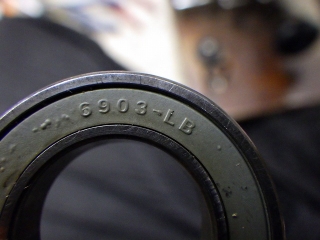
The original left-side hub bearing.
Like the front hub's bearing, it has
orange contact seal on outside / gray non-contact seal on inside, but
the size is 6903, a standard-size bearing, so
the contact seal should have LU or LLU marking,
and the non-contact seal should have LB or LLB marking,
following bearing industry standards.
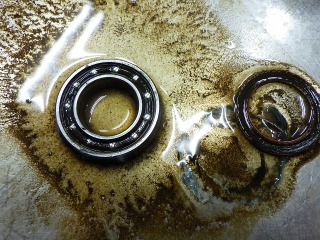
I peeled back the seal and sprayed with parts cleaner.
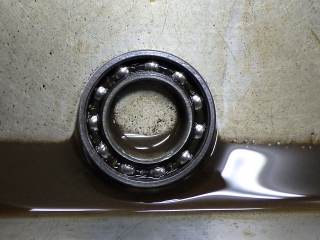
This rust liquid is purely from that bearing.
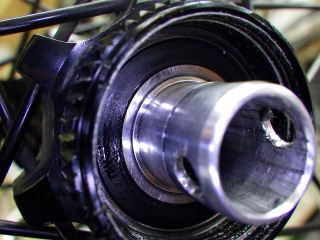
I replaced the hub body left-side bearing.
Since the outside is non-contact seal, just like the front hub left and right and rear hub left,
I applied grease before installing the quick-release ends on
all these three bearing locations.
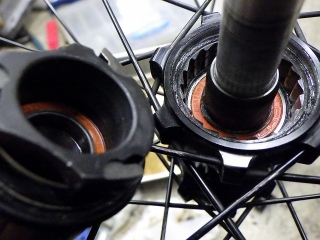
I cleaned the freebody claw area too.
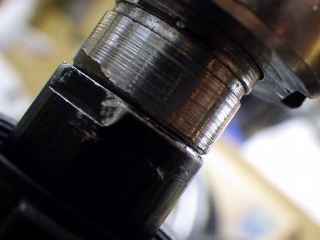
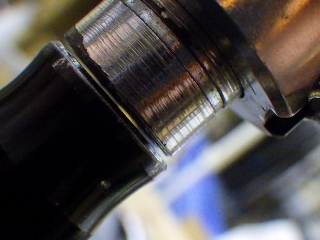
Assembled the hub, and here's the rear wheel temporary center.
It's shifted in the opposite direction from typical aging shift,
and with symmetrical left-right lacing, this is the result of
someone doing spoke tension work, just tightening the easy-to-tighten low-tension side,
and never checking with a centering gauge.
I'd been suspicious since the front wheel, but
this rear also shows the same peculiar axial runout as if only radial runout was done,
plus there's axial runout at a specific phase for an apparent reason.
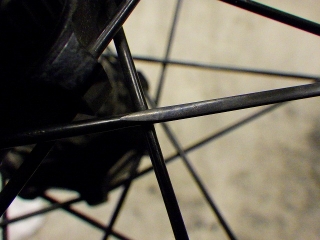
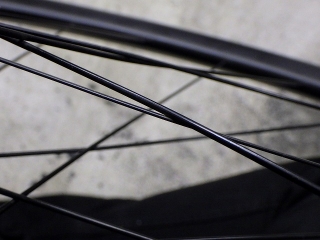
Despite all-comp equivalent spokes,
one was repaired with CX-RAY.
A competent shop would re-center during repair.
I don't nitpick over a sheet of paper worth of clearance to one side,
but obvious evidence of tampering with clear shift toward the other side? That's a no-go.
The spoke diameter is all-comp equivalent, so
spoke weight percentage is definitely near 85%.
CX-RAY is about 65%, a difference of negative 20%.
Finding all-comp equivalent black straight spokes is difficult, so
if you're mixing spoke weight percentages,
14-gauge plain at 100% would be better—
only +15% difference and similar shape, making it more appropriate.
So why didn't they do that?
Per-spoke cost, 14-gauge plain straight in black—
either DT's black Champion or Sapim's black Leader—
is cheaper, but they come in 100-spoke packs, so
for this one repair, CX-RAY would be cheaper.
CX-RAY straight was initially sold only in a repair-specific spec
with a long plain section on the rim side,
requiring spoke cutters—a spec Japanese distributors handled exclusively.
For this spoke length, you'd order the 310mm (cutable to 270mm) version.
Later, CX-RAY came in the normal version too: even-millimeter lengths in 2mm increments
with standard threading.
This CX-RAY doesn't have the plain section length that would result from cutting a 310mm,
so it's the regular CX-RAY straight version.
For round plain straight spokes, the specs Japanese distributors handle are
DT 14-gauge silver and black in 320mm, and
Sapim 14-gauge silver and black in 310mm only.
For all-comp equivalent spokes, 15-gauge plain is closer to the weight percentage than 14-gauge,
but it's not available from either DT or Sapim.
What puzzled me was that years before this Hologram wheel came out,
Sapim spokes (excluding Race, Strong, CX, etc.)
became available as singles, and CX-RAY is one of those, plus
14-gauge plain Leader straight also became a single-purchase option.
So why didn't they get that instead?
Because they don't own spoke cutters.
When it comes to "straight spokes with pre-cut threading available in selectable lengths,"
CX-RAY is the only option.
I didn't ask the customer much about this wheel's history,
but I did confirm they're the original owner.
So they should know about repair history.
Plus, as the original Hologram owner, they probably bought this from a Cannondale dealer,
where they could have attempted to order genuine spokes.
Maybe they tried, found none in stock, had no spoke cutter,
so went with CX-RAY straight?
Mixing spokes with significantly different weight percentages causes
radial and axial runout to appear when you match surrounding tension and runout.
Fixing both radial and axial runout makes that one different-percentage spoke
either screaming tight (if its percentage is lower) or floppy (if higher).
This is the former, which makes achieving screaming tightness incredibly difficult,
hence the prominent axial runout.
That axial runout from mixing spoke percentages, combined with
typical amateur-hour-level radial trueing creating its own axial runout,
created an absolute mess.
Did they think it wouldn't show on a disc brake wheel?
This wheel was shipped from Kyushu (I'll avoid naming the prefecture),
so it's clear they've lost trust already.
Beyond just this case, seeing nearby shops' work versus
reading this blog has apparently made customers think my shop is more trustworthy,
which I think is genuinely alarming.
I'm not rebuilding these wheels to throw shade at nearby shops,
but when the result is shade-throwing, I feel awful about it (laughing).
Thoughts like "how are they making a living with that level of skill, you hack"
or "so that's the standard in [prefecture]?"
or "I'll remember that" have never crossed my mind. Never! (Yeah right!)
Radial and axial runout fixed, center dialed in.
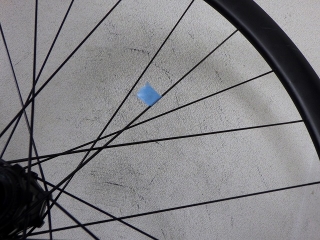
The spoke where the CX-RAY was has been replaced.
Not with 14-gauge plain, but with a precious black comp.
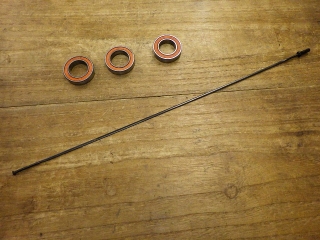
↑Replaced parts.
The original nipples were internal-fit 12mm brass,
but the CX-RAY location only used the 14mm-length
black aluminum that came with the spoke—uncool.
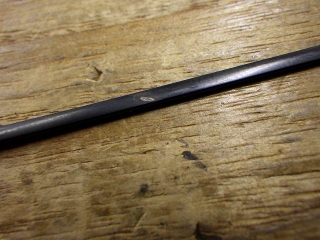
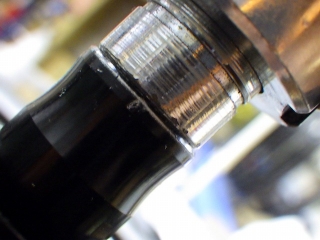
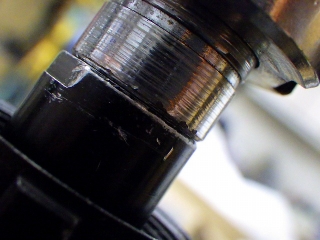
↑The CX-RAY's final crossing wear mark.
Hologram 35 Carbon wheelset for service.
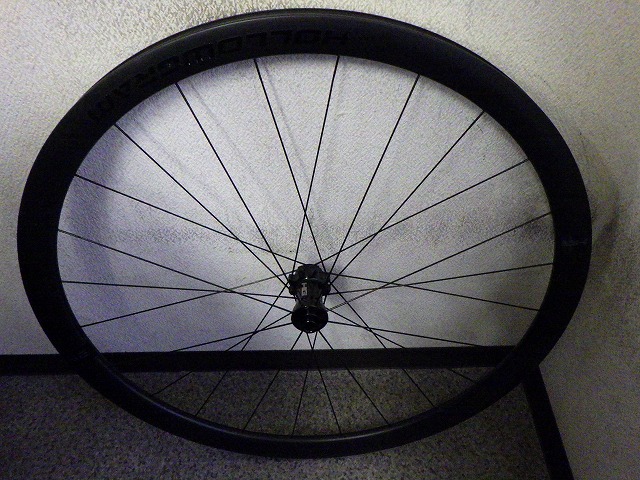
The front wheel bearings were rough and needed replacement,
plus a general inspection was requested,
but both wheels turned out to be in pretty bad shape.
Let me start with the front wheel.

As I mentioned before, the front wheel is a 2:1 laced build,
with the front being 24H and rear being 28H.
That's fine, but this front wheel was laced in XI pattern.
So other manufacturers besides Roval use this too, apparently.
It's not my first time seeing a Hologram wheel,
but I hadn't paid close attention before.
When I grip the spokes on both sides,
the side with more spokes clearly deforms more.
In fact, the front wheel of the asymmetric left-right diameter, same spoke count nom Lab wheel #8 that I built today
(in its unlaced state) shows less difference in spoke deformation between sides.
That said, even with nom Lab wheel #8's front wheel,
I can tell the side where the spoke angle is shallower
deforms more.
That one will get lacing later.
With Speed 25's front wheel, if you grip the spokes without looking at the wheel,
the deformation differences are so similar you can't tell left from right.
With a 2:1 laced 24H setup, you could take a 32H hub, skip holes for a 2:1 lace,
and get right-right-left right-right-left right-right-left right-right-left,
which is repeating XI pattern.
To convert that to Ж-pattern repetition
right right-left-right right-left-right right-left-right right-left,
where the last crossing angle on the multi-spoke side becomes obtuse,
it's technically possible to rebuild this way. But you'd end up with a 2:1 lace on a J-bend spoke hub,
and the valve hole phase ends up inside a Ж rather than between two Жs,
which looks bad aesthetically.
I'm not going to get that deep into it this time, though.

The customer mentioned there were spoke rub marks,
but said that unless I judged replacement necessary,
they could stay as-is.
When it comes to the rear wheel,
I didn't replace it "because of rub marks."
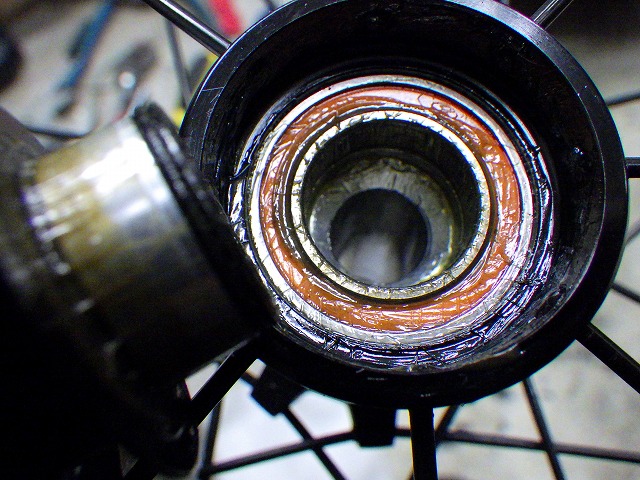
The right side's quick-release end came out easily by hand,
so I removed that one first.
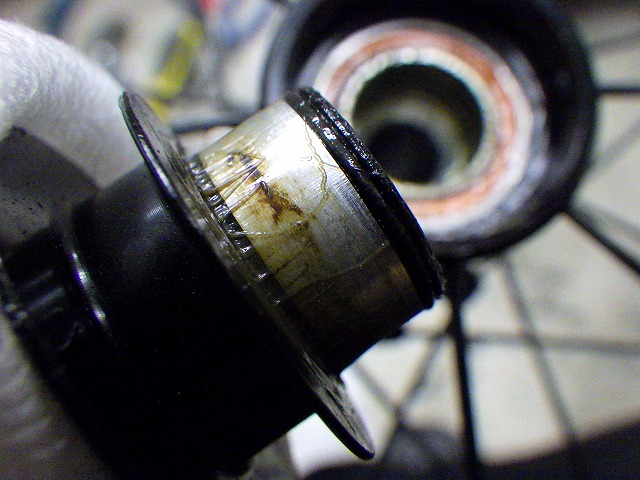
There's corrosion bloom where the bearing inner race contacts.
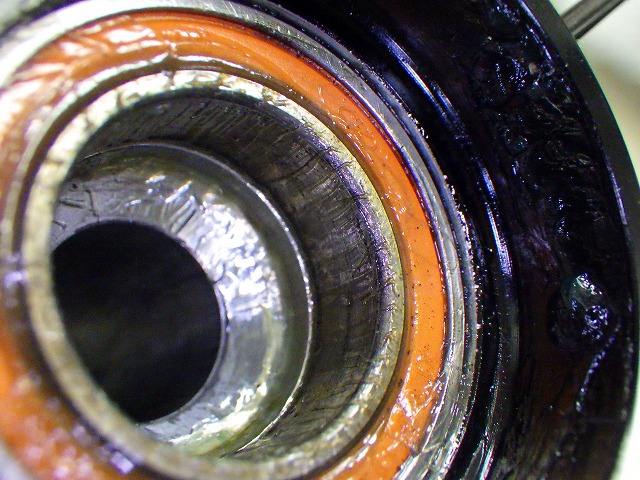
The contact surface between the bearing's inner side and the hub body
looks like a bearing puller won't grip it, but that's just because
the sleeve supporting the bearing inner race from inside
is butted, creating this shape.
With a regular sleeve, you could insert a rod into the hub
and apply slightly angled force to shift the sleeve within the hub body,
but this sleeve-like part also supports the bearing inner diameter on the other side,
so it has hub axle characteristics too.
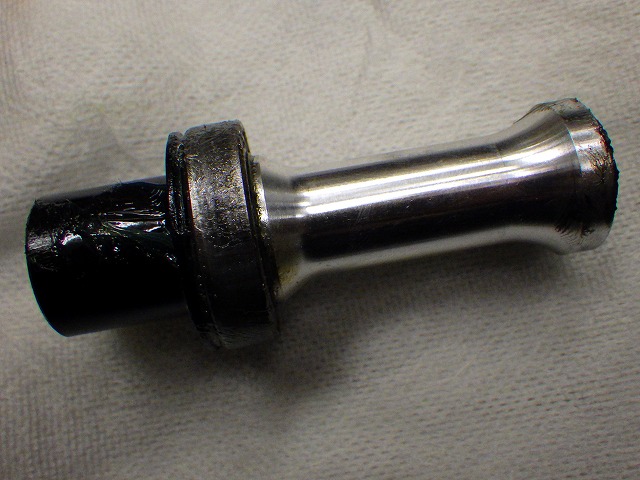
I left the right bearing from the previous image as-is
and tapped out the left bearing-with-sleeve assembly toward the left side.
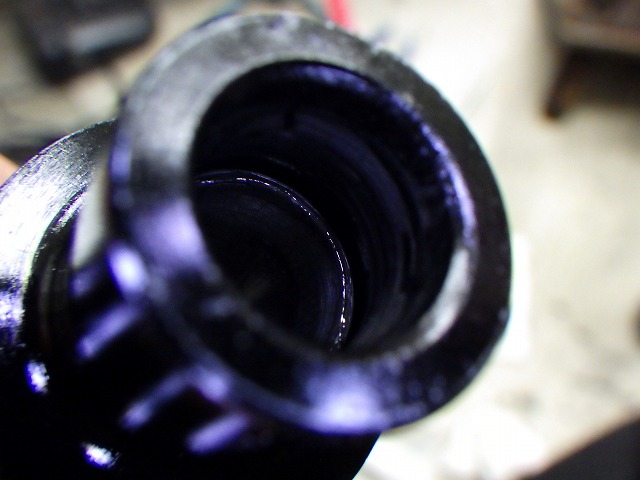
The right side's quick-release end, unlike the left, has part of it
sunk into the sleeve.
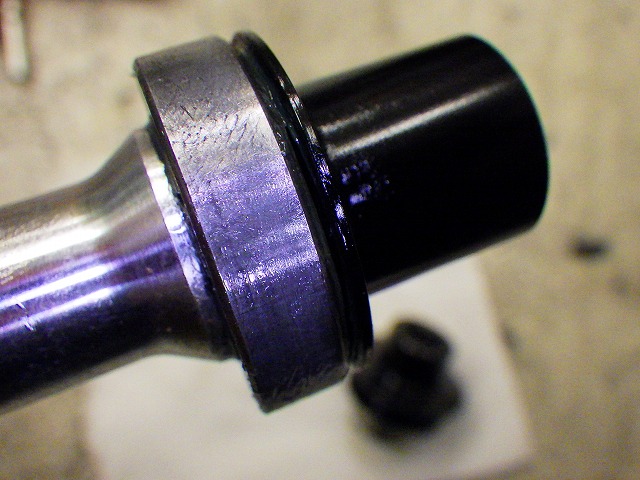
It seems to have seized a bit too—I can't rotate
the black quick-release end with one hand
while holding the silver sleeve fixed with the other.
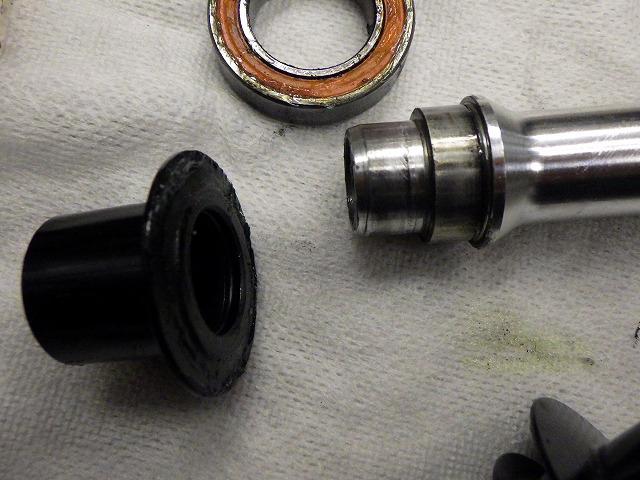
I managed to pull the quick-release end out.

↑The left side shows how deeply the end is inserted into the sleeve (hub axle).
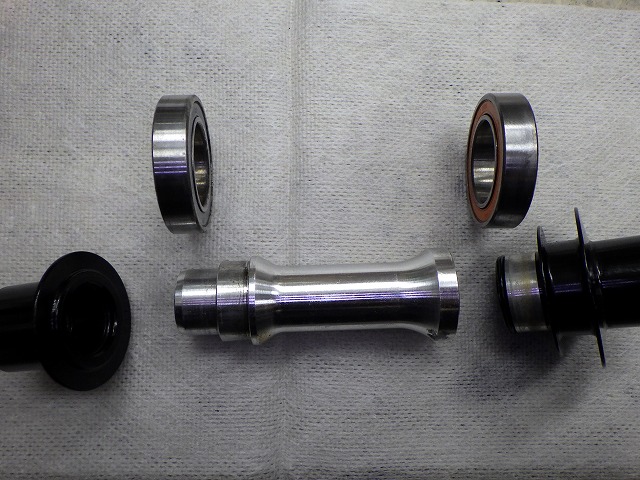
By the time of the previous image, I'd also removed the right bearing from the hub body.
It's an unusual structure: directly under the right bearing is just a quick-release end,
but directly under the left bearing is a sleeve.

The Hologram wheels are made by XERO,
and the bearing seals also carry the XERO mark.
A through-axle shaft with 12mm outer diameter fits through
a 12mm inner diameter hub axle, with a 17mm outer diameter being possible.
In that case, the standard size bearing 6903—
with 17mm inner / 30mm outer / 7mm thickness—
is commonly used.
However, when you want the hub axle outer diameter to be 18mm,
and you modify just the inner diameter of the 6903 to 18mm,
creating a non-standard size bearing called 18307,
both front wheel bearings in this case were that size.
The name 18307 is just the numbers 18/30/7mm strung together.
A similar example: the standard bearing 6902 is 15/28/7mm, and when you change only the outer diameter to 26mm,
you get the 15267 bearing, which is also commonly used.
Putting a 6902 into an HG freebody means
the thickness of the non-tooth portions of the spline gets quite thin, so 26mm outer diameter
is more convenient than 28mm, which is why it was adopted.
(For example, Tni's EVO hub uses 6902, but the EVO Lite hub uses 15267.)
When it comes time to source 15267 bearings,
the cost is apparently better than 6902,
so examples of adoption in hub bodies have increased.
As for 18307, I've seen it in the rear hub of Mavic's InstantDrive 360,
but that's an extremely water-prone hub, and you often find
it's turned into a rusty 18307 inside, continuously oozing brown liquid once you realize there's corrosion.
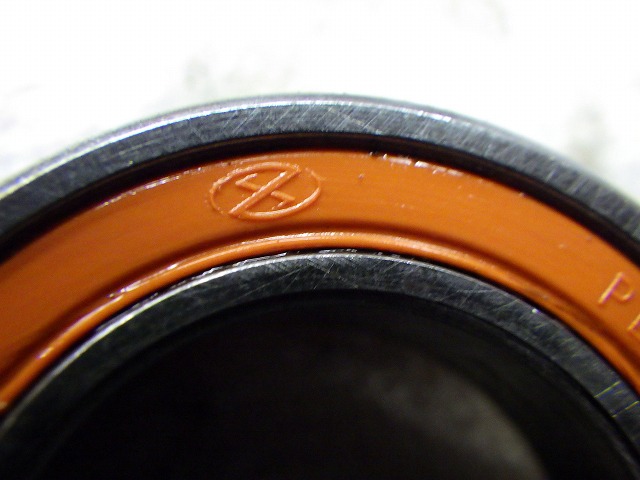
The XERO logo is also built into the seal.
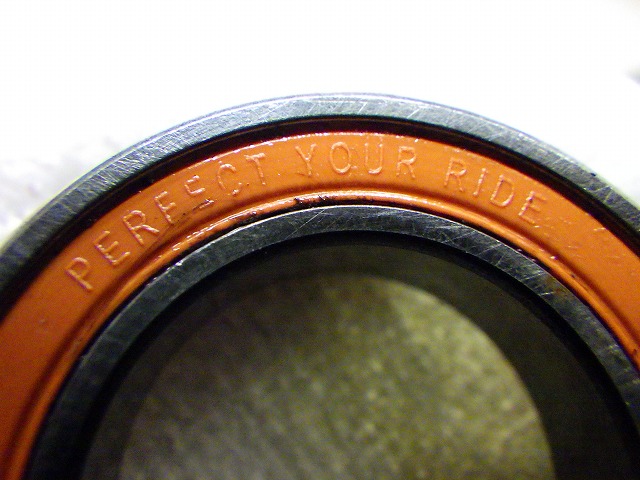
They've even put in a nice message.
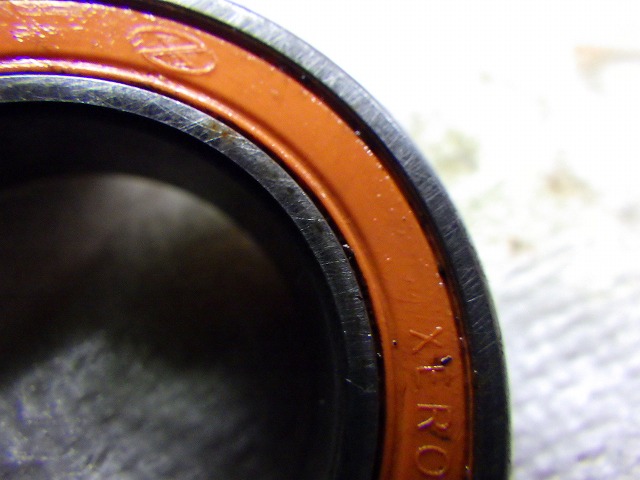
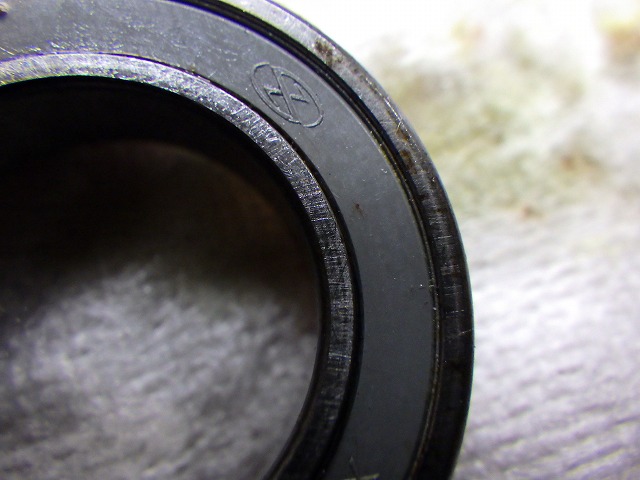
DT does the same thing with their hub bearings:
the XERO bearing side facing outward is a contact seal,
and the side facing into the hub body is a non-contact seal.
Looking closely, the seal on the orange version has fins between it and the inner race,
while the gray one does not.
Getting bearings with this spec isn't impossible,
but with DT, regardless of size, a steel-ball bearing costs
a flat ¥2,700 pre-tax / ¥2,970 including tax at list price—pretty expensive.
By the way, DT doesn't offer an 18307 ceramic bearing version,
but ceramic bearings are also a flat
¥12,200 pre-tax / ¥13,420 including tax at list price, regardless of size.
For DT steel-ball bearings, the outside is orange seal and inside is black seal,
while ceramic bearings have yellow seal outside and black seal inside.
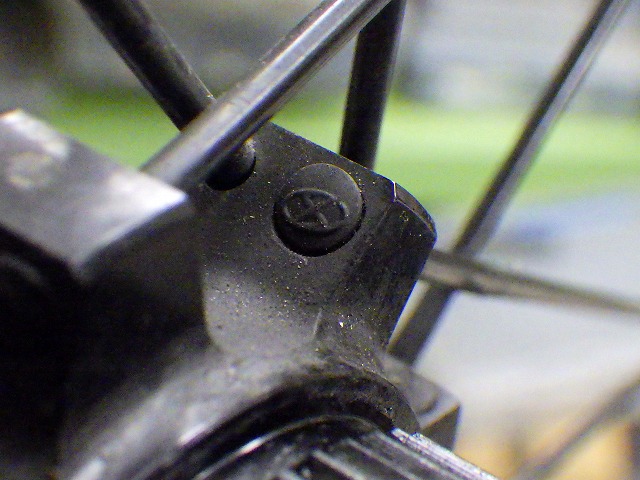
The XERO-made wheels even have the XERO logo on the spoke heads.
They don't manufacture the bearings or spokes in-house—
they just order them from manufacturers.
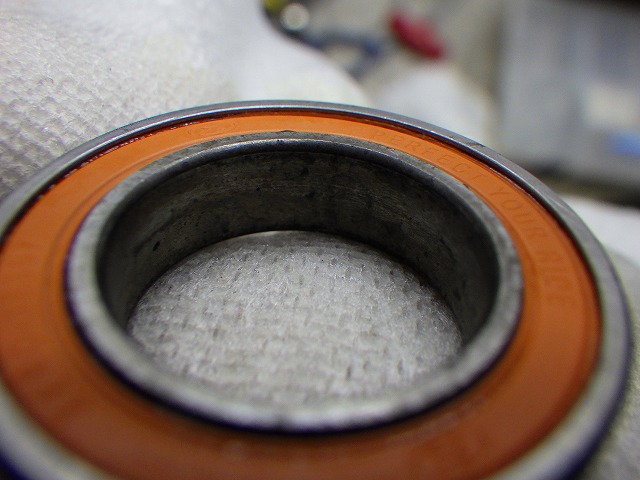
The right-side bearing, whose inner race was in contact with the non-anodized aluminum end,
shows rub marks from corrosion.
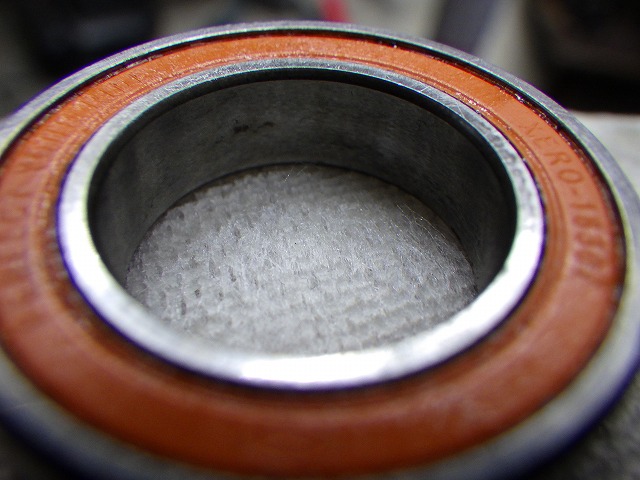
The left-side bearing, whose inner race was in contact with the non-anodized aluminum sleeve,
is comparatively clean.
However, the left bearing was the one rotating grittier.
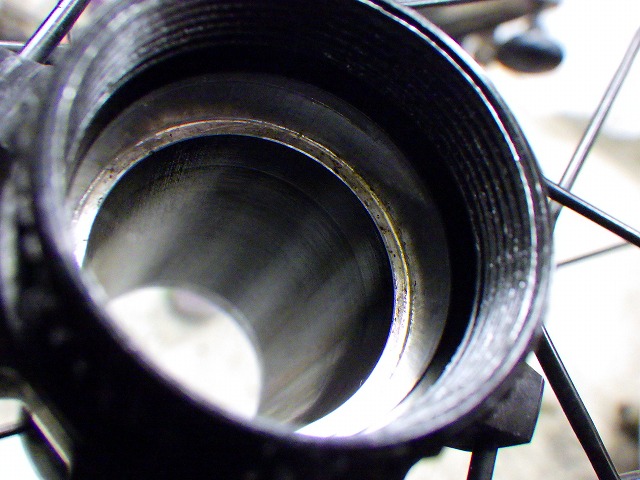
The hub body with both bearings removed.
I pressed in the left bearing first.
Then I inserted the sleeve—or hub axle—from the right side.
↑The hub body right side at that point looks like this.
If I'd pressed in the right bearing first,
I'd have to press in the left bearing with the protruding sleeve attached,
which is possible but tedious.
This fixture...

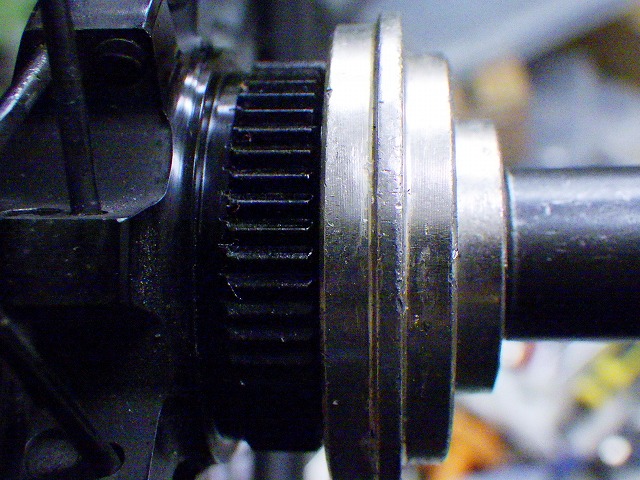
...doesn't contact the sleeve's protruding part,
and the center guide function is maintained at just slightly tight tolerance.
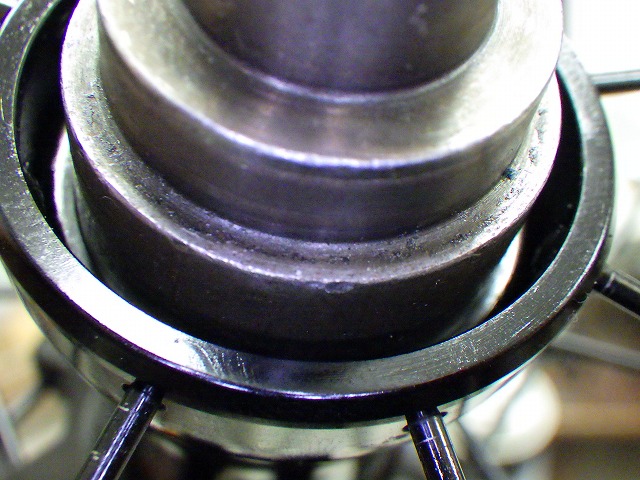
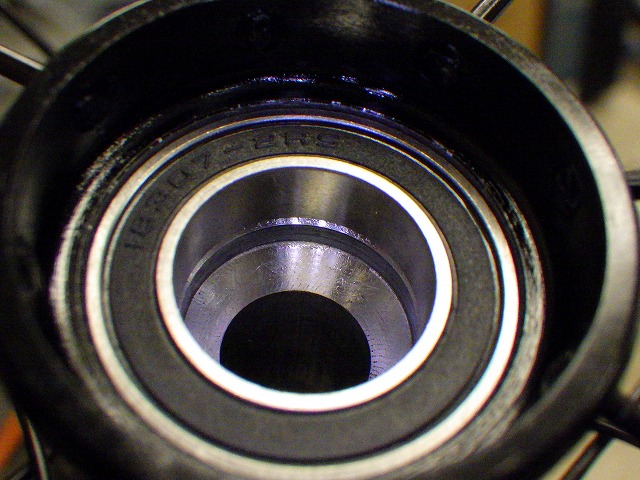
I pressed in the right bearing.
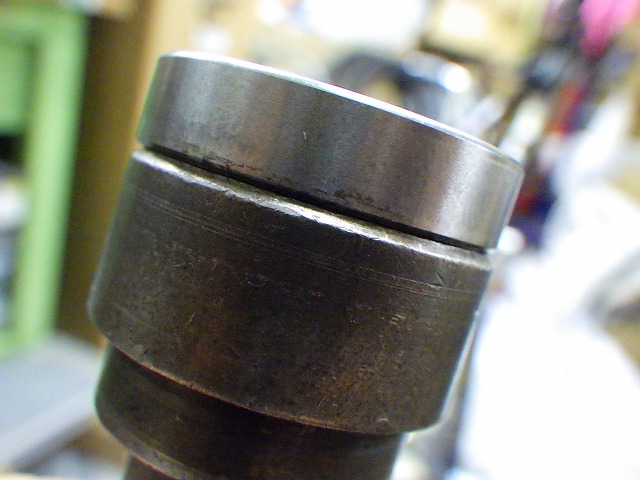
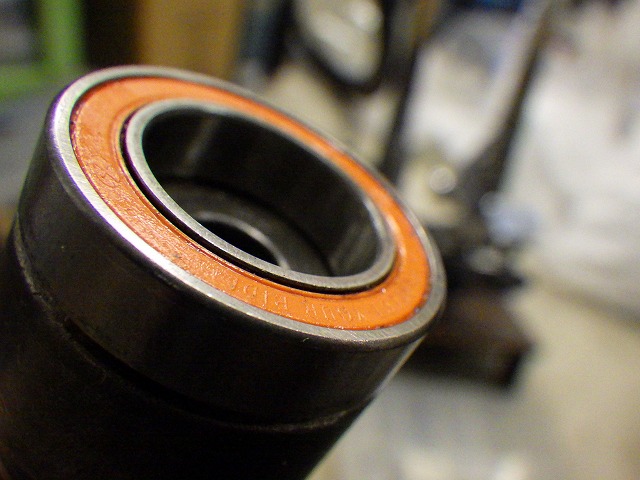
I'm showing the original bearing removed, but the fixture is just the right size
to press the outer race.
This is speculation, but the fact that both 18307-sized bearings
were shot is probably due to over-tightening of the through-axle.
However, these wheels are probably mounted on a Cannondale frameset.
Cannondale framesets should have the Mavic Speed Release standard
two-thread screw holes,
and Speed Release has a mechanism that, in a way the user doesn't consciously register,
prevents you from really cranking it down.
So given the bearing size and the Cannondale spec,
I don't think over-tightening is that likely...
The X-12 standard through-axle that Specialized uses, as proposed by Syntace,
can still be tightened about another ¼ turn after the wheel is perfectly secure,
but doing that causes abnormal bearing wear.
Plus, Roval's front wheel uses standard 6802 bearings—or
15245 in the 18307-style notation—which are small diameter, and
that's one reason why gritty Roval front wheels are commonly seen.
I don't know what frameset your wheels are mounted on,
but through-axle tightening only needs to be tight enough
to eliminate hub side-to-side play.
(Grab the rim with the tire from above and shake it
side-to-side—if there's no play, you're good.)
Try installing with a "loose as possible while maintaining zero play" approach.
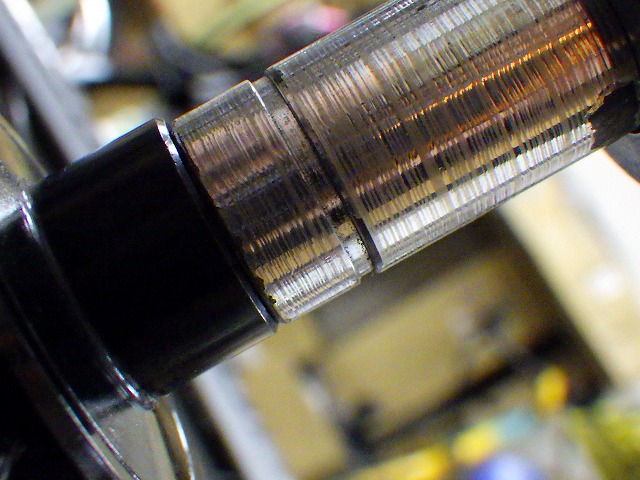
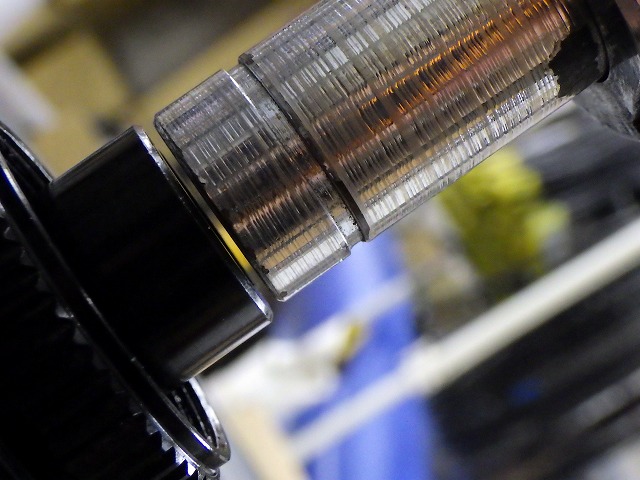
Finally at a temporary center.
The rim is shifted toward the left side (the disc side, multi-spoke side)...
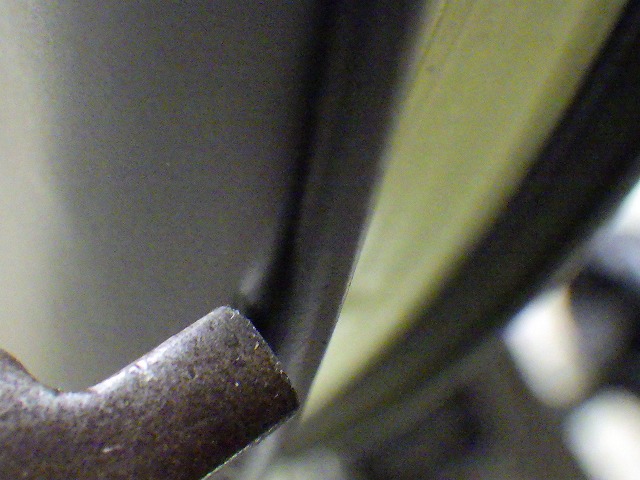
At the phase with the most radial runout, it barely touches the gauge on the truing stand.

At most other phases, there's this much clearance.
And the runout isn't just at one spot—there are about three areas that are pretty badly out.
Plus, there was axial runout so bad
I'd say it wouldn't pass factory QC.
Maybe it's because it's XI-laced, but I felt it more pronounced,
and the multi-spoke side was loose, so
knowing it would initially increase center misalignment,
I focused on tightening the multi-spoke side
to fix both radial and axial runout, then
used additional tightening on the single-spoke side (lesser spoke side)
to bring the rim back to center.
In other words, there isn't a single nipple that I loosened from the original state.
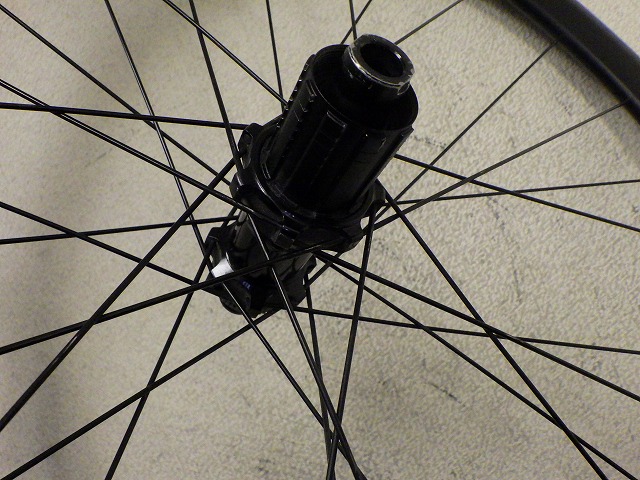
Now for the rear wheel.
It's 28H with symmetrical left-right lacing.
Both front and rear spokes are complete-equivalent (all-comp)
round-butted spokes.
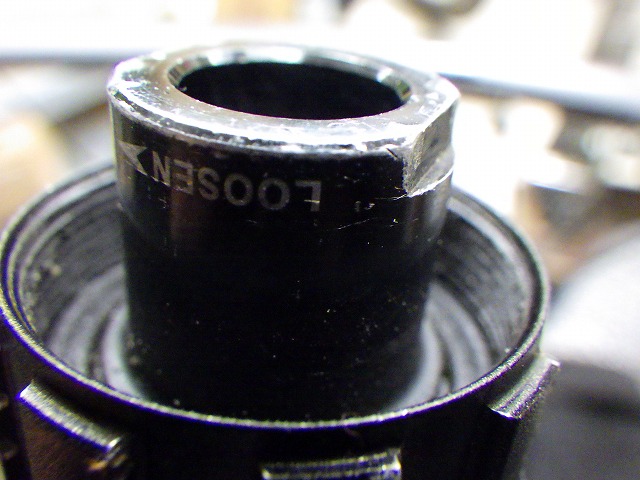
Of all four ends (front/rear, left/right), only the rear right is threaded
rather than quick-release.
When there's a caution note about which direction to loosen, it's usually
reverse-threaded like this one.
To loosen and tighten it, there's a method to prevent rotation:
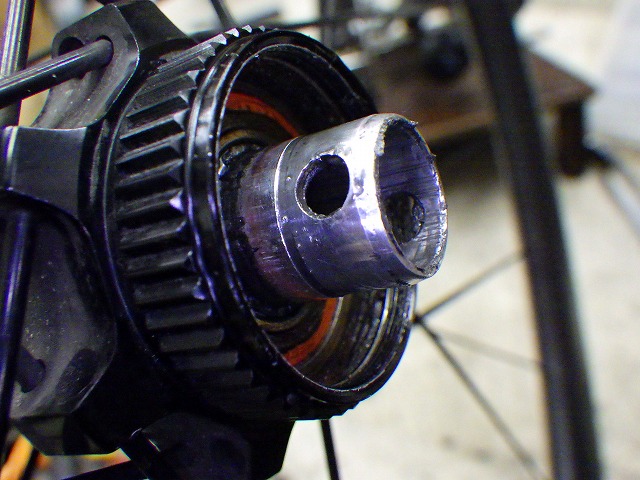
...inserting a 4mm Allen key into the hub axle after removing the left quick-release end.

But the problem is, contaminated grease has leaked from the bearing
through the contact seal.
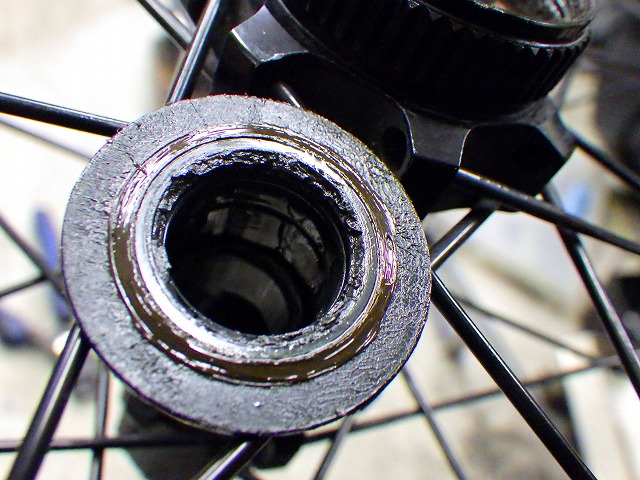
The area around the bearing step that presses the inner race
was also contaminated.
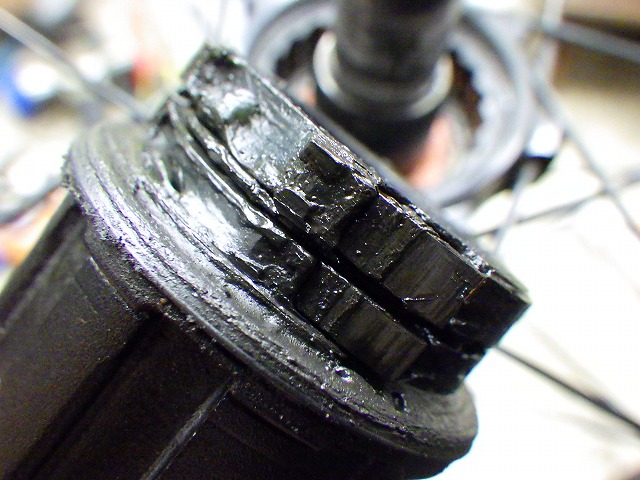
The freebody claw area is also gunked up with contaminated grease, but
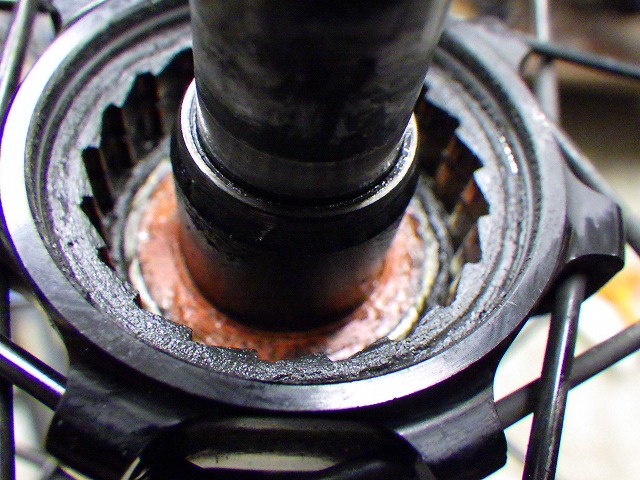
the right-side bearing of the hub body seems okay.
The hub rotation wasn't as rough as the front wheel,
perhaps because it wasn't as bad,
and the customer didn't propose replacement at that level,
but the rear wheel still rotated pretty grittily.
Based on a judgment that the drive-side bearing was less damaged,
I tapped out the left bearing with the hub axle,
then
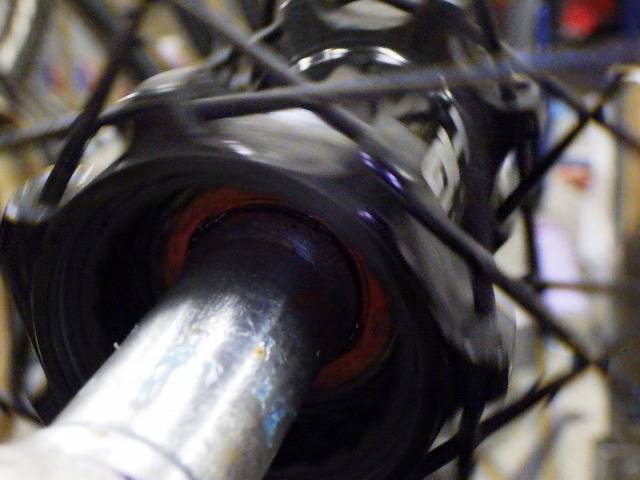
inserted the left end of the hub axle into the right side of the hub,
and rotated the wheel.
In the image above, the wheel is spinning.
Since the rotation of only the hub body's right-side bearing
was nearly clean,
I decided to reuse that one.
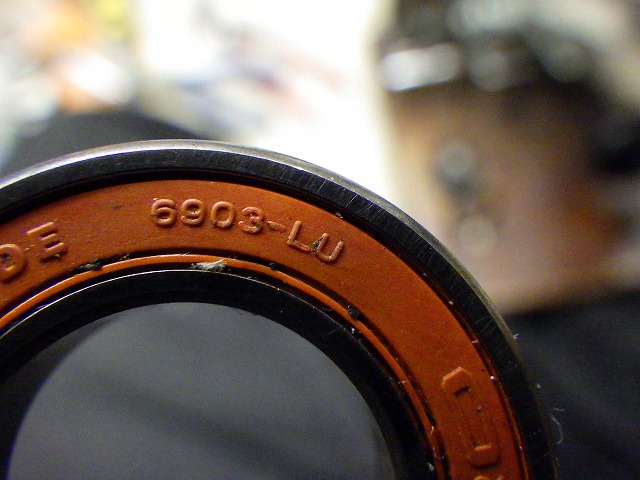
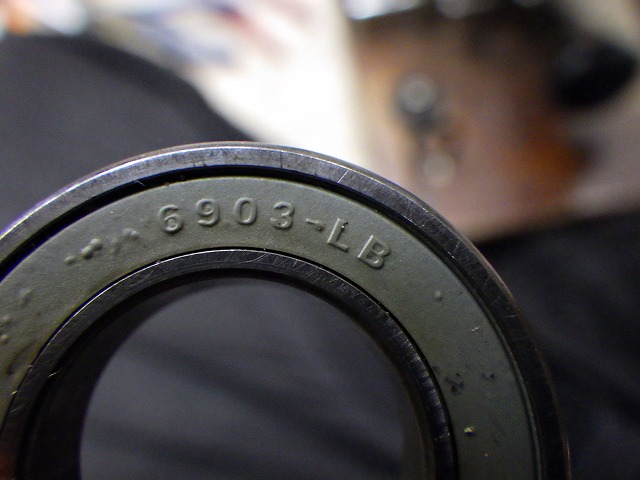
The original left-side hub bearing.
Like the front hub's bearing, it has
orange contact seal on outside / gray non-contact seal on inside, but
the size is 6903, a standard-size bearing, so
the contact seal should have LU or LLU marking,
and the non-contact seal should have LB or LLB marking,
following bearing industry standards.
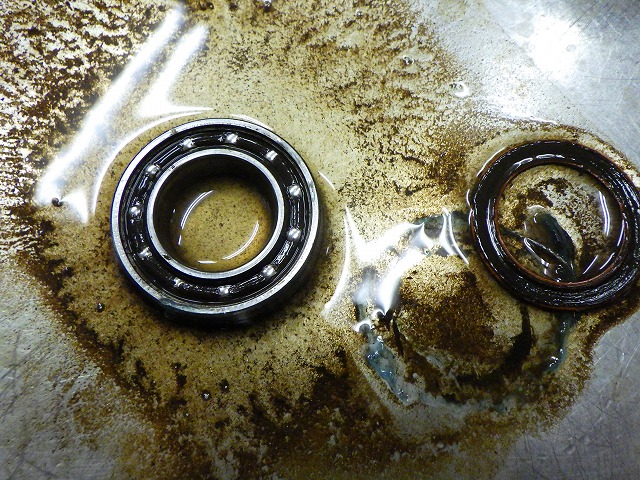
I peeled back the seal and sprayed with parts cleaner.

This rust liquid is purely from that bearing.
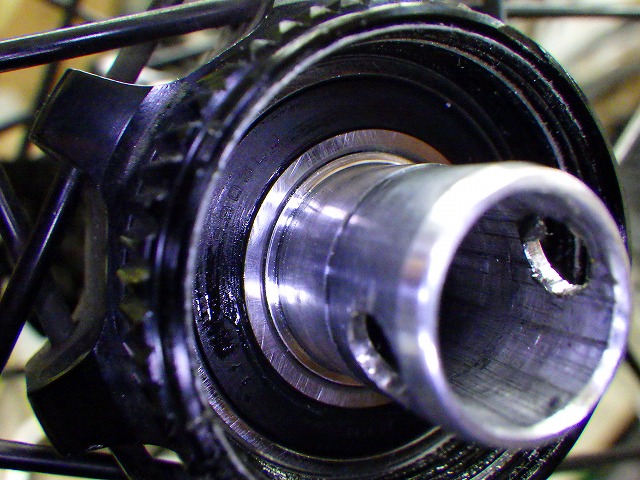
I replaced the hub body left-side bearing.
Since the outside is non-contact seal, just like the front hub left and right and rear hub left,
I applied grease before installing the quick-release ends on
all these three bearing locations.

I cleaned the freebody claw area too.

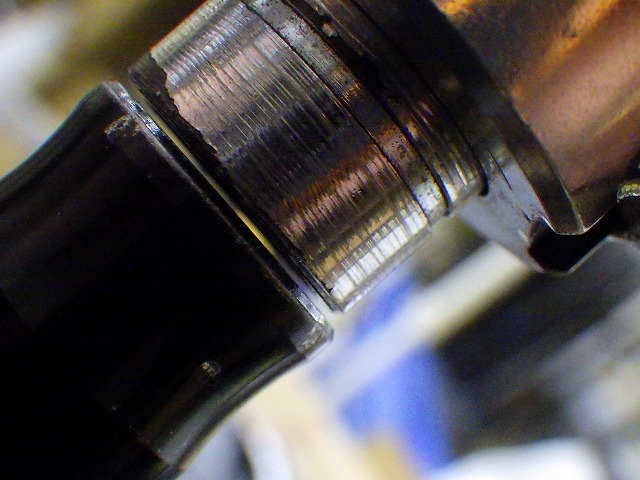
Assembled the hub, and here's the rear wheel temporary center.
It's shifted in the opposite direction from typical aging shift,
and with symmetrical left-right lacing, this is the result of
someone doing spoke tension work, just tightening the easy-to-tighten low-tension side,
and never checking with a centering gauge.
I'd been suspicious since the front wheel, but
this rear also shows the same peculiar axial runout as if only radial runout was done,
plus there's axial runout at a specific phase for an apparent reason.
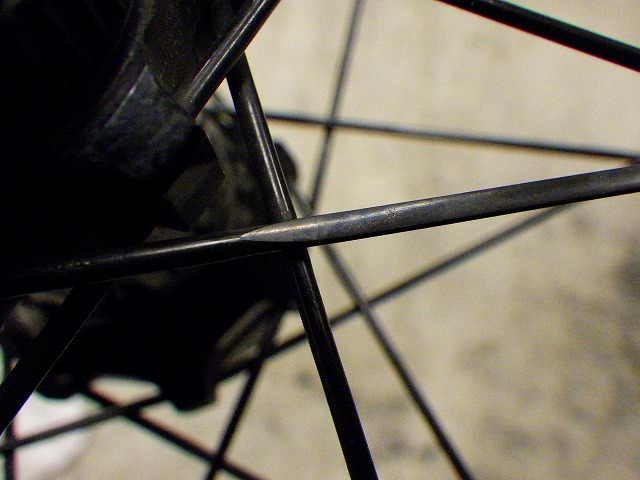
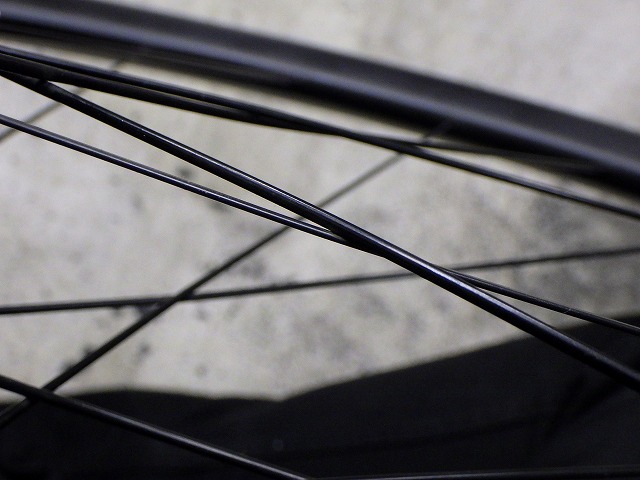
Despite all-comp equivalent spokes,
one was repaired with CX-RAY.
A competent shop would re-center during repair.
I don't nitpick over a sheet of paper worth of clearance to one side,
but obvious evidence of tampering with clear shift toward the other side? That's a no-go.
The spoke diameter is all-comp equivalent, so
spoke weight percentage is definitely near 85%.
CX-RAY is about 65%, a difference of negative 20%.
Finding all-comp equivalent black straight spokes is difficult, so
if you're mixing spoke weight percentages,
14-gauge plain at 100% would be better—
only +15% difference and similar shape, making it more appropriate.
So why didn't they do that?
Per-spoke cost, 14-gauge plain straight in black—
either DT's black Champion or Sapim's black Leader—
is cheaper, but they come in 100-spoke packs, so
for this one repair, CX-RAY would be cheaper.
CX-RAY straight was initially sold only in a repair-specific spec
with a long plain section on the rim side,
requiring spoke cutters—a spec Japanese distributors handled exclusively.
For this spoke length, you'd order the 310mm (cutable to 270mm) version.
Later, CX-RAY came in the normal version too: even-millimeter lengths in 2mm increments
with standard threading.
This CX-RAY doesn't have the plain section length that would result from cutting a 310mm,
so it's the regular CX-RAY straight version.
For round plain straight spokes, the specs Japanese distributors handle are
DT 14-gauge silver and black in 320mm, and
Sapim 14-gauge silver and black in 310mm only.
For all-comp equivalent spokes, 15-gauge plain is closer to the weight percentage than 14-gauge,
but it's not available from either DT or Sapim.
What puzzled me was that years before this Hologram wheel came out,
Sapim spokes (excluding Race, Strong, CX, etc.)
became available as singles, and CX-RAY is one of those, plus
14-gauge plain Leader straight also became a single-purchase option.
So why didn't they get that instead?
Because they don't own spoke cutters.
When it comes to "straight spokes with pre-cut threading available in selectable lengths,"
CX-RAY is the only option.
I didn't ask the customer much about this wheel's history,
but I did confirm they're the original owner.
So they should know about repair history.
Plus, as the original Hologram owner, they probably bought this from a Cannondale dealer,
where they could have attempted to order genuine spokes.
Maybe they tried, found none in stock, had no spoke cutter,
so went with CX-RAY straight?
Mixing spokes with significantly different weight percentages causes
radial and axial runout to appear when you match surrounding tension and runout.
Fixing both radial and axial runout makes that one different-percentage spoke
either screaming tight (if its percentage is lower) or floppy (if higher).
This is the former, which makes achieving screaming tightness incredibly difficult,
hence the prominent axial runout.
That axial runout from mixing spoke percentages, combined with
typical amateur-hour-level radial trueing creating its own axial runout,
created an absolute mess.
Did they think it wouldn't show on a disc brake wheel?
This wheel was shipped from Kyushu (I'll avoid naming the prefecture),
so it's clear they've lost trust already.
Beyond just this case, seeing nearby shops' work versus
reading this blog has apparently made customers think my shop is more trustworthy,
which I think is genuinely alarming.
I'm not rebuilding these wheels to throw shade at nearby shops,
but when the result is shade-throwing, I feel awful about it (laughing).
Thoughts like "how are they making a living with that level of skill, you hack"
or "so that's the standard in [prefecture]?"
or "I'll remember that" have never crossed my mind. Never! (Yeah right!)

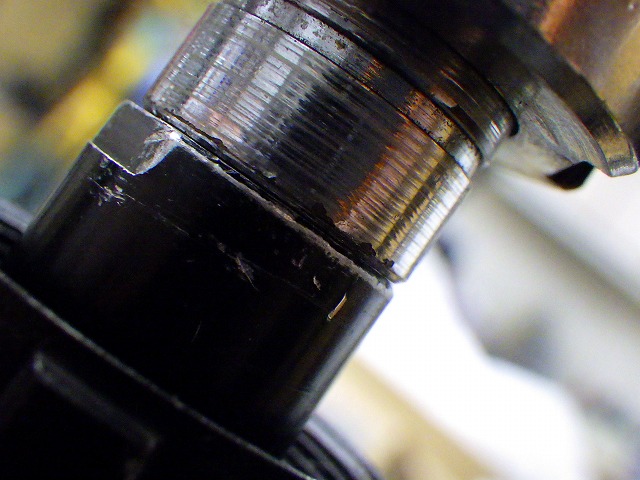
Radial and axial runout fixed, center dialed in.
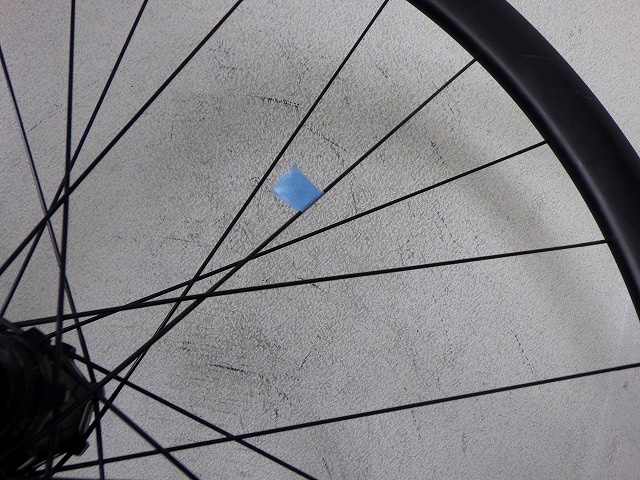
The spoke where the CX-RAY was has been replaced.
Not with 14-gauge plain, but with a precious black comp.

↑Replaced parts.
The original nipples were internal-fit 12mm brass,
but the CX-RAY location only used the 14mm-length
black aluminum that came with the spoke—uncool.

↑The CX-RAY's final crossing wear mark.