Another day with wheels (and so on).
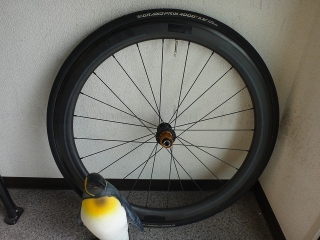
A customer brought me a wheel from the brand whose name must not be spoken.
There was a fairly serious problem, and they asked me to do something about it.
The wheel lacing is 2:1, and I realized once again that this brand simply doesn't understand wheels.
But if I just said that, it would be slander, so I decided to write up the suspected causes and remedies too.
Be grateful. ←(getting ahead of myself)

For the sake of future photo shoots, just being considerate wasn't enough, so I applied tape to conceal the brand name.

When I applied it tightly, the logo embossed through, so I decided to apply it loosely instead.

So, the serious problem is that the tire sidewall rubbed against the left chainstay and stripped the paint. Frame rub, not shoe rub. The bare carbon is apparently showing where the paint came off, and the customer discovered it when they were switching to their race wheels before a race.
From what I know, I've heard of cases where a loose wheel on a frame with a very tight dropout shape caused rubbing, but frame rub usually happens on "wheels where a spoke went slack".

I'll examine the rub marks. I placed tape as a reference at the beginning of the rub.

→

→→

→→→

→→→→

It ends around here.

There were rub marks across about 150° of the tire sidewall. The wheel has no lateral runout. The customer's frame is an Anchor RS9. The chainstay is somewhat tapered, but when I showed myself and a colleague the actual bike with a 25C tire, the gap between the tire sidewall and the chainstay wasn't unusually tight.
The RS9's rear dropout is what's called a "straight dropout". A straight dropout prevents the rear wheel from being mounted at an angle. Classical steel frame road dropouts and track or certain TT bike rear track-style dropouts can cause the rear wheel to be mounted at an angle.
If somehow the customer mounted the rear wheel at an angle relative to the frame, then rub marks would appear across the entire tire circumference. In reality, it's rubbing in part (though nearly half the wheel), so this is a wheel problem.
For the customer's use, they weren't wringing the wheel like crazy on flat ground; it seems the rubbing happened during normal climbing out of the saddle. The customer's weight isn't extreme either.

The tire is a Grand Prix 4000S II in 23C, and this tire grows about 2mm over use.

Measured, it's 25.1mm. The fact that it's effectively 25C is likely due more to being mounted on a wide rim in a stretched state than aging. But as I wrote earlier, even if the tire is effectively 25C, it's not incompatible with the RS9, so blaming the frame or tire is a stretch. It's still the wheel's fault.


I removed the tire and checked the wheel center. It's spot on, but actually being off would have been a mercy—it might have been fixable with a retension. The spoke tension under these conditions isn't screamingly high, but it is well-tensioned, leaving little room for further tightening.
With this rim, this hub, these spokes, and this lacing pattern, if I were to try to fix it further, spoke tension adjustment is the only variable.
If from here I kept the lateral runout at zero and the wheel center while progressive tightening the nipples, the tire sidewall contact range would ideally recede like a tide: 150°...120°...80°...50°......0°! But the situation isn't loose enough to be solved by tightening alone. It'd be easy if I could just say "the unit was abnormally loose, so with this much tension it won't rub anymore!"
That means this wheel causing frame rub in an RS9 isn't a one-in-a-hundred rarity. Unless you eliminate the root causes, there's no solution.


This wheel is 2:1 laced, but there's an important principle that every completed-wheel maker using 2:1 lacing should know, and this brand missed it. I think that's reason enough for the frame rub. Don't try right-left asymmetric lacing with that brain of yours.
The issue is that it's four-spoke lacing. A 12+12H 24H four-spoke and a 16+8H 24H four-spoke are completely different things.

I've touched on this before, but let me write it again.
Say you take a left-right symmetric 24H wheel and lace it in a four-cross pattern. Under the condition that the rim and hub dimensions are the same, if Y/X is the same ratio in an X-cross Y-hole pattern,

even if the number of crosses X differs, the spoke trajectories are completely similar. Because they're similar, the final crossing angle is also the same.

From there, angles that differ depending on spoke count (360 / (number of final crossing intersections on one side) °) cause the final crossing points to rotate and shift,

and at the new location, similar spoke trajectories emerge—repeat this once around and you get a wheel.
In a thought experiment, a 1440H 240-spoke pattern would also have spoke trajectories similar to the above, with the final crossing rotation angle being 1°.
My point is that something like "four-cross" or "six-cross" isn't an absolute standard that determines the final crossing angle by itself. Even with identical rim and hub dimensions, if the hole count conditions change, four-cross and six-cross can have the same crossing angle, and vice versa.

Now, 16+8H adds up to 24H, but if you look only at the right flange, it's no different from one side of a 32H hub. The rim is 24H not 32H, so technically it's different, but this wheel, while appearing to be 24H four-spoke, is actually effectively 32H four-spoke. This is the wheel's biggest design flaw.

Here, let me draw a development diagram of a 12+12H rear wheel with outpoke-side radial lacing in a hub-to-rim-to-hub format. If I set the valve hole phase to 0°, it gets hard to draw, so I set the first rim hole phase clockwise from the valve hole as 0°.
The freewheel-side spokes and rim holes are drawn in blue, the outpoke side in red.
I'm representing tangent lacing as one-cross (two-spoke) because two-cross and above gets messy with lines.

Next, I'll draw the development diagram for 16+8H as well.

The rim hole phase on the rim line is the same as 12+12H, but with 2:1 lacing it repeats blue-red-blue.
The reason the neighbor of the valve hole is blue is because,

in the actual wheel too, both neighbors of the valve hole are freewheel-side spokes.

When the zero-cross spoke trajectory is on a radial line (normal radial lacing does this), it's perpendicular to the rim line. I drew the outpoke-side radial lacing first.

This wheel's 2:1 lacing has the outpoke-side radial-laced spoke passing through the freewheel-side final crossing when viewed from the side, so

if I extend the red line to the freewheel side, it should hit the blue final crossing. After that, drawing the right-flange holes at uniform intervals equivalent to a 32H hub, the development diagram for a 16+8H 24H rear wheel is complete.

I lined up the 12+12H and 16+8H development diagrams. When doing the same "freewheel-side four-cross" lacing, the 16+8H spoke angle gets closer to radial. That is, despite both being "24H freewheel-side four-cross", the 16+8H will be lower tension. Moreover, with the spoke-tension balancing effect of left-right asymmetric lacing being so extreme, in some cases the outpoke side can end up higher tension.

I actually checked the H1ST (first spoke tension reading).

One outpoke-side reading was 157.


One freewheel-side reading was just under 154. Call it 154.
I forgot to mention something important: this wheel uses left-right equal-diameter spokes. If this were a left-right different-diameter setup, I couldn't definitively judge the magnitude of the second spoke tension (2ST) just by comparing first tensions.

These are the results, measured clockwise for the freewheel side from the freewheel side and counterclockwise for the outpoke side from flipped. The freewheel-side "Y" points in the Mr. Hedgehog direction, "Outpoke" in the anti-hedgehog direction, but it doesn't much matter. If I number all rim holes clockwise starting from top, freewheel-side is 1, 3, 4, 6, 7, 9, 10, 12, 13, 15, 16, 18, 19, 21, 22, 24, and outpoke-side is 2, 5, 8, 11, 14, 17, 20, 23. The left tire was rubbing around the opposite side from the valve, so around the 10-15 phase region would be low tension—or so I thought, but apparently not. Also, if tension were glaringly absent, we'd see lateral runout.
What stands out is that the outpoke-side tension is higher. "Is it a problem if the outpoke side has higher tension?" someone might ask, but the spoke tension bottleneck being determined by the outpoke side seems wrong to me.
There's an advanced technique: to partially reverse the outpoke side's extreme balancing effect, deliberately employ different-diameter or different-count lacing with lower balancing effect. This can't be used and wouldn't even be thought of without truly understanding wheels. A Kolima 12+8H 3:2 wheel where the outpoke-side spokes are thicker (higher spoke gravity) is an example of this. I flipped when I first saw this. I wonder how many people besides me understand what this means. The Kolima people probably don't frame wheels in nomlabo terminology, but they're viewing wheels with the same or better conceptual grasp as I have.

↑This one. Recovered from a broken camera's SD card. Inspection drop-off rather than something we sold, but actually we did sell this one.


↑Left-right reversed different-diameter lacing. Not an extreme spoke-weight difference, but it feels calculated.

Plus the quick release is too cool (irrelevant).
Back on track. Between choosing different-diameter lacing as a counter to asymmetric lacing and choosing different-count lacing, the difficulty level is higher for different-diameter.

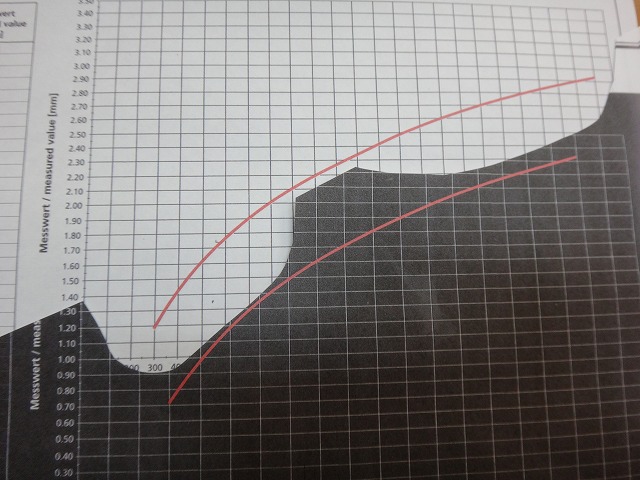
↑This is a DT Champion conversion table.

↑And a Competition conversion table. Both are the 14mm-thread version, with the vertical axis as D1ST (DT's first-tension gauge reading) and the horizontal as spoke tension (second tension). They look similar, but

the Champion table has D1ST ranging from 1 to 3.5,

while Competition goes from 0 to 2.5, so they're actually different tables.


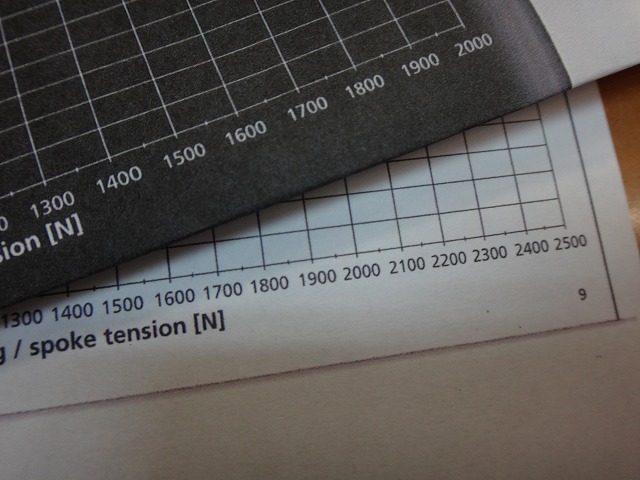
Cut and pasted together. Even at the same spoke tension (2ST), D1ST or H1ST changes if spoke size, shape, or weight changes. So if you're using different-diameter lacing as a counter, you really need to know your 2ST well, which makes it difficult.

Hm?

Oi wait, the vertical axes are the same length but the horizontal axes are different. Well, I think the point got across anyway so it's fine.

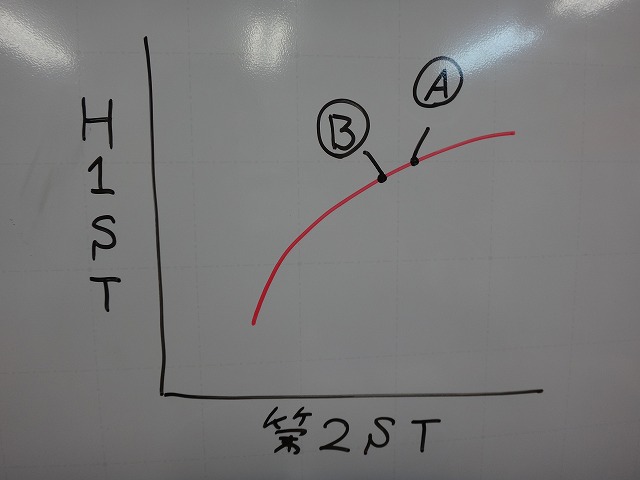
With left-right equal-diameter lacing, I can't determine the magnitude ratio of 2ST just by looking at 1ST differences, but the relative order is definite. So I can at least prevent the outpoke side from ending up higher tension. With a normal wheel, the above diagram A would be the freewheel side, but in this case it's B. My actual measurements show B averaging 150.9 and A averaging 157, so for H1ST B is about 96% of A, but the 2ST difference can't be known without a conversion table. From this 16+8H four-spoke lacing, if I re-lace using reverse different-count into six-spoke, I can hopefully prevent frame rub. Likely the positions of A and B won't switch places—I expect B to rise above A while A stays put, subject to the rim's tension limit.

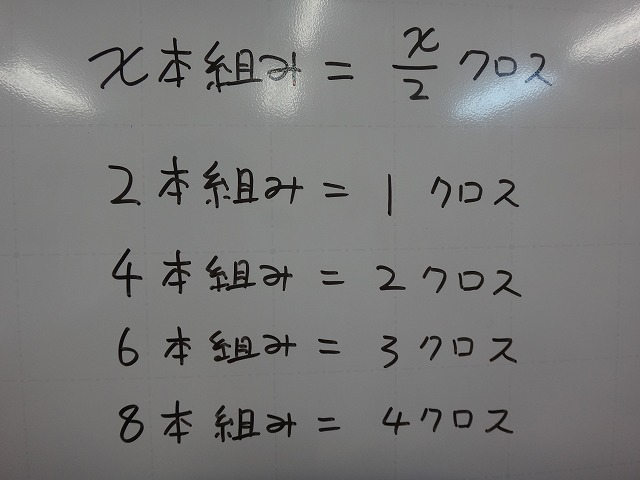
Here, let me summarize the relationship between cross-count and spoke-count nomenclature. X-spoke can be restated as X/2-cross, but only when flange holes are evenly spaced.

↑This is a Vittoria 2:1 wheel, but it's two-cross. It's two-cross, but in practical terms it isn't four-spoke. The flange-hole spacing (where spoke heads are) alternates between sparse and dense, not evenly spaced.

I drew an evenly-spaced flange-hole six-spoke. The red anti-hedgehog-direction spoke, including the final crossing, crosses the hedgehog-direction spoke three times. Three-cross equals six-spoke.

I set a larger flange that swallows the original. The new larger-flange holes are positioned where the spoke trajectory overlaps the original flange's outer diameter. From there, erasing the original flange and its holes,

we get this. The remaining spoke trajectory is completely unchanged, so the sparse-dense-hole two-cross is equivalent to evenly-spaced-hole six-spoke.
To restate: appearance-wise two-cross but at a smaller diameter than this, and the remaining portions are similar to a generic six-spoke setup, so the final crossing angle is also the same.
The reason for doing this is likely to shorten spokes and gain stiffness.

So some might push: why not go even larger with the flange, setting crossing reads at one-cross or zero-cross? But in complete-wheel makers, there's a balance where they're hitting the sweet spot—getting nearly all the spoke-length and hub-stiffness benefits without as much hub-weight penalty.
The wheel brand we're rebuilding throws baseless criticism around at other companies' specs, but

their own wheel uses 2:1 lacing with evenly-spaced flange holes in a four-spoke setup—a level of understanding that's hilarious. The final crossing gets way too close to the flange.

↑Vittoria
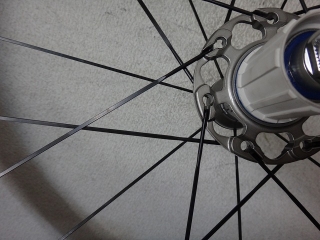
↑Fulcrum Both use freewheel-side sparse-dense-flange two-cross effective six-spoke lacing.

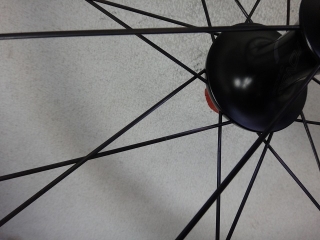
↑Roval This one compresses spoke-head positions relative to flange diameter a bit, making it closer to four-spoke than six....
With evenly-spaced generic hubs you can't do effective six-spoke... or rather, you just do regular six-spoke. So for 2:1 lacing, I think instead of four-spoke, you should do six-spoke while embedding reverse different-count into the left-right asymmetric lacing. That's my view.

I disassembled the wheel. Removing the tape to measure rim weight. Ugh.

A similar rim-height Campagnolo Bullet. It's a full carbon rim, but the brake zone is aluminum so normal brake shoes work.
"Normal brake shoes work" means they don't melt from descent braking heat and stop normally. Also, the Bullet doesn't get frame rub.

The spokes from the removed hub. Checking spoke weight ratio, I got about 96-97%.

Side view from left-right direction

Side view from front-rear direction I think a Sapim CX (101% spoke weight) would be more aerodynamically interesting. This brand seems so obsessed with rim aerodynamics—saying rim aero matters more than wheel weight to overall performance, like a 500g rim is no big deal if aero is good—that this spoke choice seems questionable.
If I could get this same spoke in six-spoke length, I could measure freewheel H1ST at the same outpoke-side H1ST as before the relacing, but unfortunately I can't, so I'll think of another method.
By my assessment, this 2:1-laced rear wheel has lower quality than the left-right symmetric lacing before it (haven't heard of the old model causing frame rub), and a 12+12H black-half Competition four-spoke with lacing definitely offers better results (with prior model rebuilds having gotten better and never worse), but this rear rim is thoughtfully drilled for 2:1 lacing. Ignoring that and lacing with a left-right symmetric hub is possible but not what I do. I need to think through the lacing approach while keeping to 2:1.
We didn't use asymmetric lacing on our (nomlabo) wheels because there's a lack of trial-and-error history on how much reverse different-count-and-diameter as a counter is optimal, and even if there were history, probably left-right symmetric different-count different-diameter with lacing would still be catchier. With asymmetric lacing, the outpoke side can't be tangent laced—doing so would make the outpoke side win too much, causing the freewheel to be lower tension at the outpoke-tension bottleneck.

Done relacing (three-eyed one sees through).

16+8 24H hub Competition/CX six-spoke with lacing. Tangent lacing on freewheel-side only, so lacing naturally goes to the freewheel side.

Pre-relace spokes fit through round holes, but the hub flange had a slit so I used CX.

↑Pre-relace 24 spokes

↑Post-relace 24 spokes I mentioned CX weight at 101%, quoted from prior data of 101.3%, but checking today's shipment I got 99.3%. Computing from Sapim's stated 423g per 260mm × 64 spokes gives 98.9%. At this level there's no conscious sense of left-right different-diameter, so "CX is approximately 100%" is fine.
Competition though—calculating weight at this length gives 85.6%. This is actually post-cut weight, so the butted portion ratio is larger than stock. Without trying what Kolima tested, I attempted to mix reversed different-diameter into the asymmetric-count counter.
I laced the freewheel side because I suspect frame rub won't happen even without it, but if it does, redoing is a hassle so I did. This wheel brand claims lacing has no meaning, but I want them to quit the frame rub first.
Despite lecturing grandly here, what matters to the customer is just whether the tire rubs the frame or not. If that's not solved, all this spoke-weight and reverse-different-diameter talk is worthless hot air.
We also have the front wheel on inspection, so I rotated tires and put the previously rub-free front tire on the rear. I asked the customer to watch for rub marks on the left side appearing again.
About the rim hole-positioning issue: The next two images are both pre-relace,

↑Normal
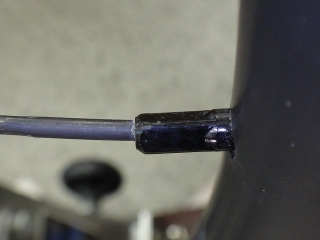
↑Hole-positioning issue where the nipple tilts nearly perpendicular or backwards, which I arbitrarily call this. It's common in carbon rims. Pre-knowing the nipples could be accessed from outside, I unfastened from inside only. When loosening instead of tightening, there was a metallic grinding feel like a grommet, so I figured something was in there, but

there was a nipple washer. Larger ones might distribute spoke tension across area, but this size doesn't provide that.

With a rim this thick inside,pointlessly washers are unnecessary.

I didn't reuse nipples. They're 14mm-nipple-equivalent length, but

not using washers either, so 12mm nipples work fine.

These washers often have odd deformation, and

this was killing the nipple base's range of motion, so

it might have caused the hole-positioning issue. Normally holes don't correct themselves (though lightly drilling with a hand pin vise helps sometimes), but relacing without washers made the obvious hole-positioning issue disappear.

↑Normal

↑Slightly offset but normal Long nipples have deep thread pockets, so tilted spokes and nipple holes contact easily. Incidentally, washer-free, short nipples, and spoke changes all gave weight savings.
Finally. This wheel brand's people will eventually see this, I reckon, so hear me out: I strongly recommend either shifting specs from four-spoke to six-spoke lacing or at minimum doing in-house testing (normally done pre-release). The nipple washers seem more harmful than helpful.
This customer's physical condition, frame specs, and riding style aren't extreme outliers, so frame rub might happen elsewhere too. Continuing to sell four-spoke lacing when this happens seems unfair to customers (though I'm the only one thinking that). If you did shift to six-spoke after reading here, that's not thoughtful redesign—it means you lost to my wheel theory. Reverting to original left-right symmetric spokes is also "running away". Pick whichever suits your pride.
Acknowledgments: For knowledge about the Anchor RS9... *wait* Didn't you say not to use names? Anyway, I'm grateful.
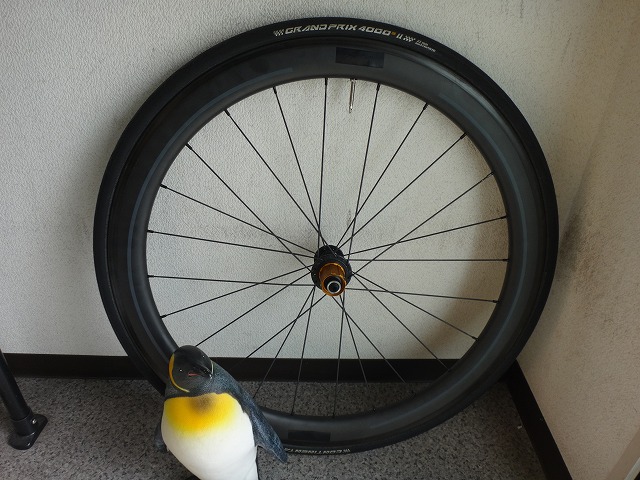
A customer brought me a wheel from the brand whose name must not be spoken.
There was a fairly serious problem, and they asked me to do something about it.
The wheel lacing is 2:1, and I realized once again that this brand simply doesn't understand wheels.
But if I just said that, it would be slander, so I decided to write up the suspected causes and remedies too.
Be grateful. ←(getting ahead of myself)
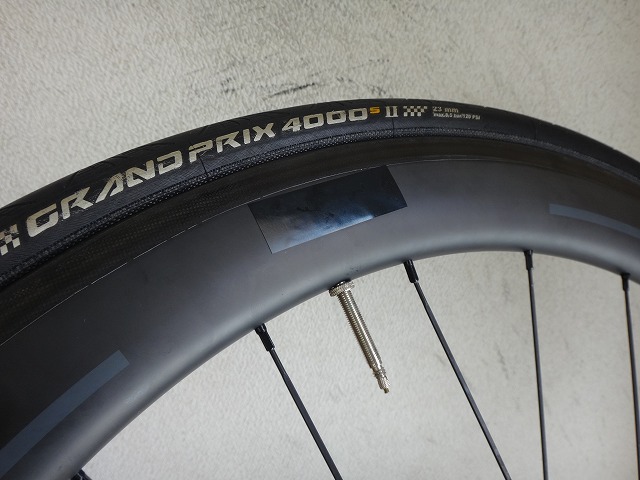
For the sake of future photo shoots, just being considerate wasn't enough, so I applied tape to conceal the brand name.

When I applied it tightly, the logo embossed through, so I decided to apply it loosely instead.
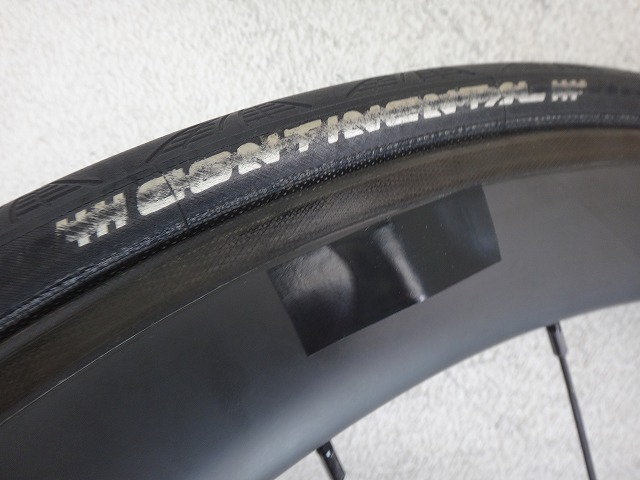
So, the serious problem is that the tire sidewall rubbed against the left chainstay and stripped the paint. Frame rub, not shoe rub. The bare carbon is apparently showing where the paint came off, and the customer discovered it when they were switching to their race wheels before a race.
From what I know, I've heard of cases where a loose wheel on a frame with a very tight dropout shape caused rubbing, but frame rub usually happens on "wheels where a spoke went slack".
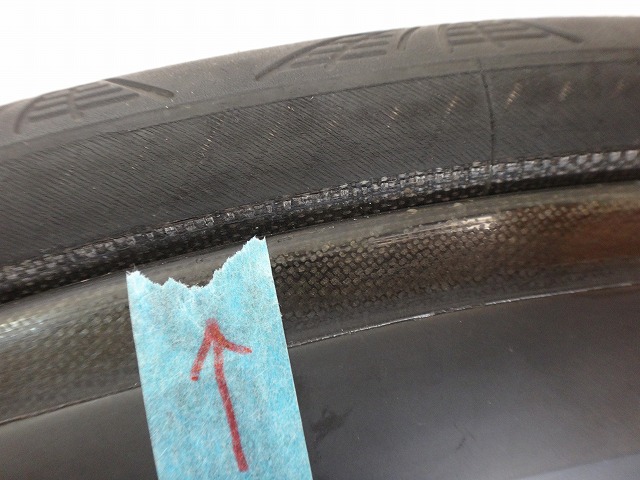
I'll examine the rub marks. I placed tape as a reference at the beginning of the rub.
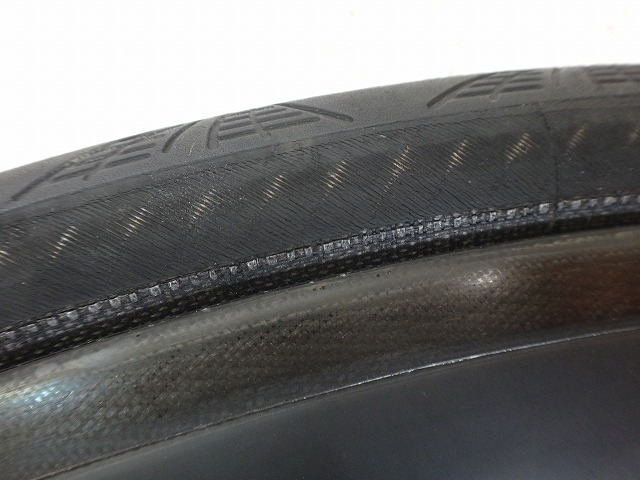
→
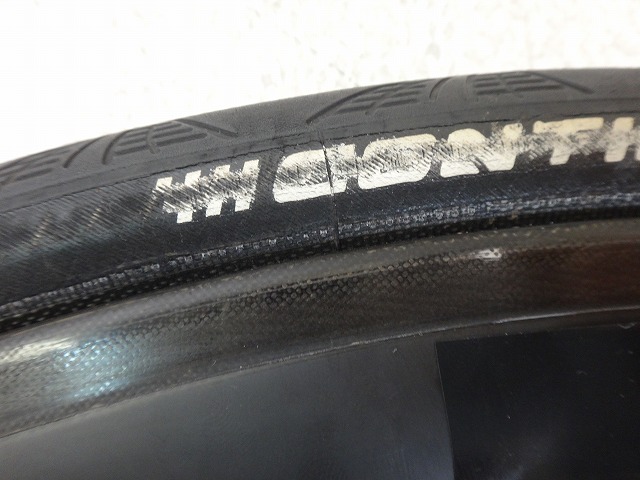
→→

→→→

→→→→

It ends around here.

There were rub marks across about 150° of the tire sidewall. The wheel has no lateral runout. The customer's frame is an Anchor RS9. The chainstay is somewhat tapered, but when I showed myself and a colleague the actual bike with a 25C tire, the gap between the tire sidewall and the chainstay wasn't unusually tight.
The RS9's rear dropout is what's called a "straight dropout". A straight dropout prevents the rear wheel from being mounted at an angle. Classical steel frame road dropouts and track or certain TT bike rear track-style dropouts can cause the rear wheel to be mounted at an angle.
If somehow the customer mounted the rear wheel at an angle relative to the frame, then rub marks would appear across the entire tire circumference. In reality, it's rubbing in part (though nearly half the wheel), so this is a wheel problem.
For the customer's use, they weren't wringing the wheel like crazy on flat ground; it seems the rubbing happened during normal climbing out of the saddle. The customer's weight isn't extreme either.
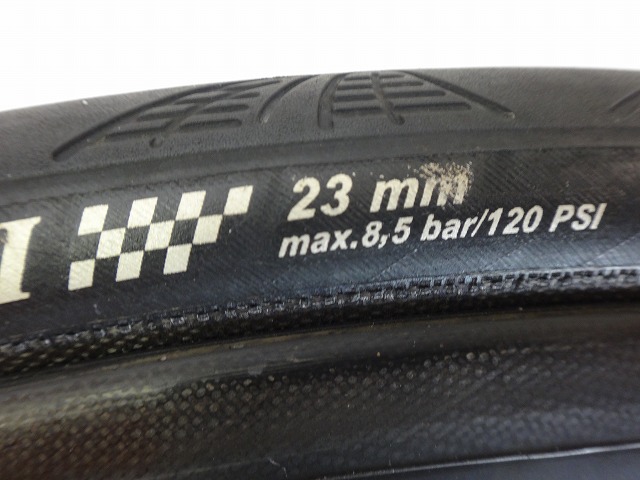
The tire is a Grand Prix 4000S II in 23C, and this tire grows about 2mm over use.
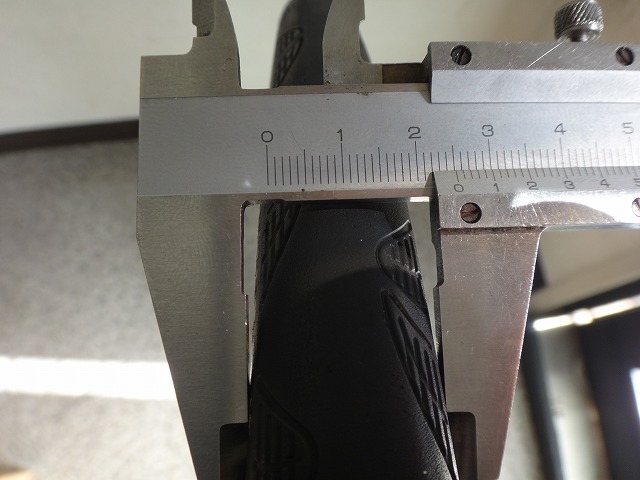
Measured, it's 25.1mm. The fact that it's effectively 25C is likely due more to being mounted on a wide rim in a stretched state than aging. But as I wrote earlier, even if the tire is effectively 25C, it's not incompatible with the RS9, so blaming the frame or tire is a stretch. It's still the wheel's fault.
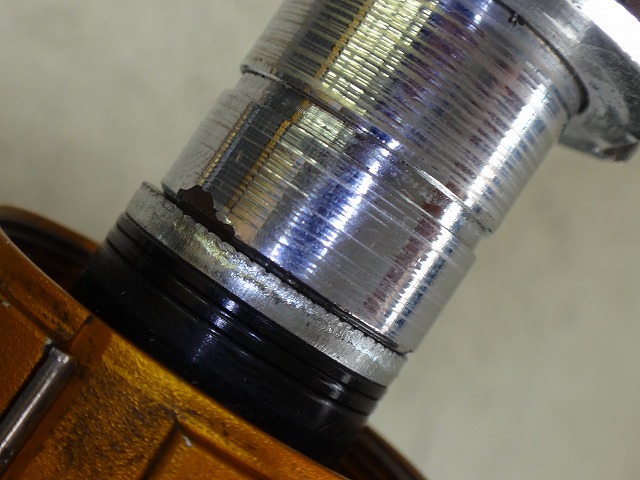

I removed the tire and checked the wheel center. It's spot on, but actually being off would have been a mercy—it might have been fixable with a retension. The spoke tension under these conditions isn't screamingly high, but it is well-tensioned, leaving little room for further tightening.
With this rim, this hub, these spokes, and this lacing pattern, if I were to try to fix it further, spoke tension adjustment is the only variable.
If from here I kept the lateral runout at zero and the wheel center while progressive tightening the nipples, the tire sidewall contact range would ideally recede like a tide: 150°...120°...80°...50°......0°! But the situation isn't loose enough to be solved by tightening alone. It'd be easy if I could just say "the unit was abnormally loose, so with this much tension it won't rub anymore!"
That means this wheel causing frame rub in an RS9 isn't a one-in-a-hundred rarity. Unless you eliminate the root causes, there's no solution.
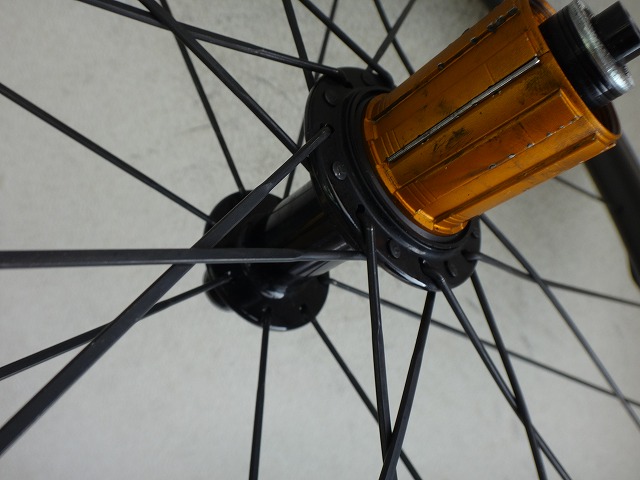
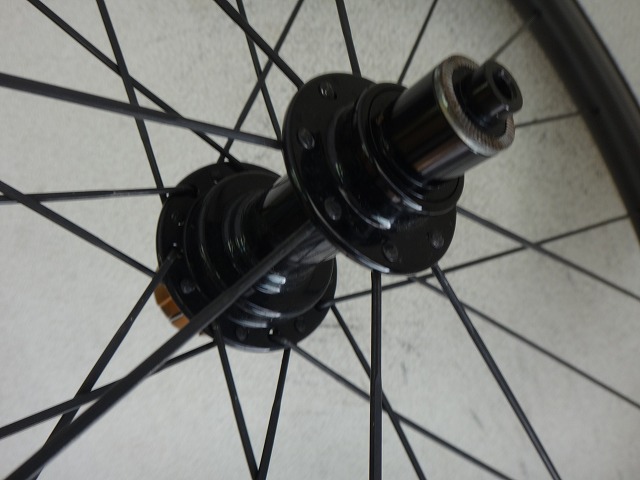
This wheel is 2:1 laced, but there's an important principle that every completed-wheel maker using 2:1 lacing should know, and this brand missed it. I think that's reason enough for the frame rub. Don't try right-left asymmetric lacing with that brain of yours.
The issue is that it's four-spoke lacing. A 12+12H 24H four-spoke and a 16+8H 24H four-spoke are completely different things.
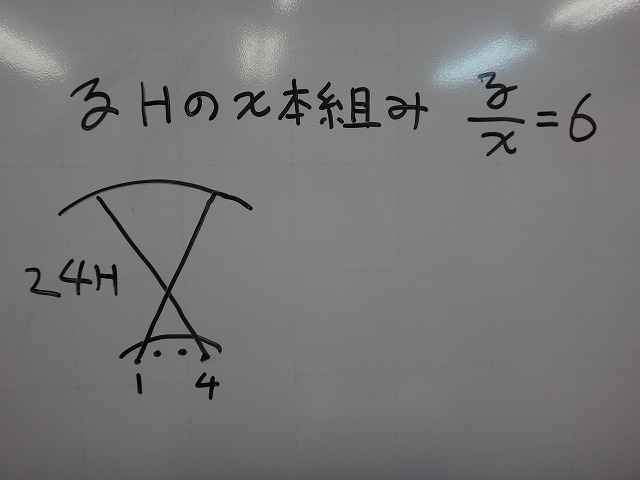
I've touched on this before, but let me write it again.
Say you take a left-right symmetric 24H wheel and lace it in a four-cross pattern. Under the condition that the rim and hub dimensions are the same, if Y/X is the same ratio in an X-cross Y-hole pattern,
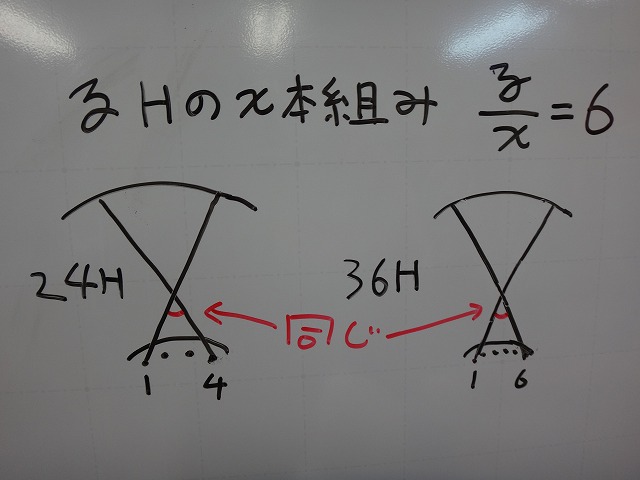
even if the number of crosses X differs, the spoke trajectories are completely similar. Because they're similar, the final crossing angle is also the same.

From there, angles that differ depending on spoke count (360 / (number of final crossing intersections on one side) °) cause the final crossing points to rotate and shift,
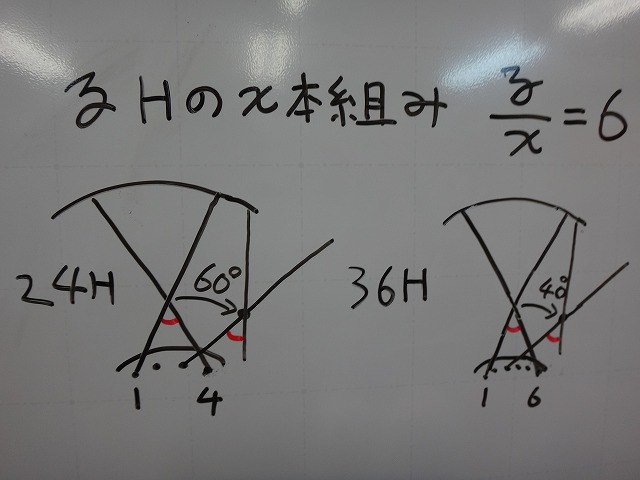
and at the new location, similar spoke trajectories emerge—repeat this once around and you get a wheel.
In a thought experiment, a 1440H 240-spoke pattern would also have spoke trajectories similar to the above, with the final crossing rotation angle being 1°.
My point is that something like "four-cross" or "six-cross" isn't an absolute standard that determines the final crossing angle by itself. Even with identical rim and hub dimensions, if the hole count conditions change, four-cross and six-cross can have the same crossing angle, and vice versa.

Now, 16+8H adds up to 24H, but if you look only at the right flange, it's no different from one side of a 32H hub. The rim is 24H not 32H, so technically it's different, but this wheel, while appearing to be 24H four-spoke, is actually effectively 32H four-spoke. This is the wheel's biggest design flaw.
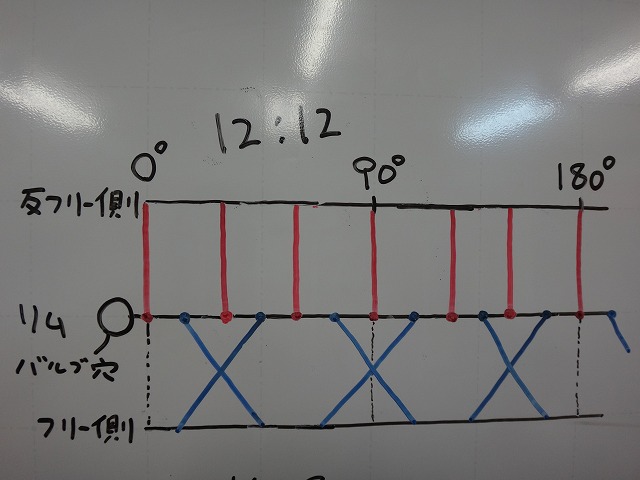
Here, let me draw a development diagram of a 12+12H rear wheel with outpoke-side radial lacing in a hub-to-rim-to-hub format. If I set the valve hole phase to 0°, it gets hard to draw, so I set the first rim hole phase clockwise from the valve hole as 0°.
The freewheel-side spokes and rim holes are drawn in blue, the outpoke side in red.
I'm representing tangent lacing as one-cross (two-spoke) because two-cross and above gets messy with lines.
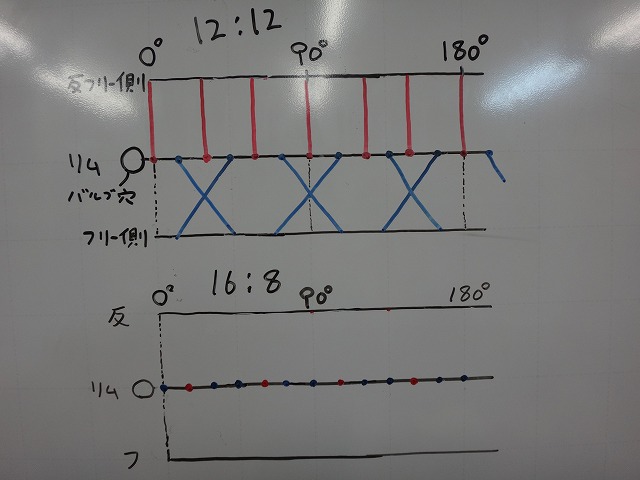
Next, I'll draw the development diagram for 16+8H as well.
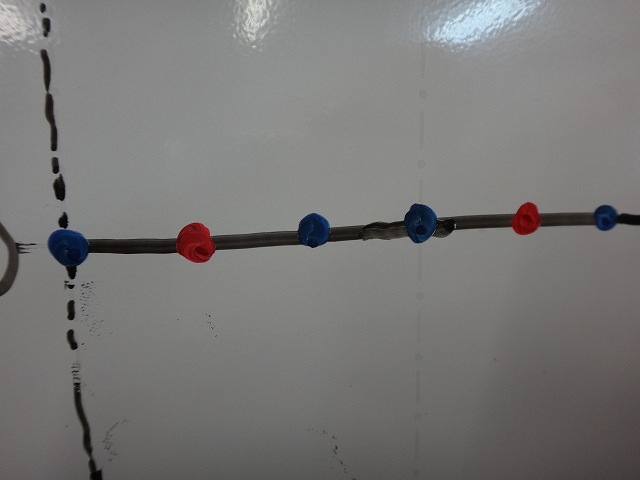
The rim hole phase on the rim line is the same as 12+12H, but with 2:1 lacing it repeats blue-red-blue.
The reason the neighbor of the valve hole is blue is because,

in the actual wheel too, both neighbors of the valve hole are freewheel-side spokes.

When the zero-cross spoke trajectory is on a radial line (normal radial lacing does this), it's perpendicular to the rim line. I drew the outpoke-side radial lacing first.
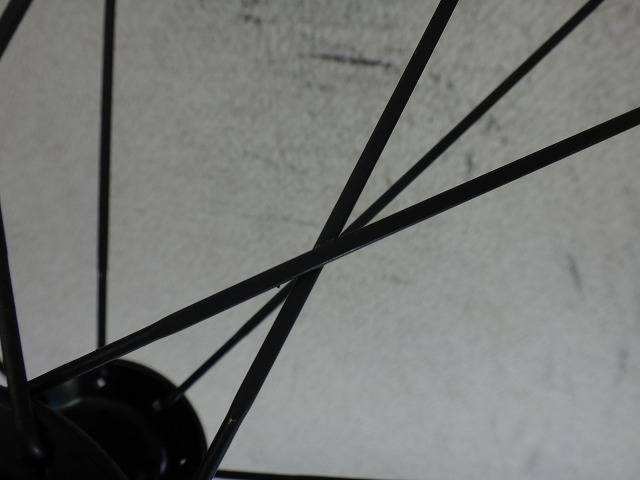
This wheel's 2:1 lacing has the outpoke-side radial-laced spoke passing through the freewheel-side final crossing when viewed from the side, so
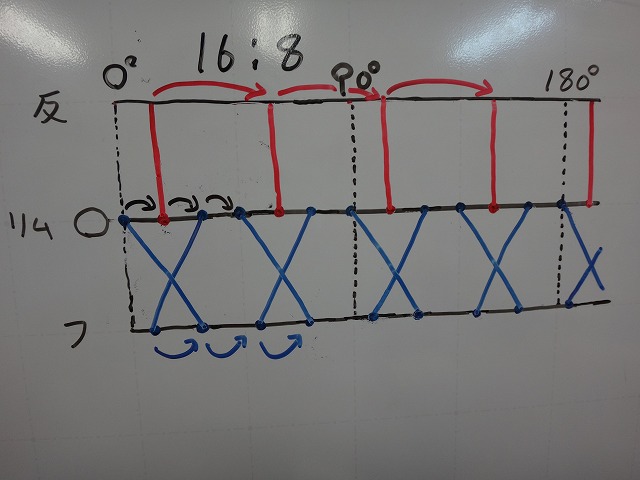
if I extend the red line to the freewheel side, it should hit the blue final crossing. After that, drawing the right-flange holes at uniform intervals equivalent to a 32H hub, the development diagram for a 16+8H 24H rear wheel is complete.
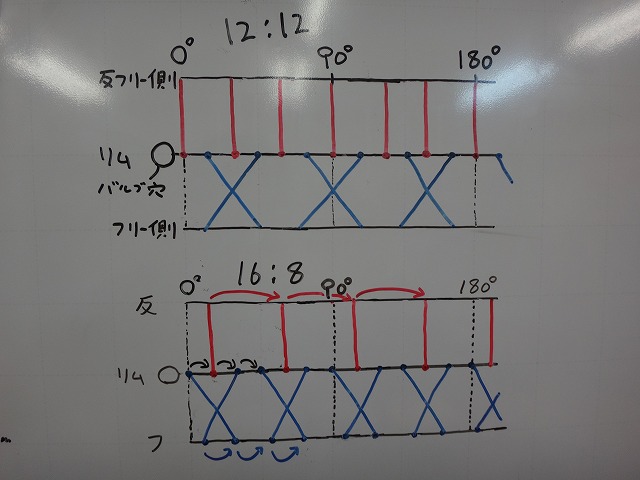
I lined up the 12+12H and 16+8H development diagrams. When doing the same "freewheel-side four-cross" lacing, the 16+8H spoke angle gets closer to radial. That is, despite both being "24H freewheel-side four-cross", the 16+8H will be lower tension. Moreover, with the spoke-tension balancing effect of left-right asymmetric lacing being so extreme, in some cases the outpoke side can end up higher tension.
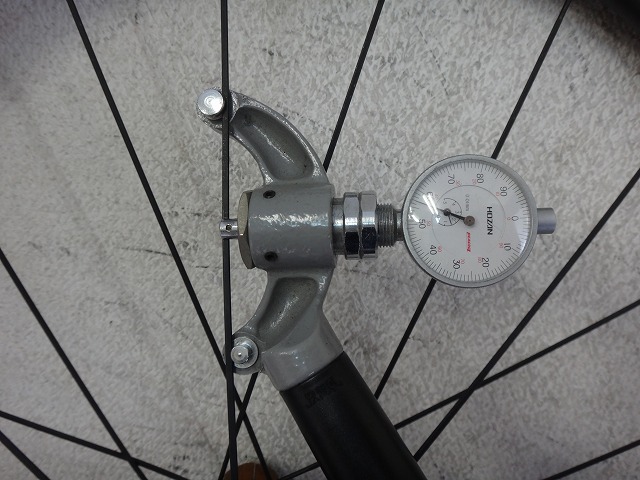
I actually checked the H1ST (first spoke tension reading).
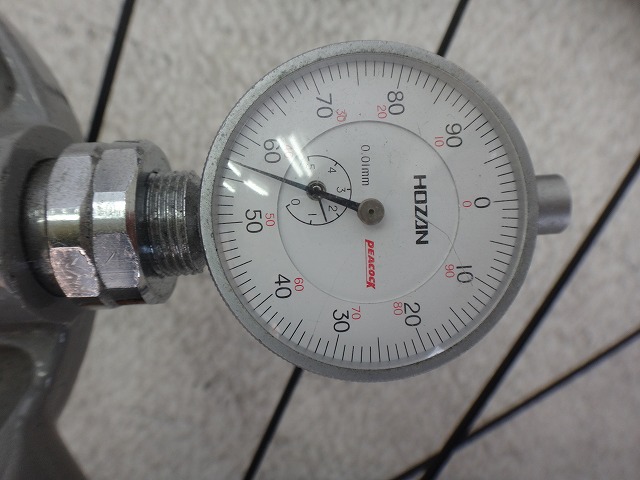
One outpoke-side reading was 157.
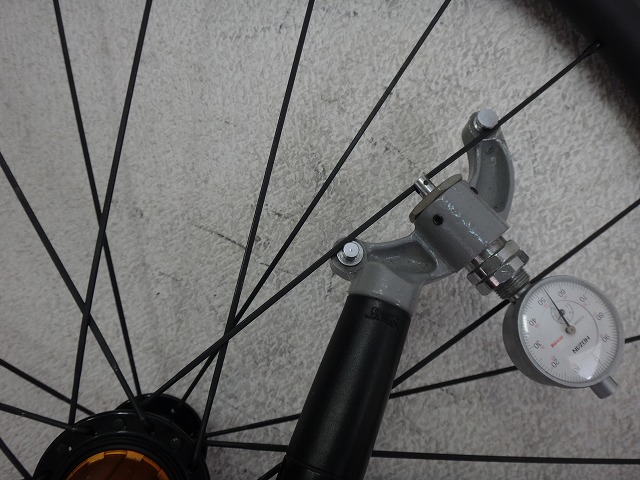
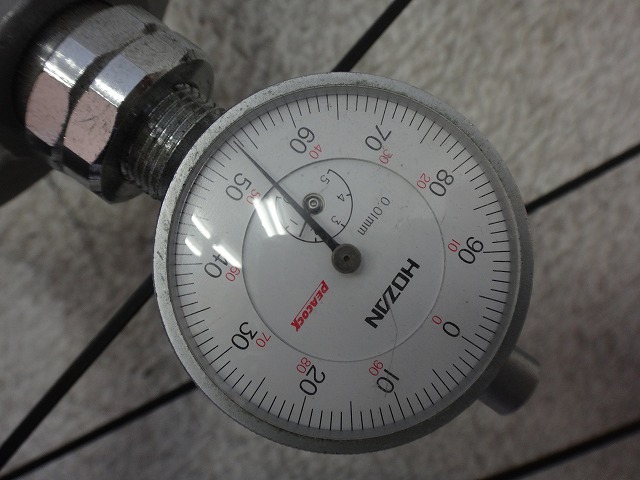
One freewheel-side reading was just under 154. Call it 154.
I forgot to mention something important: this wheel uses left-right equal-diameter spokes. If this were a left-right different-diameter setup, I couldn't definitively judge the magnitude of the second spoke tension (2ST) just by comparing first tensions.

These are the results, measured clockwise for the freewheel side from the freewheel side and counterclockwise for the outpoke side from flipped. The freewheel-side "Y" points in the Mr. Hedgehog direction, "Outpoke" in the anti-hedgehog direction, but it doesn't much matter. If I number all rim holes clockwise starting from top, freewheel-side is 1, 3, 4, 6, 7, 9, 10, 12, 13, 15, 16, 18, 19, 21, 22, 24, and outpoke-side is 2, 5, 8, 11, 14, 17, 20, 23. The left tire was rubbing around the opposite side from the valve, so around the 10-15 phase region would be low tension—or so I thought, but apparently not. Also, if tension were glaringly absent, we'd see lateral runout.
What stands out is that the outpoke-side tension is higher. "Is it a problem if the outpoke side has higher tension?" someone might ask, but the spoke tension bottleneck being determined by the outpoke side seems wrong to me.
There's an advanced technique: to partially reverse the outpoke side's extreme balancing effect, deliberately employ different-diameter or different-count lacing with lower balancing effect. This can't be used and wouldn't even be thought of without truly understanding wheels. A Kolima 12+8H 3:2 wheel where the outpoke-side spokes are thicker (higher spoke gravity) is an example of this. I flipped when I first saw this. I wonder how many people besides me understand what this means. The Kolima people probably don't frame wheels in nomlabo terminology, but they're viewing wheels with the same or better conceptual grasp as I have.
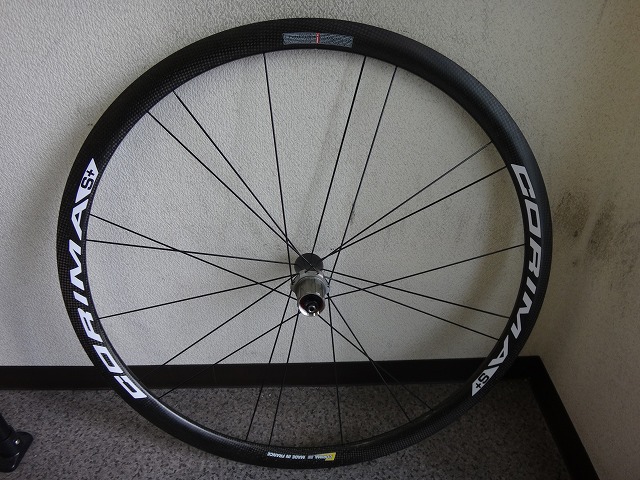
↑This one. Recovered from a broken camera's SD card. Inspection drop-off rather than something we sold, but actually we did sell this one.
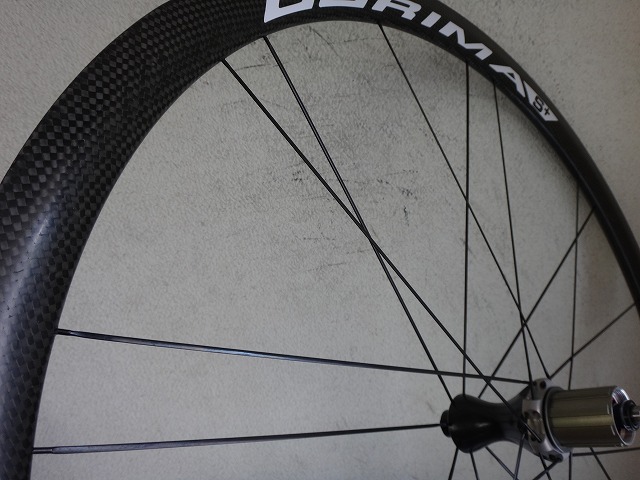
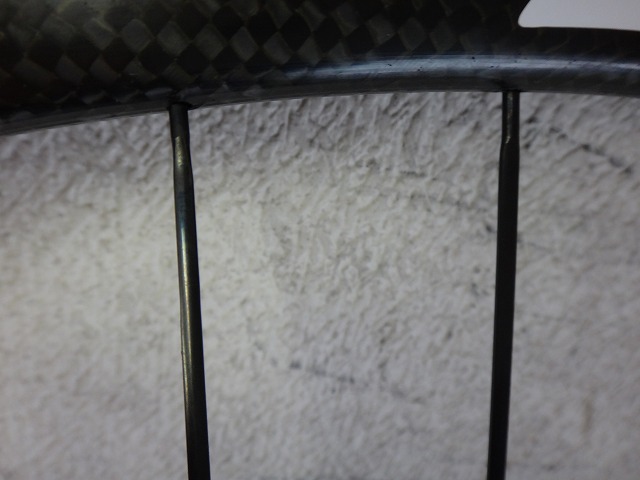
↑Left-right reversed different-diameter lacing. Not an extreme spoke-weight difference, but it feels calculated.
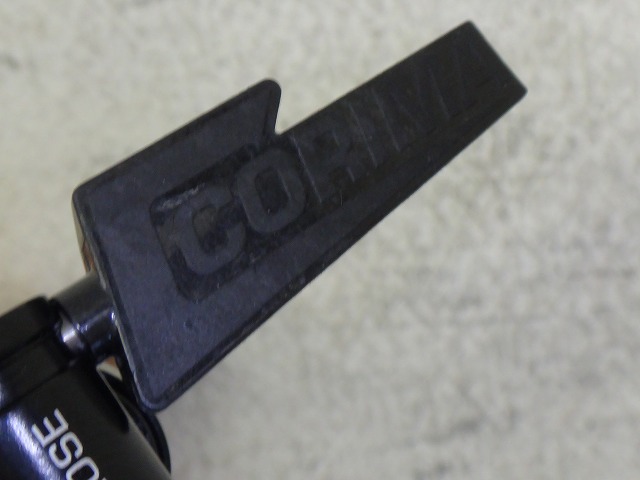
Plus the quick release is too cool (irrelevant).
Back on track. Between choosing different-diameter lacing as a counter to asymmetric lacing and choosing different-count lacing, the difficulty level is higher for different-diameter.
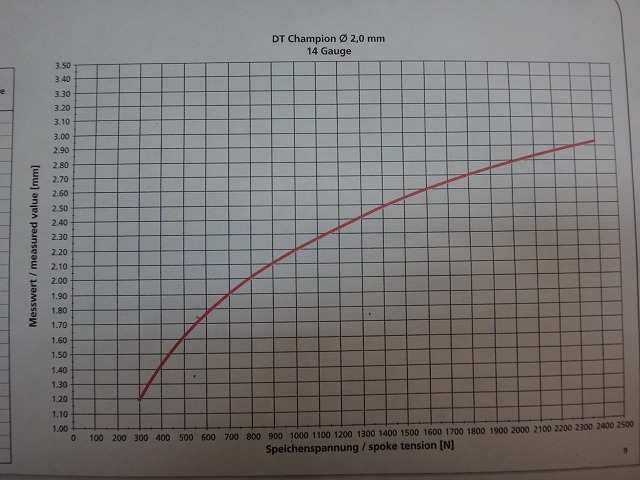
↑This is a DT Champion conversion table.

↑And a Competition conversion table. Both are the 14mm-thread version, with the vertical axis as D1ST (DT's first-tension gauge reading) and the horizontal as spoke tension (second tension). They look similar, but
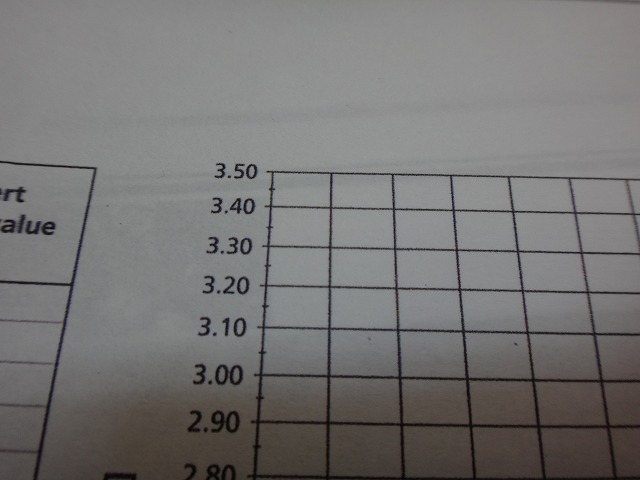
the Champion table has D1ST ranging from 1 to 3.5,
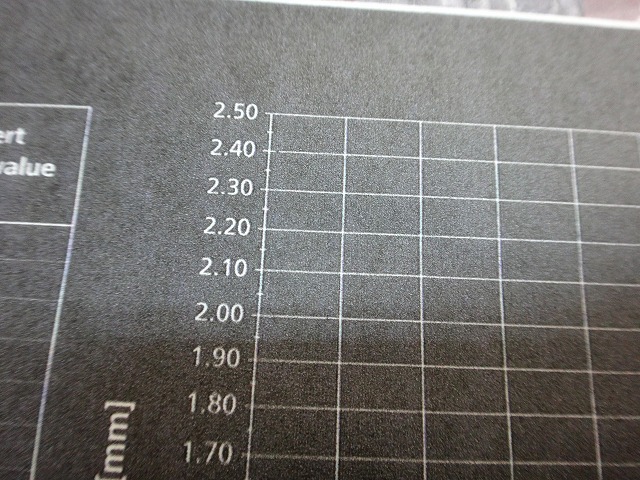
while Competition goes from 0 to 2.5, so they're actually different tables.
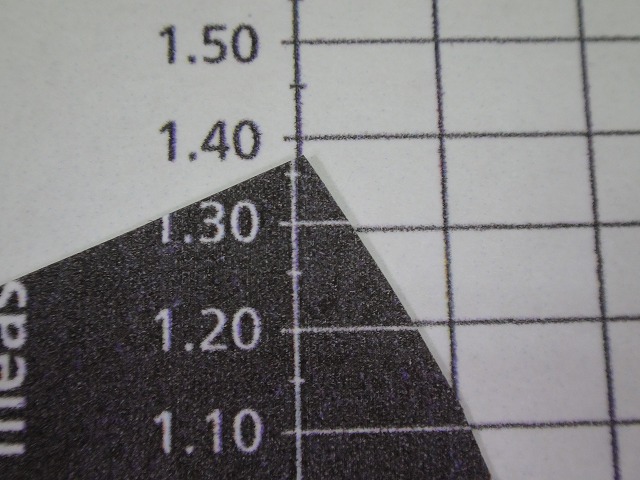
Cut and pasted together. Even at the same spoke tension (2ST), D1ST or H1ST changes if spoke size, shape, or weight changes. So if you're using different-diameter lacing as a counter, you really need to know your 2ST well, which makes it difficult.

Hm?
Oi wait, the vertical axes are the same length but the horizontal axes are different. Well, I think the point got across anyway so it's fine.
With left-right equal-diameter lacing, I can't determine the magnitude ratio of 2ST just by looking at 1ST differences, but the relative order is definite. So I can at least prevent the outpoke side from ending up higher tension. With a normal wheel, the above diagram A would be the freewheel side, but in this case it's B. My actual measurements show B averaging 150.9 and A averaging 157, so for H1ST B is about 96% of A, but the 2ST difference can't be known without a conversion table. From this 16+8H four-spoke lacing, if I re-lace using reverse different-count into six-spoke, I can hopefully prevent frame rub. Likely the positions of A and B won't switch places—I expect B to rise above A while A stays put, subject to the rim's tension limit.
Here, let me summarize the relationship between cross-count and spoke-count nomenclature. X-spoke can be restated as X/2-cross, but only when flange holes are evenly spaced.

↑This is a Vittoria 2:1 wheel, but it's two-cross. It's two-cross, but in practical terms it isn't four-spoke. The flange-hole spacing (where spoke heads are) alternates between sparse and dense, not evenly spaced.
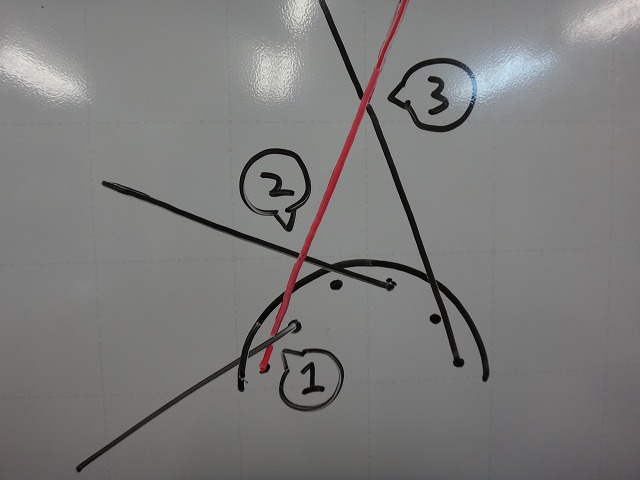
I drew an evenly-spaced flange-hole six-spoke. The red anti-hedgehog-direction spoke, including the final crossing, crosses the hedgehog-direction spoke three times. Three-cross equals six-spoke.
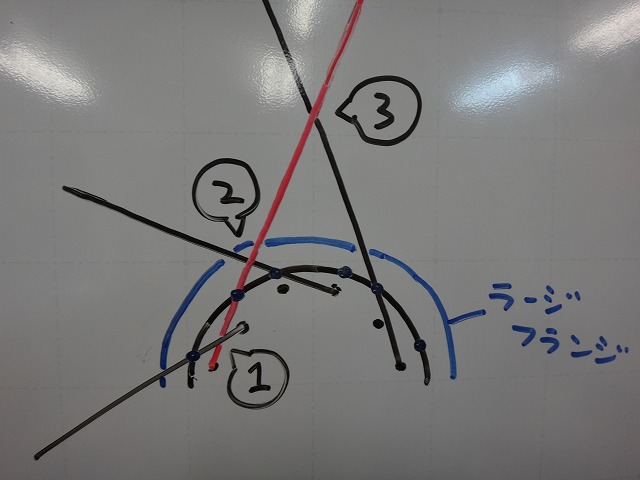
I set a larger flange that swallows the original. The new larger-flange holes are positioned where the spoke trajectory overlaps the original flange's outer diameter. From there, erasing the original flange and its holes,
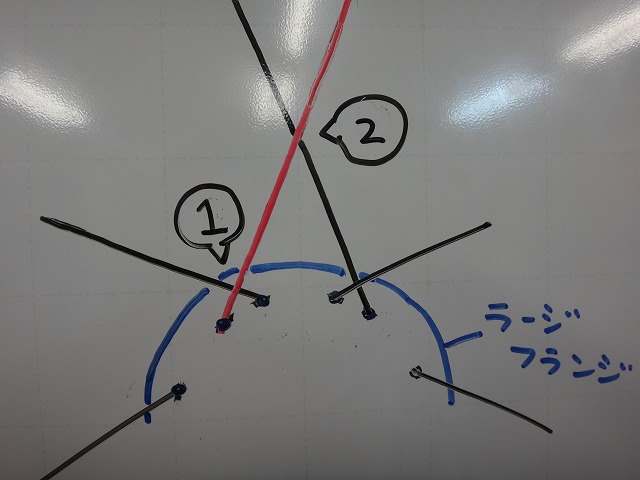
we get this. The remaining spoke trajectory is completely unchanged, so the sparse-dense-hole two-cross is equivalent to evenly-spaced-hole six-spoke.
To restate: appearance-wise two-cross but at a smaller diameter than this, and the remaining portions are similar to a generic six-spoke setup, so the final crossing angle is also the same.
The reason for doing this is likely to shorten spokes and gain stiffness.

So some might push: why not go even larger with the flange, setting crossing reads at one-cross or zero-cross? But in complete-wheel makers, there's a balance where they're hitting the sweet spot—getting nearly all the spoke-length and hub-stiffness benefits without as much hub-weight penalty.
The wheel brand we're rebuilding throws baseless criticism around at other companies' specs, but
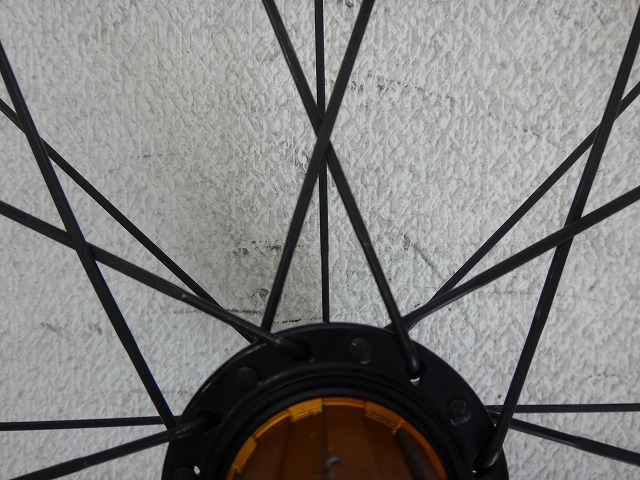
their own wheel uses 2:1 lacing with evenly-spaced flange holes in a four-spoke setup—a level of understanding that's hilarious. The final crossing gets way too close to the flange.

↑Vittoria

↑Fulcrum Both use freewheel-side sparse-dense-flange two-cross effective six-spoke lacing.

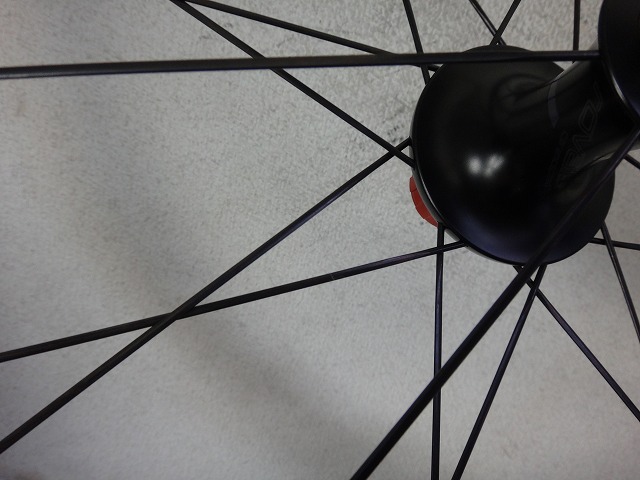
↑Roval This one compresses spoke-head positions relative to flange diameter a bit, making it closer to four-spoke than six....
With evenly-spaced generic hubs you can't do effective six-spoke... or rather, you just do regular six-spoke. So for 2:1 lacing, I think instead of four-spoke, you should do six-spoke while embedding reverse different-count into the left-right asymmetric lacing. That's my view.

I disassembled the wheel. Removing the tape to measure rim weight. Ugh.
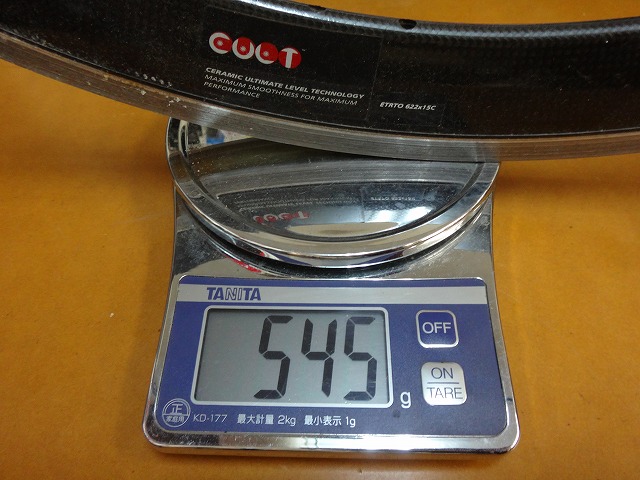
A similar rim-height Campagnolo Bullet. It's a full carbon rim, but the brake zone is aluminum so normal brake shoes work.
"Normal brake shoes work" means they don't melt from descent braking heat and stop normally. Also, the Bullet doesn't get frame rub.
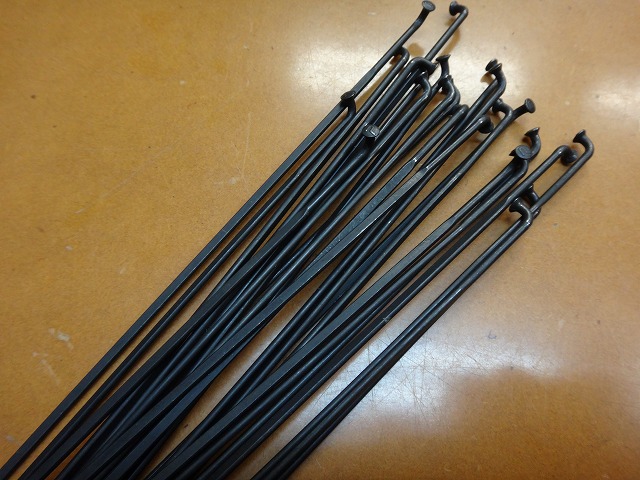
The spokes from the removed hub. Checking spoke weight ratio, I got about 96-97%.
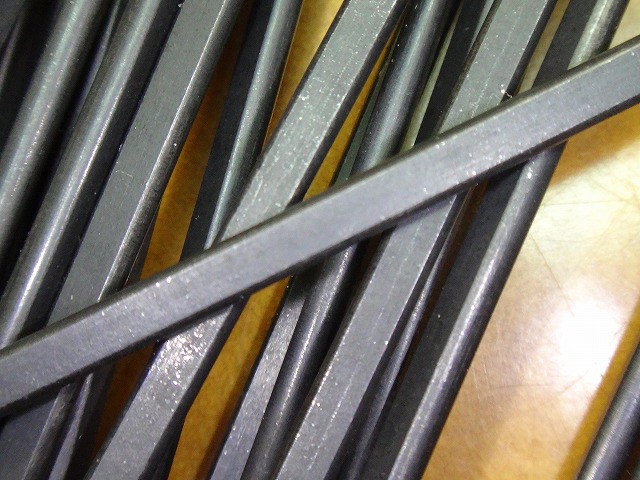
Side view from left-right direction

Side view from front-rear direction I think a Sapim CX (101% spoke weight) would be more aerodynamically interesting. This brand seems so obsessed with rim aerodynamics—saying rim aero matters more than wheel weight to overall performance, like a 500g rim is no big deal if aero is good—that this spoke choice seems questionable.
If I could get this same spoke in six-spoke length, I could measure freewheel H1ST at the same outpoke-side H1ST as before the relacing, but unfortunately I can't, so I'll think of another method.
By my assessment, this 2:1-laced rear wheel has lower quality than the left-right symmetric lacing before it (haven't heard of the old model causing frame rub), and a 12+12H black-half Competition four-spoke with lacing definitely offers better results (with prior model rebuilds having gotten better and never worse), but this rear rim is thoughtfully drilled for 2:1 lacing. Ignoring that and lacing with a left-right symmetric hub is possible but not what I do. I need to think through the lacing approach while keeping to 2:1.
We didn't use asymmetric lacing on our (nomlabo) wheels because there's a lack of trial-and-error history on how much reverse different-count-and-diameter as a counter is optimal, and even if there were history, probably left-right symmetric different-count different-diameter with lacing would still be catchier. With asymmetric lacing, the outpoke side can't be tangent laced—doing so would make the outpoke side win too much, causing the freewheel to be lower tension at the outpoke-tension bottleneck.
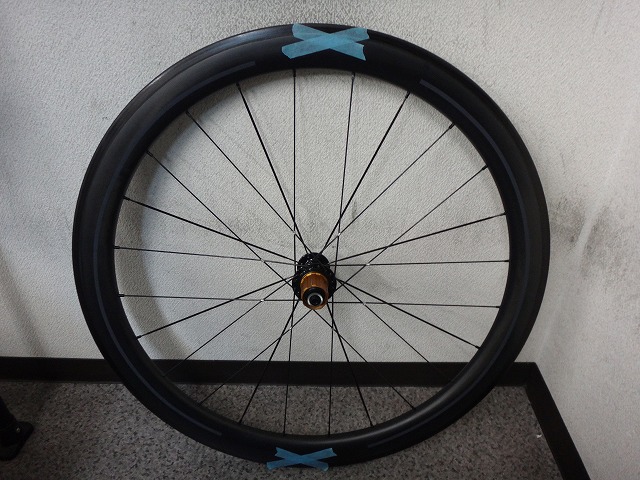
Done relacing (three-eyed one sees through).

16+8 24H hub Competition/CX six-spoke with lacing. Tangent lacing on freewheel-side only, so lacing naturally goes to the freewheel side.

Pre-relace spokes fit through round holes, but the hub flange had a slit so I used CX.

↑Pre-relace 24 spokes

↑Post-relace 24 spokes I mentioned CX weight at 101%, quoted from prior data of 101.3%, but checking today's shipment I got 99.3%. Computing from Sapim's stated 423g per 260mm × 64 spokes gives 98.9%. At this level there's no conscious sense of left-right different-diameter, so "CX is approximately 100%" is fine.
Competition though—calculating weight at this length gives 85.6%. This is actually post-cut weight, so the butted portion ratio is larger than stock. Without trying what Kolima tested, I attempted to mix reversed different-diameter into the asymmetric-count counter.
I laced the freewheel side because I suspect frame rub won't happen even without it, but if it does, redoing is a hassle so I did. This wheel brand claims lacing has no meaning, but I want them to quit the frame rub first.
Despite lecturing grandly here, what matters to the customer is just whether the tire rubs the frame or not. If that's not solved, all this spoke-weight and reverse-different-diameter talk is worthless hot air.
We also have the front wheel on inspection, so I rotated tires and put the previously rub-free front tire on the rear. I asked the customer to watch for rub marks on the left side appearing again.
About the rim hole-positioning issue: The next two images are both pre-relace,
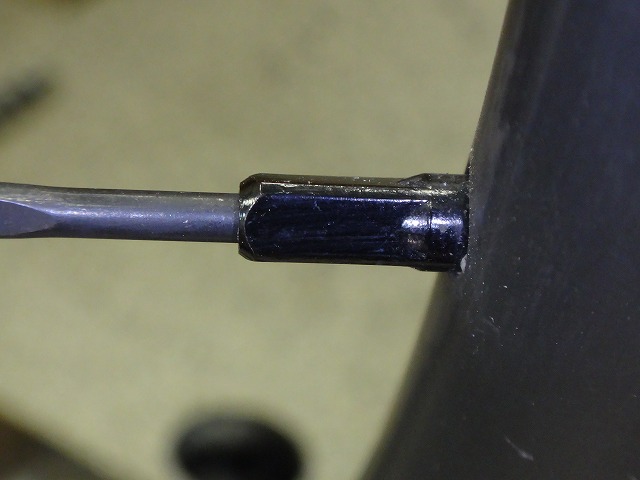
↑Normal

↑Hole-positioning issue where the nipple tilts nearly perpendicular or backwards, which I arbitrarily call this. It's common in carbon rims. Pre-knowing the nipples could be accessed from outside, I unfastened from inside only. When loosening instead of tightening, there was a metallic grinding feel like a grommet, so I figured something was in there, but
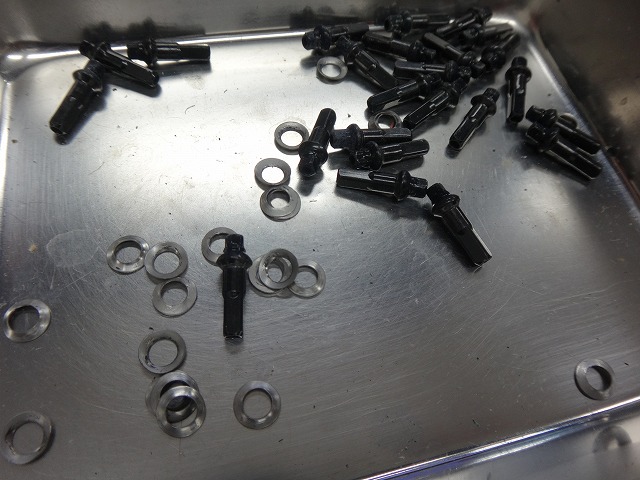
there was a nipple washer. Larger ones might distribute spoke tension across area, but this size doesn't provide that.
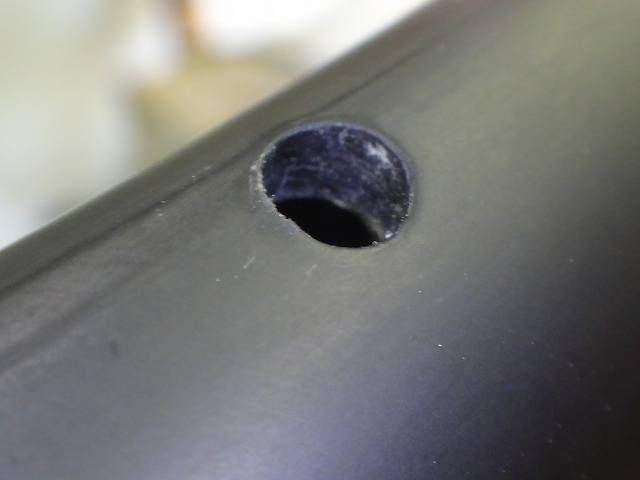
With a rim this thick inside,
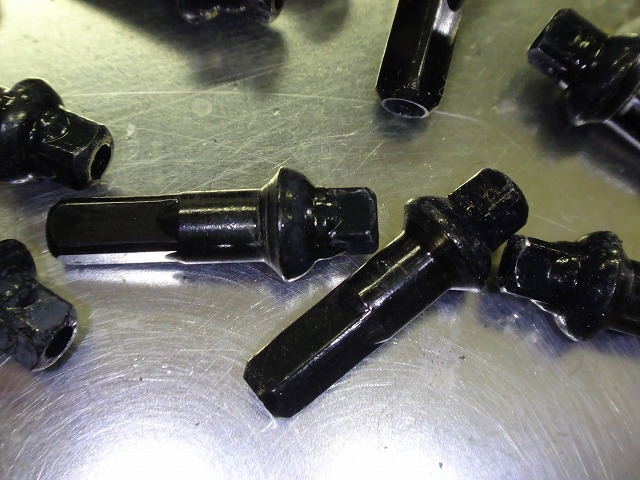
I didn't reuse nipples. They're 14mm-nipple-equivalent length, but
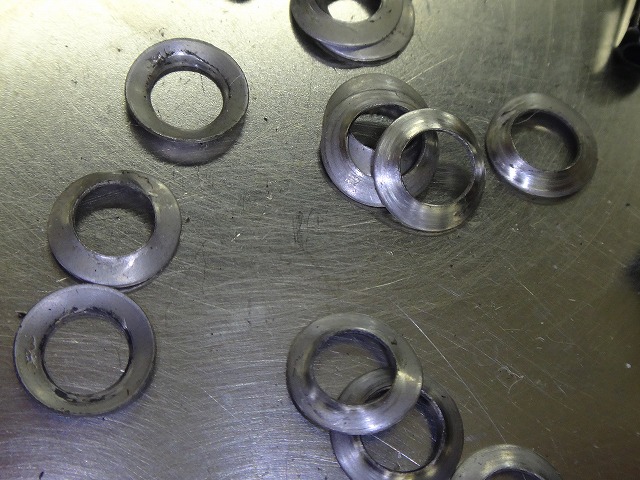
not using washers either, so 12mm nipples work fine.
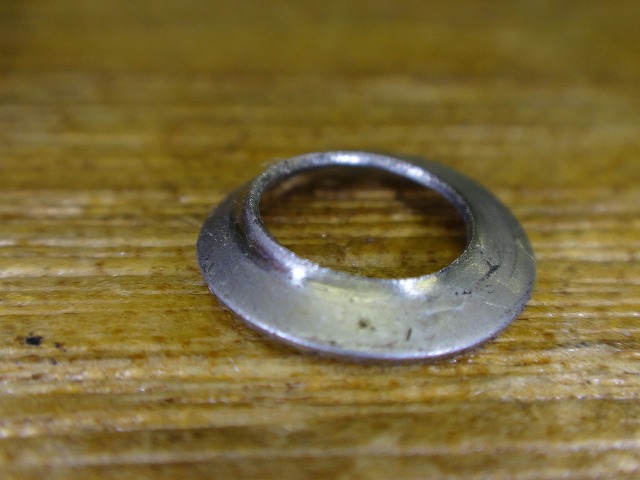
These washers often have odd deformation, and

this was killing the nipple base's range of motion, so
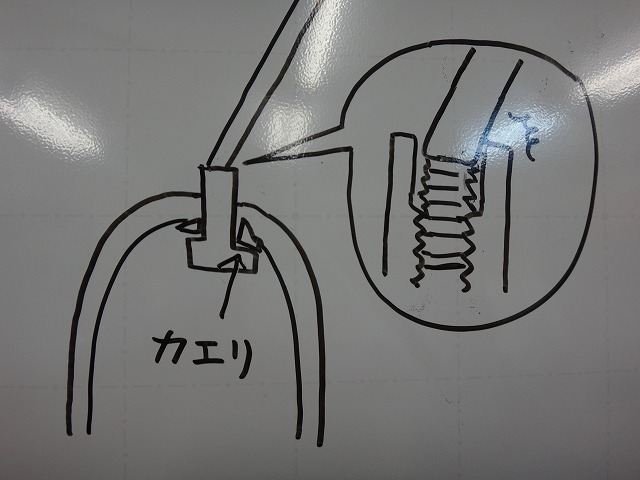
it might have caused the hole-positioning issue. Normally holes don't correct themselves (though lightly drilling with a hand pin vise helps sometimes), but relacing without washers made the obvious hole-positioning issue disappear.
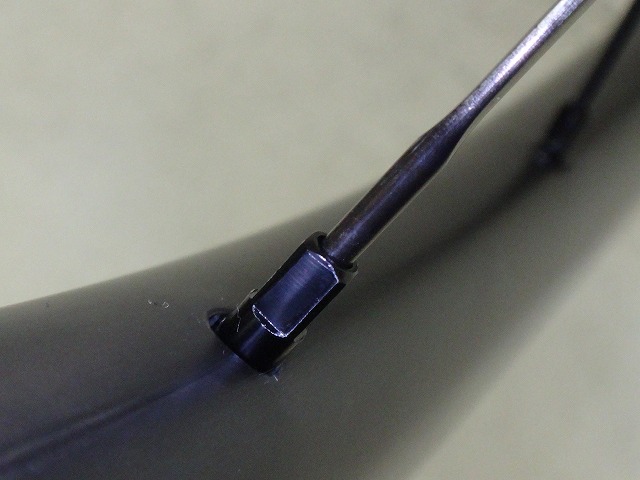
↑Normal
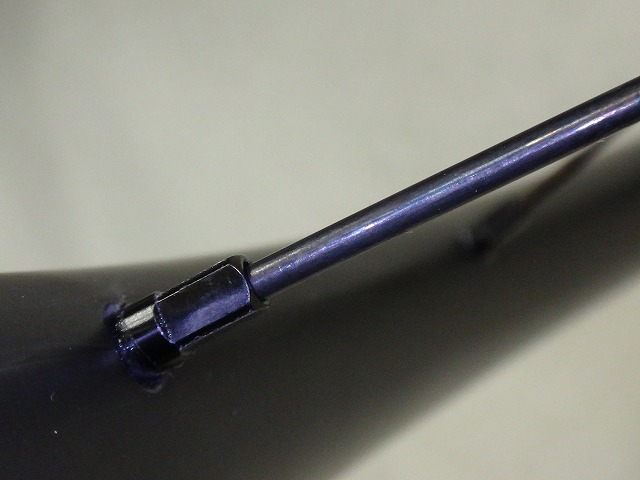
↑Slightly offset but normal Long nipples have deep thread pockets, so tilted spokes and nipple holes contact easily. Incidentally, washer-free, short nipples, and spoke changes all gave weight savings.
Finally. This wheel brand's people will eventually see this, I reckon, so hear me out: I strongly recommend either shifting specs from four-spoke to six-spoke lacing or at minimum doing in-house testing (normally done pre-release). The nipple washers seem more harmful than helpful.
This customer's physical condition, frame specs, and riding style aren't extreme outliers, so frame rub might happen elsewhere too. Continuing to sell four-spoke lacing when this happens seems unfair to customers (though I'm the only one thinking that). If you did shift to six-spoke after reading here, that's not thoughtful redesign—it means you lost to my wheel theory. Reverting to original left-right symmetric spokes is also "running away". Pick whichever suits your pride.
Acknowledgments: For knowledge about the Anchor RS9... *wait* Didn't you say not to use names? Anyway, I'm grateful.
Products Mentioned in This Article
* Amazon affiliate links — prices may vary
Original Japanese post: のむラボ日記 #3760