I say "rebuilt" in the title
but since I didn't do a complete disassembly
today I also won't meet the wheel (and so on) quota.
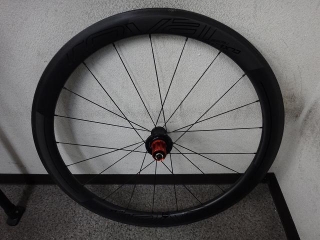
Anyway, a customer brought in
the rear wheel from a Rovale CLX50.
It's mushy, so they asked if I could do something about it if at all possible.
It's a rear wheel for rim brakes, a 21-hole 2:1 lace pattern.
If it were 24-hole, Rovale wheels from this generation
don't have asymmetric rim drilling, so I'd rebuild it
with a standard 12:12 hub, but that's not an option here.
On a separate note, the CLX50DB (→here) I rebuilt a while back
was exhibiting flex even on corners at Sakai-Hama, let alone downhills,
and after I gave the customer the rebuilt wheel,
shortly afterward they said "it's too stiff, could you loosen it a bit?"
so I lowered the spoke tension slightly.
Apparently the flexing sensation in corners was gone after that.
Even with the tension lowered somewhat, it should still be considerably stiffer than before,
so I don't think there's any concern about lateral stiffness.
On yet another separate matter, a certain rider who can break sub-hour on Norikura
recently came by with a Rovale front and rear wheel—his frame isn't a Specialized—
asking me to inspect them, and when I did, he said that Rovale
isn't as bad a wheel as I make it out to be, and that he's been getting
a strong positive impression about how it rides, so I thought,
"finally, a high-level amateur I know is defending Rovale,"
but then later when he brought in yet another different Rovale
to be inspected, he asked me
"it's clearly mushier than the Nomu Lab Wheel No. 7—
can we tension it up? Is rebuilding possible?"
I told you so! This athlete is stronger than all those other people complaining it's mushy,
so he should understand that! Anyway, I declined the rebuild.
Was it an "accessory to the complete bike"?
There's barely any sign of use on it.
I don't know much about Specialized frames, but
for complete bikes, the fact that this wheel is included in the price
is nothing short of tragic.
Looking purely at spoke count and rim height,
the Bora One (ボーラワン) would make you considerably happier.
As for the disc brake version, Rovale does have the advantage
of a lighter rim with a better height-to-weight ratio,
so I can't definitively say which is better.
(If it were mine, I'd rebuild the Rovale, and
if forced to use off-the-shelf wheels, I'd still pick the Bora One DB.)

The rim was already offset toward the freewheel side from the start.
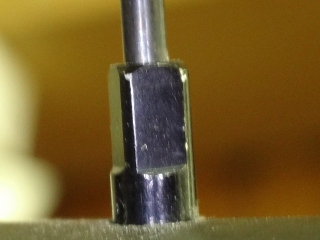
On nipples that can be turned from the rim side,
the grip portion on the spoke side often has shorter vertical height
and oddly rounded edges—presumably because that's the design premise
(you see this a lot on Bontrager and Reynolds wheels).
But these aren't like that—they're universal nipples.
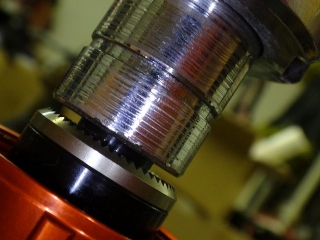
I need to replace spokes on the non-freewheel side,
and if I'm careful, I can do the work without removing the DT (ディーティー) tubeless-ready rim tape.
But since there was something I wanted to see, I removed the tape.
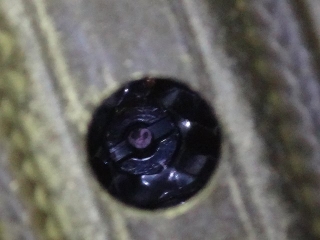
↑
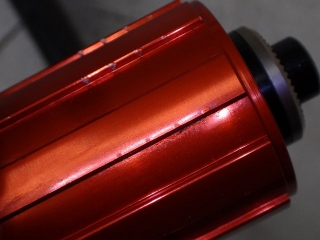
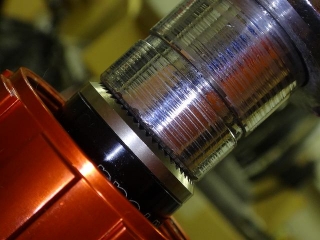
The spoke length is short. It doesn't reach the slot.
This is the freewheel side, but
the non-freewheel side showed the same tendency.
I'll leave the freewheel-side spokes as-is,
but I'll make the non-freewheel-side spokes very slightly longer than the originals.

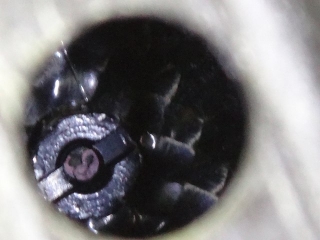
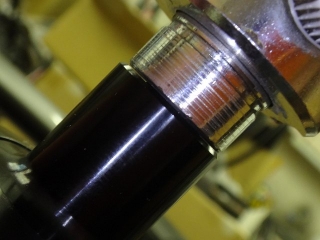
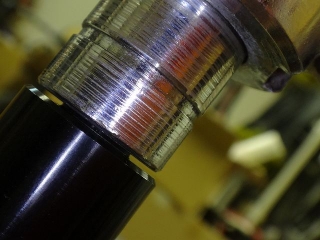
I loosened the non-freewheel-side nipples 4 turns as a preliminary disassembly.
The fact that about 2 thread peaks are visible means
the wheel was built with something like 2 additional turns
after the threads disappeared under the nipple.
Anyone who's built a wheel will understand how ridiculously short that is.
Strictly speaking, the number of thread peaks varies by manufacturer
and threading machine, but the differences aren't huge.
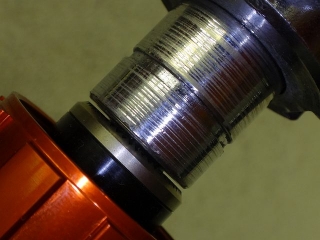
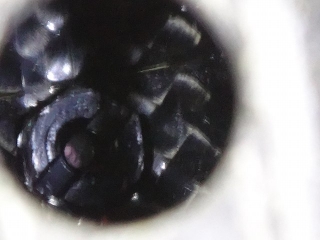
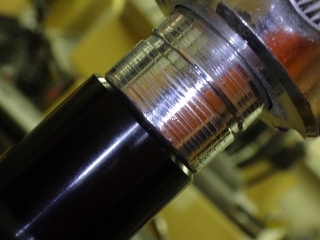
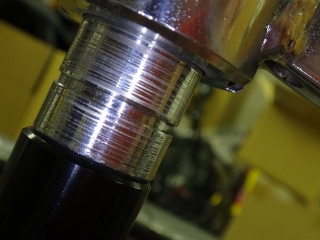
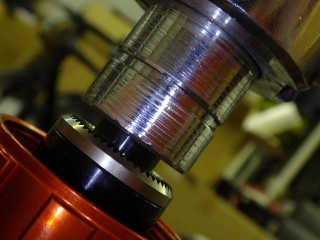
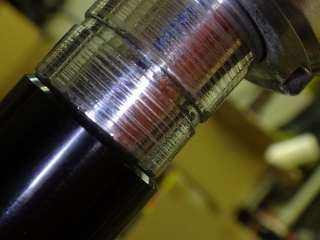
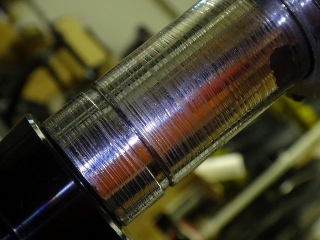
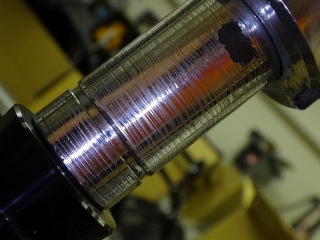
Also, while not on every nipple,
some showed periodic markings like in the image.
Since they extend beyond the tool grip area,
they don't appear to be tool marks.
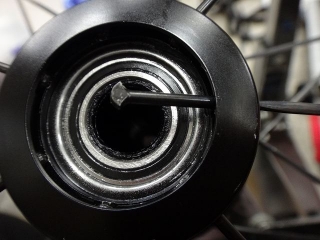
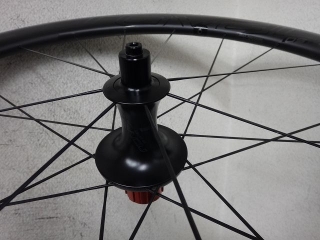
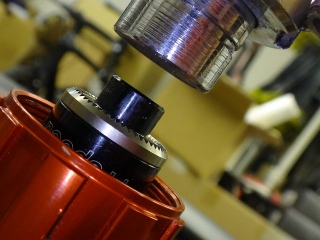
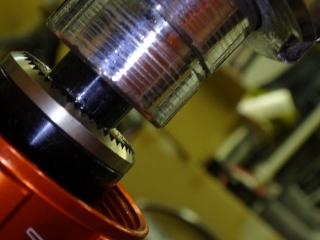
This is a left end that presses into the hub axle,
and you can replace straight spokes
without pulling the hub axle out of the hub body!
How convenient!

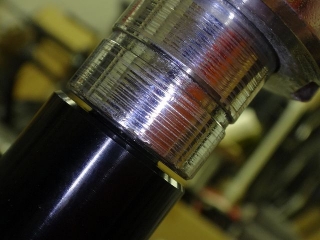
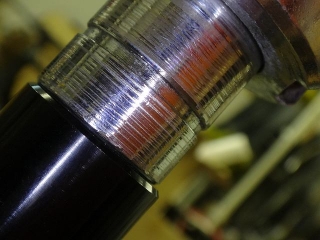
After replacing the spokes, I tightened the non-freewheel-side spokes
to the point where the threads just disappear under the nipples.
That's the state shown in the image above.
There was a slight lateral runout, so the gap amount varies
depending on where you place the gauge, but it's not significant.
Up to this point, I haven't turned the freewheel-side nipples at all.
From here, I increased tension on the freewheel-side nipples by 1 turn each.
After that, I corrected the notable radial runout in the loosening direction,
so the average rotation angle of the 14 freewheel-side nipples
is less than 360°, but the net result was still about 1 turn of tightening.
I didn't take an image at that point,
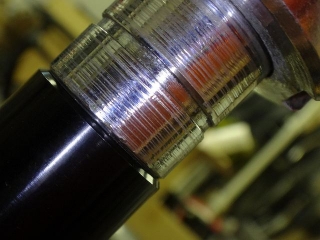
but tightening the non-freewheel-side nipples by 2 turns from there gave me
↑this.
From there I tightened the non-freewheel side another 2 turns,
and also corrected the lateral runout at that point, giving
↑this.
From there, after tightening the non-freewheel side 1 more turn,
I placed the gauge against the non-freewheel end at the point shown in the image above, which gave
↑this. That's the rim movement resulting from tightening the non-freewheel-side nipples 1 turn.
From there I took new measurements, and
when I placed it against the freewheel side, it looked like this.
I wanted to tighten the non-freewheel side further,
but I felt the freewheel-side 1-turn increase was overdone, so
I did something I rarely do: "vibe loosening" on the freewheel side.
The rotation was about 1/4 turn.
So the freewheel-side nipples ended up with
only about a half-turn of tightening from the original state.
When I placed the gauge from the image above
against the left end after the vibe loosening
plus fine runout correction with a slight non-freewheel-side tightening bias, I got
↑this.
That's the rim movement from the vibe loosening
plus the slight non-freewheel-side tightening.
Taking new measurements from there,
I got this.
At this point, both radial and lateral runouts are dialed in.
When you get the wheel to a "zero radial and lateral runout with only center offset" state,
any lateral runout that appears from here on from non-freewheel-side tightening comes only from
the runout that results from turning those nipples,
so after this point (barring any overall tension adjustment),
I almost never touch the freewheel-side spoke nipples.
Center is achieved.
Compared to the original state, the freewheel side got not just a 3/4-turn increase
but also had its offset corrected with non-freewheel-side tightening,
so definitely all spokes are now under higher tension than before.
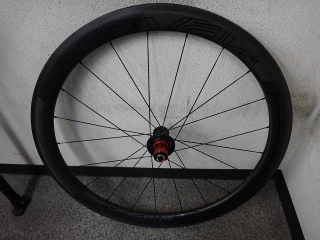
Built.
I've changed the non-freewheel side from CX-RAY-equivalent spokes
to CX Sprint spokes.
Rovale rear wheels with 2:1 lacing tend to show
less deformation on the 1-spoke side
(poor asymmetric lacing), but
the change in spoke weight ratio on the non-freewheel side
has increased that tendency—the non-freewheel side is just that much stiffer now.
The freewheel-side lacing might not be necessary, but I'll do it anyway.

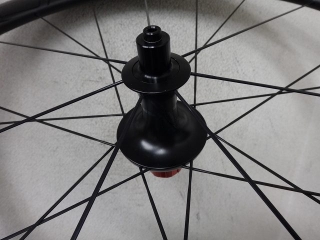
Next, the front wheel.
This one is inspection only.
The provisional center showed no offset, but there was lateral runout.
The amount is minimal, but it spans about 1/3 of the wheel circumference—
it's a long-wavelength runout that doesn't show up when riding.
Besides, since there's almost no sign of use,
it's clear the wheel hasn't been ridden enough to develop runout.
but since I didn't do a complete disassembly
today I also won't meet the wheel (and so on) quota.

Anyway, a customer brought in
the rear wheel from a Rovale CLX50.
It's mushy, so they asked if I could do something about it if at all possible.

It's a rear wheel for rim brakes, a 21-hole 2:1 lace pattern.
If it were 24-hole, Rovale wheels from this generation
don't have asymmetric rim drilling, so I'd rebuild it
with a standard 12:12 hub, but that's not an option here.
On a separate note, the CLX50DB (→here) I rebuilt a while back
was exhibiting flex even on corners at Sakai-Hama, let alone downhills,
and after I gave the customer the rebuilt wheel,
shortly afterward they said "it's too stiff, could you loosen it a bit?"
so I lowered the spoke tension slightly.
Apparently the flexing sensation in corners was gone after that.
Even with the tension lowered somewhat, it should still be considerably stiffer than before,
so I don't think there's any concern about lateral stiffness.
On yet another separate matter, a certain rider who can break sub-hour on Norikura
recently came by with a Rovale front and rear wheel—his frame isn't a Specialized—
asking me to inspect them, and when I did, he said that Rovale
isn't as bad a wheel as I make it out to be, and that he's been getting
a strong positive impression about how it rides, so I thought,
"finally, a high-level amateur I know is defending Rovale,"
but then later when he brought in yet another different Rovale
to be inspected, he asked me
"it's clearly mushier than the Nomu Lab Wheel No. 7—
can we tension it up? Is rebuilding possible?"
I told you so! This athlete is stronger than all those other people complaining it's mushy,
so he should understand that! Anyway, I declined the rebuild.

Was it an "accessory to the complete bike"?
There's barely any sign of use on it.
I don't know much about Specialized frames, but
for complete bikes, the fact that this wheel is included in the price
is nothing short of tragic.
Looking purely at spoke count and rim height,
the Bora One (ボーラワン) would make you considerably happier.
As for the disc brake version, Rovale does have the advantage
of a lighter rim with a better height-to-weight ratio,
so I can't definitively say which is better.
if forced to use off-the-shelf wheels, I'd still pick the Bora One DB.)


The rim was already offset toward the freewheel side from the start.

On nipples that can be turned from the rim side,
the grip portion on the spoke side often has shorter vertical height
and oddly rounded edges—presumably because that's the design premise
(you see this a lot on Bontrager and Reynolds wheels).
But these aren't like that—they're universal nipples.
I need to replace spokes on the non-freewheel side,
and if I'm careful, I can do the work without removing the DT (ディーティー) tubeless-ready rim tape.
But since there was something I wanted to see, I removed the tape.


↑
The spoke length is short. It doesn't reach the slot.
This is the freewheel side, but

the non-freewheel side showed the same tendency.
I'll leave the freewheel-side spokes as-is,
but I'll make the non-freewheel-side spokes very slightly longer than the originals.

I loosened the non-freewheel-side nipples 4 turns as a preliminary disassembly.
The fact that about 2 thread peaks are visible means
the wheel was built with something like 2 additional turns
after the threads disappeared under the nipple.
Anyone who's built a wheel will understand how ridiculously short that is.
Strictly speaking, the number of thread peaks varies by manufacturer
and threading machine, but the differences aren't huge.
Also, while not on every nipple,
some showed periodic markings like in the image.
Since they extend beyond the tool grip area,
they don't appear to be tool marks.

This is a left end that presses into the hub axle,
and you can replace straight spokes
without pulling the hub axle out of the hub body!
How convenient!


After replacing the spokes, I tightened the non-freewheel-side spokes
to the point where the threads just disappear under the nipples.
That's the state shown in the image above.
There was a slight lateral runout, so the gap amount varies
depending on where you place the gauge, but it's not significant.
Up to this point, I haven't turned the freewheel-side nipples at all.
From here, I increased tension on the freewheel-side nipples by 1 turn each.
After that, I corrected the notable radial runout in the loosening direction,
so the average rotation angle of the 14 freewheel-side nipples
is less than 360°, but the net result was still about 1 turn of tightening.
I didn't take an image at that point,
but tightening the non-freewheel-side nipples by 2 turns from there gave me


↑this.
From there I tightened the non-freewheel side another 2 turns,
and also corrected the lateral runout at that point, giving


↑this.
From there, after tightening the non-freewheel side 1 more turn,
I placed the gauge against the non-freewheel end at the point shown in the image above, which gave

↑this. That's the rim movement resulting from tightening the non-freewheel-side nipples 1 turn.

From there I took new measurements, and

when I placed it against the freewheel side, it looked like this.
I wanted to tighten the non-freewheel side further,
but I felt the freewheel-side 1-turn increase was overdone, so
I did something I rarely do: "vibe loosening" on the freewheel side.
The rotation was about 1/4 turn.
So the freewheel-side nipples ended up with
only about a half-turn of tightening from the original state.
When I placed the gauge from the image above
against the left end after the vibe loosening
plus fine runout correction with a slight non-freewheel-side tightening bias, I got

↑this.
That's the rim movement from the vibe loosening
plus the slight non-freewheel-side tightening.

Taking new measurements from there,

I got this.
At this point, both radial and lateral runouts are dialed in.
When you get the wheel to a "zero radial and lateral runout with only center offset" state,
any lateral runout that appears from here on from non-freewheel-side tightening comes only from
the runout that results from turning those nipples,
so after this point (barring any overall tension adjustment),
I almost never touch the freewheel-side spoke nipples.


Center is achieved.
Compared to the original state, the freewheel side got not just a 3/4-turn increase
but also had its offset corrected with non-freewheel-side tightening,
so definitely all spokes are now under higher tension than before.

Built.

I've changed the non-freewheel side from CX-RAY-equivalent spokes
to CX Sprint spokes.
Rovale rear wheels with 2:1 lacing tend to show
less deformation on the 1-spoke side
(poor asymmetric lacing), but
the change in spoke weight ratio on the non-freewheel side
has increased that tendency—the non-freewheel side is just that much stiffer now.
The freewheel-side lacing might not be necessary, but I'll do it anyway.

Next, the front wheel.
This one is inspection only.


The provisional center showed no offset, but there was lateral runout.
The amount is minimal, but it spans about 1/3 of the wheel circumference—
it's a long-wavelength runout that doesn't show up when riding.
Besides, since there's almost no sign of use,
it's clear the wheel hasn't been ridden enough to develop runout.